Author: kaypea

  • Mango Creme Brulee Donuts

    Mango Creme Brulee Donuts

    Skip to Recipe
    I know that I am usually done with the mango recipe posts by now, but these mango creme brulee donuts just couldn’t wait until next year!

    Mango-filled donuts had been on my list of things to try during Mango Madness since last year.  I simply ran out of time (and mangoes) when I finally felt like I was ready to give it a shot.  Fast forward to this year, and the mangoes were coming so quickly that I really had no excuse NOT to try making donuts.  I’m a lazy baker, so of course I made my donuts dough in the bread machine.  Still, the combination of a fluffy fried dough, creamy mango filling, and crunchy burnt sugar crust made the mango creme brulee donuts an instant hit among my friends.

    I was so proud of how these mango creme brulee donuts turned out that I entered them in the mango dessert competition at the South Beach Mango Festival.  Sadly, I didn’t win the contest, but I did get props and handshakes from some of the event organizers and guest chefs.  I’d still call that a win!  And, because I have such a warm reception wherever I bring these donuts, I think that this recipe is worth passing along.

    The first part is pretty straightforward.  I made the dough in the bread machine, rolled it out on a floured surface when it was ready, then cut out my donut circles using a biscuit cutter.  Let them rise in a warm place until they double in size.  That will take about 45 minutes.

    Preheat the oil in your deep fryer (or your preferred stovetop frying vessel) until it reaches 375 degrees.  Fry 3 or 4 donuts at a time for 35-40 seconds per side.  They should be puffy and golden.  Drain them on a wire rack (I also blot them with paper towels afterwards).  After that, allow them to cool completely.

    After they have cooled, use a pastry bag fitted with a pastry filling tip to fill your donuts with the mango pastry cream.  Then, spoon a layer of sugar over each donut and use a kitchen torch to heat the sugar until it liquefies and melts.  I usually do about 3 layers of sugar so that the donuts have a thick layer of sugar crunch.
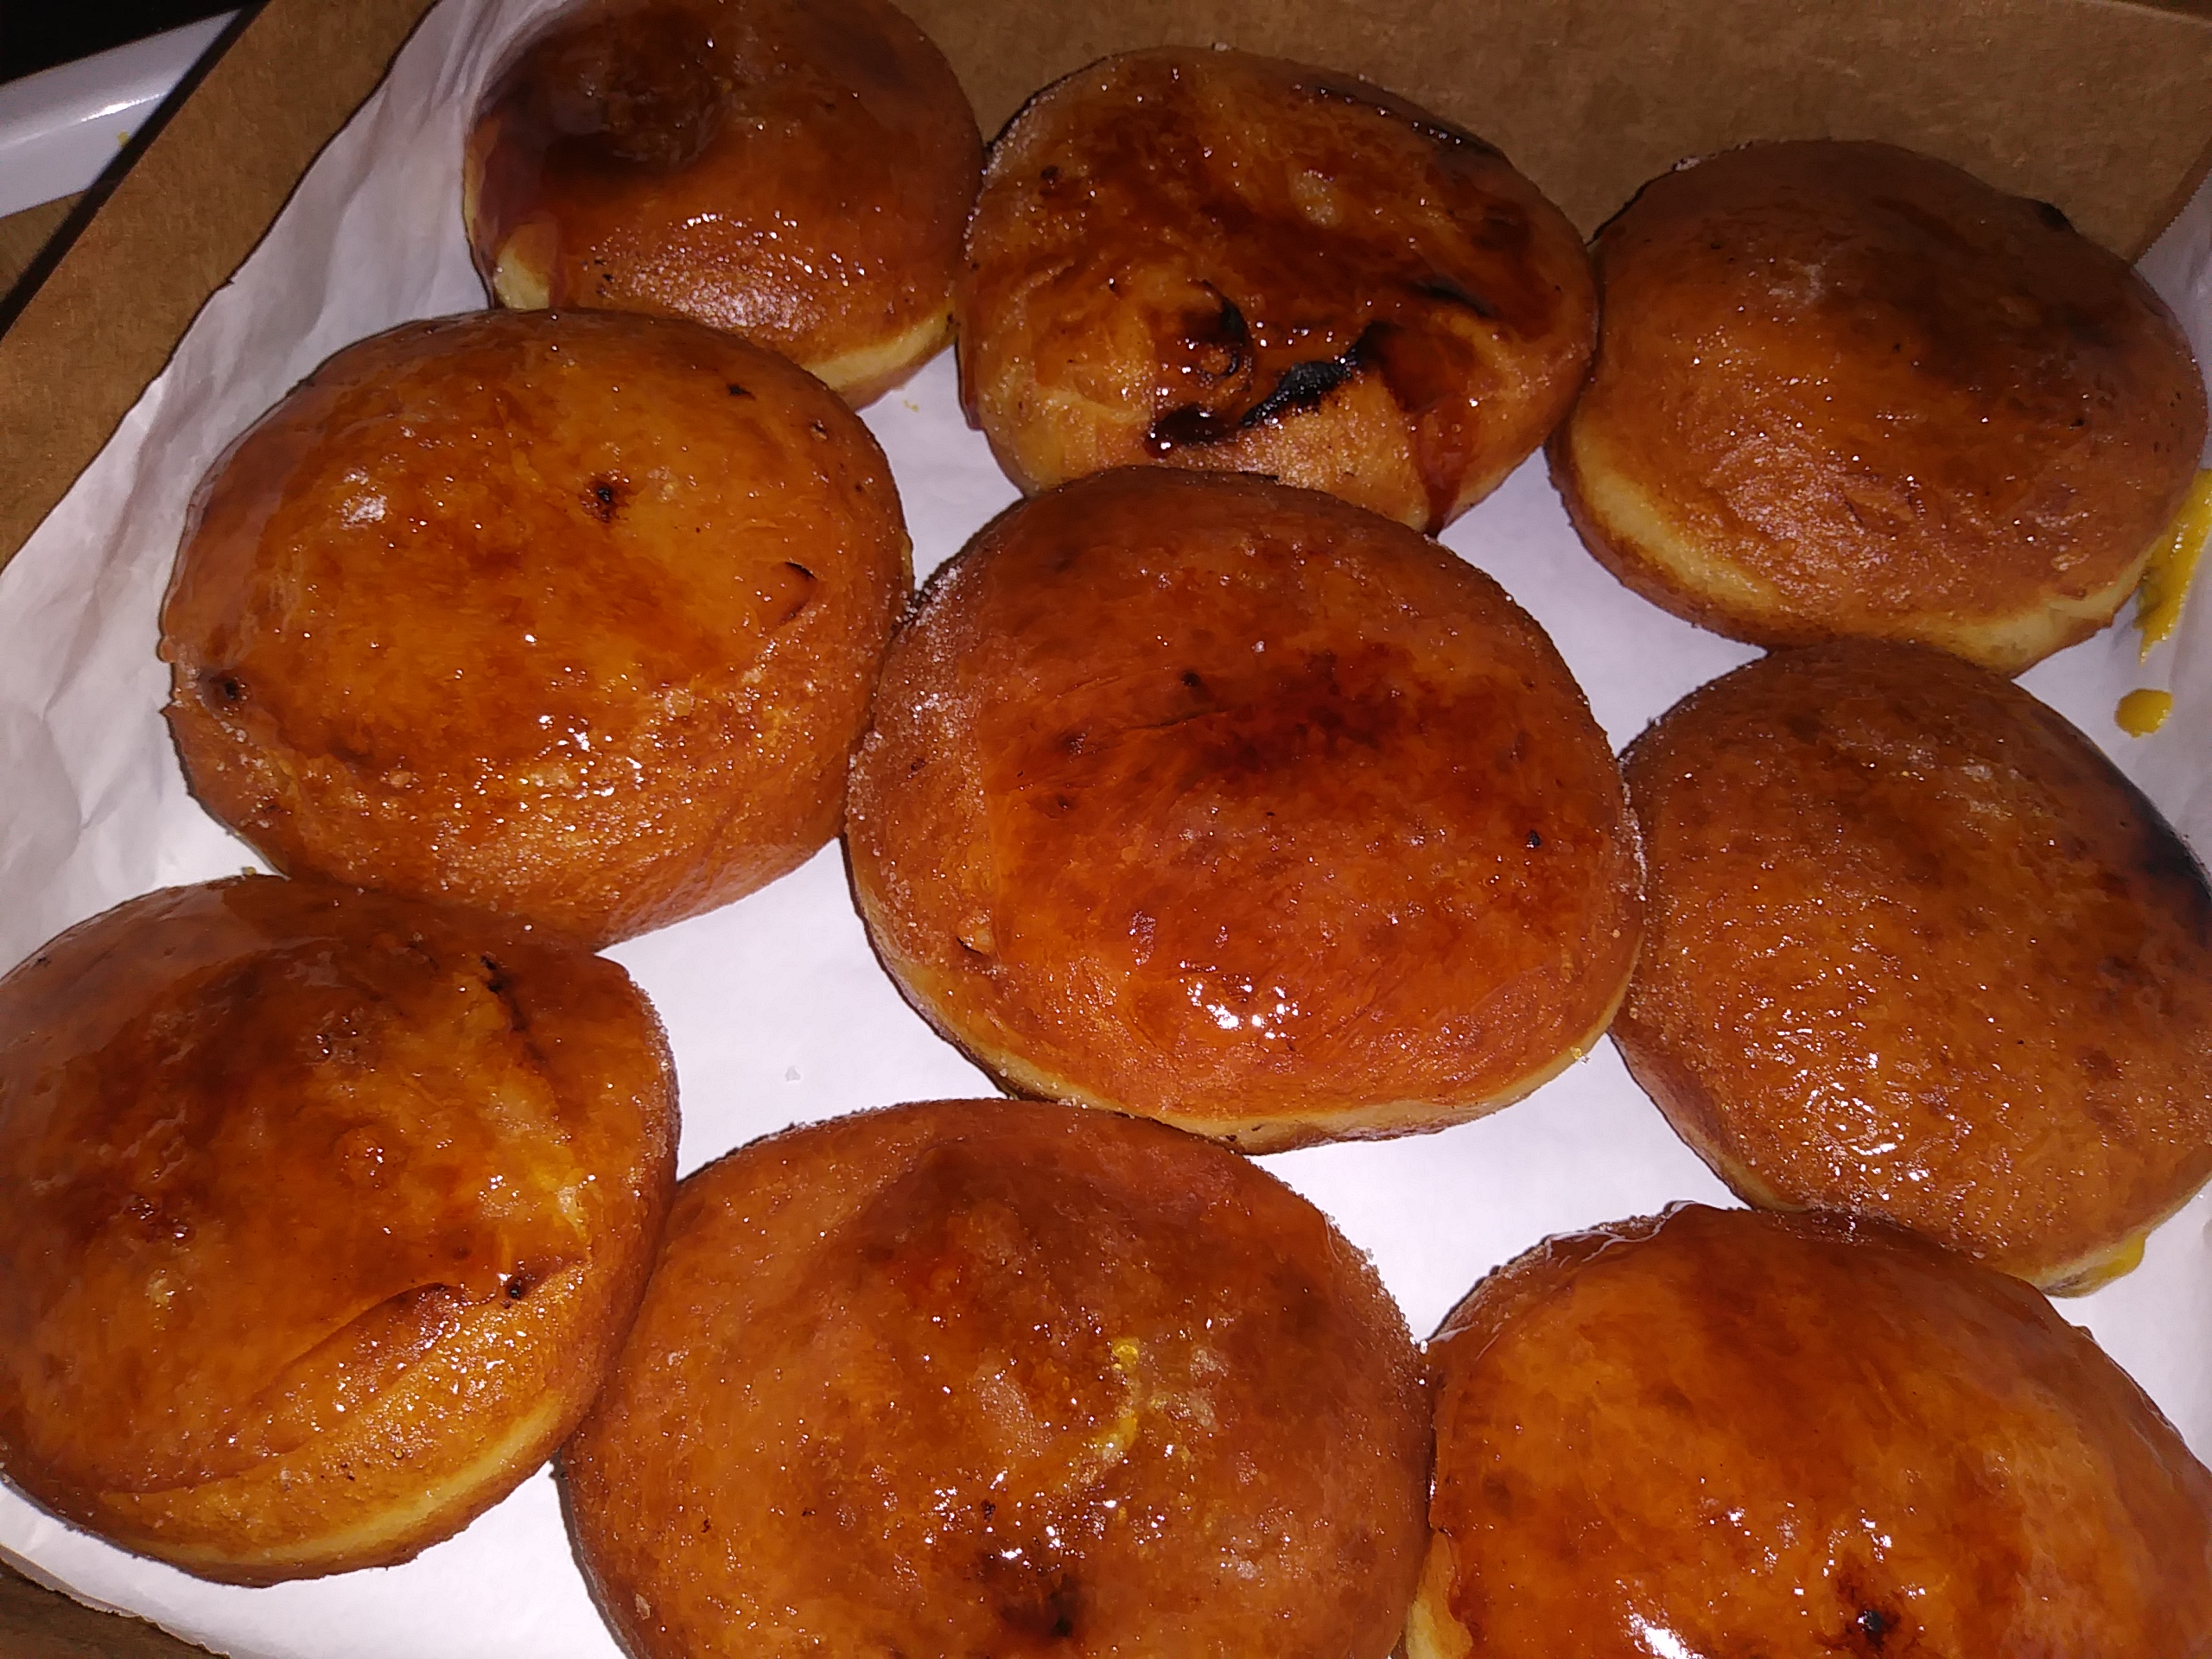
    Homemade donuts are best eaten the same day that they are made.  I have been told, however, that these donuts are still tasty and fluffy after a day in the refrigerator.  They rarely last that long, though.

    Mango Creme Brulee Donuts

    Ingredients

    • 1 1/4 cups warm milk
    • 2 1/4 tsp (1 package) bread machine yeast
    • 2 eggs
    • 1/2 cup butter, melted and cooled slightly
    • 1/4 cup granulated sugar, plus more for torching
    • 1 tsp salt
    • 4 1/4 cups bread flour
    • 1 recipe batch of Mango Pastry Cream
    • Oil for frying

    Directions

    Add all of the ingredients except for the pastry cream and the frying oil to the pan of your bread machine according to the manufacturer’s directions.  Set the machine to the Dough cycle and allow to run.

    When the Dough cycle is complete, turn the dough out onto a lightly floured surface.  Roll the dough out to about 1/2 inch thickness.  Cut circles out of the dough using a 2 2/4 inch biscuit cutter.  Transfer circles to a baking sheet, leaving space for the dough to rise.  Cover and allow to rise in a warm place until they are doubled in size, about 45 minutes.

    Just before the donuts have completed their second rise, preheat your frying oil in a deep fryer (or the stove-top frying vessel of your choice) to 375 degrees F.  Fry the donuts, 3 or 4 at a time (depending on the size of your frying vessel).  Allow to cool on a wire rack, then blot on paper towels to remove excess oil.

    Using a pastry bag fitted with a filling tip, fill the donuts with mango pastry cream.  Set the filled donuts on a wire rack over a baking sheet.  Top the donuts with sugar, then use a kitchen torch to melt the sugar until the donut is coated in an amber glaze.  Repeat 2 or 3 more times until the sugar coating is the desired thickness.  Allow the donuts to rest for at least 10 minutes before serving.

  • Mango Madness in July – Part 5 (2018 Chapter)

    Mango Madness in July – Part 5 (2018 Chapter)

    It’s hard to believe that it’s already been 5 years since I started Mango Madness.  Mango Madness 2018 was actually going to be my last year of doing this, because I was legitimately running out of ideas.  Yet. the mangoes flowed so heavily this year that I got all sorts of inspired!  Seriously, I got mangoes from all different directions, and LOTS of them.  It turned out to be one of my most productive Mango Seasons yet!

    Wave upon wave of mangoes this season!

    As per the usual, Mango Madness 2018 will only feature NEW ways to use mango that have not been covered in previous posts.

    Similar to the cobbler, mango crisp is a great choice for you fans of pies or related desserts.  Served warm with a scoop of ice cream (cream cheese ice cream, in this case) is a real treat.

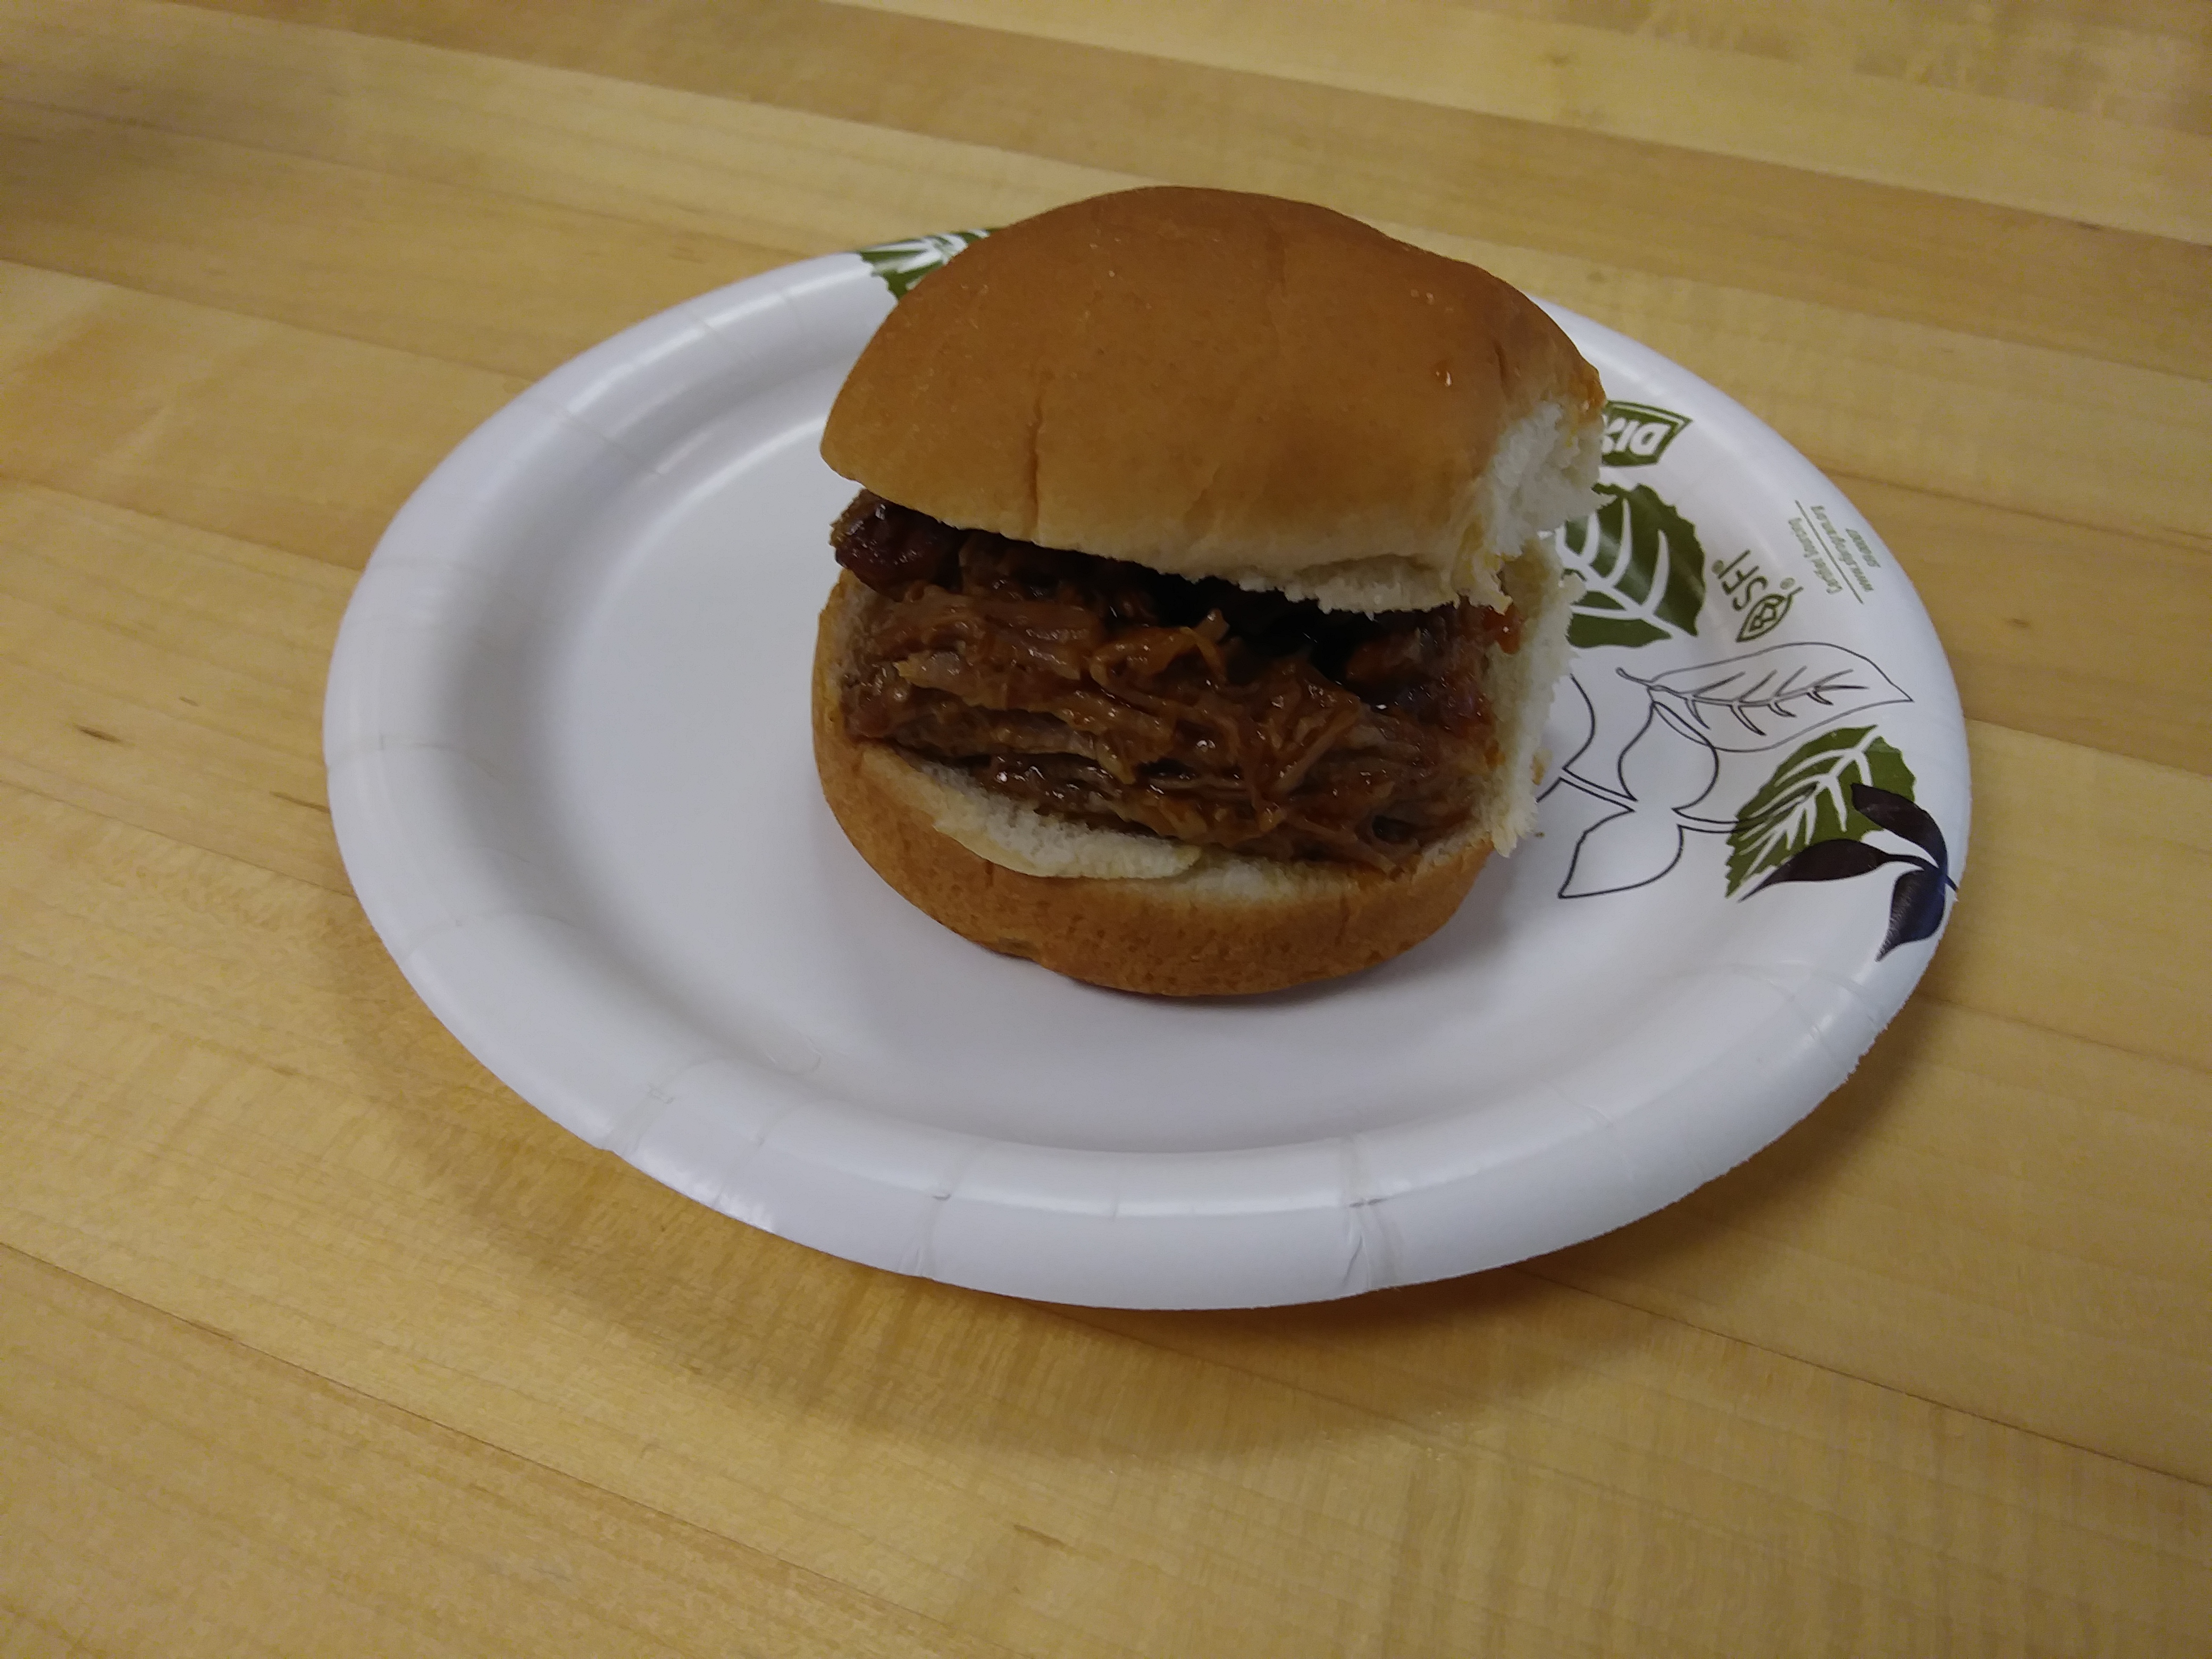
    For those that are into the sweet and savory pairings, try mango pulled pork.  I make it in the pressure cooker.  The sweetness of the mango really adds something special to the pork.

    Making mango souffle was actually only my second time making souffle.  The first time was a cheese souffle that was an absolute disaster.  This mango souffle was light, airy, and delicious.

    Fill some pate a choux (cream puff shells) with mango pastry cream!  And, for extra texture, dip your cream puffs in caramelized sugar for a sweet crunch.

    Mango empanadas are a cinch of you use refrigerated pie dough.  Just fill with mango compote, seal, and bake at 350 degrees for 25-30 minutes.

    Mango shortcake was something that my friend and I sort of came up with by accident, but it turned out so delicious that we decided to pass it along.  Just layer your shortcake with fresh mango slices.  Instead of whipped cream, we drizzled with mango Creme Anglaise.  A little bit unconventional, but SO GOOD.

    I have made mango flan before, but adding mango to flan always altered the texture in a way that was not too appealing to me.  The solution to that, I found, was not to make “flan” at all.  Now, I instead make mango purin (Japanese style flan), which is set with gelatin instead of baked.  Comes out smooth and creamy every single time!

    It was actually shocking to me how well mango works in ceviche.  I know that eating mango with lime juice is a thing, but that is usually done with mango that is not ripe yet.  This ceviche uses ripe, sweet mangoes, but the tartness of the ceviche balances the sweet of the mango in each bite.  You can find the recipe for this awesome ceviche here.

    When a Filipina friend of mine suggested that I use mango to make halo-halo, I had no idea what she was talking about.  I won’t try to explain it to you.  Just Google it.  You will thank me later.  Since I wanted the mango to be the star, I didn’t get too crazy with the ingredients.  My halo-halo consisted of nata de coco (coconut gel), candied sugar palm fruit, shaved ice, coconut milk, fresh mango chunks, a drizzle of condensed milk, and a scoop of mango ice cream.  Truly the culmination of all things Mango Madness!

    Mango Madness 2018 was a great addition to the Mango Madness tradition!  It also inspired me to keep it going for an extra year.  Let the Madness continue!

  • Mango Pastry Cream

    Mango Pastry Cream

    Skip to Recipe
    I’ve been experimenting with recipes for mango pastry cream for a while.  My previous go-to recipe was good, but it really didn’t have a whole lot of mango flavor.  I’m pretty happy with the results of this current iteration of mango pastry cream.  My friends and family must agree, because I got so many requests for the recipe that I had no choice but to share!

    Place your egg yolks in a measuring cup or small mixing bowl and whisk them, then add sugar and whisk until the sugar dissolves.  Once that is done, add your flour and whisk until the flour is combined, there are no clumps, and the mixture is pale yellow.  Set them aside.

    Combine the mango puree and the half-and-half in a small saucepan over medium heat, stirring to combine.  Heat the mixture until it starts to simmer, then remove it from the heat.  Add the hot mango mixture gradually into the yolk mixture, a little bit at a time, whisking constantly.  When about 1/3 of the mango mixture has been added, add the yolk mixture to the remaining mango mixture in the pot.

    Return the mixture to the heat and cook until the mixture thickens (it took about 5-10 minutes for me), whisking frequently to keep clumps from forming.  When it is thick enough, remove it from the heat and stir in your butter and vanilla bean paste.  When the butter has melted and the mixture is smooth, strain it into a heat-proof bowl with a fine mesh strainer.

    Cover the pastry cream with plastic wrap and refrigerate for at least a couple of hours before you use it.

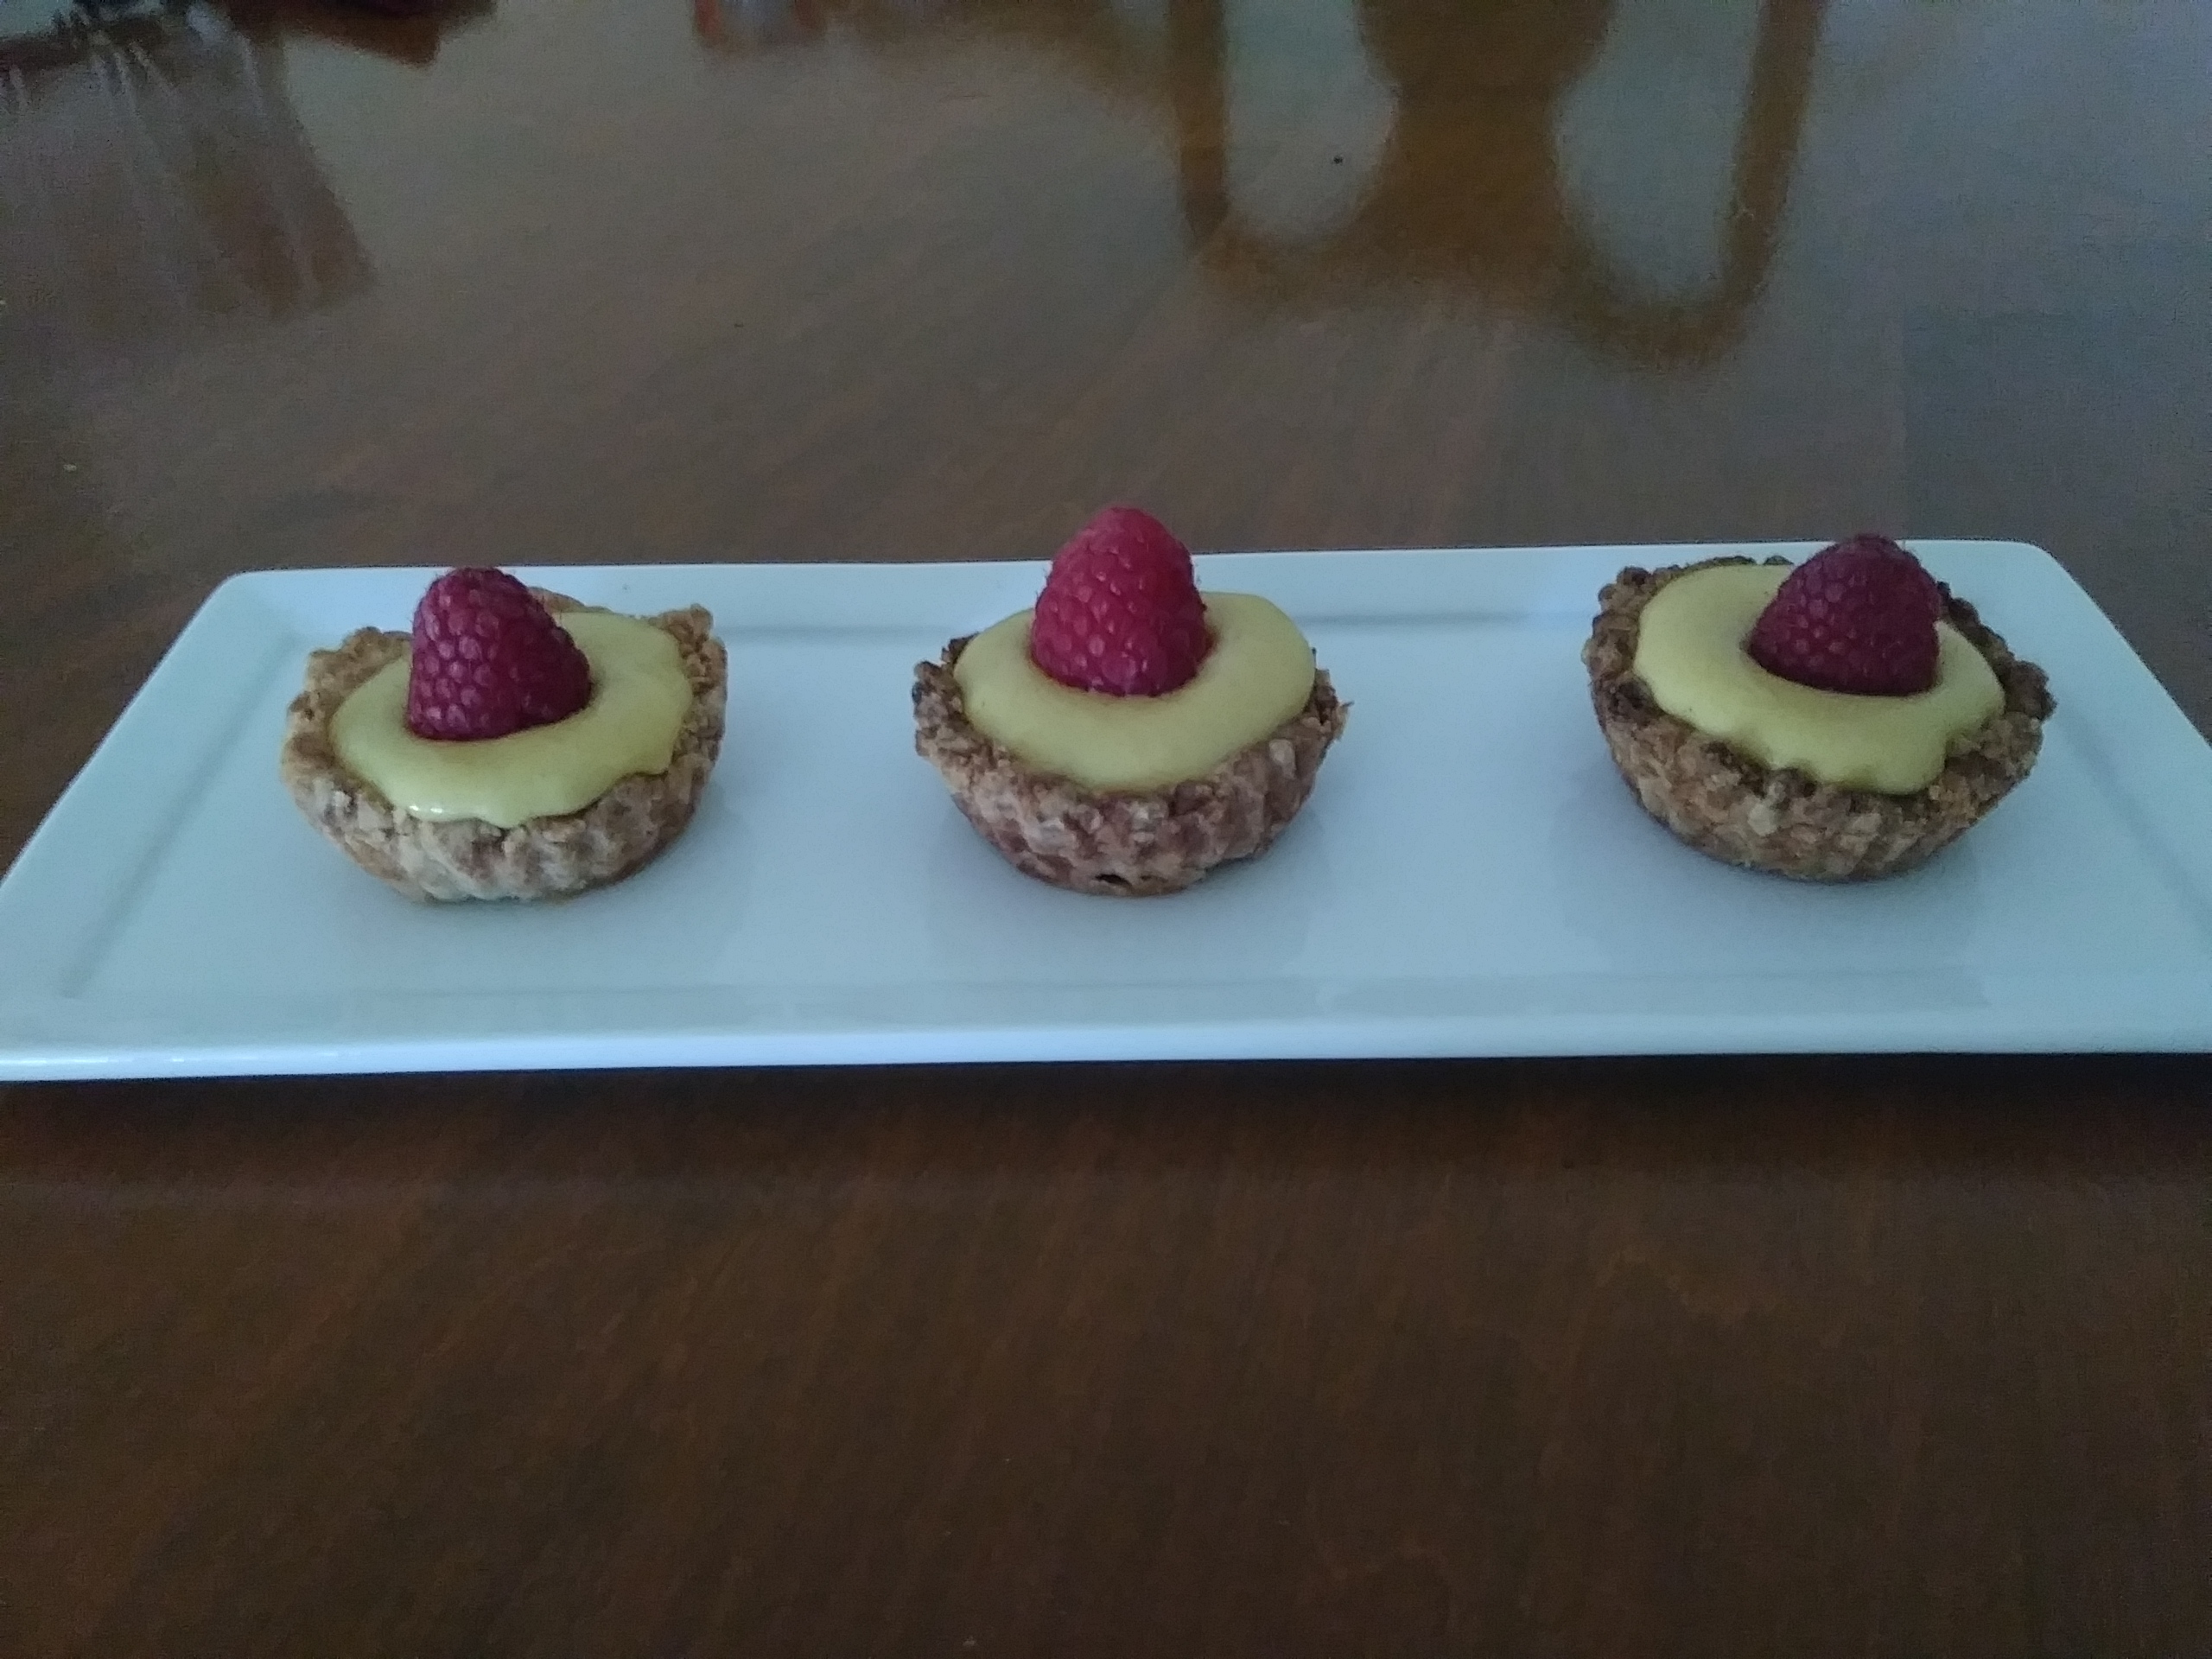
    This pastry cream has many uses.  One of the favorites is filling tartlet shells with it, which makes a simple and fancy dessert.  You can also use it to fill donuts, in puff pastry, or even just eaten as-is with whipped cream!

    Stayed tuned for a post on how to many tartlet shells coming soon!

    Mango Pastry Cream

    Ingredients

    • 1 cup mango puree (strained if using fibrous mangoes)
    • 1 cup half-and-half
    • 3/8 cup sugar
    • 1/4 cup flour
    • 6 egg yolks
    • 1/2 tsp vanilla bean paste (or vanilla extract)
    • 1/4 cup (1/2 stick) butter, cut into chunks

    Directions

    In a measuring cup or small mixing bowl, whisk the egg yolks, sugar, and flour until pale and creamy.  Set aside.

    In a small saucepan, heat the mango puree and half and half.  When the mixture starts to simmer, remove from heat.  Gradually add the hot mango mixture to the egg yolk mixture, whisking constantly.  When about 1/3 of the mixture has been incorporated, pour the yolk mixture into the remaining hot mango mixture and stir to combine.

    Return the mixture to the heat and cook, whisking constantly, until the mixture thickens starts to form bubbles.  Remove from heat and add the butter and vanilla paste (or extract), stirring until the butter has completely melted and incorporated.  Strain with a fine mesh strainer into a heat-proof bowl, then cover with plastic wrap (with the plastic touching the surface of the cream to avoid forming a skin), and refrigerate for at least 4 hours before using.

  • Pressure Cooker Thai Iced Tea

    Pressure Cooker Thai Iced Tea

    Skip to Recipe
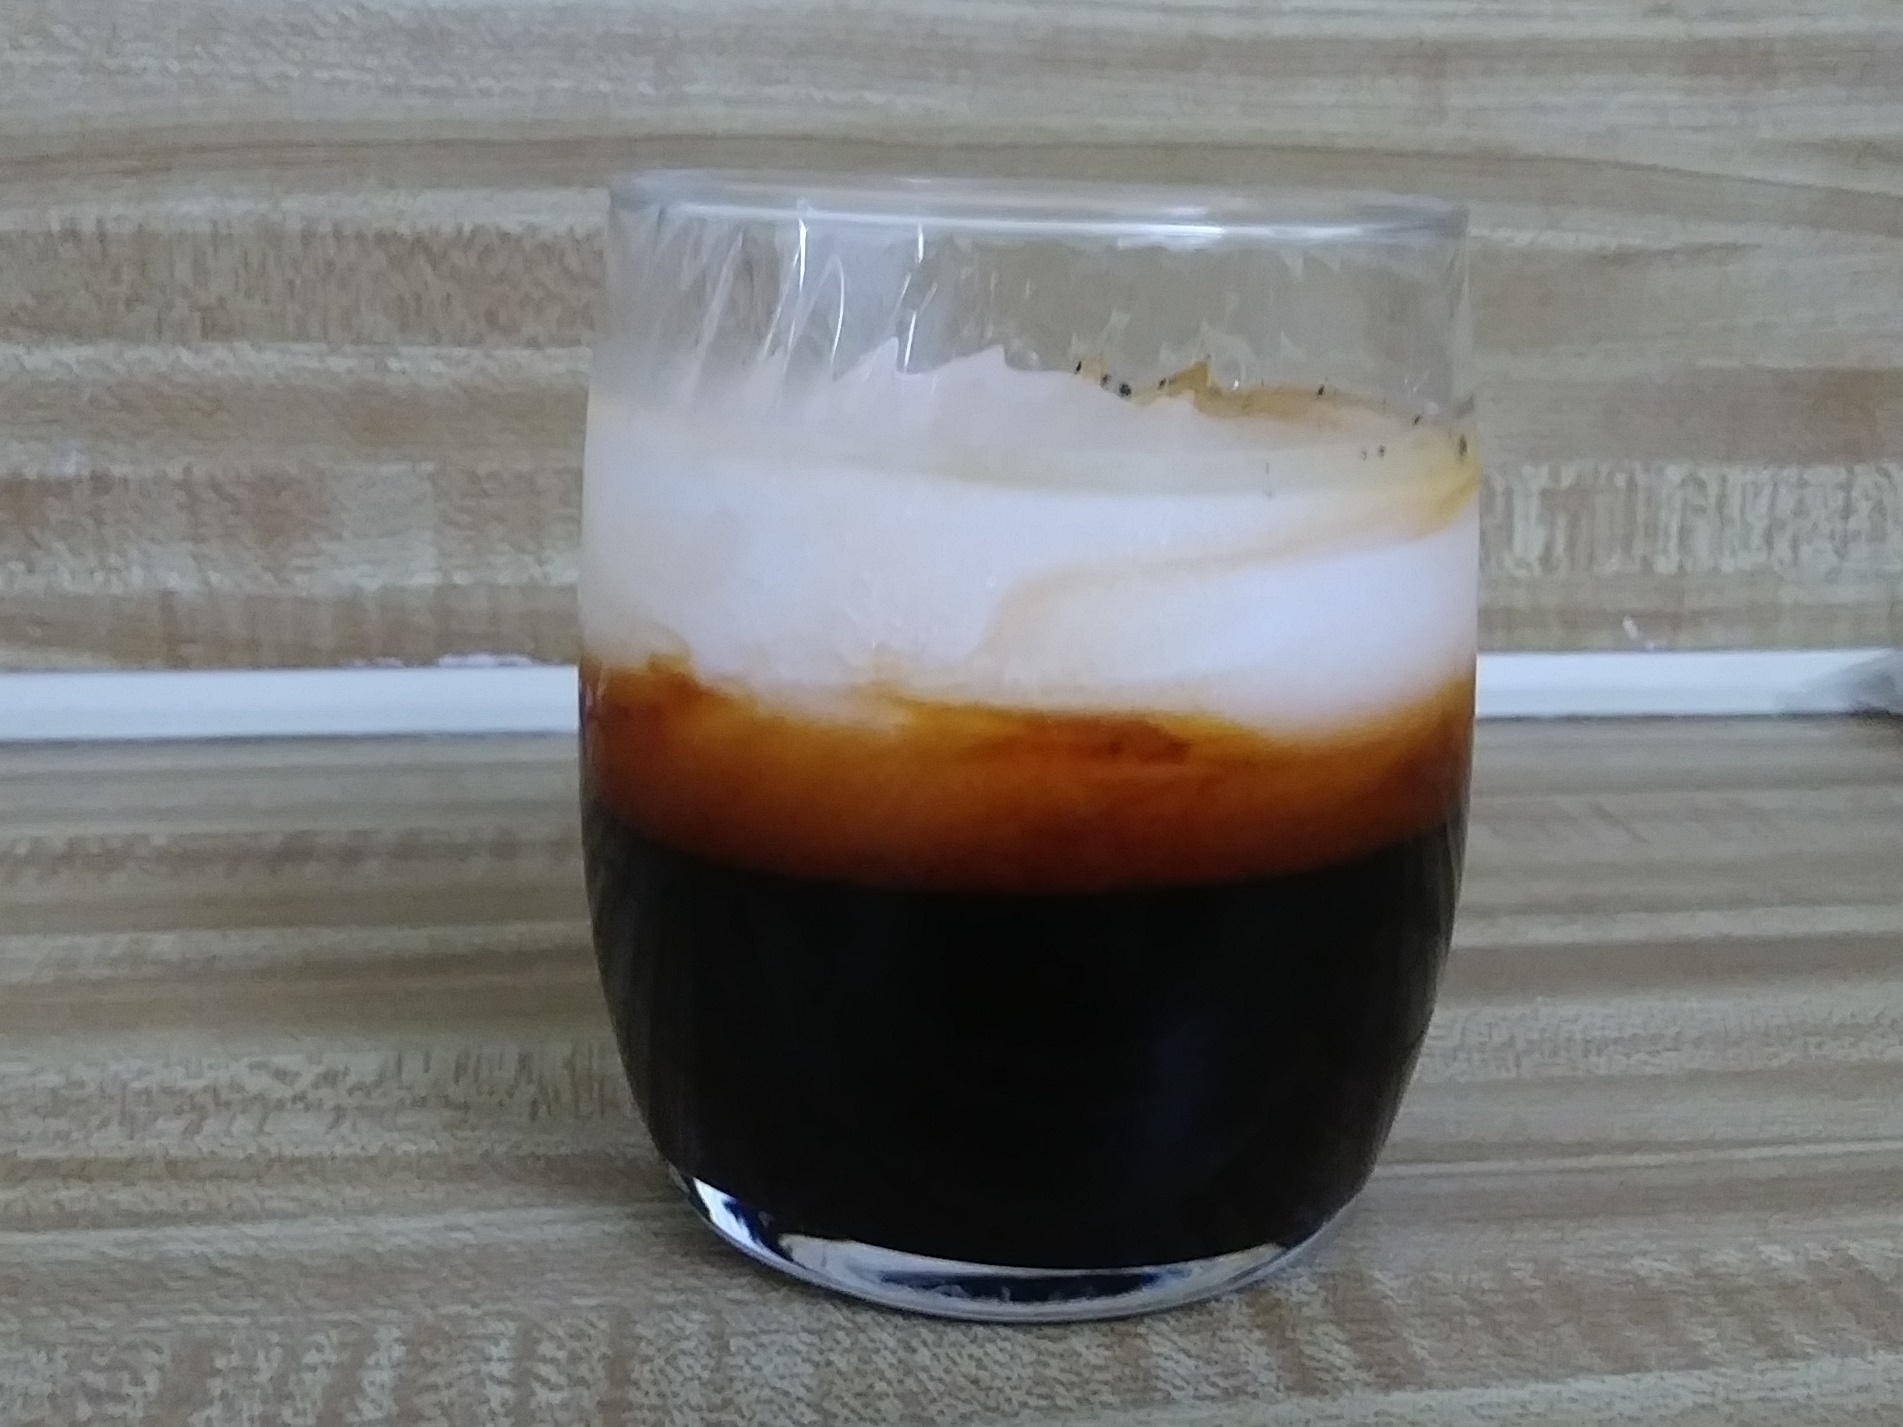
    Thai iced tea is basically dessert in a glass, and is great for soothing the burn from that hot and spicy Thai food that you might be enjoying.  Here in South Florida, practically any Asian restaurant serves Thai iced tea nowadays.  There are just so many of them that serve more than one type of Asian food.

    I think I first had Thai iced tea at a Japanese/Thai joint.  Someone else at the table ordered one, and it looked so good when it came to the table that I followed suit.  After basically inhaling my glass, and many more in subsequent visits, I eventually tried making my own at home.  I started with the Thai iced tea bags, which were basically like drinking Thai tea flavored water.  I eventually found the bags of Thai tea dust at one of my local Asian grocery stores, but getting the right flavor still eluded me.  Eventually, the game-changer came at a Vietnamese restaurant, when a server leaned over and whispered to me that the secret is that it needs to be STRONG and have enough sugar to suspend the half-and-half.  I won’t name the restaurant or the server, because I don’t want to get him in trouble for giving away secrets, but I thank him to this day.

    I used to make this on the stovetop, but just to try I decided to make it in the electric pressure cooker.  It made the flavor MUCH more intense with the same amount of tea leaves, so this will be how I make it from now on.

    Pressure Cooker Thai Iced Tea

    Ingredients

    • 6 cups water
    • 1 cup sugar
    • 1 cup Thai tea dust
    • Half-and-Half or evaporated milk for serving

    Directions

    Combine the water, sugar, and Thai tea dust in the liner of your pressure cooker.  Cover, seal, and cook on Manual (High Pressure) for 1 minute.  Allow the pressure to release naturally for 15 minutes before releasing any remaining pressure.

    Strain the tea through a mesh strainer, then through a coffee filter (I use a reusable coffee filter).  Let it cool at room temperature, then refrigerate until cold.

    To serve, add some ice to a glass then pour tea until it reaches about 2/3 of the way up.  Gently pour your evaporated milk or half-and-half to layer and fill the rest of the glass.  Enjoy!

    Makes about 1.5 quarts

    Stovetop directions:

    In a medium saucepan, bring the water and the sugar to a boil.  Remove from heat and stir in the tea dust.  Let stand for 10-15 minutes, then strain the tea through a mesh strainer and then through a coffee filter.  Allow to cool, then refrigerate until cold.

  • Pressure Cooker Mango Creme Brulee

    Pressure Cooker Mango Creme Brulee

    Skip to Recipe

    Mango creme brulee is a Mango Madness staple, and I have been making it since I first started experimenting with mango a few years ago.  Since I was getting so many mangoes anyway, I decided to try adapting the recipe to make in my Instant Pot electric pressure cooker.  It took a few tries, but I was able to get a smooth and creamy mango creme brulee!  You still need to do all of the stovetop work, but cooking them in a pressure cooker takes the guess work out of getting the perfect texture.

    Put your egg yolks in a measuring cup or small mixing bowl, then whisk them and set them aside.  Heat your cream, sugar, and mango chunks over medium to medium high heat.  As the cream heats, you will notice that it will start to change color as the mango releases juices into the cream.  When the cream starts to simmer, using a potato masher (or a fork, if you don’t have one) to gently mash the cooked mango so that it releases a little bit more flavor into the cream.  Then, remove the mango chunks using a slotted spoon and discard them.  Remove the cream from the heat and get your egg yolks ready.

    Temper the egg yolks by gradually adding some of the hot cream mixture into the yolks.   When you have incorporated about a third of the hot cream mixture into the yolks, whisk them into the pot with the rest of the cream mixture.  Strain the mixture into a heat-proof bowl, stir in the vanilla, then divide it evenly among 6 4oz custard cups.  Cover them with foil and arrange them in two layers in the liner of your pressure cooker (filled with 1 cup of water at the bottom).  Cover, seal, and cook on Manual (High Pressure) for  minute, and then allow the pressure to release naturally for 10 minutes before you release any remaining pressure.

    Remove the custards, uncover them, and allow them to cool completely on a wire rack.  When they’re cool, cover them and refrigerate for at least 4 hours or up to 3 days.

    When you are about to serve them, sprinkle about 1 teaspoon of sugar over the surface of the custard.  Tilt the custard cup around to make sure that the entire surface is covered, then use a torch to melt the sugar on the surface of the creme brulee until it bubbles and turns amber.  Let the custards cool for at least 5 minutes before you dig in.

    This is a great dessert if you want to impress!  Smooth, creamy, with just the right touch of mango flavor.

    Pressure Cooker Mango Creme Brulee

    Ingredients

    • 2 cups heavy cream
    • 2 cups fresh mango slices
    • 6 tbsp sugar, plus more for torching
    • 4 egg yolks
    • 1/2 tsp vanilla extract

    Directions

    Pour 1 cup of water into the liner of your pressure cooker.  Whisk your egg yolks in a heat-proof measuring cup or small bowl and set aside.

    Heat the cream, mango, and sugar in a saucepan over medium heat.  When the cream mixture is just about to simmer, lightly mash the mango, then allow the mixture to simmer for about 5 minutes (do not boil).  Remove from heat and use a slotted spoon to scoop out the mango pieces and discard them.

    Slowly add the hot cream mixture to your egg yolks, 1-2 tablespoons at a time, whisking constantly.  Once about 1/3 of the cream mixture has been added to the eggs, incorporate the egg mixture into the remaining hot cream mixture.  Strain using a fine mesh strainer, then stir in the vanilla.

    Divide the mixture equally among 6 4oz ramekins.  Cover with foil, then arrange in two layers on trivets in the pressure cooker.  Cover, seal, and cook on Manual (High Pressure) for 1 minute, and then allow the pressure to release naturally for 10 minutes.  Remove custards from pressure cooker and allow to cool completely on a wire rack, then cover and refrigerate for at least 4 hours.

    To serve, sprinkle a thin layer of sugar over the top of each custard, then use a kitchen torch to melt the sugar until it browns and forms a crispy top.  Allow the creme brulee to sit for 5 minutes after melting the sugar, then enjoy.

    Makes 6 servings

  • Pressure Cooker Mango Pulled Pork

    Pressure Cooker Mango Pulled Pork

    Skip to Recipe
    Mango Season continues here in South Florida, and I am lucky to have plenty of donors giving me a steady supply of mangoes.  I’m usually not much of a risk-taker with ingredients.  I am too just cheap to accept that I might have to throw food away if it doesn’t work out.  Mango Season is a little bit different, because all of the free mangoes means that I won’t feel as bad if an experiment doesn’t work out.  And, since Mango Madness has been going on for a few years, I have been getting better at figuring out what works and what doesn’t.  So, while making mango pulled pork was kind of risky, I felt confident that the flavor combination would probably work out.  And, I wasn’t wrong!

    My favorite kind of BBQ sauces are the ones that are slightly sweet, so the sweetness of the mango actually complimented the savory pork.  However, you will want to avoid pairing it with a sweet BBQ sauce so that your pulled pork doesn’t get overly sweet.  I think that a slightly spicy BBQ sauce works well to balance out the sweetness of the fruit.

    Get all of your ingredients ready, then heat the liner of your pressure cooker on the Saute/Browning setting.  Cut your pork butt into large chunks and season with BBQ rub.  When the liner is sufficiently hot, work in batches and brown your pork chunks for about 1-2 minutes on each side.  Once all of the pork chunks have been browned, return them to the pot, add the remaining ingredients (except the BBQ sauce).  Cover, seal, and cook on Manual (High Pressure) for 55 minutes, then allow the pressure to release naturally before opening the pressure cooker.

    Remove the pork chunks and set them aside.  Strain the liquid from the pressure cooker, but save the cooked fruit and vegetables.  Shred the pork and return it to the liner.  Blend the cooked onion/mango mixture with your choice of BBQ sauce, then pour it back over the shredded pork.  Mix it well before serving.

    You can eat the pork as-is, but you can also make pulled pork sandwiches or sliders.  So yummy!

    Pressure Cooker Mango Pulled Pork

    Ingredients

    • 4lbs Boston butt roast, cut into large chunks
    • 1 tbsp BBQ rub
    • 1 large onion, quartered
    • 2 cups ripe mango chunks
    • 4 cloves of garlic
    • 1 tbsp olive oil
    • 1/4 cup apple cider vinegar
    • 1 cup spicy BBQ sauce (I used honey chipotle)

    Directions

    Heat the liner of your pressure cooker on the Saute/Browning setting.  Season the pork chunks with BBQ rub.

    When the liner is hot, brown the pork chunks on all sides in the liner, working in batches.  When all of the pork chunks have been browned, return all of the pork to the pressure cooker.  Add the remaining ingredients (except for the BBQ sauce).  Cover, seal, and cook on Manual (High Pressure) for 55 minutes.  When the timer runs out, allow the pressure to release manually.

    Uncover and remove the pork and shred it.  Strain the liquid in the pot, but keep the solids.  Place the solids in a blender along with the BBQ sauce and blend until smooth.  Return the pork to the pot, then stir in the BBQ sauce.  Serve immediately.

  • B & B Butchers (A Review)

    B & B Butchers (A Review)

    On a recent visit to Houston to visit my sister, we agreed that I had to have a classic “Houston Steakhouse” experience.  After all, Texas is cattle country, and they sure do pride themselves on the quality of their beef.  B & B Butchers was not too far from where my sister lived at the time, so it was a good choice for us to try out.  Plus, the reviews were pretty high.  Can’t argue with that, right?

    The restaurant is located at the site of a former bakery.  In addition to the actual steakhouse restaurant, it also features a butcher shop and a deli on the side.  We didn’t visit either of those, and they are not visible from within where we were at the restaurant.

    Not long after you are seated, they bring you a nice basket of bread and a side of whipped butter.  That is pretty standard for a white-linen type of place.  The bread was good, although I don’t know what kind of bread it actually was.

    Their appetizer special was bacon wrapped jumbo shrimp.  While I wish that the bacon was a little more crisp, the dish overall was delicious.  It was served in a butter herb sauce that was subtle enough to keep your focus on the taste of the shrimp and the bacon.  My sister also ordered a crab cake, which was a solid crab cake.  It definitely tasted like a fancy steakhouse crab cake, but there was nothing particularly unique about it.

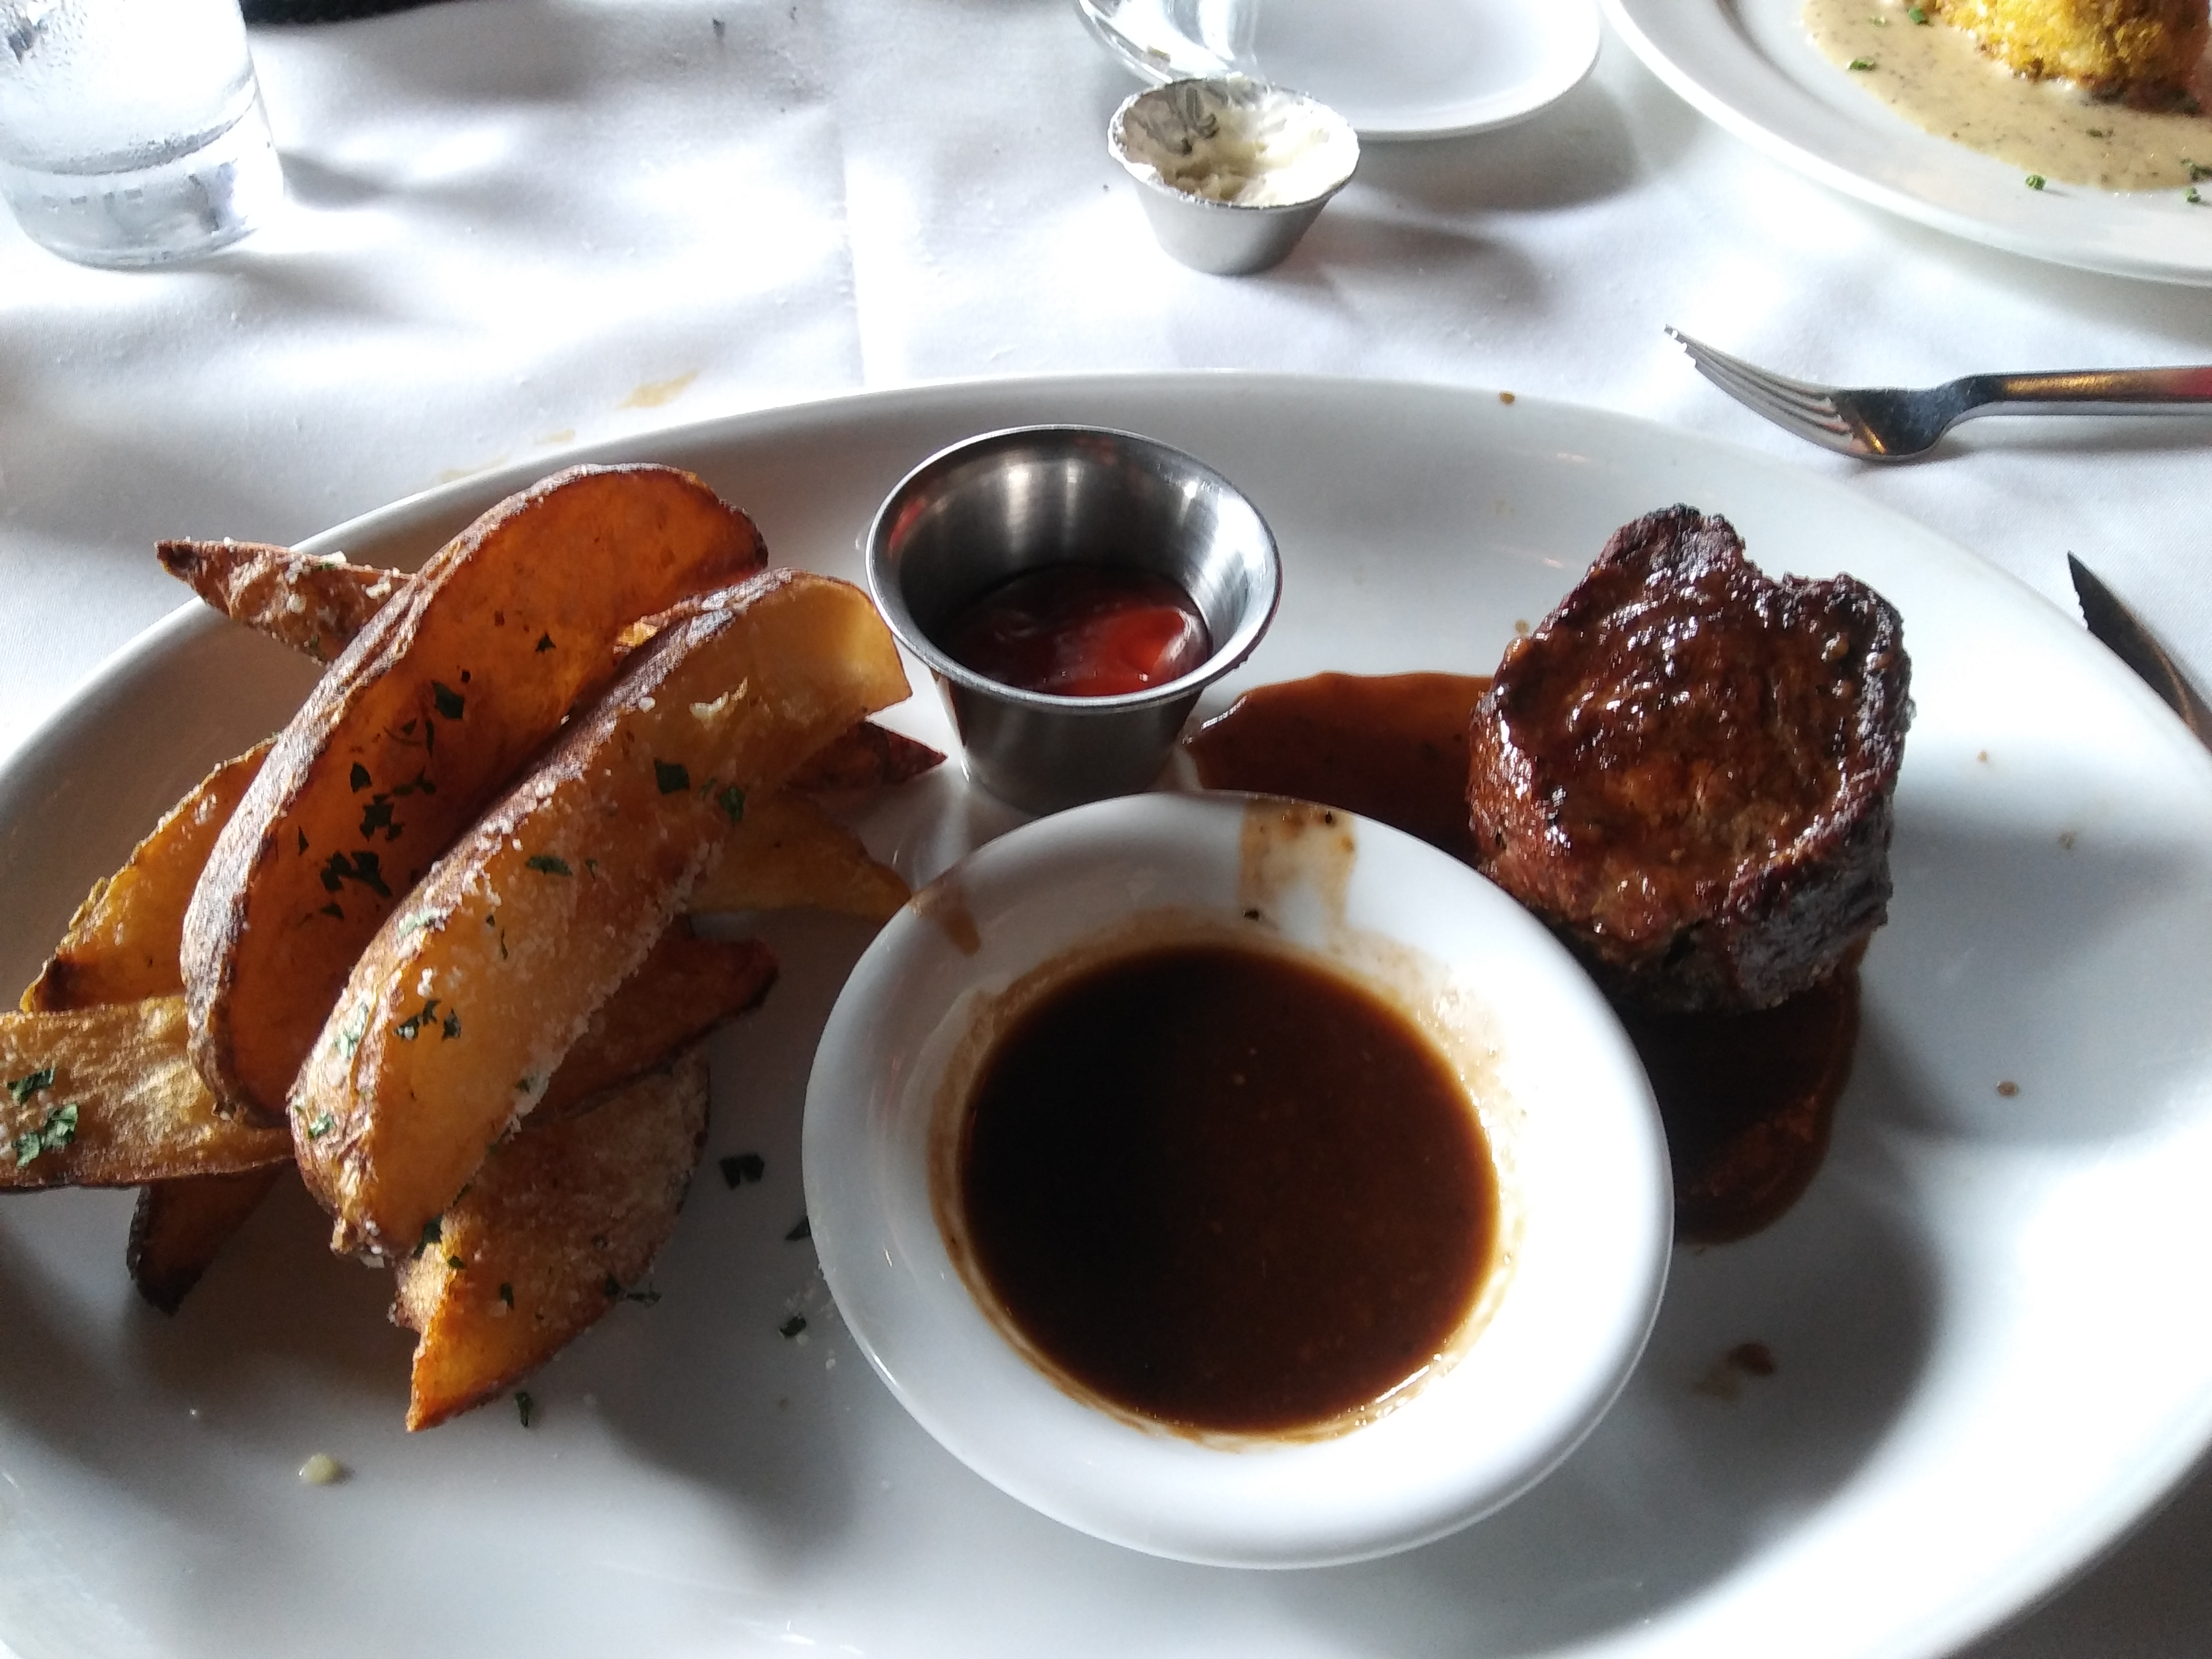
    For my entree, I got the ribeye club cut.  I had never had a “club cut” before, so I was expecting a long and marbled slab of fatty steak.  At first, I was shocked at getting what looked like a tiny filet.  When the shock wore off, I actually enjoyed my steak very much.  It wasn’t quite as tender as a filet, but it had full-bodied flavor.  It was also surprisingly filling, despite the size.  The steak was served with what I think was a house-made steak sauce and truffle “fries.”  To me, steak fries are more like potato wedges instead of fries, but they did taste a lot better than most potato wedges do.  I appreciated that the potato was soft all the way through, since steak fries have a tendency to taste raw in the middle.

    I enjoyed my meal at B & B Butchers and would definitely eat there again if my travels bring me to Houston.

    For more information on B & B Butchers, visit their web site at http://bbbutchers.com/


  • Pressure Cooker Mango Chile Sauce

    Pressure Cooker Mango Chile Sauce

    Skip to Recipe
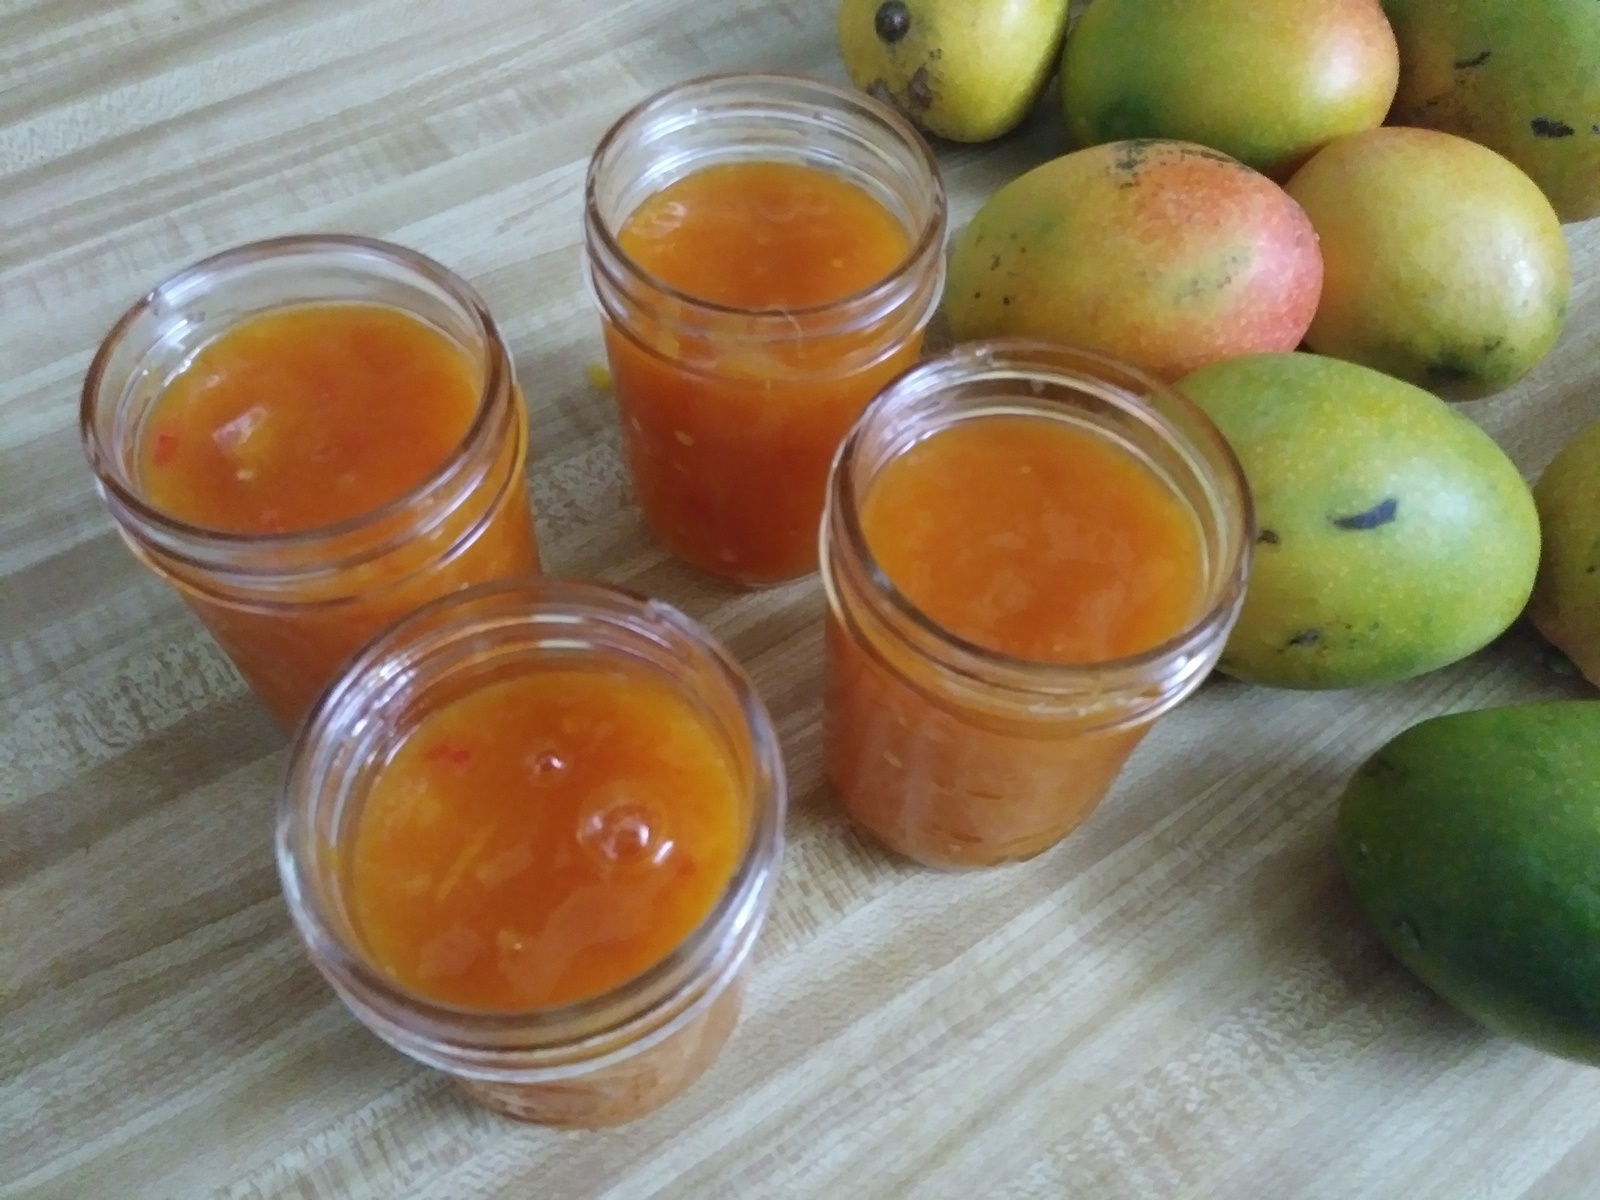
    The great thing about Mango Season in South Florida is that you can usually get your hands on more mangoes than you know what to do with.  The bad part about Mango Season in South Florida is that you can usually get your hands on more mangoes than you know what to do with.  Mango Season is one of those times where being the daughter of third-worlders kicks in.  The thought of letting any mango go to waste is just appalling.  Still, finding a use for mangoes that are a little too ripe to eat as is can be a challenge.  Typically, it’s best to use them cooked or pureed.  Therefore, this is why making a mango chile sauce was a great idea.

    The hardest part about this sauce is prepping the ingredients.  Once your mangoes are peeled and cut and your other veggies are chopped, it’s simply a matter of dumping everything into your pressure cooker and letting it do its thing.  When it’s cooked, just puree the sauce, add a cornstarch slurry to thicken, and you’re done!

    You can use other types of chiles, if you wish.  For the best color, you’ll want to stick to red chiles.  Still, you can customize it to your preferred heat level and flavor profile by picking a different kind of pepper.

    Pressure Cooker Mango Chile Sauce

    (Adapted from this recipe)

    Ingredients

    • 3-4 cups fresh mango slices
    • 1 yellow bell pepper, roughly chopped
    • 4 red jalapeño peppers, roughly chopped (remove seeds if desired)
    • 3 cloves of garlic, minced
    • 1/2 tsp salt
    • 1 cup sugar
    • 1 cup apple cider vinegar
    • 1 lime, juiced
    • 2 tbsp cornstarch, dissolved in about 4 tbsp of water

    Directions

    Add all of the ingredients except for the cornstarch to the liner of your pressure cooker.  Cover, seal, and cook on Manual (high pressure) for 10 minutes.

    When the cook time is done, manually release the pressure.  Open the pot, and puree the cooked mixture using an immersion blender.  Switch the pressure cooker to the Saute/Browning setting on the lowest level, then add your cornstarch and water mixture, stirring constantly. until mixture has thickened and starts to bubble.  Turn off the pressure cooker and remove the liner to transfer the sauce to jars.  Store in the refrigerator until ready to use.

    Makes about 6 cups.

  • Mango Ice Cream (Egg-Free)

    Mango Ice Cream (Egg-Free)

    Skip to Recipe
    Mango Season is on FIRE, and the season just getting started.  My usual mango suppliers have been extra generous with me this season, and I make sure that their mangoes do not go to waste.   Some of the fruits get eaten as-is.  Other mangoes get sliced or chopped and used in cakes and fillings.  I puree and strain those that are too far gone to slice, but not far enough to go in the trash.  Then, I use that mango puree in all sorts of ways.  This is where mango ice cream comes in.

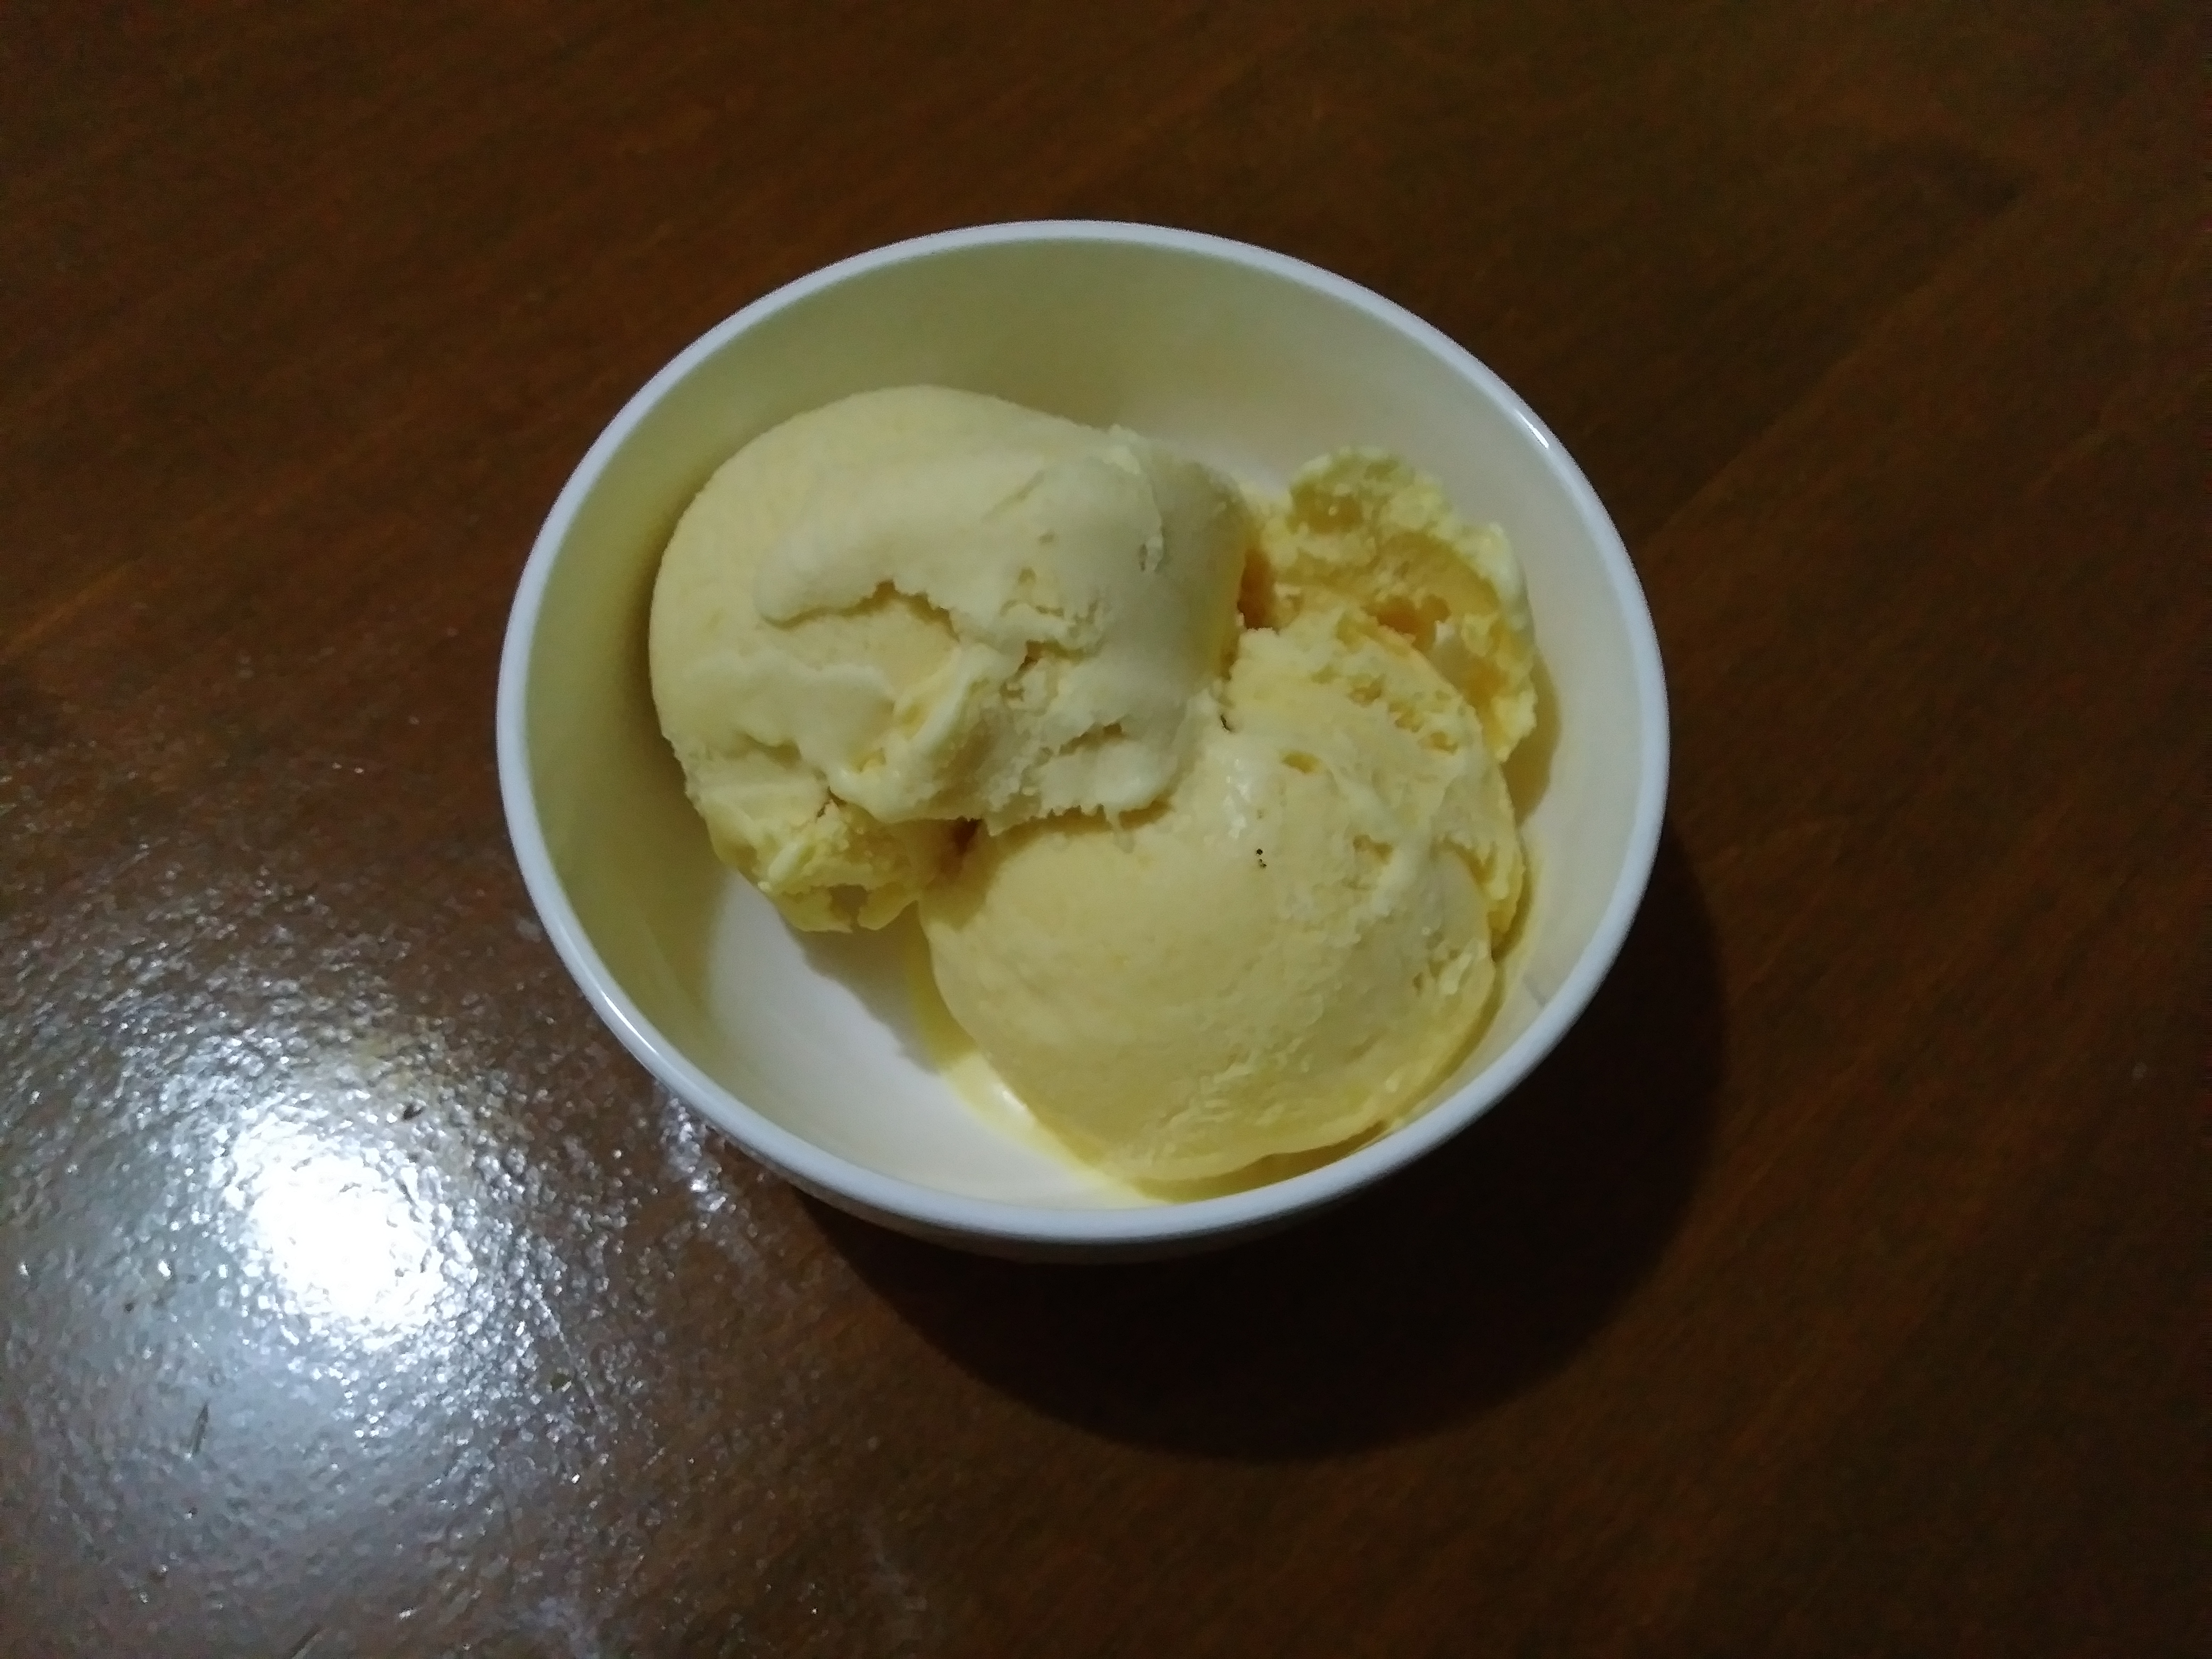
    When I first started Mango Madness, I always made mango ice cream using a custard-base.  This guaranteed the smooth and creamy consistency that I love in my ice creams.  Recently, I read somewhere that you can achieve that same creamy texture by making ice cream with condensed milk.  Something about the condensed milk mimics the properties of a custard base, which ensures a smooth and creamy product without ever turning on your stove.  The ice cream base comes together in a matter of minutes, and mangoes that would have otherwise gone ignored are reborn as a delicious mango ice cream!

    Smooth, creamy, refreshing mango ice cream.  And, with very little effort!  As the Barefoot Contessa would say, “How bad can that be?”

    And so, there you have it.  Be advised, though, that homemade ice cream doesn’t last as long as store-bought.  So, eat it fast.  Otherwise, it can get freezer burn.

    Mango Ice Cream (Egg Free)

    Ingredients

    • 1 1/2 cups heavy cream
    • 1 1/2 cups strained mango puree
    • 1 can sweetened condensed milk
    • 1/2 tsp vanilla extract

    Directions

    In a medium bowl, gently stir all of the ingredients together.  Cover and refrigerate until very cold.

    When cold, freeze in your ice cream maker according to the manufacturer’s directions.  Store the mango ice cream in a freezer-safe container.

    Makes about 1 1/2 quarts

  • Pressure Cooker Mango Key Lime Pie

    Pressure Cooker Mango Key Lime Pie

    Skip to Recipe
    It has been raining nonstop here in South Florida for the past 2 weeks or so.  The upside to this rain is that it has been knocking the mangoes out of trees prematurely, which means that mango season has started a little early this year.  My friends and my coworkers have all been generous with their stashes, so mangoes haven’t been in short supply for me.  One particular coworker and I have a verbal agreement where he will let me have first pick of his surplus mangoes every season as long as he gets a mango key lime pie.  Of course, I always deliver.  This year, though, I decided to try making it in my Instant Pot.  It was a smashing success, so I decided to share.

    Mix your crust ingredients and press them into the bottom and halfway up the sides of a greased 7-inch springform pan, then set aside.  If you’d like, you can line the bottom with parchment paper to make it easier to get out of the pan.  I also like to bake my crust for about 5 minutes in the oven at 350, but that is totally optional.  Whisk the rest of your ingredients together in a small mixing bowl, and then pour the mixture into your prepared crust.  Cover the pan with foil, place it on a trivet, and lower it into your pressure cooker liner (filled with 1 cup of water).  Cover, seal, and cook on Manual (High Pressure) for 10 minutes.  When the time is up, allow the pressure to release naturally for an additional 10 minutes before you release the remaining pressure.  Remove your pan and uncover.  The top should be shiny with no jiggle.

    Let the pie cool completely in the pan, then cover and refrigerate it for at least 4 hours before you serve it.

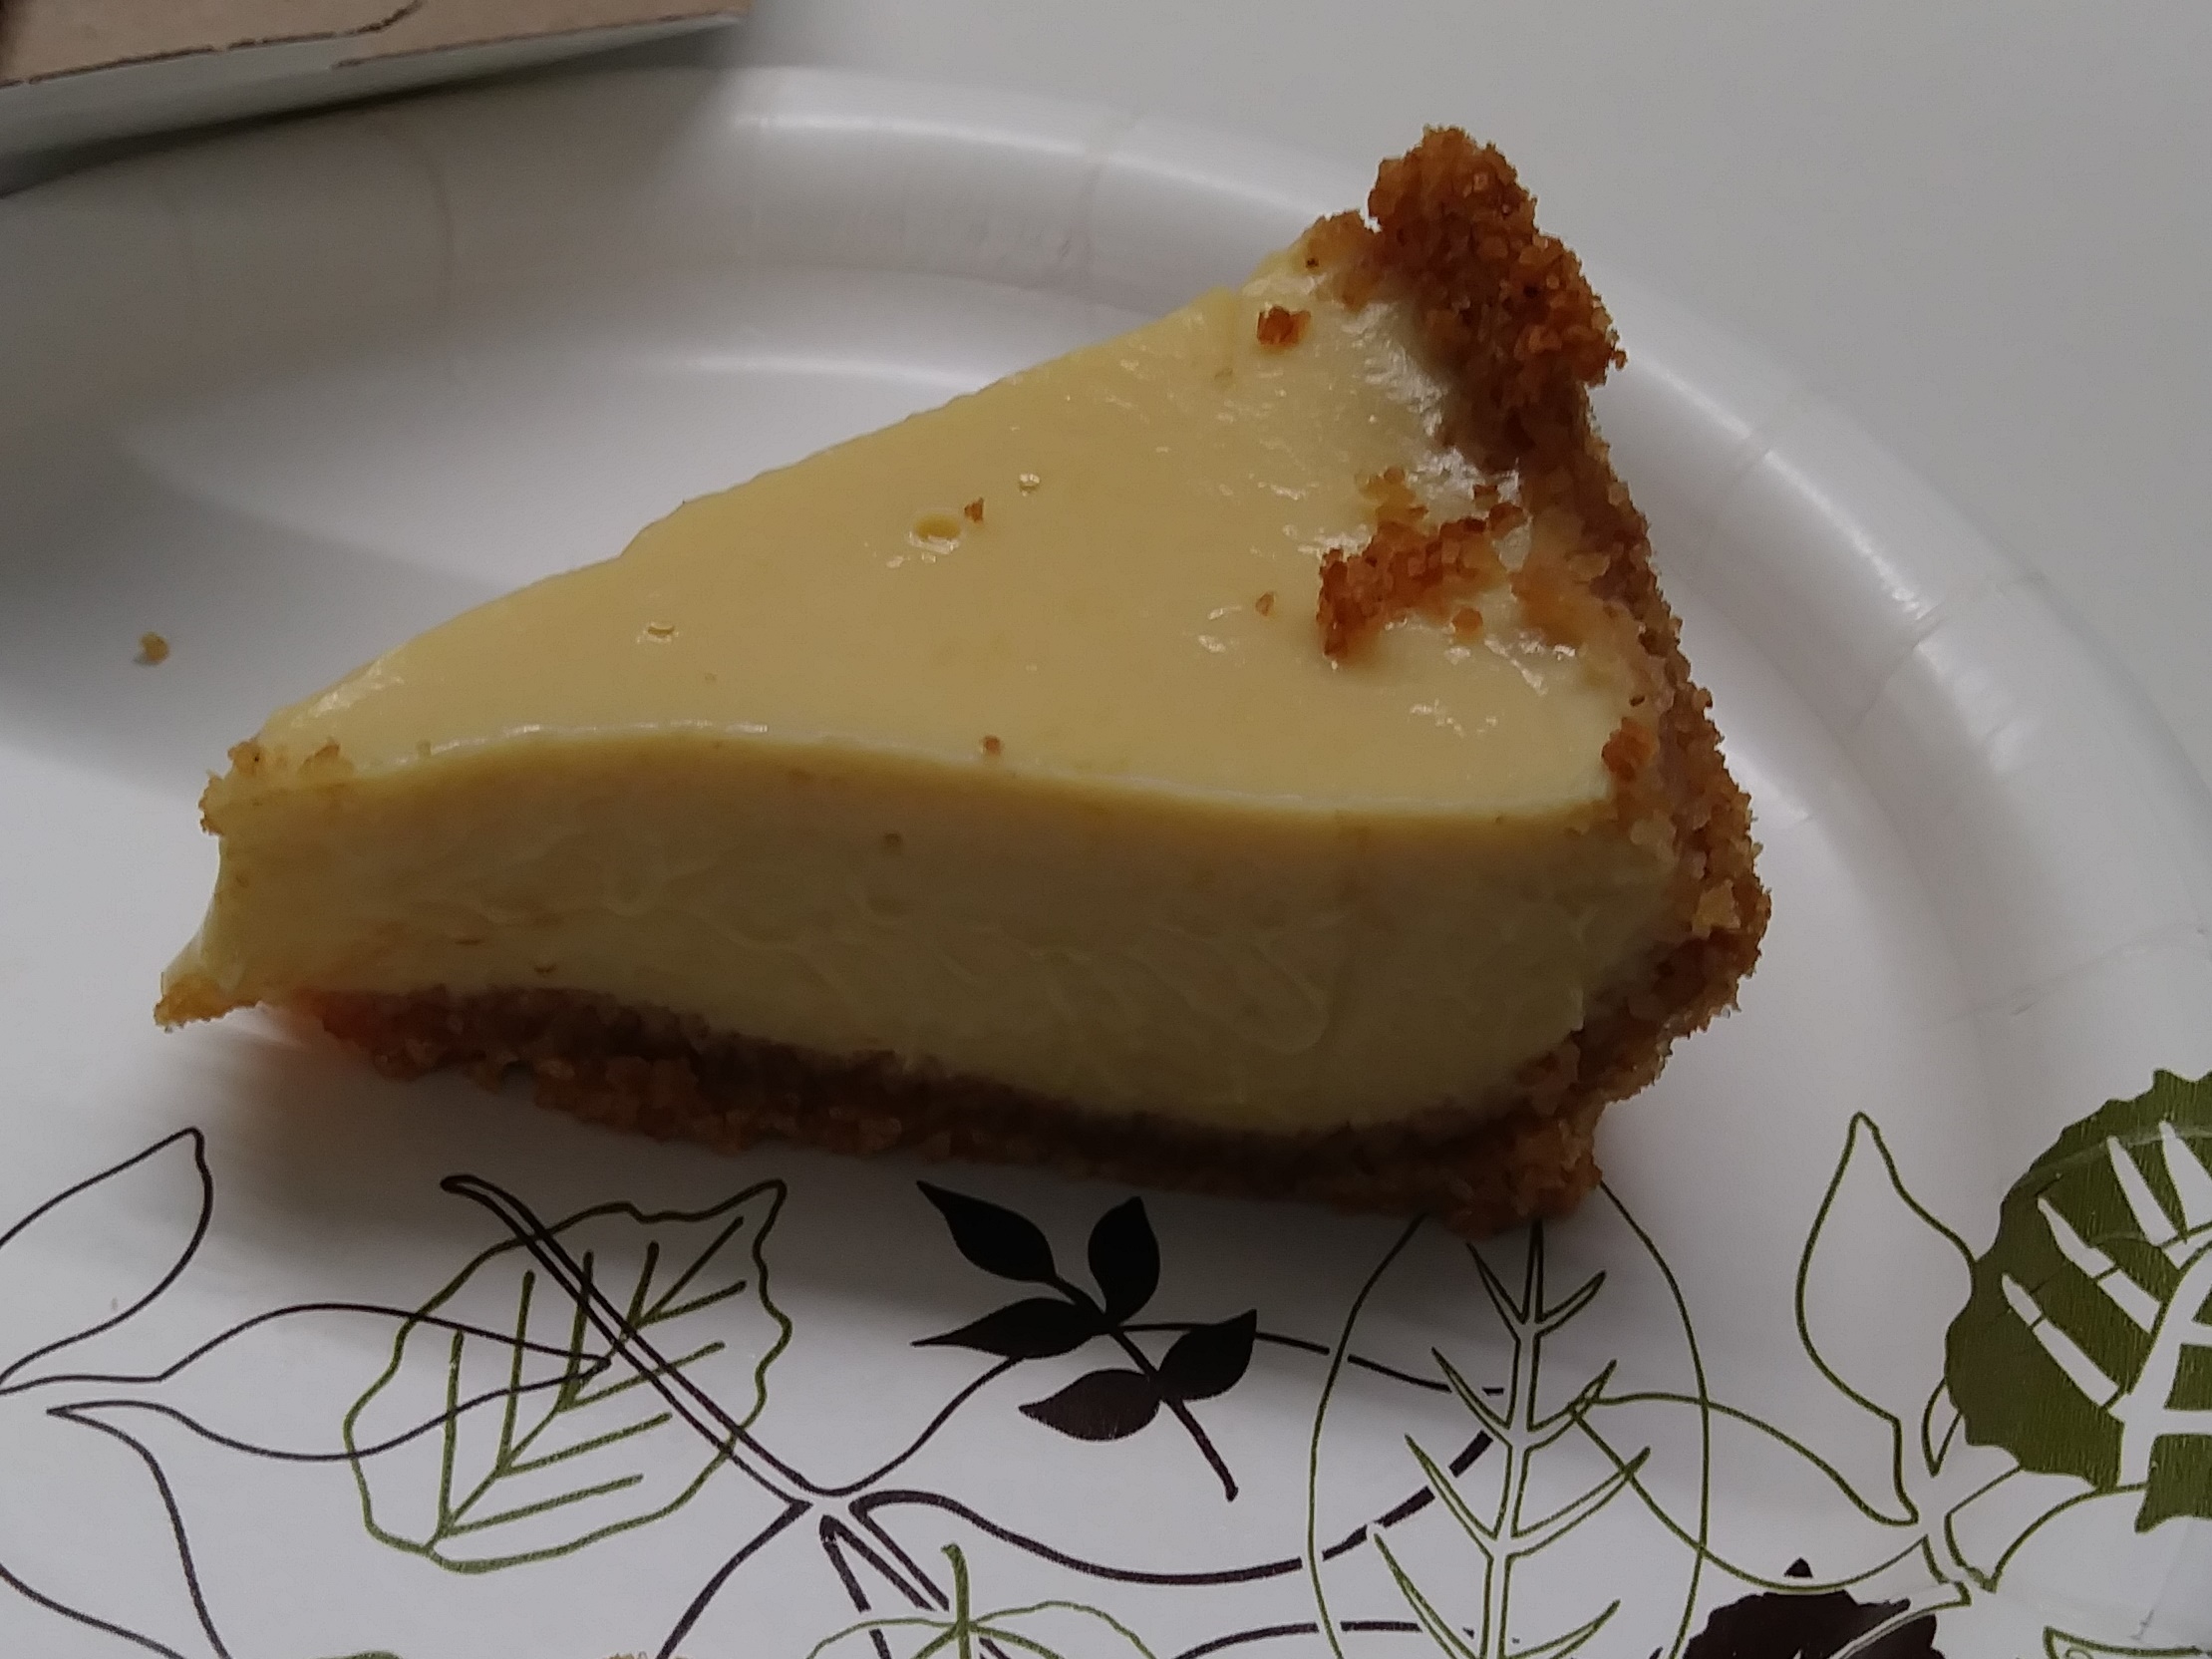
    Maybe you can make your crust look prettier than mine, eh?

    Serving a pie cooked in a springform pan is actually easier than serving it in a traditional pie pan.  There is a lot less hassle when digging your spatula underneath a slice.  You can’t make as big a pie, though, so choose who to share with wisely.

    Pressure Cooker Mango Key Lime Pie

    Ingredients

    • 1 cup graham cracker crumbs
    • 1 tbsp sugar
    • 3 tbsp butter, melted
    • 1 can sweetened condensed milk
    • 1/3 cup key lime juice (or use 1/4 cup if you like it less tart)
    • 1/4 cup mango puree
    • 1 egg
    • 1 egg yolk

    Directions

    Grease a 7-inch springform pan and line the bottom with parchment paper (if desired).  Pour 1 cup of water into the liner of your pressure cooker.

    Combine the graham cracker crumbs, sugar, and melted butter, then press onto the bottom and halfway up the sides of your prepared pan.  Set aside (you can also bake at 350 for about 5 minutes prior to filling).

    Whisk the remaining ingredients together in a small mixing bowl, then pour into your prepared crust.  Cover with foil and place on a trivet in the liner of your pressure cooker.

    Cover, seal, and cook on Manual (High Pressure) for 10 minutes, then allow the pressure to release naturally for an additional 10 minutes before releasing the remaining pressure.  Remove pie from pressure cooker, uncover, and allow to cool completely.  Refrigerate for at least 4 hours before serving.

    Makes about 8 servings.