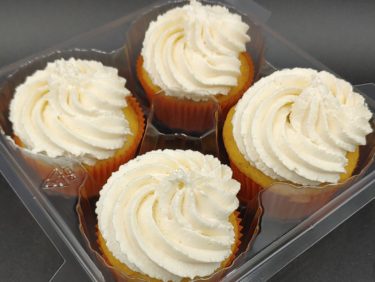
I used to think that I hate frosting. And, while frosting is still not my favorite part of a cake or cupcake, I realize now that it’s not all frostings. Mostly, I dislike American buttercream. I mostly discovered this when I decided to try making Swiss buttercream because I had way too many egg whites in my fridge and was tired of making macarons. After a few tries, I got comfortable enough to try flavoring it, and that’s how this passion fruit Swiss buttercream was born.
This recipe uses passion fruit powder, which is dehydrated ground passion fruit. You can find it online. I don’t recommend substituting with passion fruit pulp, as the added moisture might make the frosting too runny.
Passion Fruit Swiss Buttercream
Ingredients
6 egg whites
1 1/2 cups granulated sugar
1/4 tsp cream of tartar
1 lb (4 sticks) unsalted butter, softened but still on the firm side
1/2 cup passion fruit powder
1/2 tsp vanilla bean paste
a pinch of salt
Directions
Combine the egg whites, sugar, and cream of tartar over a double boiler. Warm the mixture until all of the sugar is dissolved and the temperature reaches 165 degrees.
Transfer to stand mixer with whisk attachment and whip until stiff peaks form and the bowl no longer feels warm.
Change the whisk attachment to paddle attachment and add the butter, 1-2 tbsp at a time, while the mixer is running. Once all of the butter is added and the frosting looks smooth, add a pinch of salt, vanilla paste, and passion fruit powder. Beat until fully combined.
**Note: If your frosting looks runny, you may have added the butter while the meringue was still too warm. Pop your frosting into the refrigerator for about 30 minutes and then check to see if it has stiffened.
Several of my loved ones are obsessed with Oreo. So, when I had a fight with one of them recently, I knew that whatever I made as a peace offering should have Oreos in it. I looked at a few recipes for Oreo cheesecakes online, but none looked like they would make a cheesecake with the exact texture that I like. So, I decided to make my own. I wound up getting a bunch of requests for my Oreo cheesecake recipe, so I decided to record it for posterity.
I get a lot of questions from people about why I use such a small amount of butter in my Oreo crusts. Oreo filling is basically sweetened shortening. When it gets hot, it will melt. This creates additional melted fat to make up for the rest of the butter that would typically go in a graham cracker crust. If you’re removing the filling or using another type of non-filled cookie for your crust, definitely add an extra 2 tbsp of melted butter. Otherwise, the crust for your Oreo cheesecake might end up too oily. Take it from someone who’s had to wipe grease off of the bottom of her cheesecakes.
Pressure Cooker Oreo Cheesecake
Ingredients
For the crust:
1 cup crushed Oreo crumbs (don’t remove the cream filling)
1 tbsp butter, melted
For the cheesecake:
16 oz cream cheese, softened
1/2 cup granulated sugar
2 eggs, room temperature
1/3 sup sour cream
1/2 tsp vanilla extract
1/2 cup crushed Oreo crumbs (or chopped Oreo pieces, if you prefer chunks in your cheesecake)
Combine the melted butter and the Oreo crumbs in a small bowl. Press onto the bottom of a 7″ cheesecake pan. Grease the sides of the pan, then set aside.
*Note: If desired, bake the crust in a pre-heated oven at 350 degrees for 8 minutes.
Make the cheesecake
Cream the cream cheese and sugar until smooth (best to use a stand mixer for this). Add the eggs, one at a time, beating well with each addition.
Mix in the sour cream and vanilla, mixing until just combined. Do not overmix!
Gently fold in the Oreo crumbs, then pour into your prepared cheesecake pan. Set aside.
Pour 1 cup of water into the liner of your electric pressure cooker, then set to the Saute/Browning setting. When the water begins to simmer, place the cheesecake in pot on a trivet or silicone sling.
Cook the Oreo cheesecake on High Pressure for 20 minutes. When the timer stops, allow for a 15-minute Natural Release before releasing any remaining pressure.
Remove the cheesecake from the pot. Blot any condensation built up on top of the cheesecake with paper towel. Allow to cool completely, then cover and refrigerate for at least 4 hours (preferably overnight). Remove the Oreo cheesecake from the pan and decorate with Oreo pieces and whipped cream, if desired.
I must confess: I hate papayas. Or, at least, I hate ripe papayas. I am one of those unfortunate people for whom the smell of ripe papaya just brings to mind all sorts of unpleasantness. Still, papaya trees keep growing in my backyard, as if to mock me. Rather than let them go to waste, a friend suggested that I try using them while green. Apparently, green papaya lacks that off-putting smell and aftertaste. Because of its comparison to green mango, I decided to try making green papaya chutney. The result turned out spectacular.
One lesson that I learned while making papaya chutney: milk your green papayas before cutting. That is, score the skin of the papaya and let it sit on your counter for about an hour. This will drain the papain, which is an enzyme found in papaya. If you’re sensitive to papain, it can make you very itchy. If you’re not, it’s also considered to be a great meat tenderizer.
The green papaya chutney should keep for about a month in refrigerator.
Green Papaya Chutney
Ingredients
1 medium white onion, diced
2 tablespoons fresh ginger, finely minced
3 cloves garlic, finely minced
1 red chili, sliced (or substitute 1/2 tsp red chili flakes)
2 teaspoon coriander seeds
2 teaspoon cumin seeds
1/2 tsp methi (fenugreek) seeds
¼ teaspoon ground turmeric
5 whole cloves
1 cinnamon stick
1 teaspoon salt
5 green cardamom pods
5 cups of papaya, peeled and julienned (or diced)
1 cup white granulated sugar
1 cup light brown sugar
1 cup distilled white vinegar
Directions
Combine all of the ingredients except for the vinegar in a non-reactive saucepan. Cover and let sit at room temperature overnight.
The following day, remove the cover and add the vinegar. Bring to a simmer over medium heat. Continue to cook until the chutney has thickened and reduced to your liking, about 30 minutes.
Remove the cinnamon stick. Transfer the cooked papaya chutney to jars and allow to cool. Keep refrigerated until ready to use.
One of my sisters is obsessed with pretty much anything cookies and cream. The day that her divorce papers were to be signed, I knew that I wanted to surprise her with something cookies and cream. And, since she’s the fancy sort, I decided to try making cookies and creme entremets.
Long story short, there were a lot of happy screams of delight that evening. Then, sadly, COVID hit hard and she packed up and went off to NYC to go save lives. I haven’t gotten to make them for her again since. But, since the entremets were such a big hit, I decided to pass the recipe along.
These cookies and cream entremets are made of a few components. There is a chocolate ganache center, a cookies and cream “mousse”, and a full sized chocolate sandwich cookie thrown in for good measure. I serve the cookies and cream entremets on a brownie base. You could probably also serve it over sponge or wafer cookie, if you wanted.
One of the best parts about entremets is that they can mostly be made in advance and then frozen until you’re ready for them. Even mirror glaze can be made ahead of time and refrigerated or frozen until you need it. Then, you just reheat it and pour.
If you will be serving your entremets on a brownie (or other) base, make sure that the glaze has set before transferring.
The end-result is a beautiful, Instagram/Pinterest worthy dessert that will leave a lasting impression. Next time, I might let the mirror glaze cool a little longer before coating, but otherwise I am very happy with the results!
In a microwave safe bowl, melt the chocolate and the cream by microwaving in 15-second bursts until the mixture is smooth. Divide the mixture evenly among the cavities of the 15-cavity mold. Freeze until ready to use.
Make the cream layer:
Add the water to a small, microwave-safe bowl. Sprinkle the gelatin over the top. Allow the gelatin to soften for about 5 minutes. Microwave the mixture in 10-second bursts until the gelatin is fully dissolved. Set aside.
In the bowl of a stand mixer fitted with the whisk attachment, mix the cream cheese and icing sugar until smooth. Add the heavy cream and continue whipping until the mixture starts to thicken. Once thickened, add the gelatin mixture and continue whipping until the mixture starts to hold its shape. Add the vanilla extract, and then gently fold in the crushed sandwich cookies.
Assembly
Fill each cavity of the 6-cavity hemisphere molds about 1/2 full of the cream mixture. Gently press 1 frozen ganache dome into each, flat side facing up. Top with 1 chocolate sandwich cookie, gently pressing down to that the top is flush with the top of the cavity. Add more cream mixture, if needed, to fill the entire cavity. Use an offset spatula to smooth and flatten out the tops. Cover with plastic wrap and freeze overnight, or until ready to use.
Glazing and serving:
Prepare the mirror glaze according to the recipe directions.
Use a round cookie or biscuit cutter to cut out circles of brownie. If your brownie is thick, you can cut each circle in half to double the number of brownie bases. Arrange the brownie circles on a serving tray or plate.
Arrange the frozen entremets on a wire rack with a parchment-lined cookie sheet underneath. Pour the cooled mirror glaze evenly over each entremet, adding a second coating if needed. Allow a few minutes to set, then garnish with a mini chocolate sandwich cookie (if using). Gently lift each glazed entremet off of the rack and transfer on top of a brownie circle. Cover and refrigerate until ready to serve.
This is my first pressure cooker recipe in a while, since quarantine really messed with my motivation and productivity. I’m slowly adjusting to this “new normal,” and trying to get back into my regular routines. That includes actually making regular posts on my blog. Therefore, I give you curried carrot soup!
I like to make curried carrot soup when I have a surplus of carrots. It’s always a hit, and also freezes really well.
Make sure to have all of your ingredients prepped before you begin. When you are almost done with the prep part, you can start preheating your Instant Pot.
When the liner is hot, add some oil and then the onions. Cook the onions until they start to soften, and then add the celery. After cooking the celery for a few minutes, add the ginger and garlic. After about a minute, add in the curry powder and salt, then stir to get all of the vegetables coated.
Add the carrots, and then the vegetable stock. Stir to loosen any browned bits that stuck to the bottom of the liner. Cover, seal, and cook on High Pressure for 5 minutes. When the timer goes off, let the pressure release manually for an additional 10-15 minutes before you release any remaining pressure.
Transfer the cooked vegetables to a blender with the coconut milk (leave the rest of the liquid in the pot). Blend until smooth. If you have a smaller blender, you might need to do this in batches. Once you have a smooth puree, transfer it back to the pot with the liquid. Stir until smooth. Taste and adjust seasoning as needed.
Right before serving, squeeze a little bit of lemon juice into each serving to punch it up. You can also garnish with cilantro, if you want.
Pressure Cooker Curried Carrot Soup
Ingredients
3 tablespoons neutral-flavored oil
1-2 tbsp curry powder
8 medium carrots, peeled and coarsely chopped (about 6 cups)
4 medium stalks celery, thinly sliced
1 medium onion, chopped
1 tbsp ginger, minced
4 cloves garlic, crushed
4 cups vegetable stock (I used vegetable bouillon dissolved in water)
1 15oz can full fat coconut milk
½ tsp salt (more or less to taste)
Freshly ground pepper, to taste
Lemon wedges for serving
Chopped cilantro for garnish (optional)
Directions
Set the liner of your electric pressure cooker to the Saute/Browning setting.
When the liner is hot, add oil. Add the onions and cook until they just start to soften. Add the celery and cook for another 3-4 minutes. Stir in the garlic and ginger. Cook until fragrant, about 1 minute more. Add the curry powder, salt, and pepper. Stir until the vegetables are coated.
Add the carrots and the vegetable stock. Stir to scrape up any browned bits that stuck to the bottom of the pot. Cover, seal, and cook on High Pressure for 5 minutes. When the timer is up, allow the pressure to release naturally for another 10-15 minutes before releasing any remaining pressure.
Transfer the cooked vegetables (do NOT discard the cooking liquid) to a blender with the coconut milk and puree. Do this in batches if needed. Return the puree to the pot with the cooking liquid. Stir until smooth. Taste and adjust seasonings as needed. Serve with a squeeze of lemon juice and garnish with cilantro (if desired).
It’s been an interesting few months. I’m still trying to adjust to “the new normal” brought about by the pandemic, so I apologize for not posting anything in a while.
July is normally Mango Madness, but my mango supply was fairly limited due to quarantine. This was one of the things that I made with the supply of mangoes that I did get, and it was so perfectly refreshing for the hot Florida summer.
Mango Passion Fruit Sorbet
Ingredients
2 1/2 cups mango puree
1 cup seedless passion fruit pulp
1 cup sugar
1 tbsp lime juice
Directions
In a small saucepan, combine the passion fruit pulp and sugar. Bring to a boil, then boil for 5 minutes. Remove from heat and set aside to cool slightly.
Add the passion fruit syrup to the mango puree. Stir in the lime juice. Refrigerate until very cold.
Freeze the sorbet mixture in your ice cream maker according to the manufacturer’s directions. Transfer the sorbet to a freezer-safe container and freeze until firm.
For Latinos, guava and cream cheese go together like milk and cookies. One of my mother’s favorite after-dinner treats was eating canned guava shells over a slice of cream cheese. We also grew up eating guava paste over sliced cheese as a snack. So, I’m not sure why it never occurred to me until now to make guava cheesecake.
I used crushed Maria cookies for the crust, but you can also use graham crackers if you are unable to find Maria cookies in your area.
Melt the guava paste in the microwave with a little bit of rum (or water). I like to do this right before I start making the cheesecake batter. This way, it has a few minutes to cool so that you’re not adding bubbling hot guava paste to your batter.
As usual, I prefer to make my cheesecake batter in the blender. I have heard people say that this adds too many air bubbles and ruins the texture. That has never been my experience. Just be careful not to overmix.
After the batter is done, it’s 20 minutes of High Pressure and then 15 minutes of Natural Release to have a delicious guava cheesecake on your hands!
The addition of the guava gives the cheesecake a nice mauve color. My taste testers agreed that the guava flavor was noticeable in each bite. I call that a win!
Like with most cheesecakes, it is best to make the guava cheesecake at least one day before serving for best flavor.
Pressure Cooker Guava Cheesecake
Ingredients
For the Crust:
1 cup crushed Maria cookies (or graham cracker crumbs)
3 tbsp butter, melted
1 tbsp sugar
For the Cheesecake:
1lb of cream cheese, softened
2 eggs, room temperature
2 tbsp sugar
1/4 cup sour cream
7oz guava paste
1 tablespoon rum (or water)
1/2 tsp vanilla extract
Directions
Mix the cookie crumbs, butter, and sugar in a small bowl until all of the crumbs are moistened. Press onto the bottom of a greased 7in springform pan. Set aside, or pre-bake the crust if desired.
In a microwave-safe bowl, heat the guava paste and the rum in the microwave in 20-second intervals on High until the paste has melted and resembles jam. Set aside.
Combine the remaining ingredients in a blender and blend on until just combined. Add the melted guava paste and blend until no streaks of guava remain. Be careful not to overmix. Pour the mixture into the prepared springform pan.
Pour 1 cup of water in the liner of your electric pressure cooker. Place the springform pan on a trivet in the pressure cooker. Cover, seal, and cook on High Pressure for 20 minutes. When the cooking time is done, allow the pressure to release naturally for an additional 15 minutes before you release any remaining pressure.
Remove the cheesecake from the pressure cooker and use paper towel to blot any excess moisture that collected on the cheesecake. Allow to cool completely on a wire rack, then refrigerate for at least 4 hours before unmolding and serving.
Commercial petit fours can be very hit or miss. In my experience, they are often too cloying. That, or they are filled with things that I don’t like (almond extract, anyone)? It’s a shame, because they are absolutely adorable. They also have to pack a lot of flavor into a small package. That was the goal when I made these Strawberries and Champagne Petit Fours.
For the uninitiated, a petit four (French for “little oven”) is the name given to a small confection (usually a cake) that is typically served after a meal. They are always bite sized. This is a good thing, because they tend to be very rich and/or sweet. My strawberries and champagne petit fours use a champagne pound cake, strawberry frosting, and poured fondant icing flavored with champagne.
Petit fours are a bit time-consuming to make, so it is best to plan ahead. Sometimes, I bake and frost my cakes one day, then cut and glaze the next.
I used sparkling Rose for my petit fours, mainly because I thought it would be cute to make pink ones for Valentine’s Day. But, you are welcome to use regular sparkling wine or champagne. Use the driest kind that you can find. There is already plenty of sugar in these, so there is no need to use a sweet champagne.
1/2 batch of strawberry frosting (I used this recipe)
For the Poured Fondant (Adapted from this recipe):
4 1/2 cups confectioner’s sugar
1/4 cup light corn syrup
1/4 cup champagne reduction (see *NOTE)
1/2 tsp vanilla extract
2-3 drops of sparkling wine flavoring
Pink food coloring if desired
Directions
Make the Cake:
Preheat oven to 350°F. Spray an 8 x 8 inch square pan with nonstick cooking spray (the kind with flour) or grease and flour it.
Sift the flour, baking powder, and salt in a medium bowl. Set aside.
In the bowl of a stand mixer, mix the melted butter, sugar, and sour cream. Stir in eggs, one at a time, then stir in vanilla and sparkling wine flavoring (if using).
Add the dry ingredients alternately with the champagne, beating until just combined with each addition. Pour into prepared pan.
Bake for 27-32 minutes, until a toothpick comes out clean (mine took 30 minutes). Place the cake (still in the pan) on a wire rack. Use a toothpick to poke holes over the surface of the cake, then slowly pour the champagne soaking syrup over the hot cake. Let the cake finish cooling completely before frosting.
To make the soaking syrup:
Heat the sugar and champagne in a small saucepan over medium heat until it boils. Boil for 1 minute, then remove from heat.
Prepare the strawberry frosting before assembling.
Assembly:
Remove the cooled cake from the pan. If the cake has a dome, trim off the dome using a cake leveler or a bread knife.
Torte the cake into two even halves. Spread strawberry frosting over one of the halves, then top with the second half. Spread additional strawberry frosting over this half, then place in the freezer until the frosting is firm and no longer sticks to your fingers when touched. This took about 2 hours for me.
Remove the cake from the freezer. Trim off the dry edges of the cake, then cut the cake into even pieces. You can cut it into squares using a knife, or you can use a cookie or biscuit cutter to cut out shapes.
Place the cut cake bites in the freezer while you make the poured fondant.
Make the Poured Fondant Icing:
Prepare a double boiler over medium heat; bring 2 inches of water in the lower pot to a simmer. Sift confectioners’ sugar and salt into the top of the boiler. Add corn syrup and champagne reduction; whisk until well blended. Stir with a spatula until icing is completely smooth and an instant-read thermometer registers no higher than 105 degrees F (40 degrees C), about 5 minutes.
Stir in the champagne flavoring and vanilla extract into the icing. Keep stirring until icing takes on a glossy sheen and flows easily off of the spatula, about 2 minutes. Add food coloring, if using. Reduce heat to low to keep the fondant the proper consistency while you glaze. Glaze your strawberries and champagne petit fours using your preferred method. For best results, take only a few out of the freezer at a time while you dip so that the rest remain firm for dipping.
*NOTE: To make champagne reduction, bring 1 cup of champagne to a boil in a small saucepan. Continue to boil until the champagne darkens in color and is reduced to about 1/4 cup.
In the US, most of us think of cheese when we hear the word “curd.” However, curds made of fruit are popular in other parts of the world. They are eaten as a spread or as a dessert topping. My first introduction to fruit curd was the lemon kind, but lemon has never been my first choice. I figured that it would also work with passion fruit, due to the high acidity. The passion fruit curd is now the only curd that I ever make.
You can use curd in a lot of ways. I have personally used it as a filling for cakes or sweet rolls, yogurt topping, pie/tart filling, and macaron filling.
Pressure Cooker Passion Fruit Curd
Ingredients
1/3 cup seedless passion fruit pulp
3/8 cup sugar
2 large eggs (or 3 yolks)
3 tbsp butter, cubed
Directions
Combine the passion fruit pulp, sugar, and eggs in a blender. Pour into a 16oz mason jar. Cover the mason jar, but do not screw on the ring.
Add 1 cup of water to the liner of your electric pressure cooker. Place the covered mason jar on a trivet in the pressure cooker. Cover, seal, and cook on High Pressure for 10 minutes. When the timer is up, let the pressure release naturally for an additional 10 minutes before releasing any remaining pressure.
Carefully remove the jar from the pressure cooker and uncover. Add the cubed butter and whisk vigorously until all of the butter is melted and the mixture is smooth. Let the passion fruit curd cool completely before refrigerating.
My family will eat just about anything if it’s made with passion fruit. Last year, when the local Latino grocery store chain had a massive sale on fresh passion fruits, I tried my hand at making a passion fruit tart. I used a store-bought refrigerated pie crust and baked it in a tart pan. It was good, but not great.
Working with dough is not my forte, but I knew that making my own tart crust would make a huge difference in the end result. I wound up finding a great recipe that came together on the first try. After that, it was just a few tweaks to get the right amount of filling to fit a 9-inch tart crust without wasting filling. What I ended up with was a tart that has been a hit with everyone who has tasted it. And so, I am passing the recipe on to my readers.
You can make this tart dairy-free by using vegan butter in the tart crust and replacing the heavy cream with coconut milk. Make sure that you use the full fat coconut milk. You need that creamy richness to balance out the tartness of the passion fruit.
1/2 cup seedless passion fruit puree (I used frozen, but you can use fresh)
1/2 cup sugar
1/2 cup heavy cream (or full-fat coconut milk)
Directions
Prepare the tart crust according to the recipe directions for partially baking the crust.
While the crust is baking, combine the remaining ingredients in a medium bowl until smooth.
When the crust is ready, pour the passion fruit mixture into the prepared crust. Return the filled tart pan to the oven.
Reduce the oven temperature to 325 degrees. Bake the tart for 30 minutes, or until the filling is set. Remove the tart from the oven and allow to cool completely on a wire rack before removing from the tart pan. Refrigerate until ready to serve.