Category: Side Dishes

  • Pressure Cooker Curried Carrot Soup

    Pressure Cooker Curried Carrot Soup

    Skip to Recipe

    This is my first pressure cooker recipe in a while, since quarantine really messed with my motivation and productivity. I’m slowly adjusting to this “new normal,” and trying to get back into my regular routines. That includes actually making regular posts on my blog. Therefore, I give you curried carrot soup!

    I like to make curried carrot soup when I have a surplus of carrots. It’s always a hit, and also freezes really well.

    Make sure to have all of your ingredients prepped before you begin. When you are almost done with the prep part, you can start preheating your Instant Pot.

    When the liner is hot, add some oil and then the onions. Cook the onions until they start to soften, and then add the celery. After cooking the celery for a few minutes, add the ginger and garlic. After about a minute, add in the curry powder and salt, then stir to get all of the vegetables coated.

    Add the carrots, and then the vegetable stock. Stir to loosen any browned bits that stuck to the bottom of the liner. Cover, seal, and cook on High Pressure for 5 minutes. When the timer goes off, let the pressure release manually for an additional 10-15 minutes before you release any remaining pressure.

    Transfer the cooked vegetables to a blender with the coconut milk (leave the rest of the liquid in the pot). Blend until smooth. If you have a smaller blender, you might need to do this in batches. Once you have a smooth puree, transfer it back to the pot with the liquid. Stir until smooth. Taste and adjust seasoning as needed.

    Right before serving, squeeze a little bit of lemon juice into each serving to punch it up. You can also garnish with cilantro, if you want.

    Pressure Cooker Curried Carrot Soup

    Ingredients

    • 3 tablespoons neutral-flavored oil
    • 1-2 tbsp curry powder
    • 8 medium carrots, peeled and coarsely chopped (about 6 cups)
    • 4 medium stalks celery, thinly sliced
    • 1 medium onion, chopped
    • 1 tbsp ginger, minced
    • 4 cloves garlic, crushed
    • 4 cups vegetable stock (I used vegetable bouillon dissolved in water)
    • 1 15oz can full fat coconut milk
    • ½ tsp salt (more or less to taste)
    • Freshly ground pepper, to taste
    • Lemon wedges for serving
    • Chopped cilantro for garnish (optional)

    Directions

    Set the liner of your electric pressure cooker to the Saute/Browning setting.

    When the liner is hot, add oil. Add the onions and cook until they just start to soften. Add the celery and cook for another 3-4 minutes. Stir in the garlic and ginger. Cook until fragrant, about 1 minute more. Add the curry powder, salt, and pepper. Stir until the vegetables are coated.

    Add the carrots and the vegetable stock. Stir to scrape up any browned bits that stuck to the bottom of the pot. Cover, seal, and cook on High Pressure for 5 minutes. When the timer is up, allow the pressure to release naturally for another 10-15 minutes before releasing any remaining pressure.

    Transfer the cooked vegetables (do NOT discard the cooking liquid) to a blender with the coconut milk and puree. Do this in batches if needed. Return the puree to the pot with the cooking liquid. Stir until smooth. Taste and adjust seasonings as needed. Serve with a squeeze of lemon juice and garnish with cilantro (if desired).

  • Pressure Cooker Rice with Noodles (Arroz con Fideos)

    Pressure Cooker Rice with Noodles (Arroz con Fideos)

    Skip to Recipe
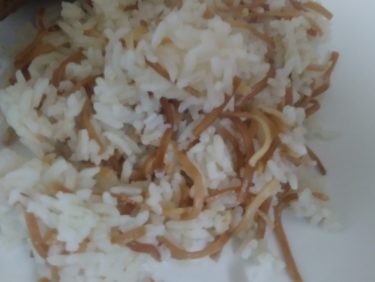
    Arroz con Fideos (rice with noodles) was something that my mother used to make all of the time when I was growing up.  It was a staple at our Thanksgiving table every year.  Eventually, she also started making it outside of holidays because we liked it so much.

    Making rice was never my strong suit.  In fact, before my Instant Pot, I avoided making rice as much as possible.  I just could never get it to turn out the way my mother’s did.  But, since I finally upped my rice game, I decided to try the noodle version in there.  My stovetop rice pot quickly became obsolete.

    The only real difference with making arroz con fideos vs regular white rice is that you brown some dried noodles in your pot before adding the rest of your ingredients and proceeding with your rice-making as usual.  My mother always added a green onion to her rice.  She said that it gave it a nice flavor.  If she didn’t have any green onion, then she would add a slice of white onion.  You don’t have to use it if you don’t want, and it gets thrown out at the end anyway.

    This rice goes great with entrees that are served in a creamy sauce or gravy.  We used to eat it the day after Thanksgiving with leftover turkey gravy.  Maybe it can become a family tradition for you, too!

    Pressure Cooker Rice with Noodles (Arroz con Fideos)

    Ingredients

    • 3 cups white rice
    • 2 cups dried thin egg noodles
    • 1 green onion (optional)
    • 1 tbsp oil
    • 4 cups water
    • salt to taste

    Directions

    Heat the oil in the electric pressure cooker on the Saute/Browning setting.  When hot, add the dried noodles and cook until they turn brown.  Add the remaining ingredients and stir to combine.

    Cover, seal, and cook on the Rice setting using the pre-programmed time.  When the timer is up, allow the pressure to release naturally.  Discard the green onion and then fluff with a fork before serving.

  • Pressure Cooker Mac and Cheese

    Pressure Cooker Mac and Cheese

    Skip to Recipe
    There are two types of people in the world: those who like their mac and cheese creamy, and crazy people.  Seriously, whenever I hear someone tell me that they like it when they have to cut their mac and cheese out of the pan with a knife, I’m just like “What’s wrong with you?”  The tendency to dry out mac and cheese is the entire reason that I normally avoid baked mac and cheeses.  I know that it’s not impossible to get a creamy mac and cheese out of the oven, but let’s be realistic here.  How many people do YOU know that can accomplish this?

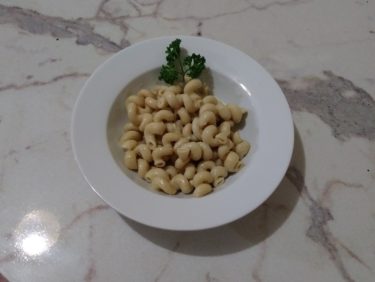
    In case it wasn’t already apparent, I have always preferred the stovetop style of mac and cheese.  There is just something so comforting about a bowl of this creamy pasta goodness.  The problem, though, is what a pain it is to get the right consistency of your cheese sauce on the stove.  I thought that I would just have to resign myself to a lifetime of lumpy mac and cheese.  That is, until I discovered a way to make it in my electric pressure cooker. Not only is it basically foolproof, but it is also a fraction of the effort.  No draining your pasta.  No cooking a roux.  Just you, a pot, and MAGIC!

    Add the pasta, water, butter, and seasonings in the liner of your pressure cooker.  Cover, seal, and cook on High Pressure for 4 minutes.  When the time is up, manually release the pressure, but keep the cooker on the Keep Warm setting.  Stir in your cream cheese, letting it melt and coat the pasta.  After that, add the milk, then the cheeses.  Make sure you add the cheese a little at a time so that it melts evenly.

    In the end, you’ve got yourself a creamy and delicious mac and cheese that took very little effort to make.

    When making this mac and cheese, it is best to shred your own cheese.  Pre-shredded cheeses are usually coated with starch or contain other ingredients that may affect the texture of your finished product.

    Pressure Cooker Mac and Cheese

    Ingredients

    • 1 lb dry elbow macaroni (I use corkscrew pasta)
    • 4 tbsp unsalted butter
    • 1 quart water
    • 2 tsp Dijon mustard
    • 1 tbsp hot sauce
    • 1/2 tsp onion powder
    • 1 tsp salt
    • 1/2 tsp ground pepper
    • 1 cup whole milk
    • 8 oz cream cheese, cut into cubes (you can also use Mascarpone cheese)
    • 8 oz white cheddar cheese, shredded
    • 8 oz Monterey Jack cheese, shredded

    Directions

    Add the dry elbow pasta followed by the butter, water, ground mustard, kosher salt, granulated onion or onion powder, black pepper, and cayenne pepper to the bowl of the Instant Pot. Secure the lid and set the vent to “sealing”.

    Cook on “Manual” (High Pressure) for 4 minutes. When the 4 minutes is up, leave the pot on Keep Warm and manually release the pressure.

    Open the lid and add the cubed cream cheese. Stir gently but thoroughly until the cream cheese is melted.

    Add the milk and stir until combined. Add the shredded cheeses, a little bit at a time, until all of the cheese is melted and smooth. Serve immediately.

  • Pressure Cooker Mac and Blue Cheese

    Pressure Cooker Mac and Blue Cheese

    Skip to Recipe
    My friends and I all love mac and cheese.  I mean, love.  And we’re not talking “passing cute notes in 8th grade Homeroom” puppy love.  I’m talking “would marry it if it were legal to marry inanimate objects” kind of love.  And, I thought I knew everything that I needed to know about mac and cheese, until one of my friends asked me if I had ever made it with more “exotic” cheese like goat cheese or blue cheese.  I hadn’t, but that conversation is how this Mac and Blue Cheese was born.  I made it my weekend mission to try and make a delicious mac and cheese with a blue cheese flavor that was present, but not overpowering.  So, armed with my pressure cooker, I went to work.  The results blew all of my taste-testers away, so I just had to share.

    There is something about this creamy pasta dish that takes the pungent flavor of blue cheese and mellows it down to a gentle note in the back of your taste buds.  In fact, the mac and cheese is mellow enough to be eaten as-is, but isn’t hurt in the slightest by a generous sprinkling of crumbled bacon for a salty punch.

    If you REALLY want to impress, though, try serving it topped with some boneless buffalo chicken.  It’s like elevating your favorite bar food.  When the tang of buffalo sauce meets the cooling factor of blue cheese, all sorts of magic happens in your palate.  And, no need for wet wipes!  For tips on making boneless buffalo chicken, check out my recipe here.

    This mac and cheese is best served fresh, but you can also reheat with a little bit of milk to get it creamy again.

    Pressure Cooker Mac and Blue Cheese

    Ingredients

    • 1 lb cavatappi pasta (or elbow macaroni)
    • 4 cups water
    • 4 tbsp butter
    • 2 tsp Dijon mustard
    • 1 tbsp hot sauce
    • 1/2 tsp salt
    • 1/2 tsp black pepper
    • 1/2 tsp onion powder
    • 1 cup milk
    • 8oz mascarpone cheese (or cream cheese)
    • 10 oz white cheddar cheese, shredded (about 2 1/2 cups)
    • 1 1/2 cups crumbled blue cheese

    Directions

    Combine the pasta, water, butter, Dijon mustard, hot sauce, salt, pepper, and onion powder in the liner of your electric pressure cooker.  Stir to combine.

    Cover and seal the pressure cooker, then cook on High Pressure for 4 minutes.  When the time is up, release the pressure manually.

    Open the pressure cooker, then add the mascarpone cheese, stirring until melted.  Stir in the milk, and then the cheeses, a little bit at a time, until melted and combined.  Serve the mac and blue cheese immediately.

  • Cuban-Style Black Beans

    Cuban-Style Black Beans

    Skip to Recipe

    With all of the hurricanes and traveling going on, I haven’t been eating very well lately.  That’s not to say that I haven’t had a lot of DELICIOUS food these past few weeks, but my stomach was long overdue for a break.  This weekend, I just wanted something simple.  Something that helped me feel like I was truly back home here in Miami.  I wanted black beans.

    Truth be told, I had tried making black beans several times in the past using the stovetop method that I got from my mother, as well as other methods I found through online research. Every single attempt was a failure.  It wasn’t until the Instant Pot came into my life that I was able to make beans without a crunchy center.  And, once I got the bean technique down, the recipe adaptations soon followed.

    If you have looked at my moros recipe, then you will probably notice that these are very similar.  Actually, my moros recipe was adapted from this recipe for Cuban style black beans, which was itself an adaptation of my mother’s recipe for black beans and a few recipes that I found online and what I remember about the black beans served at my favorite Cuban restaurants.  Most of them use chicharrones (fried pork belly), but I’m using bacon because it’s easier to work with.

    We start by cooking the beans.  Throw the dried beans in your electric pressure cooker with a quartered green pepper, a few cloves of garlic, 2 bay leaves, and a ham hock.  Add 8 cups of water and 2 tsp of salt. You can also replace the water with chicken broth or stock, but make sure to adjust the salt accordingly.  In this batch, I used water and chicken bullion, and hardly needed any additional salt.

    Seal and cook on High Pressure for 25 minutes, and then allow the pressure to release naturally.  Open the pressure cooker and discard the green pepper, bay leaves, and garlic.  Remove the ham hock, chop any meat left on it, and set it aside.  Take about 1 cup of beans from the pot and mash them up in a bowl or cup, then return to the pot and set it to Saute/Browning and simmer the beans (stirring frequently to keep them from sticking) while you are doing the next steps.  This is where the process is a little bit different than moros.

    While the beans are simmering, make the sofrito.  Have all of your sofrito ingredients prepped and ready to go.  Cook the chopped bacon in a skillet or saute pan over medium to medium high heat until it’s crispy.  Remove the bacon from the pan and set it aside, but leave the bacon grease behind.  Note that you do not have to use the bacon if you don’t want to.  You can skip that part and heat 2 tbsp of olive oil in your pan, if you prefer.Add the diced onions, red peppers, and green peppers.  Cook until the vegetables start to turn translucent, then add the garlic and the seasonings.  Continue to cook, stirring, until fragrant, then add vinegar.  Take your sofrito and pour it into the pot of simmering beans.  Taste it and adjust the seasoning as needed, then continue simmering until the beans are the desired thickness.  Stir in the cooked bacon and chopped ham bits.

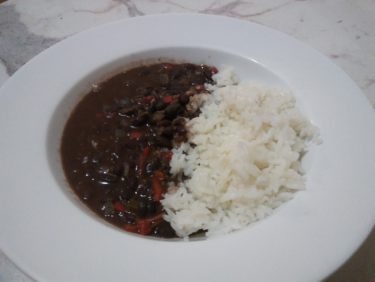
    You can enjoy the black beans on their own as a soup, or you can serve along with white rice.  The black beans also freeze incredibly well, so you can make a big batch and then freeze parts of it for the future.  Sometimes I also add chopped cilantro for a bit of zing.  I have also added jalapeno and poblano pepper if I want it to have a kick.

    Cuban-Style Black Beans

    Ingredients

    • 1lb dried black beans
    • 1 green pepper, quartered
    • 1 smoked ham hock
    • 2 bay leaves
    • 10 cloves of garlic (5 whole and 5 minced)
    • 4 strips thick cut bacon, chopped (or 2 tbsp olive oil)
    • 1 cup diced green pepper
    • 1 cup diced red pepper
    • 2 cups diced white onion
    • 1/2 tsp oregano
    • 1/2 tbsp cumin powder
    • 3 tsp salt (more or less to taste)
    • 1 tsp black pepper
    • 2 tbsp red wine vinegar
    • 8 cups of water (or chicken broth/stock)

    Directions

    Combine the beans, quartered green pepper, ham hock, bay leaves, 5 cloves of garlic, water (or broth/stock), and 2 teaspoons of salt (adjust if using broth/stock) in the liner of your electric pressure cooker.  Cover, seal, and cook on Manual (High Pressure) for 25 minutes.  Allow the pressure to release naturally, then open and discard the bay leaves, green pepper, and garlic.  Remove the ham hock, chop up any meat remaining on it, and set aside.

    Using a slotted spoon, remove about 1 cup of beans from the pot.  Mash them with a fork, then return to the pot.  Set the pressure cooker to Saute/Browning, and bring to a simmer, stirring often to keep the beans from sticking to the bottom.

    In a large skillet or saute pan, cook the bacon until crispy.  Remove the bacon from the pan using a slotted spoon and set aside, but leave the bacon grease.  Add the diced onion, diced green pepper, and diced red pepper to the hot pan with the bacon grease and cook, stirring occasionally, until the onions start to turn translucent.  Add the minced garlic and the spices.  Cook until fragrant.  Add the vinegar and continue to cook for an additional 1 or 2 minutes.

    Remove the sauteed vegetable mixture from the heat and pour into the pot of simmering beans.  Taste and adjust seasoning as needed.  Continue simmering until the desired thickness, then stir in the bacon and chopped ham hock.  Turn off pressure cooker and allow the beans to sit for 10-15 minutes before serving.

  • Moros (Cuban-style Black Beans and Rice)

    Moros (Cuban-style Black Beans and Rice)

    Skip to Recipe
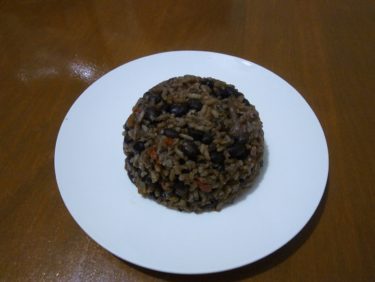
    Growing up in Miami, Fl has given me a healthy love of Cuban food.  Moros is a personal favorite of mine, and will always be my side dish of choice when dining at a Cuban restaurant.  Moros, short for moros y cristianos, is a dish in which rice is cooked with black beans, and gets its name from the wars between the dark skinned Moors (moros) and the light skinned Spaniards (cristianos) from the Eighth Century.

    Before owning an Instant Pot, all of my previous attempts at cooking beans had always ended in failure.  I tried all of the tips and tricks that I got online or from word of mouth, and nothing yielded me a tender bean.    I only ever successfully made moros using canned black beans, and it just was never the same as what I would get in the restaurants.  Now, nine months after getting my pot, I’m cooking all sorts of beans and not once has there been a failure.  I finally set out to reconfigure my moros recipe to use dried beans, and it has been a huge success.

    You will start by cooking the beans.  Add the beans, bay leaves, ham hock, chunked green pepper, 4 cloves of minced garlic, and some salt to the pot.  Pour in a quart of chicken stock, then seal and cook for 20 minutes at high pressure.  Allow the pressure to release naturally.  While this is happening, you can prep the rest of your ingredients.

    When the beans are done, drain them (save the bean liquid) and discard the bay leaves and green pepper.  If you used a meaty ham hock, remove the meat from the bone and chop it up for later use.  Wash and dry your pot liner and return to the pot.

    Set the pressure cooker to Saute (Browning) function, then adjust to the highest setting.  When it’s ready, add the bacon and cook until it is brown and crispy.  Take the bacon out of the pot (leave the fat), set aside, and then add the onions and peppers in with the bacon fat.  When they start to soften, add the garlic and seasonings, and cook until fragrant.  Add your vinegar.  Add enough water to the bean liquid to make 3 cups of liquid, then add that to the pot.  Adjust seasoning as needed, then stir in the washed rice and the beans.  Cover, seal, then switch the pot to the Rice setting and cook.  When the cooking cycle is done, allow the pressure to release naturally.

    Fluff your finished moros with a fork, then stir in the bacon.  If you have any meat from your ham hock, add that as well.

    You can serve moros as a side dish for your favorite Cuban entrees, such as lechon asado, palomilla steak, or masas de puerco.  However, this moros is so hearty and flavorful that it can easily stand alone as a meal.  The jalapeno adds a nice punch to the flavor profile, but feel free to leave it out for a mild version.

    This recipe makes a LOT, so it’s great for large families, parties, or make-ahead freezer meals.  Leftovers reheat great!

    Moros (Cuban-style Black Beans and Rice)

    Ingredients

    • 1 green pepper, cut into large chunks
    • 1 cup diced green pepper
    • 1 cup diced red pepper
    • 2 cups diced onion
    • 10 garlic cloves, minced or crushed
    • 1 pound dried black beans, rinsed and picked over to remove any stones
    • 1 quart chicken stock or broth
    • 1 smoked ham hock
    • 2 bay leaves
    • 5 teaspoons salt, or to taste
    • 4 slices thick bacon, cut into 1/2-inch pieces
    • 1 jalapeño pepper, stemmed and finely chopped (optional)
    • 1/2 tbsp dried oregano
    • 2 tsp ground cumin
    • 1 teaspoon freshly ground black pepper
    • 2 tablespoons red wine vinegar
    • 3 cups long grain white rice, rinsed

    Directions

    In the liner of the pressure cooker, add the dried beans, chunked green pepper, 4 cloves of minced garlic, 2 tsp salt, bay leaves, and ham hock.  Pour in the chicken stock, then seal and cook on Manual (high pressure) for 20 minutes.  Allow the pressure to release naturally.  Drain the beans, reserving the liquid, then set aside along with the ham hock (remove meat from bone and chop up) and discard the bay leaves and green pepper pieces.  Wash and dry the pressure cooker liner, then return to the pot.

    Set the pot to Saute (Browning).  When ready, add the bacon and cook until brown and crispy.  Using a slotted spoon, remove the bacon and set aside.  In the hot bacon fat that’s still in the pot, saute the diced onions, diced green peppers, diced red peppers, and chopped jalapeno (if using) until softened.  Add the remaining garlic, oregano, cumin, , salt and pepper, stirring until fragrant.  Add the vinegar.  Take the reserved bean liquid and add enough water to make 3 cups of liquid total.  Add this to the pot, then stir.  Taste and adjust seasoning as needed.  You will want it to taste over-seasoned, because it will mellow out once you add the rice.

    Add the rinsed rice and cooked beans, then stir to combine.  Seal the pot once more and switch to the Rice setting, allowing pressure to release naturally after the cooking cycle is complete.  Uncover, fluff rice with fork, and stir in the crispy bacon and chopped meat from the ham hock.  Serve hot.

    Makes about 5 quarts.

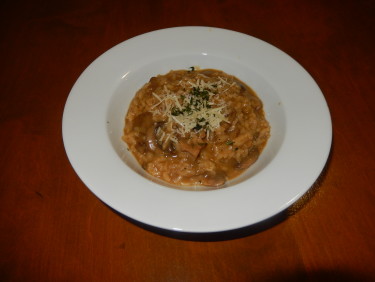
  • Mushroom Risotto

    Mushroom Risotto

    Skip to Recipe
    February posts on recipe blogs are usually dedicated to all things pink, red, and nauseatingly romantic.  This year, I have one word for you:

    Risotto.

    Just saying it makes you sound fancy, doesn’t it?  Risotto.  It’s basically just creamy rice, but you don’t impress people with a dish called “creamy rice.”  But risotto…now THAT gets people’s attention.  That’s exactly why it’s a perfect post for the month of Valentine’s Day. Forget heart-shaped cookies with sickeningly sweet, pink frosting.  This mushroom risotto is the ultimate “Date Night Trump Card.”  It uses ingredients they are easy to find and makes a great impression.  This is the dish that you want to present when you want “seeing where things go” to turn into “relationship upgrade.”  When you messed up really bad and are trying to make it up to them.  Or, maybe when you just want them to feel special.  Risotto is Italian for “I will babysit a pot of rice for 30 minutes for you, because you mean that much to me.”  It totally is, I swear.

    At its core, risotto is a Northern Italian dish of rice that is cooked by slowly adding broth to achieve a creamy consistency.  It’s funny that this dish, mainly associated with high-end Italian dining here in the U.S., is essentially staple of home-cooked comfort food.  Basically, it’s Northern Italy’s answer to mac and cheese.  Risotto intimidates a lot of home cooks because it sounds complicated, but is actually quite simple to make.  It takes time and patience, so it’s not something that can be made in a rush.  Done right, you are rewarded with a creamy and satisfying dish that makes a great accompaniment to pretty much any protein, or is hearty enough to make a meal on its own.  As a bonus, this risotto is made with mushrooms for extra heartiness.  I don’t even miss having meat in this dish.

    The key to any risotto is to add the liquid gradually.  One ladle (about 1/2 cup) of liquid should take around 2 minutes to be absorbed by the rice.  Make sure you adjust your heat accordingly to get the proper pacing of liquid absorption, or your risotto will end up either too dry or too runny.

    Mushroom risotto

    Mushroom Risotto

    (Adapted from this recipe from Allrecipes.com)

    Ingredients

    • 6 cups beef broth or stock (or vegetable broth for vegetarian option)
    • 3 tablespoons olive oil, divided
    • 1 pound portobello mushrooms, thinly sliced
    • 1 pound white mushrooms, thinly sliced
    • 1/2 cup shallots or onions, diced
    • 2 cloves garlic
    • 1 1/2 cups Arborio rice
    • 1/2 cup dry white wine
    • sea salt to taste
    • freshly ground black pepper to taste
    • 3 tablespoons finely chopped parsley
    • 4 tablespoons butter
    • 1/2 cup freshly grated Parmesan cheese

    Directions

    In a saucepan, heat the beef stock on medium to medium-high heat until it barely starts to simmer.  Reduce heat to low.

    Heat 2 tablespoons olive oil in a large saucepan over medium-high heat. Stir in the mushrooms and cook until soft, about 3 minutes. Remove mushrooms and their liquid, and set aside.

    Add 1 tablespoon olive oil to the same saucepan, and stir in the shallots or onions. Cook for 3 minute, or until onion starts to soften.  Add the garlic and cook for 1 minute, or until fragrant. Add the rice, stirring to coat with oil, about 2 minutes. When the rice has taken on a pale, golden color, reduce heat and pour in wine, stirring constantly until the wine is fully absorbed. Add 1/2 cup broth to the rice, and stir until the broth is absorbed. Continue adding broth 1/2 cup at a time, stirring continuously, until the liquid is absorbed and the rice is al dente, about 30 minutes.

    Remove from heat, and stir in mushrooms with their liquid, butter, and parmesan. Season with salt and pepper to taste.  Garnish each serving with chopped parsley and more parmesan cheese, if desired.

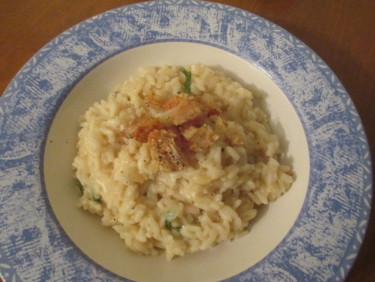
  • Lemon Risotto

    Lemon Risotto

    If you have never had risotto, then shame on you.  If you have no idea what risotto even is, then shame on you even more.  This Italian dish is essentially creamy rice, and is usually served as a first course or main dish, although it can also be a side dish.  Unlike conventional rice cooking methods, in which you add all of your liquid to the rice at the start, risotto achieves its creamy consistency by slowly and gradually adding liquid to the rice while it cooks.  The liquid is usually broth.  Chicken broth seems to be the popular way to go, although beef, fish, seafood, or vegetable broth can also be used.

  • Lobster Mac and Cheese

    Lobster Mac and Cheese

    Skip to Recipe
    I don’t know how many people would actually think of mac and cheese when they think of gourmet food.  Mac and cheese, to me, was always a comfort food or cookout/BBQ staple.  So, when I first saw lobster mac and cheese on the menu at Capital Grille, I knew I had to try it.  For one, I had to know how a fine dining establishment would interpret mac and cheese.  For another, there is always a good chance that I may never be able to afford this kind of meal again.  These are troubled times, and I’m not a broke baker for nothing! (more…)