Category: Recipes

Recipes

  • Chocolate Caramel Thumbprint Cookies

    Chocolate Caramel Thumbprint Cookies

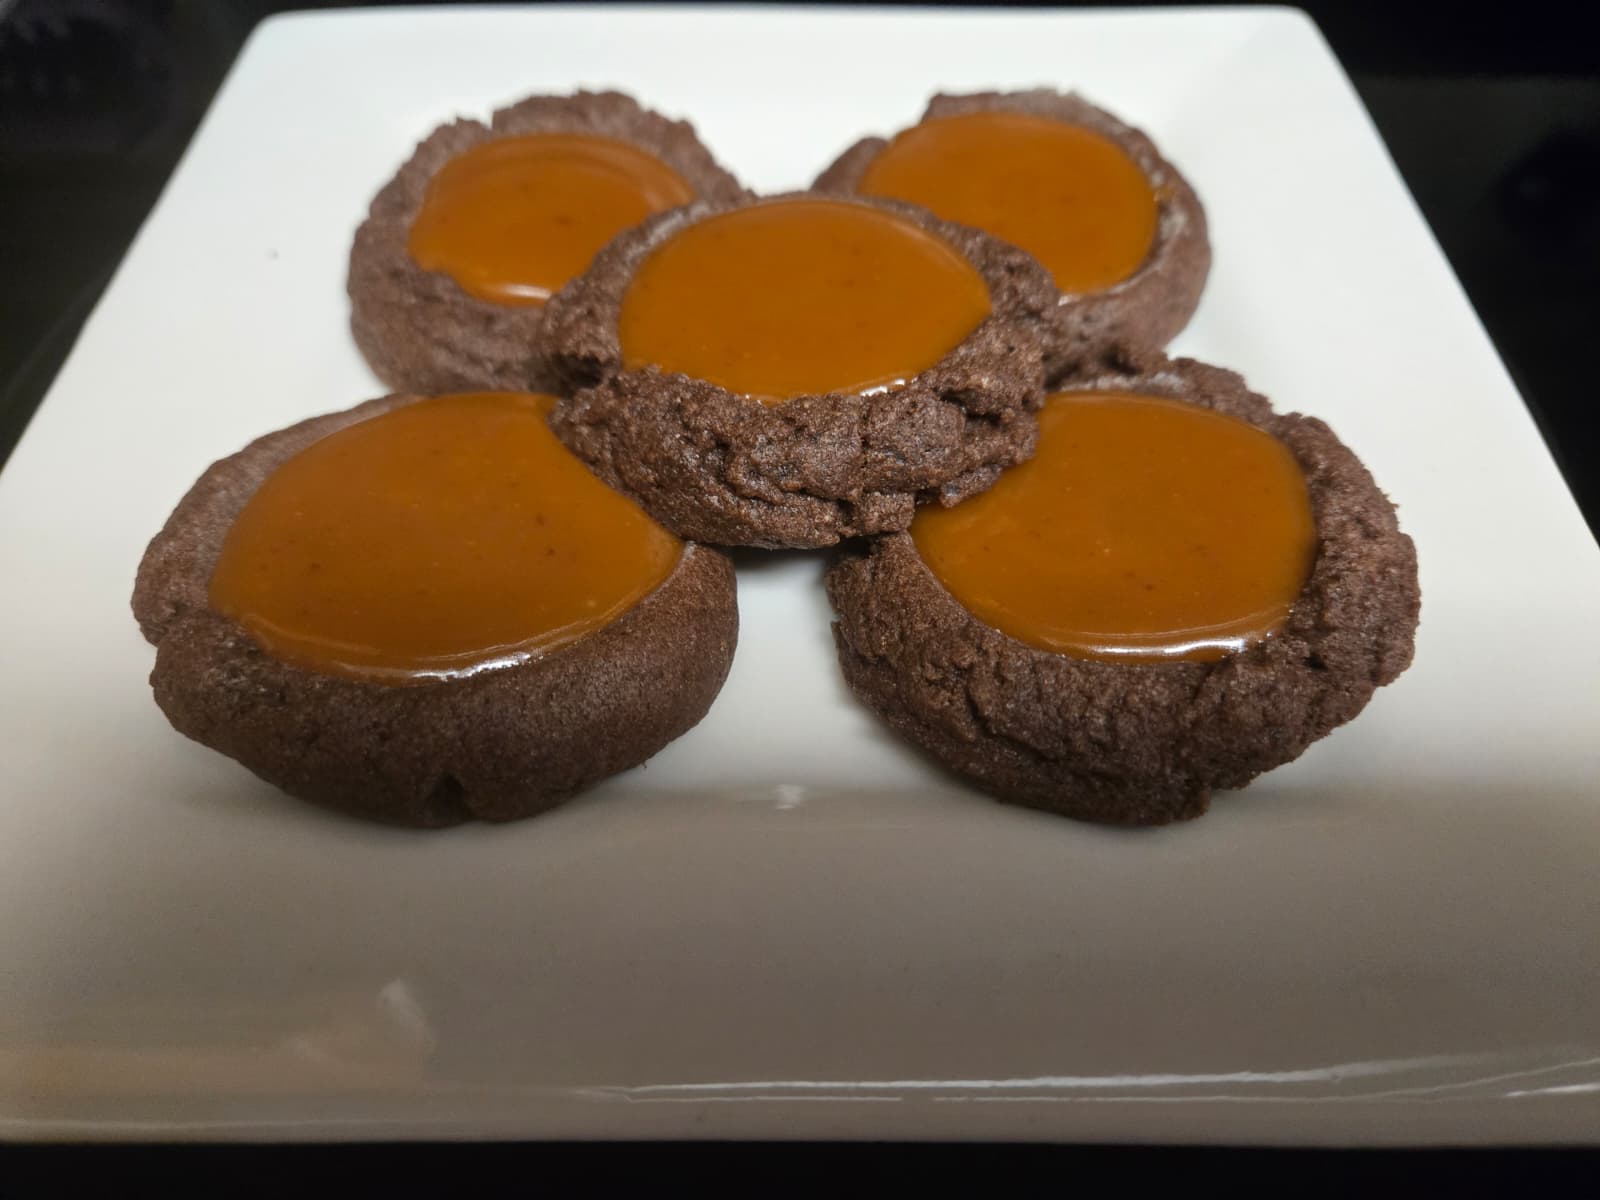
    I discovered my love for thumbprint cookies not too long ago. It was also around the time that I discovered that I don’t dislike desserts with jams/jellies in them, as long as the jams/jellies are homemade. I still prefer chocolate desserts, though, which is why I was immediately drawn to the idea of a chocolate thumbprint cookie. That idea eventually became these chocolate caramel thumbprint cookies.

    I decided to pair the cookies with a caramel filling, because chocolate and caramel are one of the most perfect combinations IMHO. You want to cook the caramel just shy of soft ball stage. You want it soft, but not runny. Adjust the salt level in the caramel to your liking.

    Chocolate Caramel Thumbprint Cookies

    Adapted from this recipe

    Ingredients

    For the cookies:

    • 1 cup (2 sticks) unsalted butter, softened
    • 3/4 cup brown sugar
    • 1/4 cup granulated sugar
    • 1 large egg, room temperature
    • 2 cups all purpose flour
    • 1/2 cup unsweetened cocoa powder
    • 1/2 tsp salt
    • 1 tsp vanilla extract
    • 2 tsp instant coffee powder (optional)

    For the caramel filling:

    • 1 cup granulated sugar
    • 1/4 – 1/2 tsp salt
    • 1 1/2 cups heavy cream
    • 4 tbsp unsalted butter

    Directions

    Line your cookie sheets with parchment paper and set aside.

    In the bowl of a stand mixer fitted with the paddle attachment, cream the butter and sugars until fluffy. Add the egg and beat until combined. Add the vanilla, salt, and coffee powder (if using) and beat until just combined.

    Add the flour and cocoa powder and mix on low speed until just combined.

    Scoop the dough (I used a Size #40 cookie scoop) and roll into uniform balls. Arrange the cookie dough balls about 2 inches apart on the baking sheets. Using your thumb, a measuring spoon, or a tart tamper, press down in the center of each dough ball to create an indentation.

    Place the cookie sheets in the freezer and freeze for about 20 minutes. Meanwhile, preheat the oven to 350 degrees F.

    Bake the cookies for 11-14 minutes, or until the edges appear set. Remove from the oven and quickly press the indentations back down (they will have puffed up a bit in the oven). Cool the cookies on the cookie sheets while you make the caramel.

    To make the caramel: Heat the cream in the microwave for about 1 minute, then set aside. In a medium saucepan, heat the sugar over medium-high heat. Gently swirl the pan occasionally, but do not stir until most of the sugar has dissolved. Once the sugar has dissolved and turned a light amber, remove from heat and CAREFULLY add the cream. Bits of sugar may clump up. This is normal.

    Return the pan to the heat and reduce the heat to medium. Continue to stir until the clumps of sugar disappear. When the caramel is liquid again, add the butter and the salt. Continue cooking the caramel until it has thickened and reaches a temperature of 238 degrees. If you like a firmer caramel, you can cook to 244 degrees.

    Working quickly (but carefully), pour the caramel into the indentations in the center of each cookie. Allow to cool completely, then store in an airtight container.

  • Red Velvet Cookies

    Red Velvet Cookies

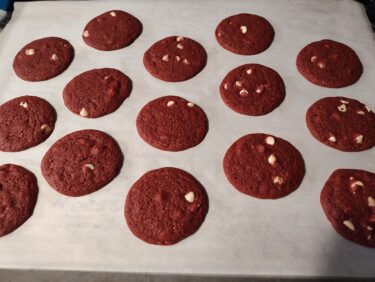
    Yes, you read that correctly. Red. Velvet. Cookies. They have the classic “hint of cocoa” as red velvet does, as well as the buttermilk tang from the addition of powdered buttermilk to the dough. To top things off, they use cream cheese chips to mimic the cream cheese icing that is commonly used with red velvet cake.

    I have found cream cheese chips for sale at my local Walmart, but you can also buy them online in a pinch.

    Red Velvet Cookies

    Adapted from Crazy For Crust

    Ingredients

    • 10 tbsp unsalted butter, melted
    • ½ cup packed brown sugar
    • ⅓ cup granulated sugar
    • 2 tablespoons natural unsweetened cocoa powder (NOT dutch process)
    • 1 tbsp buttermilk powder (sifted if it’s clumpy)
    • 1 large egg
    • 1 teaspoon vanilla extract
    • ½ teaspoon baking soda
    • ½ teaspoon salt
    • 1 ½ (cups all-purpose flour
    • 1 teaspoon white vinegar
    • 1 teaspoon liquid red food coloring
    • 1 cup cream cheese flavored baking chips

    Directions

    Line 2 cookie sheets with parchment paper. You can also use silicone baking mats, but I prefer parchment paper.

    Stir both sugars into the melted butter in the bowl of a stand mixer. Add the egg and beat until smooth. Stir in cocoa powder, buttermilk powder, vanilla, baking soda and salt. Add the flour and beat until just combined.

    Add the vinegar and red food coloring and mix one more time, then fold in the cream cheese chips by hand.

    Use a cookie scoop to scoop cookie dough balls onto the cookie sheets about 2-inches apart.

    Preheat oven to 350°F. Bake the red velvet cookies cookies for 9-12 minutes or until they just lose their glossy sheen. Cool on cookie sheets before removing to eat.

  • Chocolate Pudding

    Chocolate Pudding

    There was a time in my life where finding a plastic carton of supermarket chocolate pudding in my lunchbox would have absolutely made my day. And, while I still love a good chocolate pudding, my tastes have gotten a little more “grown up” since then.

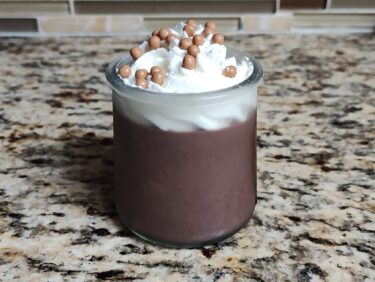
    Don’t let the plethora of boxed mixes fool you. Making your own chocolate pudding is easy, and SO MUCH better than the store-bought or instant stuff. For an extra-special treat, top your pudding with whipped cream and some chocolate crisp pearls for a dessert that will impress both young and old dinner guests.

    Chocolate Pudding

    Adapted from The Pioneer Woman

    Ingredients

    • 2 Large Egg Yolks
    • 2 tbsp. Cornstarch
    • 2 1/2 cups Whole Milk, Divided
    • 1/2 cup granulated sugar
    • 1/4 cup Unsweetened Cocoa Powder (Dutch processed, if you have it)
    • 1/4 tsp. Salt
    • 1 tsp vanilla extract

    Directions

    In a medium, heat-proof bowl, whisk the egg yolks, cornstarch, and about 1/4 cup of the milk. Once smooth and incorporated, set aside.

    Place the sugar, cocoa, salt, and remaining milk in a saucepan, and bring to barely a simmer over medium heat.

    Remove the pan from the heat. While whisking constantly, dribble the hot cocoa into the egg cornstarch mixture very gradually, about 1/4 cup at a time. Once you have incorporated about half of the chocolate milk mixture into the eggs, pour everything back into the saucepan.

    Cook over medium heat, whisking constantly, until the pudding has thickened and comes to a full boil.

    Remove the pudding from the heat and stir in the vanilla extract. Pour the pudding into a bowl and press plastic wrap directly on the surface of the chocolate pudding so that a skin doesn’t form. Alternatively, divide the pudding equally in 4-6oz ramekins or pudding cups, then cover. Refrigerate for four hours or until completely chilled. Served your chocolate pudding with a dollop of whipped cream, if desired.

  • Apple Cider Sangria

    Apple Cider Sangria

    This recipe was developed after I had some leftover apple cider that I needed to use somehow (I don’t drink cider). I wound up fairly blown away by how easy and how delicious it turned out. It’s a perfect cocktail for your next holiday gathering.

    This recipe is also customizable to your tastes. Feel free to experiment with different types of wine, fruit juices, and fruit liqueurs. Just be wary. This drink goes down very easily, so it’s hard to tell that there’s still alcohol in it.

    Apple Cider Sangria

    Ingredients:

    • 1 750ml bottle of dry red wine (recommend Cabernet)
    • 3 cups apple cider
    • 1 cup fresh orange juice
    • 1/2 cup Triple Sec
    • 1/2 cup honey
    • 2 cups of freshly diced apples

    Directions:

    In a pitcher, pour the wine and honey. Stir until the honey is completely dissolved. Add the remaining liquid ingredients and stir to combine.

    Add the diced apples. Serve over ice, and garnish with additional fruit, if desired.

  • Caramel Apple Cake Pops

    Caramel Apple Cake Pops

    Skip to Recipe

    I don’t know who it was that decided that apples and caramel would make a good pair, but they deserve a shrine in their memory. Since I was a kid, I have loved caramel apples, as well as any dessert that pairs caramel and apples. I had been entertaining the idea of trying to make caramel apple cake pops for a while, but I just never got around to it. I finally gave it a go, and wound up getting requests for the recipe. So, here it is!

    Since I never liked the idea of mushing cake and frosting together and feeding that to people, I use cake pop pans for my cake pops. The Telebrands Bake Pop pans that I use have long since been discontinued, but I have also used the Nordic Ware cake pop pans with great results.

    Caramel Apple Cake Pops

    Ingredients

    • 1 cup of all-purpose flour
    • 1 tsp baking powder
    • 1/4 tsp baking soda
    • 3/4 tsp ground cinnamon
    • 1/8 tsp ground nutmeg
    • a pinch of salt
    • 5 tbsp butter, softened
    • 3/4 cup granulated sugar
    • 1 large egg, room temperature
    • 1/2 cup store bought apple butter
    • 1 cup of peeled, grated apple (I used 3 small Honey Crisp apples)
    • 16oz caramel-flavored candy melting wafers

    Directions

    Preheat oven to 325 degrees. Grease your cake pop molds and set aside. Sift your dry ingredients and set aside.

    Cream the butter and sugar together on medium speed using a stand mixer fitted with the paddle attachment. Add the egg, and beat until just combined. Reduce the mixer speed to low and add the apple butter, and then the grated apple. At this point, the mixture may start to look curdled. This is fine.

    Add the sifted dry ingredients and mix until they are just combined with the wet ingredients. Divide the batter equally among the cavities of your cake pop pan. Bake according to the instructions provided by the cake pop pan’s manufacturer. For my model of pan, it takes about 20 minutes. If using a Nordic Ware sized cake pop pan, check the pops after 15 minutes. They are done when a toothpick inserted into the center comes out clean.

    When baking is complete, allow the cake balls to cool in the pan on a wire rack for about 10 minutes before removing to cool completely.

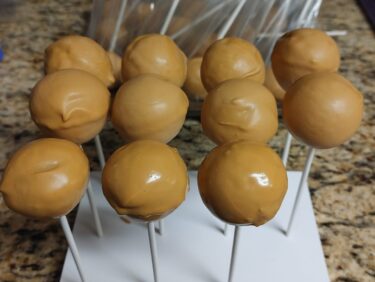
    When the cake balls are cooled, melt the caramel candy coating using your preferred method (I use a melting pot). Using a lollipop stick, poke a small hole on top of each cake ball. Dip the stick in the melted candy coating, then stick the dipped end of the lollipop stick into the hole that you created in the cake pop. Repeat for the remaining cake balls. Transfer to the freezer for 10-15 minutes.

    After the cake balls are set, dip each cake ball in the melted candy coating. Lift the cake pop out of the coating and gently shake off the excess. Set on a cake pop stand or styrofoam block to dry. Store the caramel apple cake pops in an airtight container or individually wrapped.

    Makes about 24 caramel apple cake pops (if using a cake pop pan)

  • Mojito Curd

    Mojito Curd

    A mojito is a traditional Cuban cocktail that is extremely popular here in Miami.  It generally consists of lime wedges and mint leaves muddled with sugar and topped off with rum and soda water.  I was thinking of ways to use the flavors of a mojito in a dessert or treat that went beyond cupcakes.  I came across a recipe for mojito curd, and thought that it would be fun to tweak it and convert it into a recipe that I could make in my Instant Pot.

    Mojitocurd

    Pressure Cooker Mojito Curd

    Ingredients

    • 1/2 cup fresh squeezed lime juice
    • 10 fresh mint leaves, chopped
    • 1 cup granulated sugar
    • 1/4 cup of white rum (I used Bacardi)
    • 3 eggs
    • 1/4 cup of butter, cut into cubes

    Directions

    Combine the lime juice and the mint leaves in a small bowl.  Gently muddle the mint leaves in the lime juice.  Cover and let sit for at least 1 hour.  You can also refrigerate for several hours, if desired.

    Combine the sugar, rum, and eggs in an oven-safe container.  Add the mint-infused lime juice (discard the leaves if you prefer a less-minty flavor).  Using an immersion blender, blend the mixture together until smooth.

    Cover, and place on a rack in the liner of your electric pressure cooker filled with 1 cup of water.  Seal and cook on High Pressure for 12 minutes.  When the timer is up, allow the pressure to release naturally for 12 minutes before releasing any remaining pressure.

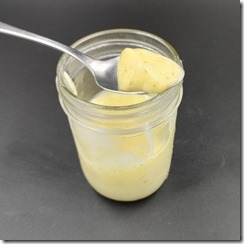
    Remove the mixture from the pressure cooker and uncover.  Add the butter and blend again with your immersion blender until the mixture is smooth and all of the butter is melted.  Transfer the mojito curd to mason jars and keep refrigerated until ready to use.

    Makes about 2 1/2 cups

  • Chocolate Peanut Butter Cupcakes

    Chocolate Peanut Butter Cupcakes

    If you know me, then you know that I am not usually a peanut butter type of person. However, chocolate and peanut butter are often too much of a magical combination to resist. I honestly don’t remember why exactly I decided to make these cupcakes. They instantly became one of my most requested items, though. So, now I share this recipe with you all.

    Chocolate Peanut Butter Cupcakes

    Ingredients

    For the cupcakes:

    • 1 cup white sugar
    • 1 cup all purpose flour
    • 1 tsp baking soda
    • 1 tsp baking powder
    • 1/2 cup unsweetened cocoa powder
    • 1/4 tsp salt
    • 1/3 cup butter
    • 1/2 cup boiling water
    • 1/2 cup buttermilk (can substitute regular milk or additional boiling water)
    • 1/2 tbsp instant coffee granules (optional)
    • 1 egg, beaten
    • 1 tsp vanilla extract

    For the filling:

    Half batch of peanut butter pastry cream (I used this recipe)

    For the frosting:

    • 6 egg whites
    • 1 1/2 cups granulated sugar
    • 1/4 tsp cream of tartar
    • 1lb (4 sticks) unsalted butter, softened (but not TOO soft)
    • 1 cup creamy peanut butter (not Natural)
    • 1/4 cup powdered peanut butter
    • 1 tsp vanilla extract
    • a pinch of salt

    For the ganache:

    • 1/2 cup heavy cream
    • 4 oz bittersweet chocolate, chopped
    • 1/2 tsp coffee liqueur (optional)

    Directions

    Make the pastry cream:

    Prepare the peanut butter pastry cream according to the recipe directions. Cover with plastic wrap and refrigerate for at least 4 hours.

    Make the cupcakes:

    Preheat your oven to 350 degrees.  Line about 15 muffin cups with paper liners.

    Add the  butter and coffee granules (if using) to your hot water (or hot water/milk mixture).  Stir until the butter melts completely.

    In a medium bowl, sift your dry ingredients.  Add the beaten egg and buttermilk and mix until the dry ingredients are moistened.  Slowly add the hot liquid until you have a smooth batter.  Add the vanilla extract.

    Divide the batter among your muffin cups.  Bake at 350 degrees for 15-20 minutes, or until a toothpick inserted in the center comes out clean. Cool completely on a wire rack before continuing.

    Make the frosting:

    In a heat-proof bowl, whisk the egg whites, sugar, and cream of tartar until just combined. Place the bowl over a pot of simmering water, making sure that the bottom of the bowl does not touch the water.

    Heat the mixture, stirring constantly, until it is no longer grainy and the temperature of the mixture reaches 160 degrees F.

    Transfer the mixture to a stand mixer. Using the whip attachment, whip until the meringue reaches stiff peaks and the bowl is no longer warm to the touch. Switch the whip attachment to the paddle attachment. With the mixer running, add the butter, 1 tablespoon at a time. Add the peanut butter and the peanut butter powder and mix until combined. Add the salt and vanilla, then mix until just combined.

    Make the ganache:

    In a microwave-safe measuring cup or bowl, heat the cream and chocolate for 30 seconds on high. Remove and stir, then return and microwave for an additional 15 seconds. Remove and stir until all of the chocolate is completely melted. Add the coffee liqueur (if using). Set aside to cool slightly. It should remain runny, but not hot.

    Assembly:

    Using your preferred method, fill each cupcake with peanut butter pastry cream. I like to use a piping bag fitted with a filling tip to inject the cream into the cupcakes.

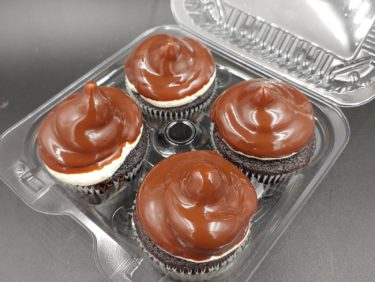
    Pipe some peanut butter frosting onto each filled cupcake. Then, carefully dip the tops of each cupcake into the ganache. Set on a wire rack for the ganache to set, then store in an airtight container.

    Makes about 2 dozen cupcakes

  • Strawberry Ice Cream

    Strawberry Ice Cream

    Skip to Recipe

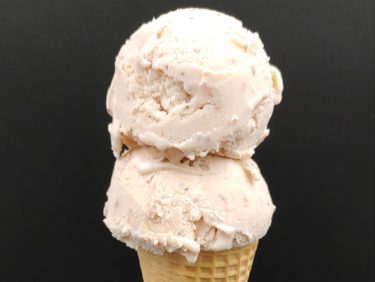
    I have always loved the idea of strawberry ice cream, but it’s generally not my first choice. This is because most commercial strawberry ice creams either have chunks of frozen berries in them (which I hate), or taste artificial. My usual solution to this is to make my own, but I never had luck getting good strawberries at the grocery store.

    Recently, I found out that I’m not too far from several strawberry farms. This is news that I probably would have come across sooner if I were the “outdoors” type, but that’s neither here nor there. I won’t get into the details of the absolute horror it was to have to pick my own berries outdoors in “hot asf Miami, FL,” but it was kind of worth it to make this strawberry ice cream. Roasting the strawberries gets rid of some of the excess water in the berries that can dilute your ice cream and also make it less prone to crystallization.

    strawberry ice cream cone

    Strawberry Ice Cream

    Ingredients

    • 1 lb fresh strawberries, washed and hulled
    • 1/2 cup plus 2 tbsp granulated sugar
    • 1 1/2 cups milk
    • 1 1/2 cups heavy cream
    • 4 egg yolks
    • 1/2 tsp vanilla extract
    • 1 tbsp corn syrup (optional, but will help keep the ice cream smooth)

    Directions

    Preheat oven to 375 degrees. Line a baking sheet with parchment or foil.

    In a bowl, toss the strawberries with 2 tbsp of sugar. Spread out on the sheet pan. Roast for about 15 minutes, or until the berries have softened and released some of their liquid. Transfer to a bowl and mash or puree in a blender. Set aside.

    Whisk the egg yolks in a small, heat-proof bowl and set aside.

    In a small saucepan, heat the milk and sugar over medium heat until the sugar is dissolved and the mixture starts to simmer. Remove from heat and pour the hot milk mixture into the egg yolks, a little bit at a time, whisking continuously. When about 1/3 of the milk has been added, pour the egg mixture into the remaining milk in the saucepan and return to the heat. Cook, whisking constantly, until the mixture thickens and coats the back of a spoon. Do not let it boil or it may curdle.

    Remove from heat and strain the mixture through a fine mesh strainer to remove any clumps. Add the heavy cream, vanilla extract, corn syrup (if using) and strawberries. Stir until smooth.

    Cover and refrigerate until the mixture is cold, then freeze the strawberry ice cream in your ice cream maker according to manufacturer’s directions.

    Makes about 1 1/2 quarts

  • Cookies and Cream Cake Pops (Using a cake pop mold)

    Cookies and Cream Cake Pops (Using a cake pop mold)

    Skip to Recipe

    As we trudge through the second wave of the pandemic, I have discovered that my sisters LOVE cake pops. They have replaced brownies as the #1 most requested sweets to be shipped in their care packages. I came up with these cookies and cream cake pops to incorporate their love for all things cookies and cream.

    Like most bloggers, I stumbled upon the idea of cake pops on Bakerella’s blog. However, the idea of cake and icing mushed together never sat quite right with me. That is why I was super excited when companies started coming out with cake pop pans. They do take a bit of practice to get working, but they are great once you get the hang of them.

    Use a sharp knife to cut your chocolate sandwich cookies into bite-sized chunks. Resist the temptation to put in a ziploc bag and crush with a rolling pin. You don’t want the pieces too small.

    Also, sift your dry ingredients together and have them ready.

    Cream the butter and the sugar together. Add the egg and vanilla, then beat until well-combined.

    Add the the dry ingredients alternately with the milk, beginning and ending with the flour mixture. Mix until just combined, but do not overmix. Fold in the chopped cookie pieces.

    Grease your cake pop pans, then divide the mixture evenly between 18 of the cavities. Grease the cake pop pan covers, then cover and clamp shut. Bake for 12-15 minutes, or until a toothpick inserted in the center comes out clean.

    I have found that the cake pops release easier when the pan is still hot, so I let the covered pans sit on a wire rack for about 5 minutes before I pop them open and take the cake pops out. If the baked cake balls have a protruding ring around them, you can cut them using kitchen shears or shave them down with a thin serrated knife.

    Because these are less dense than a traditional cake pop, dipping them can be a challenge. What you should do is melt your coating, and once it’s melted use a lollipop stick to poke a hole in each cake pop. Then, dip a lollipop stick in the coating and stick it into the prepared hole. Use a clean cake pop pan to hold them so that the sticks stay upright and the cake balls don’t roll around. Then, pop them into the freezer for 10-15 minutes to harden before you resume the dipping process.

    Unfortunately, I couldn’t capture a picture of the process that I use to dip them, since I only have two hands. I copied the process from the candy makers at Disney World (shhh don’t tell them!). I dip the pop slowly and completely in the coating, turning the pop a few times if needed to fully coat, lift up, and then move the pop (still facing down) in a swift circular motion to remove the excess.

    For extra cookies and cream goodness, I dipped the tops in chocolate sandwich cookie crumbs after dipping in the coating. Then, set them on a cake pop stand or styrofoam block to dry.

    Once they are dry, you are free to package the cookies and cream cake pops however you like. I like to wrap them individually in cellophane baggies. The ones I used here are the 6″ x 4″ size. They are always a hit!

    Cookies and Cream Cake Pops

    Ingredients

    • 1/4 cup butter, softened
    • 1/2 cup sugar
    • 3/4 cups
    • 1/2 tsp baking powder
    • a pinch of salt
    • 1 egg, room temperature
    • 1 tsp vanilla extract
    • 1/4 cup of milk
    • 1/2 cup chopped Oreo pieces (about 4 Oreos)
    • 16oz of vanilla confectionery coating
    • Required materials: Cake pop pan(s) (I used this kind)
    • Optional: 1/2 cup to 1 cup crushed chocolate sandwich cookie crumbs

    Directions

    Preheat oven to 325 degrees

    Sift together the flour, baking powder, and salt. Set aside.

    Cream the butter and sugar together using an electric mixer. Add the egg and vanilla. Mix until smooth.

    Add the flour mixture alternately with the milk. Beat until just combined. Fold in the Oreo pieces.

    Grease the cavities of your cake pop pan, then divide your batter evenly among the cavities. I normally get about 18 cake pops, so if you only have one pan then you will need to do bake in batches. Grease the cover of the cake pop pan, then cover. Bake at 325 degrees for about 15 minutes, or until a toothpick inserted comes out clean.

    Allow to cool on a wire rack for about 5 minutes before removing the pan cover (be careful, as it is still very hot). Let cool another 10 minutes, then remove the cake balls from the pan. If your cake spheres have a “ring,” you can use a small knife or kitchen shears to trim them off.

    When the cake balls are cooled, melt the white candy coating using your preferred method (I use a melting pot). Using a lollipop stick, poke a small hole on top of each cake ball. Dip the stick in the melted candy coating, then stick the dipped end of the lollipop stick into the hole that you created in the cake pop. Repeat for the remaining cake balls. Transfer to the freezer for 10-15 minutes.

    After the cake balls are set, dip each cake ball in the melted candy coating. Lift the cake pop out of the coating and gently shake off the excess. Immediately dip into the chocolate cookie crumbs (if using), then set on a cake pop stand or styrofoam block to dry. Store the cookies and cream cake pops in an airtight container or individually wrapped.

    Makes about 18 cookies and cream cake pops.

  • Pressure Cooker Chili

    Pressure Cooker Chili

    Skip to Recipe

    After searching online for a chili recipe for my Instant Pot, I was disappointed to find that most of them used canned beans. So, I decided to come up with my own recipe for chili. Everyone that has tasted it so far has loved it, so hopefully you will too.

    The first thing you need to do is par-cook your beans. I used small red beans. You can use red kidney beans if you prefer, but I like these better.

    The goal is to cook the beans about 3/4 of the way through. This way, they can finish cooking once the chili is fully prepared. For these beans, I cooked them for about 20 minutes with a 15 minute Natural Release.

    Preparing the beans can be done a day in advance. Just store the beans in the refrigerator until you’re ready to prepare your chili.

    Once you’re ready to begin making the chili, get all of your ingredients together. This will help the process go much faster.

    Brown your ground beef in 1 tbsp of oil on the Saute setting of the pressure cooker. When the meat is browned, add the onions and cook until soft. Then, add the garlic and diced jalapenos. Cook for an additional minute or so, until fragrant. Then, add the spices and beef bouillon.

    Add the beer and use your spoon to scrape up any browned bits off the bottom of the pot. Add the diced tomato and tomato sauce. Lastly, add the par-cooked beans. Cover the pressure cooker, seal, and cook on High Pressure for 10 minutes. Once the timer is done, allow the pressure to release naturally for about 15 minutes before you release any remaining pressure. Give the chili a stir, then taste and adjust seasonings as needed.

    Let the chili rest at least 20 minutes before serving. I prefer making it a day in advance to let the flavors REALLY meld, but I understand that not all of us are that patient.

    Pressure Cooker Chili

    Ingredients

    • 1lb dry red beans
    • 1 tbsp vegetable oil
    • 2 lbs lean ground beef
    • 1 medium onion, diced
    • 3 cloves garlic, minced
    • 2 jalapeno peppers, diced
    • 2 cans fire roasted diced tomatoes with green chiles
    • 3 8oz cans of tomato sauce
    • 1 12oz bottle of beer
    • 2 tbsp chili powder
    • 1 tbsp cumin powder
    • 2 tsp oregano
    • 2 tsp smoked paprika
    • 1/4 tsp cayenne pepper
    • 2 small beef bouillon cubes (or 1 large)
    • 1 tsp salt (more or less to taste)
    • 1/2 tsp ground black pepper

    Directions

    Add the beans to the liner of your electric pressure cooker with 4 cups of water. Cover, seal, and cook on High Pressure for 20-25 minutes. When the timer completes, allow the pressure to release for 15 minutes before releasing any remaining pressure. Drain the beans and set aside.

    Preheat the liner of your pressure cooker on the Saute/Browning setting. When the liner is hot, add the oil and ground beef and cook until no more pink is visible. Add the diced onion and cook until soft. Add the minced garlic and diced jalapeno. Cook until the garlic is fragrant.

    Add all of the spices, stirring until the meat mixture is evenly coated in the seasonings. Add the beer and scrape up any browned bits that stuck to the bottom of the liner. Add the diced tomatoes and tomato sauce, then stir in the beans.

    Cover, seal, and cook on High Pressure for 10 minutes. When the timer completes, allow the pressure to release naturally for an additional 15 minutes before you release any remaining pressure. Taste and adjust seasonings as needed.

    Allow to rest at least 20 minutes before serving, then serve with your choice of toppings.