Category: Main Dishes

  • Pressure Cooker Jerk Chicken Chili

    Pressure Cooker Jerk Chicken Chili

    Skip to recipe

    For the second year in a row, my job has organized a chili cook-off.  Now, chili isn’t really my forte, and it’s not something that I make often or ever.  But, ever since I got this Instant Pot I have gotten a lot more adventurous with my cooking.  So, I figured “why not?”

    I wanted to do something that was not only unique, but that had cultural significance.  Living in South Florida, chili is not something that is really huge like it would be in a place like Texas.  Plus, I have been cutting down on the red meat for health reasons and wanted a chicken chili.  I had been working on some different variations of “Latin” inspired chilis when a lightbulb went off.  We’re practically in the Caribbean…so why not make jerk chicken chili?

    Sure enough, I wasn’t the first person to have thought of this, and I came across a great recipe to use as a starting point.  Of course, the challenge became converting it into a pressure cooker recipe, but it worked out fairly well.  I added a few adjustments of my own based on my own experiences eating Caribbean food in South Florida.  And, I wound up winning First Place!  Woohoo!

    One thing to note is that I made this chili in a 6qt pressure cooker and had a lot of issues with it coming to pressure that I suspect may have been from the pressure cooker being too full.  So, the bottom would start to scorch before the pot could actually come to pressure.  If you have an 8qt pressure cooker, I think that you will be fine, but if you’re using a 6qt or smaller than I recommend scaling the recipe down to avoid this issue.

    UPDATE 3/19/2017:  As a test, I halved the recipe and cooked it in my 6qt pressure cooker, and still had the same issue where the pot would not come to pressure before the bottom would scorch.  Once I scraped the burnt bits from the bottom of the pot, it started to simmer pretty furiously and the pot pressurized after I sealed it again.  So, the trick seems to be bring the chili to a simmer prior to sealing so that it will come to pressure.  Also, scotch bonnet peppers vary in heat by color.  I used an orange one in my first batch and a red one in my second batch, and it was SO MUCH hotter.  So, choose your peppers wisely.

    Jerk chicken chili ingredients

    I got my ingredients together, including the tiny atomic bomb known as a scotch bonnet pepper.  Scotch bonnet pepper is a key component of Jamaican jerk, so of course it needs to be included in jerk chicken chili!  I mixed all of the spices and seasonings together to form a paste to make it easier to add in later.

    DSCN4590

    First, you want to cook your beans.  While they are cooking, prep all of your veggies so that they are ready to go.

    DSCN4593

    Once the beans are done, drain and set aside.

    prepthepot

    Saute your veggies until soft, then add your seasoning paste.  Add the tomatoes, beans, and chicken.  I added the tomatoes last in this case, but I would recommend adding those before the beans and chicken.  Then, seal the pot and cook on Beans/Chili setting or on High for 30 minutes.

    DSCN4612

    Let the pressure release naturally, then open and remove the chicken.  Set the pot to Saute to reduce the chili to the desired thickness, then shred your chicken and return to the pot.  Stir in the scallions.

    Finished jerk chicken chili

    Yup…good stuff!

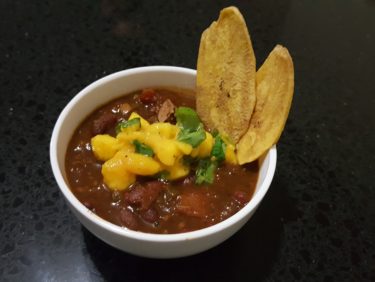
    Plated Jerk Chicken Chili

    I served this jerk chicken chili with mango salsa and plantain chips for dipping, but it also tastes good over rice or scooped up with naan or roti.  It’s great on its own as well.  This can be made on the stovetop or slow cooker with some adjustments if you don’t have a pressure cooker.  It will just take a bit longer.  You can also save some time by using canned beans instead of dried.

    Pressure Cooker Jerk Chicken Chili

    Ingredients

    • 3 lbs bone-in chicken legs and thighs
    • 14oz dried red chili beans
    • 1/2 cup jerk seasoning (I used Mild.  Use Hot at your own risk!)
    • 2 Tbsp vegetable oil
    • 1 medium onion, diced
    • 1 red bell pepper, diced
    • 1 green bell pepper, diced
    • 1 yellow bell pepper, diced
    • 1 Tbsp fresh ginger, grated
    • 5 garlic cloves, minced
    • 1 scotch bonnet or habanero pepper, de-seeded minced (keep the seeds if you like extra spicy)
    • 1½ tsp all-spice
    • 2 tsp smoked paprika
    • 2 tsp thyme
    • 1 Tbsp cumin
    • 1 Tbsp ground cinnamon
    • 1 Tbsp chili powder
    • ¼ cup molasses
    • 1 1/2 tsp liquid smoke
    • 2 tbsp soy sauce
    • 1 tbsp cider vinegar
    • 1 cup chopped scallion
    • 2 15oz cans fire-roasted diced tomatoes (or 1 28oz can also works)
    • 1 cup chicken or vegetable stock
    • salt and pepper to taste

    Directions

    Add the beans to the inner bowl of the pot with 4 cups of water.  Cover and set the pressure valve to Sealing.  Cook on Manual (High Pressure) for 17 minutes, then allow the pressure to release naturally.  Drain and set aside.  In a bowl or measuring cup, combine the jerk seasoning, ginger, allspice, paprika, thyme, cumin, cinnamon, chili powder, molasses, liquid smoke, soy sauce, and salt and pepper so that it forms a loose paste.

    Clean the inner bowl (or, use a new bowl) and set the cooker to Saute/Brown setting.  When hot, add the vegetable oil and saute the onions and peppers until they start to turn translucent.  Add the garlic and continue to saute until fragrant, then add the spice paste and stir until it coats the vegetables.  Add the tomtatoes, beans, chicken/vegetable stock, and chicken.  Stir to combine.

    Turn off the pressure cooker, cover and set the release valve back to Sealing, and set to Beans/Chili function (or Manual High for 30 minutes).  When the timer runs out, allow the pressure to release naturally.

    Once the pressure has been release, open the pot and remove the chicken using tongs and shred it with a form.  Set the cooker back to the Saute setting and cook until the chili until it is reduced to your liking, then return the shredded chicken to the pot.  Stir in the chopped scallions.  Serve the jerk chicken chili immediately or store in an airtight container in the refrigerator until ready to consume.

    Enjoy!

  • Bacon, Beer, and Three-Cheese Risotto

    Bacon, Beer, and Three-Cheese Risotto

    Skip to recipe
    I love my friends, but they are a bunch of enablers.  Instead of going outside or having a life, I prefer to spend my free time trying new things out in the kitchen.  They are happy to oblige, always providing me with recipes that caught their eye or that they think I would be interested in.  Of course, it serves their own interests as well, since they normally get to consume the finished product.  I’m not complaining.  I have discovered some pretty delicious things by having a friend plant the seed.

    One such friend, who is practically “vegetarian except for bacon,” sent me this recipe, which immediately caught my attention.  Bacon, beer, and three-cheese risotto!  I love carbs, bacon, and cheese.  What could possibly be bad about combining them all into one, steaming bowl of creamy risotto?  Nothing, that’s what.  I challenge anyone to refute that.  So, I agreed to give this recipe a shot.  And, of course, she was more than happy to come and “assist” and critique the finished product.  Quality control is an important job, you know!  But, thanks to the extra set of hands, I managed to catch some shots of the process to making this decadent dish.

    20160918_133740

    Now, I am normally a pretty ad-hoc cook, but risotto is a fairly time-sensitive dish that requires constant attention.  You really can’t step away to chop a shallot or grate cheese while it simmers, so mise en place (prepping everything and having it ready to go before you start cooking) is critical.  So, before you get started, make sure all of your ingredients are prepped and ready to go.  You can heat up your broth or stock while this is happening.

    20160918_134008

    While your cooking liquid is warming up, you can start cooking the bacon.  Make sure you lower the heat on the liquid as soon as it starts to simmer.  You don’t want to add boiling broth/stock to your risotto.

    cookthebacon

    Fry the bacon until it’s nice and crispy, and then strain the bacon out and set it aside.  Do not clean out your pan.  Just pour out all except for about a tablespoon of the bacon fat.

    addingliquids

    So, we’re leaving the fond-crusted pan as-is and dumping our chopped shallots in there, then the garlic once the shallots are soft.  Once the garlic is starting to get fragrant, throw in the rice and let it brown a little.  Add the beer, and cook until the rice absorbs most of it.  Then, reduce the heat and start adding the hot stock/broth, one ladle at a time.  Let the rice absorb most of the liquid before adding another ladle, continuing to stir gently.  It will take about 20-30 minutes for the rice to cook, so be patient and don’t rush it.  If you run out of liquid and the rice is still not cooked through, you can add some hot water and continue stirring until it’s the desired consistency.

    finishingtouches

    Once the rice is the desired consistency, add the cheeses and stir until they are melted.  The original recipe uses Parmesan and cheddar, but we added a bit of Gruyere to give it some additional bite.  Add the bacon after that, then season with salt and pepper to taste.

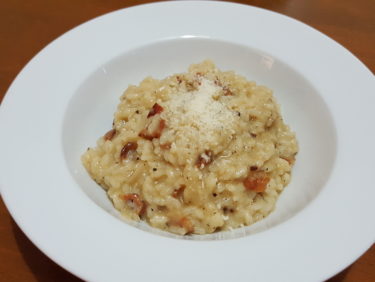
    20160918_142630

    Dinner is served!  See those dark flecks of solidified bacon drippings floating around in there? That’s concentrated flavor!

    If you’re feeling fancy, garnish with an extra sprinkle of cheese or some chopped parsley or chives.  But, I’m not fancy.  I’m hungry.

    EDIT 10/28/2017: I recently discovered that this can also be made in a pressure cooker, which saves a lot of effort.

    Bacon, Beer, and Three-Cheese Risotto

    Ingredients

    • 1 cup uncooked Arborio rice (add in extra 1/2 cup if using a pressure cooker)
    • 6 slices of bacon, cut into small pieces
    • 1/2 bottle of beer (I use lager)
    • 1 shallot, diced
    • 2 garlic cloves, minced
    • 1 quart broth or stock of your choice (I use Vegetable or Chicken Stock)
    • 1/2 cup cheddar cheese
    • 1/4 cup Parmesan cheese
    • 1/4 cup Gruyere cheese
    • salt and pepper to taste

    Directions

    Pour chicken broth in a small pot, and let it sit on a gentle heat.

    In a large sauté pan, cook bacon to render the fat. Once crispy, remove from pan and set aside.  Leaving about 1 tbsp of the bacon fat in the pan.  In the bacon fat, add the shallot. Cook until translucent, then add the garlic and cook until fragrant. Add the rice and stir to coat the grains in the fat. Cook for about 2 minutes.

    Once the grains begin to brown slightly, pour in the beer. Stir and let simmer. Once the liquid is mostly absorbed, add a large ladle of the hot broth/stock. Continue to stir until the liquid is mostly absorbed. Repeat the process until the grains are creamy and cooked through.

    Lower the heat and stir in the cheeses and cooked bacon. Remove from heat and serve.

    To make in a pressure cooker: Follow the same steps as the stovetop recipe, except use the liner of your electric pressure cooker on the Saute/Browning setting, until you get to the part where you add the beer.

    Once the rice has absorbed most of the beer, add in the entire 4 cups of broth or stock.  Cover and seal your pressure cooker, then cook on Manual (High Pressure) for 6-7 minutes.   Immediately release the pressure, uncover, and remove the liner from the pot.  Stir the rice with the liquid until it starts to thicken.  Add the cheese, a little bit at a time, until all of the cheese is melted and risotto is creamy.  Stir in the cooked bacon and serve immediately.

  • Bacon Wrapped Ribs

    Bacon Wrapped Ribs

    Skip to Recipe
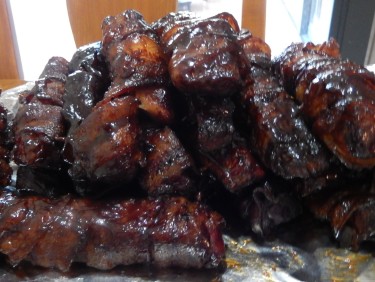
    When I moved into my house earlier this year, my friends pooled their resources and gave me a very generous wad of cash as a housewarming gift.  Naturally, I spent that money on cooking-related items.  One of these purchases was a grill and smoker, which the hardware store happened to have on sale.  South Florida has a tragic shortage of good barbecue.  I came to terms long ago with the fact that I would have to learn to use a grill if I were to ever have any hope of having accent to a decent barbecue meal.  Now that I finally have a house, and it has a space in the back big enough for entertaining, it was a good time for me to learn how to use a grill. (more…)

  • Cuban-Style Roast Pork

    Cuban-Style Roast Pork

    Skip to Recipe
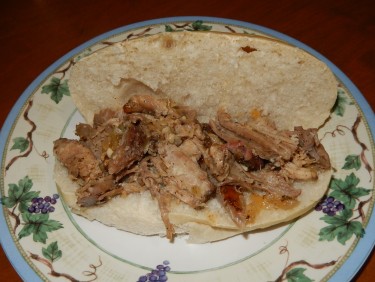
    As a native South Floridian, I have eaten my fair share of Cuban Style Roast Pork (Lechon Asado).  It’s easy to find pretty much anywhere in Miami, but can often be dry and bland.  And, since it’s not particularly difficult to prepare, it makes more sense to just make your own.  Anytime pork shoulder goes on sale at any local grocery store chain, there is a good chance that I will be making lechon asado that weekend.

    I originally got this recipe from my mother, but have since tweaked and modified it to suit my personal taste.  Once you get the hang of it, you will be able to go the same.  You can play around with the amount and types of spices to create different flavors.  Normally, you’d be roasting an entire pig in a roasting box (Caja China).  But, you can achieve the same flavor with a pork shoulder and your oven to feed a smaller crowd. (more…)

  • Adventures in Pollo a la Brasa

    Adventures in Pollo a la Brasa

    Skip to Recipe
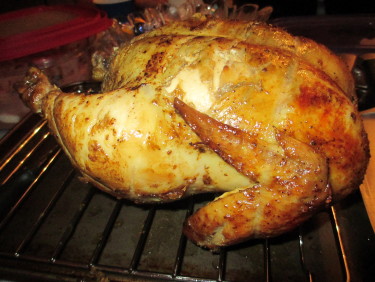
    About a year and a half ago, I was introduced to Peruvian-style pollo a la brasa (rotisserie chicken), and have been hooked ever since.  Even now, I crave it at least once a week.  It’s really not a taste that can be put into words if you are accustomed to store-bought or fast-food rotisserie chickens.  The skin is usually kind of wet and sticky, instead of dry and crispy.  You just have to try it for yourself.

    So, when I finally decided that I wanted to try making it on my own, I tasked a Peruvian friend of mine with getting me a recipe.  She nabbed the recipe from The Daring Gourmet and told me that it sounded fairly close.  So, it was time to experiment!  I made a few modifications to her recipe. (more…)

  • Colombian Tamales

    Colombian Tamales

    Skip to Recipe
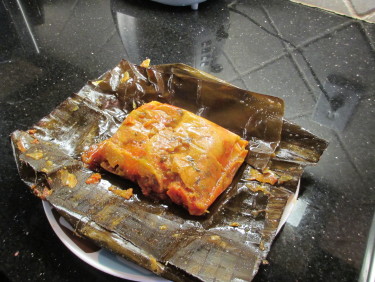
    Tamales, depending on their country of origin, come in many shapes and sizes.  Despite this, the basic idea is the same.  You get yourself some masa, your filling of choice, then wrap it up in a leaf and boil or steam it.  Several hours later, you’ve got yourself a packet of deliciousness. (more…)

  • Kalua Pork in an Electric Roaster

    Kalua Pork in an Electric Roaster

    Skip to Recipe
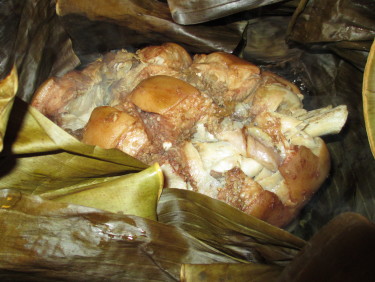
    Pretty much every movie or TV sitcom that finds the characters in Hawaii will feature a luau.  And, one of the staples of any luau is Kalua pig.  The word Kalua actually means “to cook in an underground oven.”  So, as the name implies, Kalua pig refers to pig that is cooked in an imu (a type of underground oven). (more…)