Category: Pork

  • Pressure Cooker Tonkotsu Ramen Broth

    Pressure Cooker Tonkotsu Ramen Broth

    Skip to Recipe

    My favorite ramen place is a 45 minute drive from my house. On top of that, their bowls of tonkotsu ramen about about $30.00 nowadays. When I found out that someone had figured out how to make it in their pressure cooker, I was skeptical at first. But, I decided to give it a try, and it worked out great!

    Tonkotsu ramen broth in an electric pressure cooker is not significantly less labor-intensive. You still need to boil and clean your bones before you start the broth. This helps to remove the marrow and impurities that will alter the color of your finished broth. It does cut down on the total cook time significantly, though. Plus, no babysitting a boiling pot for an entire day.

    Traditional tonkotsu ramen broth is cooked for up to 18 hours, which is what gives the broth its signature “creaminess.” The fat and collagen in the bones breaks down and emulsifies in the broth. The pressure cooker doesn’t produce the rolling boil required to emulsify the broth. So, for using a pressure cooker, you need to add your own emulsifier after the broth is finished. I have also read that you can move the broth to the stove after pressure cooking and boil for about an hour to emulsify, but I have never tried this.

    If you REALLY want to go all-out with your tonkotsu ramen, you can also make chashu pork (braised pork belly) to top it with. You can add some of the leftover braising liquid to your ramen broth for flavoring.

    Once your broth is cooked, you can season it and pour over your cooked ramen noodles and serve with your choice of toppings. In addition to the base broth recipe, there are also recommendations for seasoning your broth and for toppings to serve the ramen with. Just play around with the ingredients and quantities until it tastes to your liking.

    You can refrigerate tonkotsu broth for up to a week, or freeze for a few months. The broth will separate when chilled, so be sure to bring it back to a boil when you reheat it to emulsify it again.

    Pressure Cooker Tonkotsu Ramen Broth

    Adapted from Pressure Eats Recipe

    **NOTE: I used an 8qt Instant Pot to make this quantity of broth, and it was a very tight squeeze. If you will be using a smaller pressure cooker, I recommend cutting the recipe in half.

    Ingredients

    For the broth

    • 3lbs pork hocks, cut into discs
    • 2bs chicken backs
    • 2 whole leeks, washed and roughly chopped
    • 1 3in piece of ginger, peeled and sliced
    • 12 cloves of garlic
    • 1 large onion
    • 6 dried shitake mushrooms (you can also use fresh)
    • 1 tsp salt
    • 1 slab pork fatback
    • 1/2 egg yolk or 2 tsp soy lecithin (I used a whole egg yolk with no issues)
    • Additional recommended equipment: an immersion blender

    For seasoning the broth (per 3 cups of broth)

    • 1 tbsp tahini
    • 2 cloves grated garlic
    • Salt and pepper to taste
    • 1 tbsp mirin
    • 1 tbsp chashu braising liquid
    • 1 tbsp toasted sesame seeds
    • a dash of fish sauce

    To serve

    • Cooked ramen noodles
    • Chopped scallions
    • Sliced chashu pork (I used this recipe)
    • Sliced mushrooms
    • Seaweed
    • Hard boiled or soya egg

    Directions

    Add the pork hocks and chicken backs to a large pot. Fill pot with water until the bones are fully submerged. Cover and refrigerate for at least 1 hour, but preferably overnight.

    Drain the water from the pot and add fresh water. Place the pot, uncovered, on a stove and bring to a boil. Boil for 3 minutes, then remove from heat and drain. Allow bones to cool for about 15 minutes, then rinse and clean with cold water.

    Optional step: Char the onions and garlic by placing them on a sheet pan and broiling them until some black spots appear (this took about 5 or 10 minutes for me)

    Add the cleaned bones to the liner of your pressure cooker. Add the leeks, onions, ginger, garlic, mushrooms, and salt. Add enough water to reach about 3/4 of the way up the pot. Cover, seal, and cook on High Pressure for 3 hours.

    When the time is up, release the pressure manually. Uncover, add the slab of fatback, then cover and seal again. Cook on High Pressure for 1 hour. At this point, you can release the pressure manually or naturally. I have done it both ways and both have been fine.

    Drain the broth to remove the solids. Add the soy lecithin or egg yolk (temper the yolk first with broth if using), using the immersion blender to blend completely. Broth should become translucent.

    Season broth to taste with seasonings of choice, then pour over cooked ramen noodles. Serve with your choice of toppings.

  • Pressure Cooker Mango Pulled Pork

    Pressure Cooker Mango Pulled Pork

    Skip to Recipe
    Mango Season continues here in South Florida, and I am lucky to have plenty of donors giving me a steady supply of mangoes.  I’m usually not much of a risk-taker with ingredients.  I am too just cheap to accept that I might have to throw food away if it doesn’t work out.  Mango Season is a little bit different, because all of the free mangoes means that I won’t feel as bad if an experiment doesn’t work out.  And, since Mango Madness has been going on for a few years, I have been getting better at figuring out what works and what doesn’t.  So, while making mango pulled pork was kind of risky, I felt confident that the flavor combination would probably work out.  And, I wasn’t wrong!

    My favorite kind of BBQ sauces are the ones that are slightly sweet, so the sweetness of the mango actually complimented the savory pork.  However, you will want to avoid pairing it with a sweet BBQ sauce so that your pulled pork doesn’t get overly sweet.  I think that a slightly spicy BBQ sauce works well to balance out the sweetness of the fruit.

    Get all of your ingredients ready, then heat the liner of your pressure cooker on the Saute/Browning setting.  Cut your pork butt into large chunks and season with BBQ rub.  When the liner is sufficiently hot, work in batches and brown your pork chunks for about 1-2 minutes on each side.  Once all of the pork chunks have been browned, return them to the pot, add the remaining ingredients (except the BBQ sauce).  Cover, seal, and cook on Manual (High Pressure) for 55 minutes, then allow the pressure to release naturally before opening the pressure cooker.

    Remove the pork chunks and set them aside.  Strain the liquid from the pressure cooker, but save the cooked fruit and vegetables.  Shred the pork and return it to the liner.  Blend the cooked onion/mango mixture with your choice of BBQ sauce, then pour it back over the shredded pork.  Mix it well before serving.

    You can eat the pork as-is, but you can also make pulled pork sandwiches or sliders.  So yummy!

    Pressure Cooker Mango Pulled Pork

    Ingredients

    • 4lbs Boston butt roast, cut into large chunks
    • 1 tbsp BBQ rub
    • 1 large onion, quartered
    • 2 cups ripe mango chunks
    • 4 cloves of garlic
    • 1 tbsp olive oil
    • 1/4 cup apple cider vinegar
    • 1 cup spicy BBQ sauce (I used honey chipotle)

    Directions

    Heat the liner of your pressure cooker on the Saute/Browning setting.  Season the pork chunks with BBQ rub.

    When the liner is hot, brown the pork chunks on all sides in the liner, working in batches.  When all of the pork chunks have been browned, return all of the pork to the pressure cooker.  Add the remaining ingredients (except for the BBQ sauce).  Cover, seal, and cook on Manual (High Pressure) for 55 minutes.  When the timer runs out, allow the pressure to release manually.

    Uncover and remove the pork and shred it.  Strain the liquid in the pot, but keep the solids.  Place the solids in a blender along with the BBQ sauce and blend until smooth.  Return the pork to the pot, then stir in the BBQ sauce.  Serve immediately.

  • Pressure Cooker Boneless BBQ Pork Ribs

    Pressure Cooker Boneless BBQ Pork Ribs

    Skip to Recipe
    When you’re a working adult, you sometimes don’t have time to prepare an elaborate meal.  Sure, I would love to have the time and energy to make a lasagna from scratch on a weeknight, but the reality is that it’s a miracle that I even pack tomorrow’s lunch before bed some days.  Let’s face it, there are just going to be some days where your need for a hot meal can be overridden if it means putting in more effort than just opening a few jars and dumping things in a pot.  That’s where these boneless BBQ pork ribs come in.

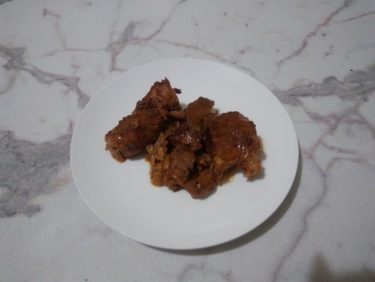
    Originally, I had picked up a pack of boneless pork ribs at the grocery store to make some bacon wrapped ribs.  Well, when the weekend rolled around, I decided that I really didn’t feel like babysitting a smoker (and then cleaning it afterward).  So, I wound up cooking them in the pressure cooker instead.  As it turns out, they were pretty tasty and flavorful when cooked this way, and came together with hardly any effort.

    Arrange your dry-rubbed ribs in the liner of your pressure cooker.  Add some apple cider vinegar and your favorite barbecue sauce, then seal and cook for 15-20 minutes.  When the timer goes off, let the pressure release naturally for about 10 minutes before you release any remaining pressure.

    When they are done, your ribs will have released a lot of liquid.  Just set the pot to Saute (Browning) and let the liquid reduce for a few minutes.  For me, it usually takes about 10 minutes to get the right consistency.

    Check out that thick, bubbling goodness!

    And there you have it.  Easy, right?  Just serve with your favorite side, and you’re good to go!

    Pressure Cooker Boneless BBQ Pork Ribs

    Ingredients

    • 1 1/2 lbs boneless pork ribs (I get the ones labeled “country style”)
    • 2 tbsp of your favorite BBQ rub (more or less to taste)
    • 1/4 cup apple cider vinegar
    • 1/2 cup of your favorite BBQ sauce

    Directions

    Sprinkle seasoning over pork ribs, turning to cover all sides.  Place in a single layer in the liner of your pressure cooker.  Add the vinegar and BBQ sauce on top.

    Cover and seal the pressure cooker.  Cook on Manual (High Pressure) for 15-20 minutes (depending on the thickness of the ribs).  Allow the pressure to release naturally for about 10 minutes before releasing the remaining pressure.  Uncover and set the pressure cooker to the Saute setting.  Let the ribs simmer until the sauce has reduced.

    Makes about 4 servings

    Note: To make this low-carb, use low-carb BBQ rub and low-card BBQ sauce

  • Pressure Cooker Pork “Al Pastor”

    Pressure Cooker Pork “Al Pastor”

    Skip to Recipe
    At its roots, al pastor style pork is basically Mexican shawarma.  The spit-grilled style of cooking the pork was brought to Mexico by Lebanese immigrants.  The rest is history.  Nowadays, tacos al pastor (which basically translates to “country-style tacos) are an ubiquitous taco truck staple.

    Traditionally, the method of cooking the al pastor pork is to roast a pork shoulder on a vertical spit with some pineapple rings.  The fat that drip from the pork crisps up the outer layers of the pork, which is then shaved off and served on a corn tortilla with some pineapple salsa, cilantro, and onions.  For the home cook, this is probably a lot more than one is prepared to undertake.  Fortunately, there are options.  I can’t take full credit for this discovery, as someone else discovered that you can get the flavors of al pastor pork in your pressure cooker for a fraction of the effort.  However, I did tinker around with the recipe until I got it to taste the way that I like it.  It may not be 100% authentic, but for delicious and flavorful pork tacos that can be made on a weeknight, these are well worth the trade-off.

    When doing al pastor meat for in the pressure cooker, the pineapple flavor is incorporated in the sauce that the meat is cooked in.  I find that fresh pineapple gives the best flavor, but you can use canned pineapple if you can’t find fresh in your area.

    Blend a cup of pineapple chunks with chipotle peppers in sauce, garlic, cumin, oregano, salt, and pepper.  It doesn’t have to be entirely smooth, but don’t leave any big chunks of anything in there.

    Heat the pressure cooker liner on the hottest Saute/Browning setting.  Lightly season the pork chunks with salt and pepper.  When the liner is hot, use it to brown your pork chunks on all sides, then remove them and set them aside.  You may have to do that in stages, because they probably won’t all fit at once.  After that, add the chopped onions to the pot and cook them until they start to soften.  Add your browned pork chunks back into the pot.

    Pour the pureed pineapple mixture over the pork and onions in the pot.  Seal, then change the setting on the pot to Manual (High Pressure) for 45 minutes.  When the timer goes off, allow the pressure to release for about 10 minutes before releasing the remaining pressure manually.  Remove the pork chunks, leaving the sauce, then set the pot back to the Saute/Browning setting.  Cook the liquid, stirring occasionally, until it’s reduced by about half.  While that’s going, brown your cooked pork chunks on all sides over a grill or in a hot skillet.  Chop or shred the meat and then return it to the pot with the liquid.  Continue to cook, stirring occasionally, for about 5 minutes or until the meat looks like it has absorbed some of the cooking liquid.  Turn the pressure cooker off and let the pork al pastor sit for at least 10 minutes before serving.

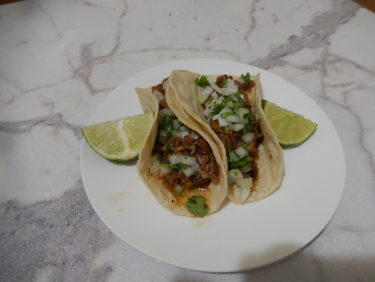
    These tacos al pastor may not be authentic, but they are darned good.  And, for those of us that don’t have a vertical spit or time, these are a great way to get your craving for good tacos taken care of at home.  Serve on corn tortillas with cilantro, onions, and lime wedges and you’re in for a treat!  The meat freezes beautifully, too, so feel free to make a big batch and save some for a rainy day.

    Pressure Cooker Pork “Al Pastor”

    Ingredients

    • 3lbs of boneless pork butt (Boston Butt Roast). cut into large chunks
    • 1 cup fresh pineapple chunks
    • 1 onion, chopped
    • 1 or 2 peppers from a can of chipotle peppers in adobo sauce (plus a spoonful or two of the sauce itself)
    • 3 cloves garlic
    • 1 tsp salt (more or less to taste)
    • 1/2 tsp black pepper
    • 1 tsp ground cumin
    • 1/2 tsp dried oregano
    • 2 tbsp olive oil

    Directions

    In a blender or food processor, mix your pineapple chunks, chipotle peppers with sauce, salt, pepper, garlic, cumin, and oregano until no large chunks remain.  Set aside.

    Preheat the liner of your pressure cooker using the Saute/Browning setting.  Season pork chunks with salt and pepper.  When the pot is hot, add the olive oil and brown the pork chunks on all sides in the liner (do this a few at a time so you don’t crowd the liner).  Remove the pork from the pot and set aside.

    Add the chopped onions to the pot and saute, stirring frequently, until they start to soften.  Return the pork chunks to the pot, then pour the blended pineapple sauce over the pork in the pot.  Cover, seal, and cook on Manual (High Pressure) for 45 minutes.  When the time is up, allow the pressure to release naturally for 10-15 minutes before manually releasing the remaining pressure.

    Remove pork chunks from the pot, leaving the cooking liquid.  Set the pot to Saute/Browning and allow the cooking liquid to come to a simmer.  Continue simmering until the liquid is reduced by about half.

    While the liquid reduces, char pork on all sides using a hot grill or skillet.  Remove from heat and chop or shred the pork.  Return the pork to the pot with the reduced cooking liquid, stirring to coat the pork.  Continue to simmer until the pork has absorbed some of the liquid, about 5 minutes.  Turn off the pressure cooker and allow to sit for 10 minutes before serving.

  • Pressure Cooker Puerco Pibil

    Pressure Cooker Puerco Pibil

    Skip to Recipe
    Puerco Pibil, also known as Cochinita Pibil, is Yucatan-style barbecued pork.  The name comes from the cooking method of the pork.  Traditionally, it’s cooked in a Mayan oven called a pib, a hole in the ground lined with hot stones.  My first exposure to puerco pibil was watching a Robert Rodriguez movie (you might already know which one I’m talking about), in which one of the characters raves about the dish.  Mr. Rodriguez even shares a recipe for it in the DVD commentary.  Naturally, not everyone has access to a hole in the ground to roast a pork, so the recipe typically roasted the pork in the oven.  My first attempt left me with tasty pork that was kind of dry.  My subsequent attempts swapped the oven for my slow cooker, which made a much more tender pork.  However, I got rid of my slow cooker once I bought my Instant Pot, and I was just too scared to try to reproduce this dish in there.  Until now.

    What was usually several hours of waiting for my puerco pibil took about 90 minutes in the pressure cooker, and that includes the time to come to pressure and then to release the pressure.  Best of all, it comes together very easily, despite the fairly long list of ingredients.  If you wanted to, you could also swap out the spices for premade Achiote paste, but I haven’t found that in my area.

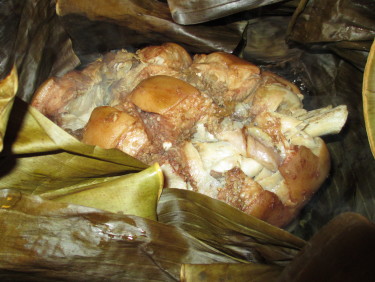
    You’ll want to marinate your pork for at least 4 hours, but preferably overnight.  Once you’re ready to cook, line your pressure cooker with about 3 layers of banana leaves.   Stagger them as much as possible, because you want to keep as much water out.  Add your chunks of pork, then fold the leaves over so that they cover the pork.  Pour 1 cup of water into the pot, then cover and seal.

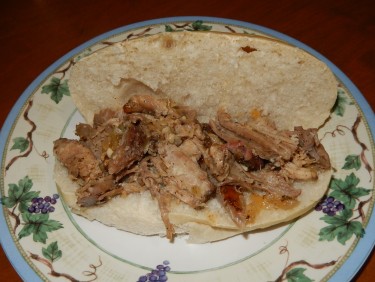
    Tender, juicy, and delicious puerco/cochinita pibil!  You can serve it with pickled onions and tortillas, or sometimes I just eat it with rice.

    If you can’t find sour oranges, you can mix equal parts orange juice and vinegar to use in this recipe.  I have also used lemon juice in this and it’s still very tasty.

    Pressure Cooker Cochinita Pibil

    Ingredients

    • 2 1/2 lbs boneless pork butt (Boston Butt roast)
    • 2 1/2 tbsp annatto seeds
    • 1 tsp cumin seeds
    • 1/2 tbsp black peppercorns
    • 4-5 allspice berries
    • 3 whole cloves
    • 1 habanero pepper (can use jalapeno for less spicy)
    • 1 tbsp salt
    • 4 cloves garlic
    • 1/2 cup Seville orange juice (naranja agria/bitter orange)
    • 3 limes, juiced
    • 1 tbsp tequila
    • 3-4 banana leaves

    Directions

    Cut the pork into 2in chunks.  Place in a large ziploc bag or shallow baking dish.

    Using a spice or coffee grinder, grind the annatto seeds, cumin seeds, peppercorns, allspice, and cloves to a powder.  Add this, along with the remaining ingredients (minus the banana leaves) to a blender and blend until combined.  Pour over the pork, then allow to marinate at least 4 hours, but preferably overnight.

    When the meat is finished marinating, line the pressure cooker liner with 3-4 banana leaves.  They should be along enough to hang over the sides of the pot.  Place the pork with the marinade in the center of the leaves, then fold them over until the pork is completely covered.  Pour 1 cup of water into the pressure cooker.

    Cover and seal the pressure cooker, then cook on Manual (High Pressure) for 60 minutes.  Afterwards, allow the pressure to release naturally for 15 minutes, then release any remaining pressure.  Uncover, remove the pork, and serve with pan juices.

    *NOTE: you can substitute the spices for pre-made Achiote paste, if you prefer.
    To make this lower in carbs, you can replace the Seville orange juice with lemon juice

  • Bacon Wrapped Ribs

    Bacon Wrapped Ribs

    Skip to Recipe
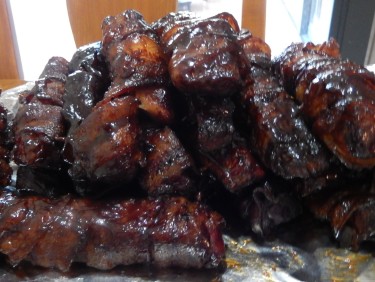
    When I moved into my house earlier this year, my friends pooled their resources and gave me a very generous wad of cash as a housewarming gift.  Naturally, I spent that money on cooking-related items.  One of these purchases was a grill and smoker, which the hardware store happened to have on sale.  South Florida has a tragic shortage of good barbecue.  I came to terms long ago with the fact that I would have to learn to use a grill if I were to ever have any hope of having accent to a decent barbecue meal.  Now that I finally have a house, and it has a space in the back big enough for entertaining, it was a good time for me to learn how to use a grill. (more…)

  • Cuban-Style Roast Pork

    Cuban-Style Roast Pork

    Skip to Recipe
    As a native South Floridian, I have eaten my fair share of Cuban Style Roast Pork (Lechon Asado).  It’s easy to find pretty much anywhere in Miami, but can often be dry and bland.  And, since it’s not particularly difficult to prepare, it makes more sense to just make your own.  Anytime pork shoulder goes on sale at any local grocery store chain, there is a good chance that I will be making lechon asado that weekend.

    I originally got this recipe from my mother, but have since tweaked and modified it to suit my personal taste.  Once you get the hang of it, you will be able to go the same.  You can play around with the amount and types of spices to create different flavors.  Normally, you’d be roasting an entire pig in a roasting box (Caja China).  But, you can achieve the same flavor with a pork shoulder and your oven to feed a smaller crowd. (more…)

  • Kalua Pork in an Electric Roaster

    Kalua Pork in an Electric Roaster

    Skip to Recipe
    Pretty much every movie or TV sitcom that finds the characters in Hawaii will feature a luau.  And, one of the staples of any luau is Kalua pig.  The word Kalua actually means “to cook in an underground oven.”  So, as the name implies, Kalua pig refers to pig that is cooked in an imu (a type of underground oven). (more…)