Category: Main Dishes

  • Pressure Cooker Mango Pulled Pork

    Pressure Cooker Mango Pulled Pork

    Skip to Recipe
    Mango Season continues here in South Florida, and I am lucky to have plenty of donors giving me a steady supply of mangoes.  I’m usually not much of a risk-taker with ingredients.  I am too just cheap to accept that I might have to throw food away if it doesn’t work out.  Mango Season is a little bit different, because all of the free mangoes means that I won’t feel as bad if an experiment doesn’t work out.  And, since Mango Madness has been going on for a few years, I have been getting better at figuring out what works and what doesn’t.  So, while making mango pulled pork was kind of risky, I felt confident that the flavor combination would probably work out.  And, I wasn’t wrong!

    My favorite kind of BBQ sauces are the ones that are slightly sweet, so the sweetness of the mango actually complimented the savory pork.  However, you will want to avoid pairing it with a sweet BBQ sauce so that your pulled pork doesn’t get overly sweet.  I think that a slightly spicy BBQ sauce works well to balance out the sweetness of the fruit.

    Get all of your ingredients ready, then heat the liner of your pressure cooker on the Saute/Browning setting.  Cut your pork butt into large chunks and season with BBQ rub.  When the liner is sufficiently hot, work in batches and brown your pork chunks for about 1-2 minutes on each side.  Once all of the pork chunks have been browned, return them to the pot, add the remaining ingredients (except the BBQ sauce).  Cover, seal, and cook on Manual (High Pressure) for 55 minutes, then allow the pressure to release naturally before opening the pressure cooker.

    Remove the pork chunks and set them aside.  Strain the liquid from the pressure cooker, but save the cooked fruit and vegetables.  Shred the pork and return it to the liner.  Blend the cooked onion/mango mixture with your choice of BBQ sauce, then pour it back over the shredded pork.  Mix it well before serving.

    You can eat the pork as-is, but you can also make pulled pork sandwiches or sliders.  So yummy!

    Pressure Cooker Mango Pulled Pork

    Ingredients

    • 4lbs Boston butt roast, cut into large chunks
    • 1 tbsp BBQ rub
    • 1 large onion, quartered
    • 2 cups ripe mango chunks
    • 4 cloves of garlic
    • 1 tbsp olive oil
    • 1/4 cup apple cider vinegar
    • 1 cup spicy BBQ sauce (I used honey chipotle)

    Directions

    Heat the liner of your pressure cooker on the Saute/Browning setting.  Season the pork chunks with BBQ rub.

    When the liner is hot, brown the pork chunks on all sides in the liner, working in batches.  When all of the pork chunks have been browned, return all of the pork to the pressure cooker.  Add the remaining ingredients (except for the BBQ sauce).  Cover, seal, and cook on Manual (High Pressure) for 55 minutes.  When the timer runs out, allow the pressure to release manually.

    Uncover and remove the pork and shred it.  Strain the liquid in the pot, but keep the solids.  Place the solids in a blender along with the BBQ sauce and blend until smooth.  Return the pork to the pot, then stir in the BBQ sauce.  Serve immediately.

  • Pressure Cooker Boneless BBQ Pork Ribs

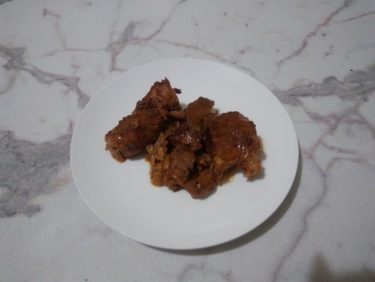
    Pressure Cooker Boneless BBQ Pork Ribs

    Skip to Recipe
    When you’re a working adult, you sometimes don’t have time to prepare an elaborate meal.  Sure, I would love to have the time and energy to make a lasagna from scratch on a weeknight, but the reality is that it’s a miracle that I even pack tomorrow’s lunch before bed some days.  Let’s face it, there are just going to be some days where your need for a hot meal can be overridden if it means putting in more effort than just opening a few jars and dumping things in a pot.  That’s where these boneless BBQ pork ribs come in.

    Originally, I had picked up a pack of boneless pork ribs at the grocery store to make some bacon wrapped ribs.  Well, when the weekend rolled around, I decided that I really didn’t feel like babysitting a smoker (and then cleaning it afterward).  So, I wound up cooking them in the pressure cooker instead.  As it turns out, they were pretty tasty and flavorful when cooked this way, and came together with hardly any effort.

    Arrange your dry-rubbed ribs in the liner of your pressure cooker.  Add some apple cider vinegar and your favorite barbecue sauce, then seal and cook for 15-20 minutes.  When the timer goes off, let the pressure release naturally for about 10 minutes before you release any remaining pressure.

    When they are done, your ribs will have released a lot of liquid.  Just set the pot to Saute (Browning) and let the liquid reduce for a few minutes.  For me, it usually takes about 10 minutes to get the right consistency.

    Check out that thick, bubbling goodness!

    And there you have it.  Easy, right?  Just serve with your favorite side, and you’re good to go!

    Pressure Cooker Boneless BBQ Pork Ribs

    Ingredients

    • 1 1/2 lbs boneless pork ribs (I get the ones labeled “country style”)
    • 2 tbsp of your favorite BBQ rub (more or less to taste)
    • 1/4 cup apple cider vinegar
    • 1/2 cup of your favorite BBQ sauce

    Directions

    Sprinkle seasoning over pork ribs, turning to cover all sides.  Place in a single layer in the liner of your pressure cooker.  Add the vinegar and BBQ sauce on top.

    Cover and seal the pressure cooker.  Cook on Manual (High Pressure) for 15-20 minutes (depending on the thickness of the ribs).  Allow the pressure to release naturally for about 10 minutes before releasing the remaining pressure.  Uncover and set the pressure cooker to the Saute setting.  Let the ribs simmer until the sauce has reduced.

    Makes about 4 servings

    Note: To make this low-carb, use low-carb BBQ rub and low-card BBQ sauce

  • Cazuela de Mariscos (Colombian Seafood Stew)

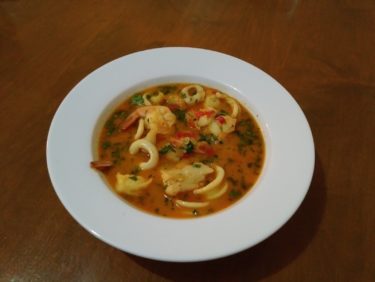
    Cazuela de Mariscos (Colombian Seafood Stew)

    Skip to Recipe

    My mother has always been an amazing cook.  That is great news for me when I was living under her roof, but not so good news now that I live on my own.  Trying to recreate my favorite Colombian dishes from my childhood is always a challenge.  I’m typically not afraid of failing a once or twice on a recipe before I get it right.  However, for cazuela de mariscos (Colombian seafood stew), the price tag of the ingredients was enough to keep me from motivating myself to take the chance.  But, as my mother gets older, I feel like it is my duty to get the skills to recreate all of the dishes that she would make for the family.

    So, armed with my mother’s cazuela de mariscos, I set about the expensive task  of gathering all of the ingredients to make this.  And, ultimately, it turned out pretty well!  Score one for Kay, and for Colombian dishes to pass down to posterity.

    I posted a picture of this stew on social media and got so many requests for the recipe that it would have been a sin to keep from posting it on the blog.  The next time that I make this, I will try to take step-by-step photos so that you all can see the entire process.  I hope you enjoy it as much as I do!

    Make sure that you get your ingredients ready before starting.  The seafood will cook very quickly, so you won’t have time to chop vegetables once you start the process.

    Have 4 cups of hot (but not boiling) fish stock ready.  Homemade fish stock is best, but store bought will also work.

    Heat a large pot or Dutch oven over medium to medium-high heat.  Add butter and olive oil.  When the butter is melted, add diced onions and cook until the onions are soft and translucent.

    While the onions cook, you should blanche your shellfish.  Bring some heavily salted water to a boil, then add the shrimp, lobster, and squid.  Boil for 1-2 minutes, then drain.  You can stop the cooking process by soaking the shellfish in a bowl of ice water after boiling.  Sometimes, I skip this step if I don’t mind firmer shellfish.

    Once the onions are ready, add the garlic and saute for an additional minute before you add the red pepper.  Saute for another 5 minutes or so before you add your spices.  Stir until combined, then add the vinegar and continue cooking until the vinegar appears to have evaporated, then add the tomato sauce and stir to combine.

    Add the coconut cream, then stir and bring to a simmer.  Once the mixture starts to simmer, add the fish and cook until the fish has cooked through (about 5-8 minutes, depending on the size of your fish chunks).  Once that is done, add the hot fish stock and bring to a simmer again before you add your cooked shellfish.  Remove from heat and stir in the cilantro.

    If you want a thicker stew, you can add a cornstarch slurry before you remove from the heat.  Dissolve 1/4 cup of cornstarch in 1/2 cup of water (or extra fish stock, if you have it).  Slowly add this to the simmering stew until you get the desired thickness.  I’m trying to watch my carb intake, so I normally skip this part.

    Traditionally, cazuela de mariscos is served with a side of rice, but enjoy it however you life.  It’s a pretty hearty meal on its own.

    You can add additional seafood to this dish, or even take one of the seafood items if you don’t like it.  My mom has added octopus, mussels, and scallops to the stew in the past.  Just be sure to blanch your seafood prior to adding it to the stew in order to avoid some of the briney taste.  According to my mom, cazuela de mariscos also freezes well.  So, you can make a large batch and freeze for the future.

    Cazuela de Mariscos

    Ingredients

    • 1 quart fish stock (homemade is preferable), hot
    • 1lb snapper fillets, cut into large chunks
    • 1lb extra large shrimp, peeled and deveined
    • 1lb calamari rings
    • 10oz lobster tail, peeled, deveined, and cut into large chunks
    • 2 tbsp olive oil
    • 3 tbsp butter
    • 4 cloves garlic, crushed
    • 1 1/2 cups (approx 10 oz) diced white onion
    • 1/2 cup (approx 2.5 oz) diced red pepper
    • 1 packet Goya seasoning (with azafran)
    • 1 tbsp vinegar
    • 1 tsp onion powder
    • 1/2 tsp garlic powder
    • 1/2 tsp cumin powder
    • 1/2 tsp black pepper
    • 1 tsp salt (more or less to taste)
    • 1/4 cup Goya Spanish-style tomato sauce
    • 1 14oz can unsweetened coconut cream
    • 1/2 cup chopped cilantro

    Directions

    Bring a large pot of water with salt to a boil.  Add the shrimp, calamari, and lobster.  Boil for 1-2 minutes, then strain and transfer to a bowl filled with ice water.  Set aside.

    Heat a large pot or dutch oven on medium to medium high heat.  Add the butter and olive oil.  When the butter has melted, add the onion and saute until the onions are translucent.  Add the garlic, and saute for another minute or until fragrant.  Add the chopped red pepper and continue sauteeing until softened.

    Add the Goya seasoning, onion powder, garlic powder, cumin powder, pepper, and salt.  Stir until completely combined, then add the vinegar and cook until mostly evaporated.  Stir in the tomato sauce, then the coconut cream. Bring to a simmer.

    Add the fish chunks and cook, gently stirring occasionally, for 5-7 minutes or until the fish is cooked.  Stir in the fish stock, then the remaining cooked seafood.  Cook for an additional 1-2 minutes, then remove from the heat and stir in the chopped cilantro.  Serve hot.

    NOTE: You can also thicken the stew some more with a cornstarch slurry, if you like.

  • Cauliflower Pizza Crust

    Cauliflower Pizza Crust

    So, I’ve been on a diet for a few weeks, and it’s been rough at times.  We all know how much I love good food, so there’s been one heck of an adjustment period.  Still, it’s been interesting to try and find ways to enjoy a food that you crave but can no longer have, such as pizza.  I mean, when you’re off carbs, it really limits your options.  That’s where cauliflower pizza crust comes in.

    I came up with this recipe by taking what I liked about a handful of cauliflower crust recipes that I found online, and tweaking them so that they fit into my macro allotment on the current plan that I am on.  It’s still a work in progress, but I am sharing because a few people have asked for the recipe.  So, here it is!  I will try to update this post at a later date with pictures of the actual process.  I just wasn’t expecting requests for this recipe.

    Cauliflower Pizza Crust

    Ingredients

    • 3 cups frozen riced cauliflower
    • 1/4 cup shredded mozzarella cheese
    • 1/4 cup grated parmesan cheese
    • 1/2 tsp Italian seasoning
    • 1/2 tsp garlic powder
    • 1 egg
    • salt and pepper to taste

    Directions

    Cook the cauliflower rice according to the package directions (I used the microwave).  Let it cool for about 10 minutes.

    Preheat your oven to 400 degrees.  Line a baking sheet with parchment paper.

    Wrap your cauliflower in cheesecloth or a kitchen towel, then squeeze all of the liquid out until you are left with a slightly firm ball of cauliflower mush.  Transfer to a bowl and mix in your cheeses, egg, and seasonings.  Your mixture should resemble a loose dough.

    Spread the cauliflower mixture on your baking sheet, making a circular shape if you’d like.  Bake in the pre-heated oven for 25-30 minutes, or until the crust is slightly golden (you might need to flip it over to brown both sides).  Remove from oven, add desired toppings, then bake for another 7-10 minutes.

    Note: The macros for the entire crust are 13.4g protein, 7.9g fat, and 4.1g net carbs.  I usually eat half and save the other half for the next day.

  • Pressure Cooker Apple Risotto

    Pressure Cooker Apple Risotto

    Skip to Recipe
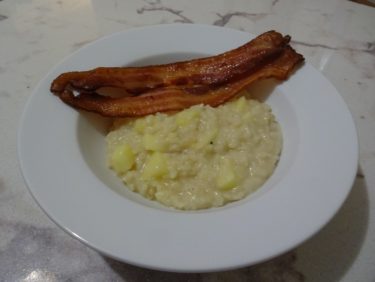
    Okay, so I know that I posted a recipe inspired by an anime last month, but I have to do it again.  In fact, this apple risotto is yet another recipe that came from the same anime (Shokegeki no Soma), which the protagonist makes in a breakfast-themed cooking duel against his father.  Although he loses the match to his father’s ramen bowl, the risotto definitely left a bigger impression.  The protagonist does it the “long and painful” way, AKA on the stovetop, but I was determined to make this in my Instant Pot.  “Work smarter, not harder”, right!?

    I made this for my friends recently, and didn’t have very high hopes.  Sweet and savory is typically not my jam, but I figured that apple risotto with bacon was basically just a fancy take on pork chops and applesauce.  Boy, did this blow my expectations out of the water!  Such a rich, creamy treat doesn’t deserve to be reserved just for breakfast.  The sweet and savory tones in the components of the dish seem to strike a perfect balance, so it doesn’t taste like a dessert that is trying to be an entree or vice versa.  Best of all, making it in a pressure cooker makes it so much easier to make!

    Start by gathering all of your ingredients.  Melt the butter in the liner of the pressure cooker on the Saute/Browning setting, then saute your onions in the butter.  When they are softened, add the rice and stir until the rice is coated in the melted butter.  Cook the rice/onion mixture until the rice becomes fragrant and starts to change color, then add some white wine and continue to cook until the rice has absorbed the wine.  Next, add the apple juice and your broth/stock of choice, then season with salt and pepper.  Cover, seal, and cook on Manual (High Pressure) for 6-7 minutes.  While the risotto is pressure-cooking, prep your apples.  Peel, core, and dice them, then toss them with the juice of a lemon.  When the pressure cooker timer goes off, release the pressure manually, then stir in your apples.  Last, stir in your mascarpone cheese and continue to stir until all of the cheese has melted into the risotto.

    Serve your risotto with some slices of crispy bacon, which adds a salty punch to counterpoint the sweet undertones of the apple in the risotto.  You can also sprinkle on some parmesan cheese, if you’d like.

    Risotto is usually best eaten fresh.  However, if you MUST reheat it, you can add a little bit of water before warming it in the microwave to keep it from getting too dry.

    Pressure Cooker Apple Risotto

    Ingredients

    • 2 Apples (I used Golden Delicious)
    • 1 lemon, juiced
    • 1 onion, diced
    • 2 cups Arborio rice
    • 3 cups of unfiltered apple juice
    • 3 cups chicken broth or stock
    • 4 tablespoons butter
    • 1/2 cup white wine
    • 4 oz mascarpone cheese
    • grated parmesan cheese (optional)
    • 1lb thick cut bacon
    • salt and pepper to taste

    Directions

    Cook the bacon according to your preferred cooking method (I use the oven).  Set aside.

    Set pressure cooker to Saute/Browning setting. When hot, add the butter. When the butter has melted, add the onions and saute until translucent, about 5 minutes. Add the rice, and stir to coat.  Continue cooking, stirring, until the rice starts to turn fragrant.

    Add the wine and continue to stir until the wine is absorbed.  Add the apple juice and chicken broth/stock, then season with salt and pepper to taste..  Cover, seal, and cook on High Pressure for 6-7 minutes.  Meanwhile, peel, core, and dice your apples.  Toss them in a bowl with the lemon juice, and set aside.

    When the pressure cooker timer goes off, release the pressure manually.  Stir in the apples, and then mascarpone cheese.  Continue to stir until the mascarpone cheese has fully melted and the apple risotto is creamy.  Serve immediately with a side of cooked bacon and topped with grated Parmesan cheese (if desired).

    Makes about 6 servings

  • Pressure Cooker Moroccan Lentil Stew

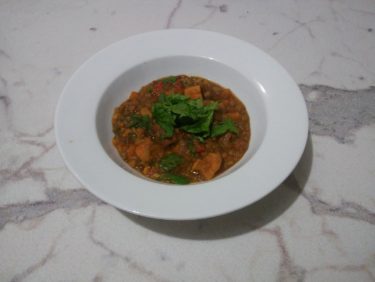
    Pressure Cooker Moroccan Lentil Stew

    Skip to Recipe
    I was recently on a really strict diet that had a LOT of rules for what I could and could not eat, and when.  In these types of situations, you try to find things that pack a big flavor punch without a lot of added fat.  I came across this recipe for a Moroccan Lentil Soup during my frantic search for foods that wouldn’t bore me to tears on fat-free days.  And, making it in the Instant Pot makes it a cinch!  I does come out more like a stew than a soup when made in the Instant Pot, though. I don’t mind this at all, but you can also add more broth or stock at the end if you prefer some extra liquid.

    Chopping your vegetables is the most difficult part of this Moroccan Lentil Stew.  Once that’s done, making this recipe is a breeze.  Just add all of your chopped veggies (minus the spinach), lentils, and spices into your pot.  Then, pour your broth or stock in and give it a gentle stir.  Seal the pressure cooker, and cook this on Manual (High Pressure) for 10 minutes.  Once the time is up, let the pressure release naturally, then open it up and sir in the chopped spinach.  Once the spinach has wilted, it’s ready to serve.

    This stew really hits the spot on cold days.  It’s also very satisfying, even though there’s no meat.  I like to make a batch and freeze in portions to have for later.

    Pressure Cooker Moroccan Lentil Stew

    Ingredients

    • 1 lb. sweet potatoes, peeled and cut into medium chunks
    • 1 cup carrots, chopped
    • 1 cup onions, chopped
    • 1 cup celery, chopped
    • 1 red bell pepper, diced
    • 6 cloves garlic, crushed
    • 1 1/2 cups green or brown lentils, rinsed and picked over
    • 2 tsp ground coriander
    • 2 tsp ground cumin
    • 2 tsp curry powder
    • 1/2 tsp smoked paprika
    • 1/2 tsp ground cinnamon
    • 1/2 tsp turmeric
    • ⅛ teaspoon ground nutmeg
    • 2 quarts chicken broth or stock (can also use vegetable)
    • 5oz baby spinach, roughly chopped
    • salt and pepper to taste
    • lemon wedges (for serving)

    Directions

    Combine all of the ingredients (except the spinach) in the liner of your electric pressure cooker.  Stir gently to combine.  Seal and set to cook on Manual (High Pressure) for 10 minutes.  When the time is up, allow the pressure to release naturally.  Open the pressure cooker and stir in the chopped spinach until wilted and combined.  Serve hot with a squeeze of lemon juice.

  • Pressure Cooker Pork “Al Pastor”

    Pressure Cooker Pork “Al Pastor”

    Skip to Recipe
    At its roots, al pastor style pork is basically Mexican shawarma.  The spit-grilled style of cooking the pork was brought to Mexico by Lebanese immigrants.  The rest is history.  Nowadays, tacos al pastor (which basically translates to “country-style tacos) are an ubiquitous taco truck staple.

    Traditionally, the method of cooking the al pastor pork is to roast a pork shoulder on a vertical spit with some pineapple rings.  The fat that drip from the pork crisps up the outer layers of the pork, which is then shaved off and served on a corn tortilla with some pineapple salsa, cilantro, and onions.  For the home cook, this is probably a lot more than one is prepared to undertake.  Fortunately, there are options.  I can’t take full credit for this discovery, as someone else discovered that you can get the flavors of al pastor pork in your pressure cooker for a fraction of the effort.  However, I did tinker around with the recipe until I got it to taste the way that I like it.  It may not be 100% authentic, but for delicious and flavorful pork tacos that can be made on a weeknight, these are well worth the trade-off.

    When doing al pastor meat for in the pressure cooker, the pineapple flavor is incorporated in the sauce that the meat is cooked in.  I find that fresh pineapple gives the best flavor, but you can use canned pineapple if you can’t find fresh in your area.

    Blend a cup of pineapple chunks with chipotle peppers in sauce, garlic, cumin, oregano, salt, and pepper.  It doesn’t have to be entirely smooth, but don’t leave any big chunks of anything in there.

    Heat the pressure cooker liner on the hottest Saute/Browning setting.  Lightly season the pork chunks with salt and pepper.  When the liner is hot, use it to brown your pork chunks on all sides, then remove them and set them aside.  You may have to do that in stages, because they probably won’t all fit at once.  After that, add the chopped onions to the pot and cook them until they start to soften.  Add your browned pork chunks back into the pot.

    Pour the pureed pineapple mixture over the pork and onions in the pot.  Seal, then change the setting on the pot to Manual (High Pressure) for 45 minutes.  When the timer goes off, allow the pressure to release for about 10 minutes before releasing the remaining pressure manually.  Remove the pork chunks, leaving the sauce, then set the pot back to the Saute/Browning setting.  Cook the liquid, stirring occasionally, until it’s reduced by about half.  While that’s going, brown your cooked pork chunks on all sides over a grill or in a hot skillet.  Chop or shred the meat and then return it to the pot with the liquid.  Continue to cook, stirring occasionally, for about 5 minutes or until the meat looks like it has absorbed some of the cooking liquid.  Turn the pressure cooker off and let the pork al pastor sit for at least 10 minutes before serving.

    These tacos al pastor may not be authentic, but they are darned good.  And, for those of us that don’t have a vertical spit or time, these are a great way to get your craving for good tacos taken care of at home.  Serve on corn tortillas with cilantro, onions, and lime wedges and you’re in for a treat!  The meat freezes beautifully, too, so feel free to make a big batch and save some for a rainy day.

    Pressure Cooker Pork “Al Pastor”

    Ingredients

    • 3lbs of boneless pork butt (Boston Butt Roast). cut into large chunks
    • 1 cup fresh pineapple chunks
    • 1 onion, chopped
    • 1 or 2 peppers from a can of chipotle peppers in adobo sauce (plus a spoonful or two of the sauce itself)
    • 3 cloves garlic
    • 1 tsp salt (more or less to taste)
    • 1/2 tsp black pepper
    • 1 tsp ground cumin
    • 1/2 tsp dried oregano
    • 2 tbsp olive oil

    Directions

    In a blender or food processor, mix your pineapple chunks, chipotle peppers with sauce, salt, pepper, garlic, cumin, and oregano until no large chunks remain.  Set aside.

    Preheat the liner of your pressure cooker using the Saute/Browning setting.  Season pork chunks with salt and pepper.  When the pot is hot, add the olive oil and brown the pork chunks on all sides in the liner (do this a few at a time so you don’t crowd the liner).  Remove the pork from the pot and set aside.

    Add the chopped onions to the pot and saute, stirring frequently, until they start to soften.  Return the pork chunks to the pot, then pour the blended pineapple sauce over the pork in the pot.  Cover, seal, and cook on Manual (High Pressure) for 45 minutes.  When the time is up, allow the pressure to release naturally for 10-15 minutes before manually releasing the remaining pressure.

    Remove pork chunks from the pot, leaving the cooking liquid.  Set the pot to Saute/Browning and allow the cooking liquid to come to a simmer.  Continue simmering until the liquid is reduced by about half.

    While the liquid reduces, char pork on all sides using a hot grill or skillet.  Remove from heat and chop or shred the pork.  Return the pork to the pot with the reduced cooking liquid, stirring to coat the pork.  Continue to simmer until the pork has absorbed some of the liquid, about 5 minutes.  Turn off the pressure cooker and allow to sit for 10 minutes before serving.

  • Pressure Cooker Rabo Encendido (Oxtail Stew)

    Pressure Cooker Rabo Encendido (Oxtail Stew)

    Skip to Recipe

    In my circle of friends, I am notorious for not being a particularly adventurous eater.  Keep those beef hearts and chicken feet away from me, and don’t even get me started on the time that I found out that beef tongue (something my mom made for us a lot growing up) was meant to be taken literally.  I mean, it’s not like “pigs in a blanket” means you’re eating blankets, right!?  With that in mind, I can’t really explain why I still love rabo encendido (oxtail stew) so much.  Yes, you’re technically eating a cow’s tail. I don’t care.  It’s delicious.

    According to my mother, she and my father first had rabo encendido at a Cuban restaurant long before I was born.  He liked it so much that he begged her to learn how to make it.  This was long before there was the Internet and sources to get copycat recipes from, so she just set out to figure it out on her own.  In the end, her version of rabo encendido is different than what you get at a traditional Cuban restaurant, but it’s what I grew up eating.  As a result, none of the versions that I get at Cuban restaurants ever tastes “right” to me.  So, thanks Mom for ruining my palate for the real thing, but I love you anyway because your version tastes better.  🙂

    Originally, making oxtails was a stovetop affair that took a good 6 hours.  Nowadays, I make them in my Instant Pot, and it makes the process MUCH faster.  I can get rabo encendido on the table for dinner on a weeknight after work, which is a VERY big deal.

    The base of the sauce is made from tomato, garlic, and red pepper.  Just throw this into a blender with white wine and puree.  Add your oxtails to the liner of your pressure cooker and throw the chunks of green pepper and onion on top, along with the bay leaves.  Pour the tomato and red pepper puree over the ingredients in the pressure cooker liner, then add the seasonings.  Seal the pressure cooker and set to 45 minutes.  When the timer goes off, allow the pressure to release naturally for another 15-20 minutes, then release any remaining pressure.

    When it is safe to open the pressure cooker, do so and remove the cooked oxtails and vegetables, but leave the liquid in the pressure cooker liner.  Set the oxtails aside and discard the cooked onions and peppers.  Skim as much fat as you can from the cooking liquid, then set the pressure cooker to Saute/Browning on the highest possible setting, allowing the liquid to come to a simmer.  When the liquid is simmering, add the cooked oxtails and continue heating until the sauce has reduced by about half.

    This results in oxtails that are tender, but may still have a little bit of resistance near the bone.  This is how I like them, but if you like them to be completely falling apart then you might want to add another 10-15 minutes of pressure-keeping time.  Either way, they will be flavorful and delicious!  I like to serve them with a side of white rice, and sometimes I’ll fry up some sweet plantains if I have them.

    Pressure Cooker Rabo Encendido (Oxtail Stew)

    Ingredients

    • 3 lbs oxtails
    • 1 medium onion, cut into large chunks
    • 1 green pepper, cut into large chunks
    • 1 red bell pepper
    • 2 Roma tomatoes
    • 4 cloves of garlic
    • 2 bay leaves
    • 1 packet Goya seasoning (the kind that says “con Azafran”)
    • 1/2 tsp ground cumin
    • 1 tbsp vinegar (I use red wine vinegar)
    • 1 tbsp hot sauce
    • 1 cup white cooking wine
    • 1 8oz can Spanish-style tomato sauce
    • salt and pepper to taste

    Directions

    Using a blender, blend the tomato, red pepper, garlic, and white wine until a coarse puree is formed.

    In the liner of the pressure cooker, combine the oxtails, green pepper, onions, bay leaves, Goya seasoning, cumin, hot sauce, vinegar, and salt and pepper.  Pour the red pepper and tomato puree over the ingredients in the pressure cooker, then cover and seal.

    Cook on Manual (High pressure) for 45-60 minutes (depending on desired tenderness), then allow the pressure to release naturally for about 15-20 minutes before releasing the remaining pressure.  Open the pressure cooker and remove the oxtails and vegetables, but leaving the liquid in the liner.  Discard the vegetables and set the oxtails aside.  Strain as much fat from the cooking liquid in the liner as you can.

    Add the tomato sauce to the liquid in the pot, then set the pressure cooker to the highest Saute/Browning setting.  When the liquid starts to simmer, return the oxtails to the pot.  Continue cooking until the liquid has reduced by about half, then taste and adjust seasonings if necessary.  Serve hot.

    Makes about 4 servings.

  • Pressure Cooker Puerco Pibil

    Pressure Cooker Puerco Pibil

    Skip to Recipe
    Puerco Pibil, also known as Cochinita Pibil, is Yucatan-style barbecued pork.  The name comes from the cooking method of the pork.  Traditionally, it’s cooked in a Mayan oven called a pib, a hole in the ground lined with hot stones.  My first exposure to puerco pibil was watching a Robert Rodriguez movie (you might already know which one I’m talking about), in which one of the characters raves about the dish.  Mr. Rodriguez even shares a recipe for it in the DVD commentary.  Naturally, not everyone has access to a hole in the ground to roast a pork, so the recipe typically roasted the pork in the oven.  My first attempt left me with tasty pork that was kind of dry.  My subsequent attempts swapped the oven for my slow cooker, which made a much more tender pork.  However, I got rid of my slow cooker once I bought my Instant Pot, and I was just too scared to try to reproduce this dish in there.  Until now.

    What was usually several hours of waiting for my puerco pibil took about 90 minutes in the pressure cooker, and that includes the time to come to pressure and then to release the pressure.  Best of all, it comes together very easily, despite the fairly long list of ingredients.  If you wanted to, you could also swap out the spices for premade Achiote paste, but I haven’t found that in my area.

    You’ll want to marinate your pork for at least 4 hours, but preferably overnight.  Once you’re ready to cook, line your pressure cooker with about 3 layers of banana leaves.   Stagger them as much as possible, because you want to keep as much water out.  Add your chunks of pork, then fold the leaves over so that they cover the pork.  Pour 1 cup of water into the pot, then cover and seal.

    Tender, juicy, and delicious puerco/cochinita pibil!  You can serve it with pickled onions and tortillas, or sometimes I just eat it with rice.

    If you can’t find sour oranges, you can mix equal parts orange juice and vinegar to use in this recipe.  I have also used lemon juice in this and it’s still very tasty.

    Pressure Cooker Cochinita Pibil

    Ingredients

    • 2 1/2 lbs boneless pork butt (Boston Butt roast)
    • 2 1/2 tbsp annatto seeds
    • 1 tsp cumin seeds
    • 1/2 tbsp black peppercorns
    • 4-5 allspice berries
    • 3 whole cloves
    • 1 habanero pepper (can use jalapeno for less spicy)
    • 1 tbsp salt
    • 4 cloves garlic
    • 1/2 cup Seville orange juice (naranja agria/bitter orange)
    • 3 limes, juiced
    • 1 tbsp tequila
    • 3-4 banana leaves

    Directions

    Cut the pork into 2in chunks.  Place in a large ziploc bag or shallow baking dish.

    Using a spice or coffee grinder, grind the annatto seeds, cumin seeds, peppercorns, allspice, and cloves to a powder.  Add this, along with the remaining ingredients (minus the banana leaves) to a blender and blend until combined.  Pour over the pork, then allow to marinate at least 4 hours, but preferably overnight.

    When the meat is finished marinating, line the pressure cooker liner with 3-4 banana leaves.  They should be along enough to hang over the sides of the pot.  Place the pork with the marinade in the center of the leaves, then fold them over until the pork is completely covered.  Pour 1 cup of water into the pressure cooker.

    Cover and seal the pressure cooker, then cook on Manual (High Pressure) for 60 minutes.  Afterwards, allow the pressure to release naturally for 15 minutes, then release any remaining pressure.  Uncover, remove the pork, and serve with pan juices.

    *NOTE: you can substitute the spices for pre-made Achiote paste, if you prefer.
    To make this lower in carbs, you can replace the Seville orange juice with lemon juice

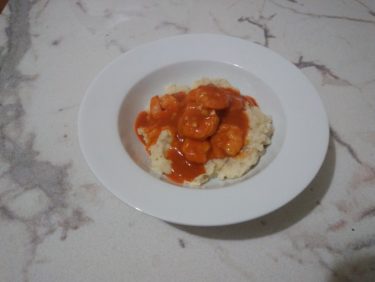
  • Buffalo Shrimp and Blue Cheese Grits

    Buffalo Shrimp and Blue Cheese Grits

    Skip to recipe

    Shrimp and grits are something that I have only recently tried, and was pretty ambivalent towards.  I guess it just didn’t click because it’s not something that I grew up eating.  But, during a conversation at work one day, we were talking about what foods could and could not be made “buffalo-style,” and that’s when a light bulb went on in my head.  What about buffalo shrimp and blue cheese grits?  My coworkers’ eyes just lit up.

    Naturally, I wasn’t the first one that had ever thought up such an idea, so it was not difficult to find a recipe for buffalo shrimp and blue cheese grits.  My version isn’t particularly flashy or fancy, but it’s tasty as heck.  Plus, making grits in a pressure cooker or Instant Pot makes this recipe a cinch.  The only thing that you really need to worry about is not overcooking your shrimp.

    Buffalo Shrimp and Blue Cheese Grits

    (Adapted from recipe at Food52)

    Ingredients

    For the Grits

    • 1 cup grits (can be white or yellow) – not Quick Cook or Instant Grits
    • 4 cups chicken broth or stock
    • 1 tbsp butter
    • 4 oz crumbled blue cheese
    • salt and pepper to taste

    For the Buffalo Shrimp

    • 1lb medium shrimp, peeled and deveined
    • 2 tbsp butter
    • 1/2 tsp paprika
    • 3 cloves garlic, minced
    • 1/2 cup buffalo sauce (can be homemade or store-bought)
    • salt and pepper to taste
    • juice of 1/4 lemon

    Directions

    Make the Grits

    To make in the Instant Pot: Set the pressure cooker to Saute – Normal.  When it reads HOT, melt the butter in the pot, then add the grits and stir to coat them in the butter.  Keep stirring the butter-coated grits until they turn fragrant.  Add the chicken stock and season with salt and pepper.  Turn off the Instant Pot, put the lead on and seal, and set to Manual (high pressure) for 25 minutes.  Allow the pressure to release naturally for 10-15 minutes, then release any remaining pressure.  Stir in the crumbled Blue cheese.

    To make on the stovetop: Melt butter in a medium saucepan over medium heat.  Add the grits, stirring to coat in butter.  Continue stirring until the grits start getting fragrant.  Add the chicken broth/stock and season with salt and pepper.  Bring to a brisk simmer, then reduce heat and allow to simmer for about 20 minutes, or until grits are the desired texture.  Remove from heat and stir in the Blue cheese.  Serve immediately.

    Make the Buffalo Shrimp

    Rinse the shrimp and pat dry.  Season with salt, pepper, and paprika.  Toss to coat.

    Heat a skillet on medium to medium-high.  Melt butter on hot skillet, then add shrimp.  Cook the shrimp, turning once, until almost opaque (you want them to be slightly undercooked at this point).  Using a slotted spoon, remove the shrimp and set aside.

    Add the garlic to the hot skillet and cook until fragrant (about 2-3 minutes).  Add the buffalo sauce and continue cooking until sauce begins to thicken and reduce (you may need to lower the heat if it looks like the sauce is starting to burn).  Return the shrimp to the pan and toss to coat in the sauce.  Cook 1-3 minutes until the shrimp are cooked through.  Remove from heat and add the lemon juice.  Serve on top of grits.