Category: Custards

  • Pressure Cooker Irish Cream Flan

    Pressure Cooker Irish Cream Flan

    This is a haphazard post.  I hadn’t really been planning on posting this recipe to the blog, but I have had a lot of requests for Irish Cream Flan recipe that I just couldn’t refuse.  The public asks, and I deliver.  🙂

    For some reason, I have been on a Bailey’s kick lately, so I’ve been trying to come up with ways to incorporate Irish Cream into desserts.  I made Irish Cream ice cream with mixed success, as the alcohol in the Bailey’s made the ice cream too soft and melted quickly.  So, what else is creamy and whose texture will not suffer from the addition of alcohol?  Flan!  And, an Irish Cream Flan sounded like too good of an idea to pass up.  Best of all, it worked on the first try!

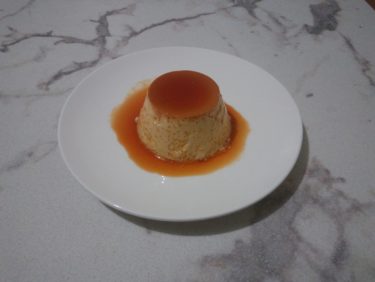
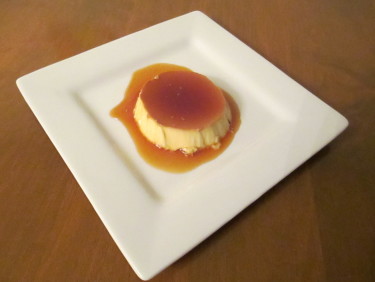
    The outside of the flan had me a little worried that I had overcooked it, but the inside was as smooth and creamy as I like my flans to be.  I was afraid that using too much Irish Cream would make the flan taste too heavily of booze, so I replaced some of the liqueur with Irish Cream flavored coffee creamer.  Feel free to play around with the ratios of booze and creamer to get your preferred concentration of Bailey’s flavor, but this was just right for me.

    Hope you enjoy!

    Pressure Cooker Irish Cream Flan

    Ingredients

    • 1/4 cup plus 2 tbsp white sugar, divided
    • 1 tbsp water
    • 1 cup Half and Half
    • 1/4 cup Irish Cream flavored coffee creamer
    • 1/4 cup Irish Cream
    • 2 eggs

    Directions

    In a small saucepan, heat 1/4 cup of sugar over medium heat, swirling the pan occasionally to distribute the heat.  Once the sugar has melted and turned deep amber, remove from heat and add the 1 tbsp of water (careful, it may splatter) and stir until combined.  Distribute the syrup evenly between 3 6 oz ramekins or custard cups.

    Crack the eggs into a small, heat-proof bowl and whisk, then set aside.  In a small saucepan (can be the same one if you want), heat the Half and Half, creamer, Irish Cream, and sugar until lightly simmering.  Remove from heat and gradually add this mixture, 2 tbsp at a time, to the eggs, whisking constantly.  Once about 1/3 of the hot cream mixture has been added to the eggs, slowly pour the remaining hot cream into the egg mixture, whisking the entire time.

    Add 1 cup of water to the inner liner of your electric pressure cooker and place a trivet inside.  Cover your custard cups tightly with foil, then set on the trivet inside the pressure cooker.  Seal and cook on Steam setting for 5 minutes, then allow the pressure to release naturally for an additional 5 minutes before releasing the rest of the pressure manually.  Remove custards from the pressure cooker and allow to cool, uncovered, on a wire rack.  Flans will be very jiggly when you take them out.  This is normal.  Re-cover and refrigerate at least 4 hours, but preferably overnight.

    To serve, run a small knife around the edge of the custard cup, then invert onto a plate.

    Makes 3 servings.

  • Pressure Cooker Red Velvet Flan

    Pressure Cooker Red Velvet Flan

    Skip to Recipe

    My boss hates flan, but loves anything red velvet.  When I asked her what she thought of a red velvet flan, she was like “H’mm…I might try that.”Sadly, Google wasn’t very helpful in locating a recipe for red velvet flan that looked promising.  So, I devised my own.

    Making a red velvet flan posed a bit of a challenge at first.  The two primary flavors that come together to make that classic and recognizable “red velvet” flavor are cocoa powder and buttermilk.  So, I knew that I wanted to include buttermilk in the flan, but in a way that wouldn’t make it curdle or taste too sour.  I found that I could safely replace a fourth of the milk with buttermilk, and replaced the rest of the milk with half-and-half so that the additional fat content would discourage curdling.

    Since owning a pressure cooker, flan is one of the many dishes that I have discovered that a pressure cooker excels at making.  The moist heat of the pressure gives it a smooth and silky texture in about half the time of oven baking.  I highly recommend using a flanera (flan plan), which has a lid that locks in place to protect your flan.  I know some people use a pyrex dish or cake pan covered in foil, and that should also work.  You can also bake the flan in the oven if you don’t have a pressure cooker.  Just bake at 350° for about an hour in a water bath.

    Melt the sugar in a saucepan over medium to medium-high heat.  Once the sugar is melted and dark amber, remove from heat and add water.  It will bubble, steam, and sizzle furiously, so be careful.  Once you can get your hand close, stir until the water and sugar are combined, and then pour it into your flan mold.

    The rest of the ingredients can go in your blender.

    And blend until smooth.

    Pour this mixture in your prepared flan pan (or making dish) and cover in foil.  Place on a trivet in your pressure cooker filled with about 1 cup of water, then cook on manual (high pressure) for 12 minutes.  After the time is up, allow the pressure to release naturally for another 10-15 minutes, then release any remaining pressure (if any) and remove the flan from the pressure cooker.  Uncover and allow to cool completely before refrigerating.  Let is refrigerate at least overnight before you remove the red velvet flan from the pan.

    Red Velvet Flan

    The food coloring kind of bleeds into the caramel and dyes it red, which I think adds some visual impact.

    red velvet flan slice

    There are a few air bubbles here and there, but the overall texture of this red velvet flan is very smooth and creamy.  Best of all, it tastes like actual red velvet!

    Red Velvet Flan

    Ingredients

    • 1/2 cup white sugar
    • 2 tbsp water
    • 1 can sweetened condensed milk
    • 1 1/2 cups half-and-half
    • 1/2 cup buttermilk
    • 2 tbsp cocoa powder
    • 1 tbsp red food coloring
    • 1 tsp vanilla extract

    Directions

    In a saucepan over medium heat, heat the sugar until it melts and turns medium amber.  Remove from heat and add the water (careful, as it may splatter), stirring until combined.  Quickly pour the mixture into a flan pan or baking dish.  Set aside.

    Using a blender, combine the condensed milk, half-and-half, buttermilk, cocoa powder, vanilla extract, and food coloring until smooth and uniform.  Pour mixture into prepared pan and cover.  Set pan on a trivet and lower into pressure cooker filled with 1 cup of water.

    Cook on Manual (High Pressure) for 12 minutes, then allow the pressure to release naturally for 10-15 minutes.  Remove the flan from the pressure cooker, uncover, and allow to cool completely on a wire rack.  Refrigerate 8 hours or overnight before serving.

    To unmold: Run a thin bladed knife around the inside of the flan pan to loosen the flan, then invert onto a baking dish (or a deep plate).  Lift the flan pan upward off the dish, shaking gently to loosen the flan.

    Oven Directions: Same as above, except use an 8″ or 9″ round pan.  Bake uncovered in a water bath at 350° for about an hour, or until center is only slightly jiggly.

  • Irish Cream Brownie Trifles

    Irish Cream Brownie Trifles

    Skip to recipe
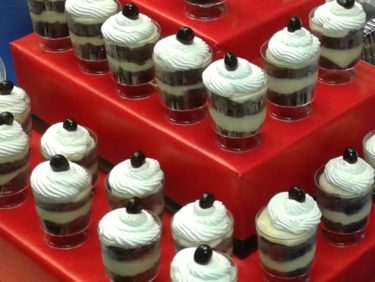
    The title says it all, but I will say it again: Irish Cream Brownie Trifles.  Pieces of brownie are layered with Irish Cream pastry cream, then topped with a swirl of whipped cream and garnished with a chocolate covered espresso bean.  Itty, bitty bites of happiness in an itty, bitty dish.  Who could ask for more?

    Broke Baker veterans are probably already aware that, every year, my employer throws a bake-off during the holidays.  Any employees that can bake, or have relatives that can bake, are encouraged to enter. The result is a day full of cakes, pies, and all sorts of other treats.

    This was my third year entering.  My coworkers once advised that, in order to win, your dessert needs to contain alcohol.  I scoffed at the idea, although I still made Eggnog Mini Cheesecakes that had rum in both the cheesecake and the caramel sauce for the first year.  The 2014 winner was a Coquito Rum Cake, which I took to mean that the judges are more partial to desserts with latin-inspired flavors.  So, last year I took this knowledge at face value and made Chocolate Coquito Macarons.   While the judges found them to be good, a Coquito Flan took the title.  I heard through the grapevine that my macarons were considered good, but that they didn’t think they really qualified as “dessert.”  So, for 2016, I went into this armed with the knowledge that my entry had to both contain alcohol and represent the traditional idea of a “dessert.”

    I went with Irish cream because it’s sweet and translates easily into dessert form.  I considered cake, cheesecake, and even mousse when I was thinking of what to make.  Ultimately, I decided on making trifles because they seemed like the most unique option.  Plus, serving them in disposable mini cups from the local party supply store made for a nice presentation without a whole lot of messing around with icing or complex decorating.  The trifles are a bit time-consuming, but they are not particularly labor-intensive.  All you have to do is bake a thin layer of brownie, cut it into small circles, and then layer it in mini trifle dishes with the pastry cream.  A dollop of whipped cream finishes it off.  They just require a little bit of planning so that you have all of the components ready to go in the right order.  In the end, I got First Place in Presentation (for the third year in a row), but nothing in Taste except for a pat on the back from several judges for the deliciousness of my trifles.  And, since they DID receive a warm reception, I decided to share the recipe with you all.

    The recipe below makes enough brownie for about 2 dozen mini trifle cups filled with brownie circles, but about enough pastry cream for 36 trifles total.  What I usually do is chop up the brownie scraps and use that to layer the last dozen.  You could also always make a regular-sized trifle with it by just cutting a regular pan of brownies into cubes and layering it with the cream.


    20161216_085442

    Irish Cream Brownie Trifles

    Ingredients

    • 3/4 recipe batch of brownie batter (from a 13″ x 9″ pan recipe)
    • 1 cup sugar
    • 6 large egg yolks (I used 3 whole eggs)
    • 6 tbsp cornstarch
    • 1/2 tsp salt
    • 3 3/4 cups half-and-half
    • 3/4 cup Irish Cream
    • 1 tsp vanilla extract
    • 1 1/2 cups sweetened whipped cream (optional)

    Directions

    Make the pastry cream:

    Place the half-and-half, irish cream, and sugar in a saucepan over medium heat.

    In a separate bowl, whisk the egg yolks, salt, and cornstarch until there are no clumps and mixture is pale in color.  Set aside.

    When the saucepan mixture is about to come to a boil, remove from heat.  Slowly add the hot mixture to the egg yolk mixture, 1/4 cup at a time, whisking constantly.  Once about half of the hot mixture has been added to the yolk mixture, pour the yolk mixture into the saucepan with the rest of the hot mixture.  Return to heat and continue to cook, stirring or whisking constantly, until mixture has properly thickened.

    Remove from heat and strain the mixture into a heat-proof bowl.  Add the vanilla and stir gently to combine.  Cover with plastic wrap and refrigerate for several hours or overnight before using.

    Make the brownie:

    Preheat oven to 350°.  Line a 10″ x 15″ jelly roll pan with parchment paper.  Spread the brownie batter evenly into the jelly roll pan, then bake for10-15 minutes or until a toothpick inserted in the center comes out clean.  Allow to cool completely on a wire rack before using.

    Assemble the trifles:

    Using a cookie or biscuit cutter the same size as the opening of your trifle cups, cut the cooled brownie into circles.  Place one circle into the bottom of a trifle cup, then spoon or pipe a small amount of pastry cream on top of it.  Place another brownie circle on top of the cream and gently push it down until there are no gaps between the brownie and the cream.  Spoon or pipe additional pastry cream until it reaches the top of the cup, then gently tap the bottom of the cup against the counter to let the cream settle.  When you run out of brownie circles, you can cut up the brownie scraps and layer those in the cups.  Repeat the process until either no brownie or pastry cream remains.  Top with whipped cream, if desired.

    Makes about 3 dozen

  • Mango Madness in July – Part 3 (2016 Chapter)

    Mango Madness in July – Part 3 (2016 Chapter)

    Another year, another Mango Season in South Florida.  This is now my third Mango Madness post, as I did this in 2014 and 2015 with great success.  But for those of you just tuning in, I will fill you in.  During Mango Season, I find myself getting a large quantity of mangoes that I don’t always know what to do with.  I mean, mangoes are great to eat just as-is, but there are only so many you can have.  Plus, it doesn’t take long for them to go from “just right” to overripe, after which the only thing you can really do is puree it and use it somehow.  That was the start of Mango Madness.

    As each year goes by, it gets harder for me to think of things to do with mango that I haven’t done the previous year.  I spent most of May and June fretting about whether Mango Madness would be as good as previous years, as my brain reserves were running low.  But, thanks to Google, feedback from friends and family, and random “Eureka!” moments, I have managed to make the 2016 chapter of Mango Madness just as prolific as the last two!

    So, what are some new things that I made with mango this year?  Check it out!

    mango lassi

    Mango Lassi is a accompaniment to spicy food, or just a healthy pick-me-up at any time of the day.  Plus, since it’s basically just a mango and yogurt smoothie, it’s super easy to make.  Just blend equal parts mango puree and plain yogurt together, then sweeten to taste with honey.  I like to bottle it to take to work.

    20160628_211755

    Take the classic Strawberry Cream Cake and make it a Mango Cream Cake!  Just replace the strawberries with chopped mango and add a little bit of mango puree to the whipped cream.

    20160711_215519

    Mango Pastelitos already have a dedicated blog post here, and they’re worth trying out!

    20160710_195620

    Mango pastry cream is delicious on its own, but also has many uses.  Plus, it’s also a good way to use up a large amount of milk that you may be looking to find a use for.  I used this recipe as a guide, but made a few changes.  I used fresh mango pulp instead of canned, omitted the cardamom and saffron, and used vanilla extract instead of vanilla bean paste.  I also went light on the vanilla so that it didn’t overpower the mango flavor.

    20160711_080402


    With all of that mango pastry cream lying around, I had the idea to make little mango tarts.  But, being too lazy to make tart shells, I went ahead and filled store-bought phyllo cups with the cream, and then topped each “tart” with a fresh raspberry.  Simple AND delicious.

    20160627_214548

    Mango mousse is delicious, refreshing, and only uses four ingredients.  Whip 3/4 cup of heavy cream until soft peaks form.  Add 1 tbsp piping gel, then continue to whip until stuff peaks form.  Fold in 3/4 cup mango puree and 1/4 tsp vanilla extract, pour into serving cups, and refrigerate until set.  Yummy!

    20160625_220632

    Mango Ice Cream Cake!  The name should say it all, but I will elaborate.  It’s a batch of mango ice cream sitting on top of a blondie.  Top with some fresh raspberry sauce, and you’ve got a winning dessert that can be made in advance!

    20160717_161834

    Mango macaron ice cream sandwiches!  Using BraveTart’s macaron recipe, I made mango macaron shells by adding 3/4 oz of freeze dried mango to the macaron batter.  Make some mango ice cream (my favorite recipe is this one) and freeze it in a 13″ x 9″ pan.  Once frozen, cut circles of ice cream about the size of your macaron shells, and sandwich one round of ice cream between two macaron shells.

    20160718_190358

    Replace the peaches in your favorite peach cobbler recipe (I used this one) with mango, and you’ve got yourself a mango cobbler!  Since mango is incredibly sweet, I also reduce the sugar in the fruit filling by half.

    I love Mango Madness because it really challenges me to be creative and think outside of the box sometimes.  Sometimes, it’s even like a race to see how many things I can make before the mangoes go bad.  There are things that I would never have thought to make before that I now wonder how I did without.  But, the stakes are raised for next year.  Will I be able to conjure up some new, mango-centric recipes for next year’s Mango Madness?  I guess I had better start brainstorming now!

    A big thank you to everyone that supplied me with mangoes this year.  As you can see, they were put to good use.  Until next year!

  • Eggnog Creme Brulee

    Eggnog Creme Brulee

    Skip to Recipe
    Is there any beverage more “holiday” than eggnog?  I didn’t think so.  Take that, Pumpkin Spiced Lattes!  To be honest, I don’t actually drink eggnog too much.  I do, however, enjoy the occasional scoop of eggnog ice cream around this time of year.

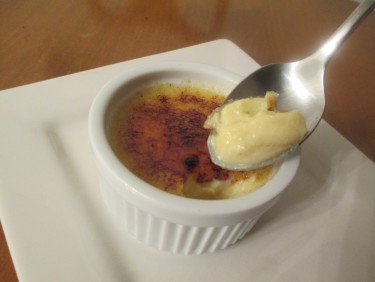
    That was the inspiration for this creme brulee.  I wanted to capture the essence of this traditional holiday beverage in a dessert.  My first attempt used the ingredients to make an actual eggnog, but the finished product didn’t taste enough like eggnog for me.  I managed to solve this by substituting half of the cream with actual eggnog.  This brought out the taste of eggnog in the dish, without ruining the delicate texture of a classic creme brulee. (more…)

  • Mango Flan

    Mango Flan

    Mango Season continues in full swing!  I continue getting generous donations of ripe mangoes from work.  It’s been fun experimenting with recipes to incorporate the mango.  This mango flan was one such experiment.  It turned out to be a success, and someone requested that I give them the recipe.  So, here it is! (more…)

  • Strawberry Cream Cake (Part 1)

    Strawberry Cream Cake (Part 1)

    When most people think of strawberry shortcake, they think of a white sponge cake layered with strawberries and whipped cream.  And, if we lived in Japan, they would be correct.  However, a true “strawberry shortcake” actually uses a crumbly,  biscuit-like cake as the base.  Still, most grocery stores will mass-produce sponge cakes with strawberries and whipped cream and still call them strawberry shortcakes.

    I’m better than that, though.  So, this recipe is not for a strawberry shortcake.  It is a recipe for a strawberry CREAM cake.  That is, a sponge cake that is layered with cream and strawberries.  And, since it’s not a shortcake, I can also take the liberty of filling the center with pastry cream, rather than the traditional whipped cream.  If you prefer the whipped cream, then have at it.  I suggest you try it at least once with the pastry cream, though.  I’ve broken the recipe up into two posts, since it’s a bit long.

    (more…)

  • Flan

    Flan

    Skip to Recipe

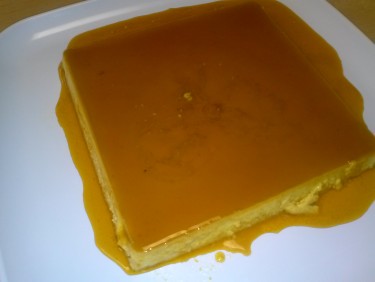
    Flan, or creme caramel, is one of those things that you either love or hate.  I didn’t like it at first, but then grew to love it.  I have a soft spot for custard-based desserts, so it’s right up my alley.  The premise is simple.  Fill the bottom of a ramekin with caramelized sugar, fill it with custard, bake, and then flip it over onto a plate and enjoy! (more…)