Category: Frozen Desserts

  • Strawberry Ice Cream

    Strawberry Ice Cream

    Skip to Recipe

    I have always loved the idea of strawberry ice cream, but it’s generally not my first choice. This is because most commercial strawberry ice creams either have chunks of frozen berries in them (which I hate), or taste artificial. My usual solution to this is to make my own, but I never had luck getting good strawberries at the grocery store.

    Recently, I found out that I’m not too far from several strawberry farms. This is news that I probably would have come across sooner if I were the “outdoors” type, but that’s neither here nor there. I won’t get into the details of the absolute horror it was to have to pick my own berries outdoors in “hot asf Miami, FL,” but it was kind of worth it to make this strawberry ice cream. Roasting the strawberries gets rid of some of the excess water in the berries that can dilute your ice cream and also make it less prone to crystallization.

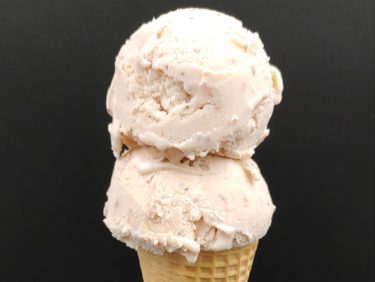
    strawberry ice cream cone

    Strawberry Ice Cream

    Ingredients

    • 1 lb fresh strawberries, washed and hulled
    • 1/2 cup plus 2 tbsp granulated sugar
    • 1 1/2 cups milk
    • 1 1/2 cups heavy cream
    • 4 egg yolks
    • 1/2 tsp vanilla extract
    • 1 tbsp corn syrup (optional, but will help keep the ice cream smooth)

    Directions

    Preheat oven to 375 degrees. Line a baking sheet with parchment or foil.

    In a bowl, toss the strawberries with 2 tbsp of sugar. Spread out on the sheet pan. Roast for about 15 minutes, or until the berries have softened and released some of their liquid. Transfer to a bowl and mash or puree in a blender. Set aside.

    Whisk the egg yolks in a small, heat-proof bowl and set aside.

    In a small saucepan, heat the milk and sugar over medium heat until the sugar is dissolved and the mixture starts to simmer. Remove from heat and pour the hot milk mixture into the egg yolks, a little bit at a time, whisking continuously. When about 1/3 of the milk has been added, pour the egg mixture into the remaining milk in the saucepan and return to the heat. Cook, whisking constantly, until the mixture thickens and coats the back of a spoon. Do not let it boil or it may curdle.

    Remove from heat and strain the mixture through a fine mesh strainer to remove any clumps. Add the heavy cream, vanilla extract, corn syrup (if using) and strawberries. Stir until smooth.

    Cover and refrigerate until the mixture is cold, then freeze the strawberry ice cream in your ice cream maker according to manufacturer’s directions.

    Makes about 1 1/2 quarts

  • Mango Passion Fruit Sorbet

    Mango Passion Fruit Sorbet

    Skip to Recipe

    It’s been an interesting few months. I’m still trying to adjust to “the new normal” brought about by the pandemic, so I apologize for not posting anything in a while.

    July is normally Mango Madness, but my mango supply was fairly limited due to quarantine. This was one of the things that I made with the supply of mangoes that I did get, and it was so perfectly refreshing for the hot Florida summer.

    Mango Passion Fruit Sorbet

    Ingredients

    • 2 1/2 cups mango puree
    • 1 cup seedless passion fruit pulp
    • 1 cup sugar
    • 1 tbsp lime juice

    Directions

    In a small saucepan, combine the passion fruit pulp and sugar. Bring to a boil, then boil for 5 minutes. Remove from heat and set aside to cool slightly.

    Add the passion fruit syrup to the mango puree. Stir in the lime juice. Refrigerate until very cold.

    Freeze the sorbet mixture in your ice cream maker according to the manufacturer’s directions. Transfer the sorbet to a freezer-safe container and freeze until firm.

    Makes about 1 quart

  • Passion Fruit Ice Cream (Egg Free)

    Passion Fruit Ice Cream (Egg Free)

    Skip to Recipe
    I snagged a ridiculously good sale on passion fruits recently.  So good, in fact, that I drove to four different participating store locations to grab up whatever passion fruits I could.  Worth every penny, and it gave me room to start making things with passion fruit that I have wanted to make for a while, but haven’t because they are so expensive.  Passion fruit ice cream was one of them.

    Passion fruit is quite an acidic fruit.  I noticed that my ice cream mixture thickened up considerably before I even put it on the stove to make the custard the first time I made it.  So, for my second batch, I decided to skip the stove step.  Using condensed milk also helps with giving the passion fruit ice cream the creamy, custard-like consistency without the need to add eggs.

    The end result is a creamy ice cream that is the perfect balance of sweet and tart.  While freezing your passion fruit ice cream in the ice cream maker, start checking it after about 15 minutes of churning.  Because the mixture is so thick, it sometimes freezes faster than normal ice cream, and you don’t want to overchurn.

    Passion Fruit Ice Cream

    Ingredients

    • 2 cups heavy cream
    • 1 14oz can sweetened condensed milk
    • 1 1/4 cups passion fruit pulp (with seeds)
    • 1/2 tsp vanilla extract

    Directions

    Combine all of the ingredients in a medium bowl.  Let sit for 10-15 minutes, then strain to remove seeds.  Cover and refrigerate until very cold.

    Freeze in your ice cream maker according to the manufacturer’s directions.  Transfer to an airtight container and freeze for at least 4 hours or until firm.

  • Seven Layer Ice Cream Cake

    Seven Layer Ice Cream Cake

    Skip to Recipe
    I think that ice cream cake might be one of my favorite kinds of cake EVER.  In fact, a Carvel ice cream cake remains the ONLY store bought cake that is acceptable for my birthday.  For a long time, trying to recreate the magic of my favorite ice cream cake was on my to-do list.  When I finally worked up the nerve to give it a shot, I decided that recreating it was not enough.  No, I didn’t want to just reproduce that combination.  I wanted to up the ante.  Let’s add some additional texture with some crushed candy in there.  Oh, and let’s add a brownie base for more flavors and some stability.  And, let’s drizzle it with caramel because caramel makes everything better.  By the time I was done, I had a seven layer ice cream cake on my hands.

    Yes, I said seven layers.  One layer of chewy brownie base.  Then, a layer of crushed candy bars.  Then, ice cream.  Then, cookie crunchies.  And then, MORE ice cream and MORE crushed candy bars.  And finally, whipped cream and caramel drizzle to finish it off.  An explosion of flavors and textures.

    The great thing about this seven layer ice cream cake recipe is that you can customize it to your tastes.  You can pick whatever flavors of ice cream you want, and whatever candy you like.  My version uses homemade caramel ice cream and crushed Heath bar pieces.  You can use store bought ice cream if you’re nervous about making your own ice cream.  Just make sure to soften it before you start assembling your cake.

    The first thing that you need to do is make your brownie base.  One fourth of the recipe for a 13 x 9 inch pan of brownies made in a 9in round pan makes the perfect thickness for the base.  Be sure to use a springform or removable bottom pan to make the brownie so that you have an easier time getting it all out in one piece.

    Freeze the brownie for at least an hour before you start to assemble.  It will help to keep the ice cream from melting too much while you’re trying to assemble the cake.  While the brownie is chilling, pulse the chocolate wafers in a food processor.  When they are broken up into large crumbs, add the chocolate shell topping and pulse until the crumbs moistened all the way through.

    Once the brownie is cool, the assembly process can begin.  I used a ring mold.  If you don’t have a ring mold, use a 9inch springform pan lined with parchment.  Place the brownie at the bottom of the mold.  Add half of the candy pieces, then 1 1/2 quarts of ice cream.  Spread the cookie crumb layer on top of that, then add the remaining ice cream.  Top with the rest of the crushed candy, then freeze for at least 4 hours (overnight is preferable) before you continue.

    When you’re ready, remove the ice cream cake from the mold and pipe dollops of whipped cream along the edges.

    Heat the butter, sugar, salt, and corn syrup in a small saucepan over medium heat.  Bring to a boil and continue to cook until the mixture turns an amber color.  Remove it from the heat and stir in the heavy cream.  Do this carefully, because it might splatter.  If the mixture looks thick enough at this point, add the vanilla extract.  Otherwise, put it back on the heat until it reaches the desired thickness, then remove it again and add the vanilla.  Keep in mind that the sauce will thicken more as it cools.  The sauce can be made in advance and stored in the fridge.  Just warm it up a tad in the microwave to get it back to pouring consistency.

    Right before you’re ready to serve the cake, drizzle it with the caramel sauce.

    To make your ice cream cake easier to cut, run your knife through hot water for a few seconds before eat cut.  It will make things a lot easier.

    This is a great make-ahead cake, so it’s perfect for events where you won’t have time for cake-making the day of.  I have made a seven layer ice cream cake a few days in advance and it is still fantastic.

    Seven Layer Ice Cream Cake

    Ingredients

    For the cake

    • 1/4 recipe for a 13 x 9 inch brownie (this recipe recommended)
    • 3 quarts of your ice cream of choice (can be homemade or store bought), softened
    • 2-3 cups of crushed candy pieces, divided
    • 1 9oz package of chocolate wafer cookies
    • 1 7-8oz bottle of chocolate shell ice cream topping
    • 1 1/2 cups sweetened whipped cream (or store bought whipped topping)

    For the caramel sauce

    • 1/4 cup (1/2 stick) butter
    • 1 tbsp light corn syrup
    • 1/2 cup white sugar
    • 1/2 tsp vanilla extract
    • 1/4 cup heavy cream
    • a pinch of salt

    Directions

    Preheat oven to 350 degrees.  Grease a 9in round springform or push-bottom pan.

    Prepare brownie batter according to the recipe directions.  Pour into prepared pan and bake for 12-15 minutes, or until a toothpick inserted in the center comes out with only frudgy crumbs.  Remove from oven and allow to cool completely on a wire rack.

    Place a 9in ring mold (or 9in springform pan lined with parchment) on a plate or cake board.  Remove the brownie from the pan and place at the bottom of the mold.  Freeze for at least one hour.

    In a food processor, pulse the chocolate wafer cookies into large crumbs.  Add the chocolate shell topping, then continue to pulse until the crumbs are moistened all the way through.

    Remove the mold with the brownie from the freezer.  Add half of the crushed candy over the brownie, spreading it evenly.  Add half of the ice cream over this, then the moistened cookie crumbs.  Add the other half of the ice cream, and then the remaining crushed candies.  Return to the freezer and freeze for at least 4 hours, or until firm.  Once firm, remove from mold and decorate with whipped cream.  Drizzle with caramel sauce right before serving.

    To make the caramel sauce:  Melt the butter, sugar, salt, and corn syrup over medium heat.  Bring to a boil, then cook until the mixture thickens and turns light brown.  Remove from heat and stir in the cream and vanilla extract.  Allow to cool to lukewarm before serving.

  • Mango Ice Cream (Egg-Free)

    Mango Ice Cream (Egg-Free)

    Skip to Recipe
    Mango Season is on FIRE, and the season just getting started.  My usual mango suppliers have been extra generous with me this season, and I make sure that their mangoes do not go to waste.   Some of the fruits get eaten as-is.  Other mangoes get sliced or chopped and used in cakes and fillings.  I puree and strain those that are too far gone to slice, but not far enough to go in the trash.  Then, I use that mango puree in all sorts of ways.  This is where mango ice cream comes in.

    When I first started Mango Madness, I always made mango ice cream using a custard-base.  This guaranteed the smooth and creamy consistency that I love in my ice creams.  Recently, I read somewhere that you can achieve that same creamy texture by making ice cream with condensed milk.  Something about the condensed milk mimics the properties of a custard base, which ensures a smooth and creamy product without ever turning on your stove.  The ice cream base comes together in a matter of minutes, and mangoes that would have otherwise gone ignored are reborn as a delicious mango ice cream!

    Smooth, creamy, refreshing mango ice cream.  And, with very little effort!  As the Barefoot Contessa would say, “How bad can that be?”

    And so, there you have it.  Be advised, though, that homemade ice cream doesn’t last as long as store-bought.  So, eat it fast.  Otherwise, it can get freezer burn.

    Mango Ice Cream (Egg Free)

    Ingredients

    • 1 1/2 cups heavy cream
    • 1 1/2 cups strained mango puree
    • 1 can sweetened condensed milk
    • 1/2 tsp vanilla extract

    Directions

    In a medium bowl, gently stir all of the ingredients together.  Cover and refrigerate until very cold.

    When cold, freeze in your ice cream maker according to the manufacturer’s directions.  Store the mango ice cream in a freezer-safe container.

    Makes about 1 1/2 quarts

  • Caramel Ice Cream

    Caramel Ice Cream

    Skip to Recipe
    A friend of mine once told me the difference between a “cook” and a “chef.”  To her, a “cook” follows recipes and a “chef” can tweak and adjust a recipe to create something new.  I thought of those words when I came up with this caramel ice cream recipe.  Truth be told, the idea came to me one day while I was making some burnt caramel custards.  As I was heating the cream on the stove, I thought to myself, “what if I added milk and threw this in the ice cream maker?”  And, one day, I did just that.  The rest is history.

    As with most of my ice cream recipes, this caramel ice cream starts with making custard using egg yolks.  I find that custard-based ice creams are richer and creamier than their egg-free cousins.

    Place your egg yolks in a mixing bowl and whisk until smooth, then set aside.  Heat your cream in a small saucepan with half a vanilla bean (split and seeds scraped) until it starts to simmer.  Reduce the heat and let keep warm while you melt the sugar.

    Place your sugar in a heavy-bottomed saucepan and cook over medium heat until the sugar melts and turns deep amber.  Remove it from the heat and pour in the warm cream, a little bit at a time.  The mixture will steam and possibly splatter, so use caution.  At this point, you will likely still have some clumps of hardened sugar in your mixture.  If this happens, return the pot to the heat and reduce the heat to medium-low, stirring the mixture gently until no clumps of hardened sugar remain.

    When that is done, remove the pot from the heat again and stir the hot cream mixture into your whisked egg yolks, a little bit at a time.  Once about 1/3 of the cream mixture has been added to the yolks, pour the yolk  mixture into the pan with the remaining cream mixture.

    Return to the heat and cook on medium to medium-low, whisking constantly, until the mixture thickens and coats the back of a spoon.  Do not let the mixture come to a boil!  While this cooks, pour your milk into a medium bowl and set a strainer over it.  When the custard mixture is done, remove it from the heat and slowly pour it through the strainer into the bowl with the milk.  Do not do this too fast, or you might make the milk curdle.

    Cover this mixture and refrigerate for 4 hours or until the mixture is sufficiently chilled.  I usually leave it overnight.  When ready, freeze the mixture in your ice cream maker according to the manufacturer’s directions, then transfer to a freezer-safe container and freeze until firm.

    This ice cream tastes great on its own, but also works great with all sorts of toppings.  Try chocolate sauce or candied peanuts.

    Caramel Ice Cream

    Ingredients

    • 2 cups heavy cream
    • 2 cups milk
    • 1 cup granulated sugar
    • 6 egg yolks
    • 1 vanilla bean, split and seeds scraped (or 2 tsp vanilla extract)

    Directions

    In a small saucepan, heat the cream and vanilla bean over Medium heat until the cream starts to come to a simmer.  Reduce heat to Low to keep warm.  Whisk egg yolks in a small mixing bowl and set aside.

    In a medium saucepan, heat the sugar over Medium heat until the sugar melts and turns a deep amber color.  Remove from heat, then take the hot cream mixture, remove the vanilla bean, and slowly pour into the melted sugar mixture.  Careful, as the mixture might splatter.  If clumps of hardened caramel remain, return mixture to heat (reduce to medium-low) and stir until the mixture is smooth and no clumps remain.  While this cooks, pour the milk into a medium bowl and set a fine mesh strainer over it.

    Remove the mixture from the heat and whisk into the egg yolks, a little bit at a time.  When about 1/3 of the mixture has been added to the yolks, add the yolk mixture to the saucepan.  Return to the heat and cook on medium to medium-low, whisking constantly, until the mixture thickens and coats the back of a spoon.  Slowly strain the mixture into the bowl with the milk (not too fast, or the milk might curdle).  Cover and refrigerate until completely chilled (usually takes about 4 hours).  When ready, freeze the ice cream according to the manufacturer’s directions for your ice cream maker.  Transfer the caramel ice cream to a freezer-safe container and freeze until firm.

    Makes about 1 1/2 quarts.

  • Peanut Butter Ice Cream (Egg-Free)

    Peanut Butter Ice Cream (Egg-Free)

    Skip to Recipe

    I have a weird relationship with peanut butter.  I don’t go nutso over peanut butter things the way that some people do.  In fact, when people would ask me, I used to say that I don’t like peanut butter all that much.  But, lately, I have been gaining a greater appreciation for it.  I don’t think that I necessarily dislike peanut butter, but maybe that some applications of it are just a bit too much for me.  Peanut butter cups, for instance, aren’t my first choice of candy.  Peanut butter ice cream, on the other hand, has won me over.

    I normally make a custard base when making ice cream, but there are times when I just don’t feel like being bothered with all of that.  For those times, I have an alternate method of making peanut butter ice cream.  It is slightly less creamy than the custard-based kind, but it’s also slightly less work.  Plus, it still tastes fantastic with a warm brownie or as an ice cream sandwich.

    The first thing you want to do is melt your peanut butter with the milk and sugar.  Once it’s all melted, but before the mixture can actually come to a boil, remove it from the heat and pour it into a bowl filled with your heavy cream.  Refrigerate this until it’s nice and cold (you can put it in an ice bath to speed up the process), and then freeze in your ice cream maker.  After that, store it in an airtight container in the freezer for at least a couple of hours to let it set into ice cream.

    Whether you like it plain, drizzled with hot fudge, or smothered in toppings, this peanut butter ice cream is sure to please any peanut butter lover in your life.  You can mix in chocolate chips or chopped peanut butter chips into the ice cream if you like it chunky, too.

    Peanut Butter Ice Cream

    Ingredients

    • 3/4 cup creamy peanut butter
    • 1 1/2 cups milk
    • 1 1/2 cups heavy cream
    • 1/2 cup sugar
    • 1/2 tsp vanilla extract

    Directions

    Pour heavy cream into a medium bowl.  Set aside.

    In a medium saucepan, combine the peanut butter, milk, and sugar.  Cook over medium heat, stirring occasionally, until the sugar has dissolved and the peanut butter has melted.

    Remove from heat and pour into the bowl with the heavy cream.  Stir in the vanilla extract.  Cover and refrigerate until cold, then freeze in your ice cream maker according to manufacturer’s directions.  Pour into freezer-safe container and freeze for 4 hours or until firm.

    Makes about 1 1/2 quarts.

  • Dulce de Leche Ice Cream

    Dulce de Leche Ice Cream

    Skip to Recipe
    When it comes to frozen treats, I always lean more towards frozen custard instead of ice cream, because I prefer the creamier consistency.  And, since learning how to make ice cream at home, I have always sought out recipes that incorporate egg yolks into the ice cream base, because I know that this will net me a creamy texture that I adore.

    The problem with using egg yolks, of course, means you end up with egg whites that you then have to find a use for.  Sometimes, I just don’t want to deal with that.  And, over time, I have found a few instances where making the ice cream egg-free still yields a creamy and luscious end product.  This dulce de leche ice cream is one of those.

    I make this dulce de leche ice cream often, because it comes together fairly easily and contains ingredients that I almost always have on-hand.  If I have milk or cream that is rapidly approaching its expiration date, ice cream is one of my go-to solutions to this predicament.

    The first thing you need to do is heat your dulce de leche on the stove with the milk.  You want to dissolve the dulce de leche so that it fully incorporates into the ice cream mixture.

    Once all of the dulce de leche has melted, you’re left with a thick, caramel colored mixture.

    Pour this mixture, along with your heavy cream, into a heat-proof bowl.  Add the vanilla extract, and stir to combine.  Cover and refrigerate until the mixture is cold.  You can speed this up by setting your bowl into a larger bowl full of ice, but I usually just let the mixture refrigerate overnight.

    When the mixture is ready, you can freeze it according to the manufacturer’s directions for your ice cream maker, then store it in the freezer until ready to serve.

    A few hours of patience while you wait for it to set will reward you with some smooth, creamy ice cream that is just bursting with dulce de leche flavor in every bite.

    You can buy premade canned dulce de leche, or make your own out of a can of condensed milk.  I haven’t yet tried this with dulce de leche that is made from scratch, but I imagine that it would also work.

    Dulce de Leche Ice Cream

    Ingredients

    • 1 14oz can dulce de leche (about 1 1/3 cups)
    • 1 1/2 cups milk
    • 1 1/2 cups heavy cream
    • 1/4 tsp vanilla extract

    Directions

    In a small saucepan, combine the dulce de leche and the milk.  Cook over medium to medium-low heat, stirring frequently, until the dulce de leche has melted and mixture is uniform and free of clumps.

    Pour mixture into a heat-proof bowl, and gently stir in the cream and vanilla extract.  Cover and refrigerate until very cold, then freeze in your ice cream maker according to manufacturer’s directions.  Transfer ice cream to a freezer-safe container, then freeze until set.

    Makes about 1.5 quarts


  • Mango Madness in July – Part 3 (2016 Chapter)

    Mango Madness in July – Part 3 (2016 Chapter)

    Another year, another Mango Season in South Florida.  This is now my third Mango Madness post, as I did this in 2014 and 2015 with great success.  But for those of you just tuning in, I will fill you in.  During Mango Season, I find myself getting a large quantity of mangoes that I don’t always know what to do with.  I mean, mangoes are great to eat just as-is, but there are only so many you can have.  Plus, it doesn’t take long for them to go from “just right” to overripe, after which the only thing you can really do is puree it and use it somehow.  That was the start of Mango Madness.

    As each year goes by, it gets harder for me to think of things to do with mango that I haven’t done the previous year.  I spent most of May and June fretting about whether Mango Madness would be as good as previous years, as my brain reserves were running low.  But, thanks to Google, feedback from friends and family, and random “Eureka!” moments, I have managed to make the 2016 chapter of Mango Madness just as prolific as the last two!

    So, what are some new things that I made with mango this year?  Check it out!

    mango lassi

    Mango Lassi is a accompaniment to spicy food, or just a healthy pick-me-up at any time of the day.  Plus, since it’s basically just a mango and yogurt smoothie, it’s super easy to make.  Just blend equal parts mango puree and plain yogurt together, then sweeten to taste with honey.  I like to bottle it to take to work.

    20160628_211755

    Take the classic Strawberry Cream Cake and make it a Mango Cream Cake!  Just replace the strawberries with chopped mango and add a little bit of mango puree to the whipped cream.

    20160711_215519

    Mango Pastelitos already have a dedicated blog post here, and they’re worth trying out!

    20160710_195620

    Mango pastry cream is delicious on its own, but also has many uses.  Plus, it’s also a good way to use up a large amount of milk that you may be looking to find a use for.  I used this recipe as a guide, but made a few changes.  I used fresh mango pulp instead of canned, omitted the cardamom and saffron, and used vanilla extract instead of vanilla bean paste.  I also went light on the vanilla so that it didn’t overpower the mango flavor.

    20160711_080402


    With all of that mango pastry cream lying around, I had the idea to make little mango tarts.  But, being too lazy to make tart shells, I went ahead and filled store-bought phyllo cups with the cream, and then topped each “tart” with a fresh raspberry.  Simple AND delicious.

    20160627_214548

    Mango mousse is delicious, refreshing, and only uses four ingredients.  Whip 3/4 cup of heavy cream until soft peaks form.  Add 1 tbsp piping gel, then continue to whip until stuff peaks form.  Fold in 3/4 cup mango puree and 1/4 tsp vanilla extract, pour into serving cups, and refrigerate until set.  Yummy!

    20160625_220632

    Mango Ice Cream Cake!  The name should say it all, but I will elaborate.  It’s a batch of mango ice cream sitting on top of a blondie.  Top with some fresh raspberry sauce, and you’ve got a winning dessert that can be made in advance!

    20160717_161834

    Mango macaron ice cream sandwiches!  Using BraveTart’s macaron recipe, I made mango macaron shells by adding 3/4 oz of freeze dried mango to the macaron batter.  Make some mango ice cream (my favorite recipe is this one) and freeze it in a 13″ x 9″ pan.  Once frozen, cut circles of ice cream about the size of your macaron shells, and sandwich one round of ice cream between two macaron shells.

    20160718_190358

    Replace the peaches in your favorite peach cobbler recipe (I used this one) with mango, and you’ve got yourself a mango cobbler!  Since mango is incredibly sweet, I also reduce the sugar in the fruit filling by half.

    I love Mango Madness because it really challenges me to be creative and think outside of the box sometimes.  Sometimes, it’s even like a race to see how many things I can make before the mangoes go bad.  There are things that I would never have thought to make before that I now wonder how I did without.  But, the stakes are raised for next year.  Will I be able to conjure up some new, mango-centric recipes for next year’s Mango Madness?  I guess I had better start brainstorming now!

    A big thank you to everyone that supplied me with mangoes this year.  As you can see, they were put to good use.  Until next year!

  • Mocha Macaron Ice Cream Sandwiches

    Mocha Macaron Ice Cream Sandwiches

    Skip to Recipe
    Do you ever think that you have a great idea, and then Google it to find out that your idea has been done repeatedly already?  Well, ice cream and macarons are both things that leave me with the same problem.  I made ice cream and am stuck with leftover egg whites after using the yolks for the custard base.  I make macarons, and now I’m stuck with egg yolks that I need to find a use for.  For a while, macarons were the direct result of having recently made ice cream, and vice versa.  Then, it occurs to me “Hey, why not combine the macarons and ice cream TOGETHER!?”  After all, it’s no secret that macaron shells are very freezer-friendly, so being part of a frozen dessert would not diminish the quality of this cookie.  Lo and behold, it had already been done, and there was plenty of online research material to prepare me for my own efforts.  And, after reading up on it, and a few YouTube videos, I finally decided to try it out.  The results were so spectacular that these quickly became one of my most requested desserts.  Chocolate macaron shells are still the only macaron shells that I can get to turn out well a reliably.  So, all of my flavor combinations were always based around a chocolate macaron shell.  To date, one of the favorite combinations among my friends is the chocolate macaron shells with coffee ice cream.  So, mocha!

    I have had many requests for the recipe, and it’s been sitting on the shelf for a while.  Truth be told, I kept making the macaron ice cream sandwiches with the intention of photographing the process for the blog post.  But, I somehow always end up forgetting to take pictures.  Macarons and ice cream are both fairly time-sensitive recipes that require use of both hands, which makes photographing difficult.

    Be warned, these aren’t really something that you can make on a whim or spur of the moment.  This requires some planning, since the ice cream has to be sufficiently set before you can begin.  The good thing is that, since it’s ice cream, you can make it way in advance and plan to make the macarons up to a few days afterwards.  Or, you can use store-bought ice cream, like a chump.  But, you’re not a chump.  You are all about doing everything from scratch, or you wouldn’t even be here, right!?

    So, here we go!  You start by making the ice cream, preferably at least a day in advance.

    138_beattheyolks

    In a small mixing bowl, whisk some egg yolks and sugar until light in color.  Set aside.

    138_heatthecream

    Heat the milk and coffee granules in a saucepan over medium heat.  Once the milk starts to simmer, remove from the heat and slowly add the hot milk mixture to the egg yolk and sugar mixture, about ¼ cup at a time, whisking constantly.  Once about half of the hot liquid had been added to the egg yolks, pour the egg mixture into the saucepan with the remaining milk mixture, whisking the entire time.

    138_cookthecustard

    Return to the stove and continue cooking, whisking constantly, until mixture thickens and coats the back of a spoon.  Pour through a fine mesh strainer (this ensures a perfectly smooth mixture) into a medium bowl with the heavy cream.  Add the vanilla extract and stir until combined.  Cover with plastic wrap and refrigerate until completely chilled.  You can help the ice cream along by putting the bowl into another bowl filled with ice water and stirring the mixture every 30 minutes or so.

    138_icecream

    Once the custard has chilled, freeze in an ice cream maker according to the manufacturer’s instructions.  Pour the frozen ice cream into a 13″ x 9″ lined with aluminum foil (heavy-duty if you have it), cover, then freeze until the ice cream hardens.

    138_macarons

    You can make any chocolate macaron batter that you like, but Chowhound’s recipe has given me great results.  The important thing here is the size of your macaron shells.  Take whatever cookie/biscuit cutter that you are going to use for your ice cream sandwiches and trace out circles on a piece of parchment big enough to fit your baking pan.  I went one step further and made a template sized for my baking pan, then took it to Kinkos to have it printed and laminated to use over and over again.  Considering how often I have been making these, it was definitely a worthwhile investment.  A 2 ¼” circle is a pretty good size for an ice cream sandwich, but you can choose whatever size you wish.  I find that the baking time is the same for ice cream sandwich sized macaron shells as it is for standard sized macaron shells, but do check them for doneness and adjust baking time as needed.

    138_assembly

    When the macaron shells are baked and cooled, you can start assembling your ice cream sandwiches.  Pair up your macaron shells and place them on a tray.  Take your cookie or biscuit cutter and cut a circle of ice cream out of the pan, then place it over a flat side of a macaron shell and top with another macaron shell to form a sandwich.  Repeat the process until you run out of macaron shells, working quickly so that the ice cream doesn’t get too soft to work with.  Scoop the leftover ice cream into an airtight container and store in the freezer.  Or, just eat it right out of the pan.  Your choice.

    138_storage

    Store them in an airtight container and freeze until ready to consume.  I normally let them sit at least overnight, but a few hours should be enough.  I also rarely have any left more than a week or so.

    macaron ice cream sandwiches

    Next stop: heaven.

    It seems like a lot of work, but the hardest part is getting your macarons to come out properly.  If you’ve already mastered macaron-making, then this should be no problem.  Don’t be afraid.  If I can do it, anyone can!

    Mocha Macaron Ice Cream Sandwiches

    Ingredients

    • 1 batch of chocolate macaron batter (recommended recipe here)
    • 2 cups heavy cream
    • 2 cups whole milk
    • 2 heaping tablespoons instant coffee granules
    • 6 egg yolks
    • 3/4 cup granulated sugar
    • 1/2 tsp vanilla extract

    Directions

    In a small mixing bowl, whisk the egg yolks and sugar until the mixture is light in color.  Set aside.

    In a small saucepan, heat the milk and coffee granules over medium heat until the coffee has dissolved and the mixture is about to come to a boil.  Remove from heat and slowly pour the hot milk mixture into the egg yolk mixture, 1/4 cup at a time, whisking constantly.  Once about 1/3 of the mixture has been added, pour the egg yolk mixture into the remaining hot milk mixture in the saucepan.  Make sure you keep stirring!

    Pour the heavy cream into a medium-sized bowl, then return the milk mixture to the heat.  Continue cooking the mixture over medium heat, whisking constantly, until the mixture thickens and coats the back of a spoon.  Remove from heat and pour through a fine mesh strainer into the bowl that contains the cream.  Add the vanilla extract and stir gently until smooth.  Cover and refrigerate until the mixture is cold.

    Remove the bowl with the custard mixture from the refrigerator and freeze the custard according to your ice cream maker’s instructions.  Pour the soft ice cream into a foil lined 13″ x 9″ pan and spread evenly.  Cover and freeze for 4 hours or until the ice cream is firm.

    While the ice cream is freezing, take the macaron batter and transfer it to a piping bag.  Pipe the macaron batter into circles of the size that you wish your ice cream sandwiches to be (I recommend 2 ¼”), then rest and bake according to the recipe’s directions.  Allow to cool completely before beginning the assembly process.

    To assemble the ice cream sandwiches, pair up the macaron shells, then remove the pan of ice cream from the freezer.  Place one macaron per pair flat side up.  Using a biscuit cutter that is the same size as the macaron shells, cut out a round of ice cream.  Place a round of ice cream on the flat side of the macaron shell, then top with the other macaron shell.  Repeat the process until you are either out of macaron shells or out of ice cream, working quickly to keep the ice cream from getting too soft (if this happens, put the pan back in the freezer until the ice cream firms up again).  Transfer the ice cream sandwiches to an airtight container and freeze for 4 hours or until ready to serve.