Category: Pastries

  • Passion Fruit Tart

    Passion Fruit Tart

    Skip to Recipe

    My family will eat just about anything if it’s made with passion fruit. Last year, when the local Latino grocery store chain had a massive sale on fresh passion fruits, I tried my hand at making a passion fruit tart. I used a store-bought refrigerated pie crust and baked it in a tart pan. It was good, but not great.

    Working with dough is not my forte, but I knew that making my own tart crust would make a huge difference in the end result. I wound up finding a great recipe that came together on the first try. After that, it was just a few tweaks to get the right amount of filling to fit a 9-inch tart crust without wasting filling. What I ended up with was a tart that has been a hit with everyone who has tasted it. And so, I am passing the recipe on to my readers.

    You can make this tart dairy-free by using vegan butter in the tart crust and replacing the heavy cream with coconut milk. Make sure that you use the full fat coconut milk. You need that creamy richness to balance out the tartness of the passion fruit.

    Passion Fruit Tart

    Ingredients

    • 1 recipe for 9-inch tart crust (I used this one)
    • 3 eggs, beaten
    • 1/2 cup seedless passion fruit puree (I used frozen, but you can use fresh)
    • 1/2 cup sugar
    • 1/2 cup heavy cream (or full-fat coconut milk)

    Directions

    Prepare the tart crust according to the recipe directions for partially baking the crust.

    While the crust is baking, combine the remaining ingredients in a medium bowl until smooth.

    When the crust is ready, pour the passion fruit mixture into the prepared crust. Return the filled tart pan to the oven.

    Reduce the oven temperature to 325 degrees. Bake the tart for 30 minutes, or until the filling is set. Remove the tart from the oven and allow to cool completely on a wire rack before removing from the tart pan. Refrigerate until ready to serve.

  • Rose Entremets

    Rose Entremets

    Skip to Recipe
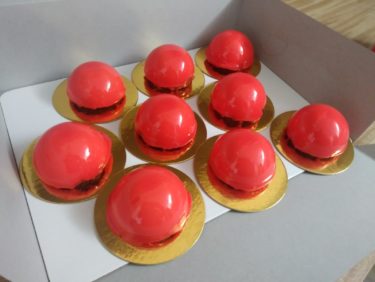
    For this month’s meeting of the South Florida Baking Club, I decided on “Flowers and Chocolate” as the theme.  Basically, your creation should incorporate flowers or chocolate.  Since I’m a little nuts, I decided to do BOTH.  And, before realizing how I had shot myself in the foot with that idea, these Rose Entremets were born.

    The rose entremets are made up of four components: A genoise sponge as the base, bavarian cream, a truffle center, and colored mirror glaze.  As the name implies, the entremets incorporate the flavor of rose in two of the four components.  The bavarian cream is flavored with rose syrup, and the truffle center has rosewater added to it.

    I wasn’t really expecting to post this so soon, so I don’t have pictures of the entire preparation process.  I will try to come back and update when I make these again!

    Once all of your components are prepared, the rose entremets are assembled in half-sphere molds, then frozen until solid so that they can be glazed.

    I highly recommend living the pan under your glazing tray with parchment paper.  It makes for much easier cleanup!

    My mirror glaze turned out a bit less opaque than I would have liked.  I think that I would add some white gel food coloring next time to make it less translucent.

    From start to finish, they took me three weekday evenings to make.  But oh, were people IMPRESSED!  I finally found a use for my gold mini cake circles that have been sitting in my pantry for AGES.

    You could definitely taste the rose, but it wasn’t overpowering.  Rather than tasting like you got smacked in the face with a bouquet, it was more of a subtle floral tone that came in at the end.  I would call these a resounding success!  The subtle rose tone in the creamy bavarian cream balanced out the indulgent and rosy truffle center.

    These are best eaten within a day after assembling, as mirror glaze doesn’t keep well.

    Rose Entremets

    Ingredients

    For the rose truffle:

    • 1/2 cup heavy cream
    • 4oz bittersweet chocolate, chopped
    • 1/4 tsp rose water

    For the chocolate genoise sponge:

    • 3/8 cup all-purpose flour
    • 2 tbsp cocoa powder
    • 3 eggs, at room temperature
    • 1/2 cup sugar
    • 1/2 tsp vanilla extract
    • 2 tbsp butter, melted and cooled slightly

    For the vanilla rose bavarois:

    • 5 egg yolks
    • 1 1/4 cups heavy cream
    • 3/4 cups heavy cream
    • 3 tbsp rose syrup
    • 2 tbsp sugar
    • 1 tbsp gelatin powder
    • 1 tsp vanilla extract

    Additional ingredients/materials

    • 1 batch of mirror glaze (I used this recipe)
    • 1 set of 2 1/2in silicone sphere molds (I used these)
    • 1 set of 1 1/2in silicone sphere mold (I used this one)
    • A 2 1/2 inch diameter cookie or biscuit cutter

    Directions

    Make the rose truffles

    Please the chopped chocolate in a heat-proof bowl.

    Heat the heavy cream in a small saucepan until it’s almost to a boil.  Pour over the chopped chocolate, then stir gently until all of the chocolate has melted and mixture is smooth.  Add the rose extract and stir to combine.

    Divide evenly among the cavities of your smaller sphere mold.  Cover and refrigerate until set.

    Make the Chocolate Genoise

    Preheat oven to 375 degrees.  Line a 13 x 9 inch baking pan with parchment paper.  Sift the flour and cocoa together and set aside.

    Using an electric mixer, beat the eggs, sugar, and vanilla until the mixture quadruples in size and turns pale yellow.  This will take about 5-10 minutes. Gently fold in the melted butter.

    Sift the flour mixture into the egg mixture and gently fold it in until no streaks remain.

    Pour into prepared baking pan and bake for about 15 minutes or until toothpick inserted in the center comes out clean.  Allow to cool completely on a wire rack.

    Make the Vanilla Rose Bavarois

    In a small bowl, bloom the gelatin in the rose syrup.  Set aside.

    In another bowl, whisk the sugar and the egg yolks together and set aside.  Heat the 1 1/4 cups of cream in a small saucepan over medium heat until it starts to simmer.  Remove from heat and very slowly whisk the hot cream mixture into the egg mixture.  Do this a little at a time, or you will scramble the eggs.  Pour the mixture back into the saucepan and return to the heat.  Reduce heat to medium-low and continue to cook, whisking constantly, until the mixture thickly coats the back of a spoon.  Remove from heat.

    Melt the gelatin mixture in the microwave by microwaving in 10-second intervals until all of the gelatin is dissolved.  Pour gelatin mixture into the cream mixture, then stir in vanilla.  Strain into a bowl using a fine mesh strainer, then let mixture cool to room temperature (place it over an ice bath to speed up the process).

    Whip the 3/4 cup of cream until it reaches stiff peaks.  Fold the whipped cream into the custard mixture.

    Assemble the entremets

    Fill each cavity of the large half-sphere molds about halfway with bavarois.  Place one truffle dome, flat side up, in the center of each.  Cut 12 rounds of chocolate genoise sponge and place one disk in each cavity.  Press it down gently to get it as flush with the tops of the cavities as possible.  Cover and freeze until solid.

    *Note: You will likely have Bavarois and truffle left over I poured the extra into small glasses and served as Bavarian Cream desserts.

    Glaze the entremets

    Place your frozen entremets on a wire rack with a parchment-lined baking sheet underneath.  Pour the prepared mirror glaze over each entremet, slowly and evenly so that it produces an even coat.  Cover and refrigerate until ready to serve.

    Makes 12 entremets

  • Mango Creme Brulee Donuts

    Mango Creme Brulee Donuts

    Skip to Recipe
    I know that I am usually done with the mango recipe posts by now, but these mango creme brulee donuts just couldn’t wait until next year!

    Mango-filled donuts had been on my list of things to try during Mango Madness since last year.  I simply ran out of time (and mangoes) when I finally felt like I was ready to give it a shot.  Fast forward to this year, and the mangoes were coming so quickly that I really had no excuse NOT to try making donuts.  I’m a lazy baker, so of course I made my donuts dough in the bread machine.  Still, the combination of a fluffy fried dough, creamy mango filling, and crunchy burnt sugar crust made the mango creme brulee donuts an instant hit among my friends.

    I was so proud of how these mango creme brulee donuts turned out that I entered them in the mango dessert competition at the South Beach Mango Festival.  Sadly, I didn’t win the contest, but I did get props and handshakes from some of the event organizers and guest chefs.  I’d still call that a win!  And, because I have such a warm reception wherever I bring these donuts, I think that this recipe is worth passing along.

    The first part is pretty straightforward.  I made the dough in the bread machine, rolled it out on a floured surface when it was ready, then cut out my donut circles using a biscuit cutter.  Let them rise in a warm place until they double in size.  That will take about 45 minutes.

    Preheat the oil in your deep fryer (or your preferred stovetop frying vessel) until it reaches 375 degrees.  Fry 3 or 4 donuts at a time for 35-40 seconds per side.  They should be puffy and golden.  Drain them on a wire rack (I also blot them with paper towels afterwards).  After that, allow them to cool completely.

    After they have cooled, use a pastry bag fitted with a pastry filling tip to fill your donuts with the mango pastry cream.  Then, spoon a layer of sugar over each donut and use a kitchen torch to heat the sugar until it liquefies and melts.  I usually do about 3 layers of sugar so that the donuts have a thick layer of sugar crunch.

    Homemade donuts are best eaten the same day that they are made.  I have been told, however, that these donuts are still tasty and fluffy after a day in the refrigerator.  They rarely last that long, though.

    Mango Creme Brulee Donuts

    Ingredients

    • 1 1/4 cups warm milk
    • 2 1/4 tsp (1 package) bread machine yeast
    • 2 eggs
    • 1/2 cup butter, melted and cooled slightly
    • 1/4 cup granulated sugar, plus more for torching
    • 1 tsp salt
    • 4 1/4 cups bread flour
    • 1 recipe batch of Mango Pastry Cream
    • Oil for frying

    Directions

    Add all of the ingredients except for the pastry cream and the frying oil to the pan of your bread machine according to the manufacturer’s directions.  Set the machine to the Dough cycle and allow to run.

    When the Dough cycle is complete, turn the dough out onto a lightly floured surface.  Roll the dough out to about 1/2 inch thickness.  Cut circles out of the dough using a 2 2/4 inch biscuit cutter.  Transfer circles to a baking sheet, leaving space for the dough to rise.  Cover and allow to rise in a warm place until they are doubled in size, about 45 minutes.

    Just before the donuts have completed their second rise, preheat your frying oil in a deep fryer (or the stove-top frying vessel of your choice) to 375 degrees F.  Fry the donuts, 3 or 4 at a time (depending on the size of your frying vessel).  Allow to cool on a wire rack, then blot on paper towels to remove excess oil.

    Using a pastry bag fitted with a filling tip, fill the donuts with mango pastry cream.  Set the filled donuts on a wire rack over a baking sheet.  Top the donuts with sugar, then use a kitchen torch to melt the sugar until the donut is coated in an amber glaze.  Repeat 2 or 3 more times until the sugar coating is the desired thickness.  Allow the donuts to rest for at least 10 minutes before serving.

  • Pumpkin and Cheese Pastries (Pastelitos)

    Pumpkin and Cheese Pastries (Pastelitos)

    Skip to Recipe

    Pumpkin and cheese (cream cheese, to be specific) is one of those combinations that sounds weird if you have never tried it, but works incredibly well.  So, pumpkin and cheese pastries (or pastelitos, as we call them down my way) seemed like a win for me.  Lightly sweetened pumpkin puree and soft cream cheese wrapped in flaky puff pastry…what could be wrong with that?

    I got the idea when I had some canned pumpkin left over from making pumpkin oatmeal and didn’t really know what to do with it.  Thankfully, I also had a few boxes of puff pastry sitting in the freezer from when I stocked up during a sale, so it wasn’t difficult to come up with a plan that incorporated both.

    You will need defrosted the pastry dough.  If you are making your own puff pastry, then more power to you.  I am not on that level yet.

    Prep your filling and your egg wash.  Combine your pumpkin puree, brown sugar, cinnamon, and nutmeg together.  Then, crack an egg into a small bowl and beat, then pour half of the beaten egg into your pumpkin mixture.  Save the other half for your egg wash.

    Unfold each piece of defrosted puff pastry and cut into 9 equal pieces.  I used a pizza cutter for that part.  Then, cut small pieces of cream cheese and place some in 9 of the squares and top with a spoonful of the pumpkin mixture.  Using a pastry brush, moisten the outer edges of the filled squares with egg wash, then top with an unfilled square of dough.  Gently press down around the edges to seal the dough.  Repeat until you have 9 filled squares of pastry.  Then, place on a baking sheet and brush with remaining egg wash.  You can also sprinkle with sugar, if you want.

    Bake them at 350º until they are puffy and golden on the outside, about 30-35 minutes.  Let them cool for at least 15-20 minutes before you attempt to consume, as the filling will be HOT.

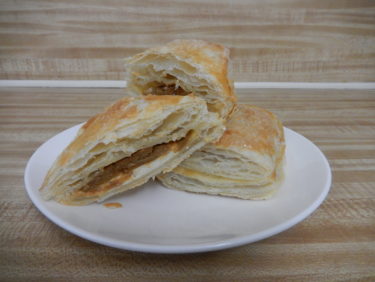
    Plated pumpkin and cheese pastries

    Using a small amount of egg as a binder ensures that you have a somewhat custard-like filling in your pumpkin and cheese pastries, instead of a mess of pumpkin oozing out.  Store any leftovers in an airtight container.  These are best served warm.  I like to heat mine up in my toaster oven the next day, but you can also eat them at room temperature if you’re not as patient as I am.

    Pumpkin and Cheese Pastries (Pastelitos)

    Ingredients

    • 1 17oz package frozen puff pastry, thawed
    • 1 cup pumpkin puree
    • 3 tbsp brown sugar
    • 1/4 tsp cinnamon
    • a pinch of nutmeg
    • 4-6 oz cream cheese, cold
    • 1 egg, beaten
    • granulated sugar (optional)

    Directions

    Preheat oven to 350º.  Line a large baking sheet with parchment paper.  Mix pumpkin, brown sugar, cinnamon, and nutmeg together in a small bowl.  Add half of the beaten egg and mix until combined.  Set aside.

    On a silicone mat or lightly floured surface, gently unfold both sheets of pastry dough and cut into 18 equal squares (9 squares per sheet).

    Cut small rectangles of cream cheese and place in the center of 9 of the dough squares.  Top with the pumpkin mixture, then use a pastry brush to brush some of the remaining egg mixture around the edges of the filled dough squares.  Top with an unfilled dough square, pressing gently to seal.  Set finished squares on prepared baking sheet and brush with leftover beaten egg.  Sprinkle with sugar, if desired.

    Bake in preheated oven for 30-35 minutes, or until tops are golden brown.  Allow to cool 15-20 minutes before eating, and cool completely on a wire rack before storing.

    Makes 9 servings.


  • Dulce de Leche Pastelitos

    Dulce de Leche Pastelitos

    Skip to Recipe
    Ever since a recent experience using puff pastry, I have been dying to find another use for it.  The problem is, I’m not a particularly big fan of cooked fruit fillings, as evidenced by the lack of fruit pies and the like on my blog.  I kept wondering what I could put in the puff pastry, until it dawned on me one day.  It probably helped that it was around the time that I come upon a giant, Costco-sized jar of dulce de leche, but it’s still amazing that it took me that long to think of it.  After all, dulce de leche is exceptionally sweet, which is perfect for a crust like puff pastry that is not too sweet.  The flavors balance each other out perfectly.  You can even add semisweet chocolate chips to the filling for an added twist.  Best of all, they’re super easy to make!  Unless you’re going to make your puff pastry and dulce de leche from scratch, that is.  Otherwise, what takes the longest is waiting for the frozen puff pastry to thaw.

    assembly

    Start by thawing your puff pastry.  Once it’s thawed, open it up into flat squares and cut each square into 9 pieces so that you have 18 squares total.  Add a spoonful of dulce de leche into 9 of the squares (add some chocolate chips if you want, as well).  Brush the outer edges with beaten egg, then place a second square on top and press firmly (but gently) to seal.  Brush the tops with additional beaten egg, then sprinkle with sugar.

    dscn4094

    Afterwards, they go into the oven!

    dscn4100

    Despite how delicious they look, resist the urge to immediately bite into one of these.  The filling is HOT.  Like, “burn your face” hot.  “Molten lava volcanic eruption” hot.  It will hurt you.  You will burn your tongue and it will take some of the enjoyment away from eating it.  Let them sit at least 20 minutes before you brave an attempt at eating one.  Take it from someone who had to rub an ice cube on her tongue (but ate it anyway).

    dscn4109

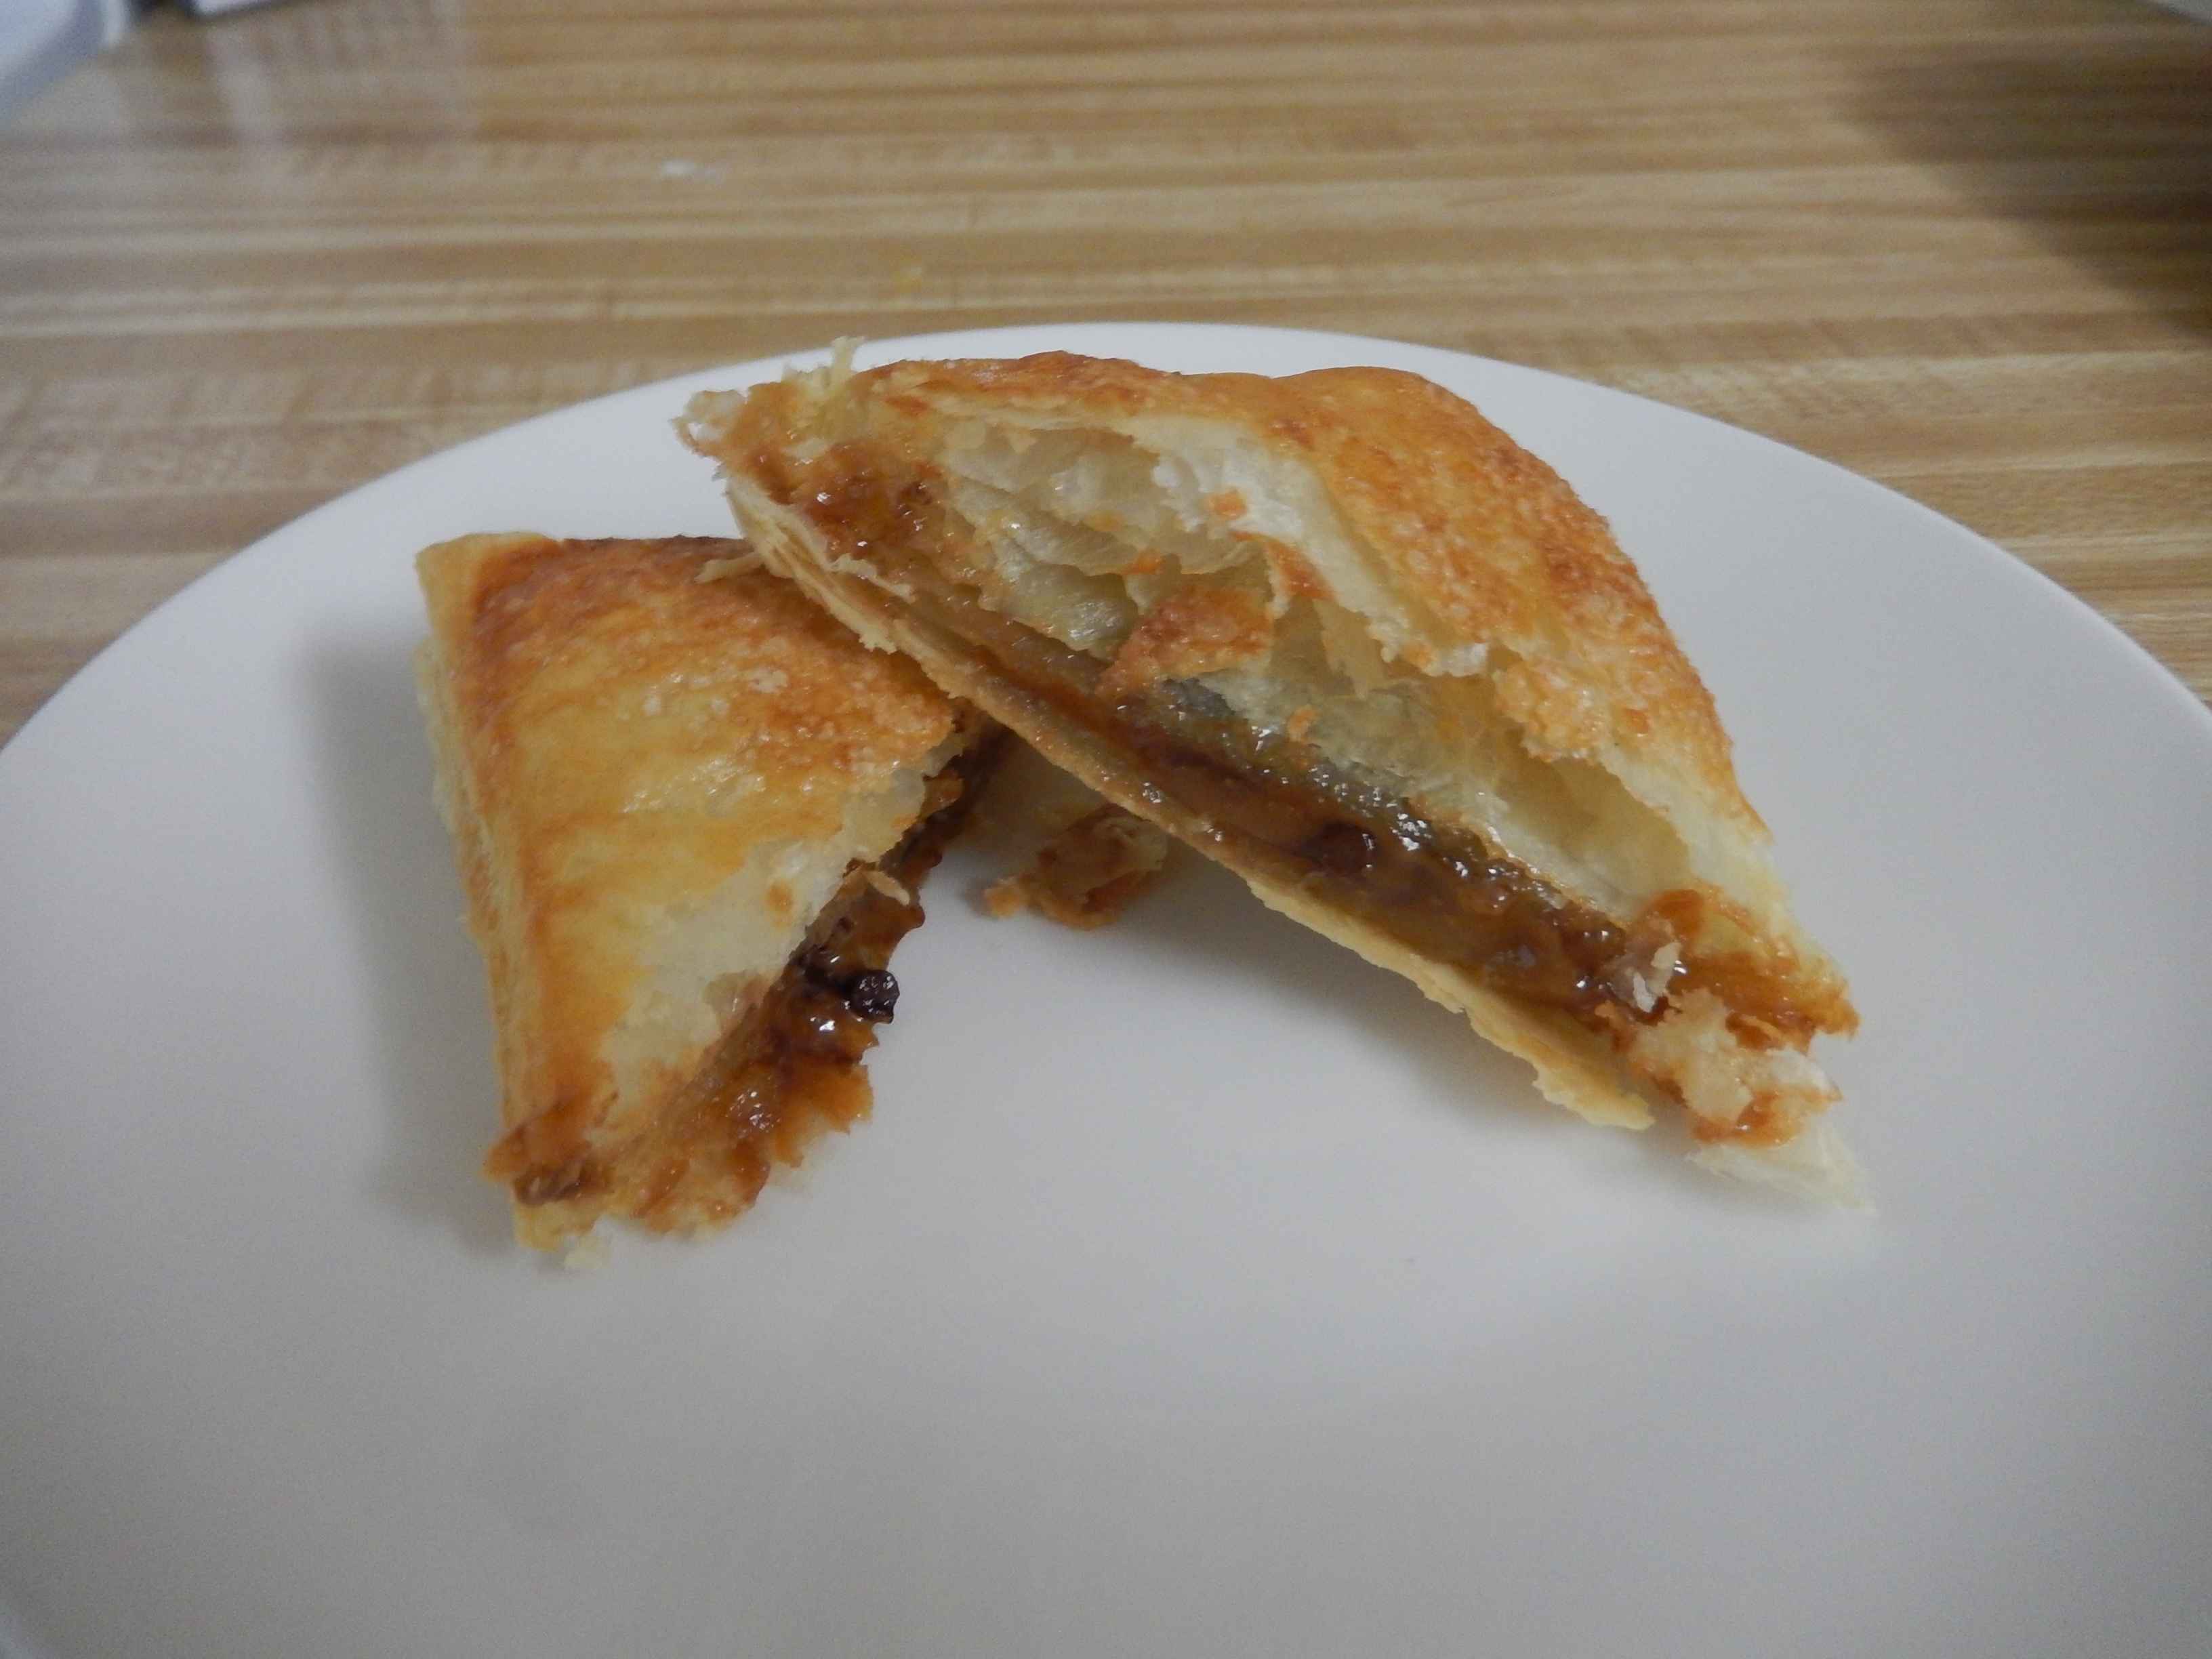
    But…I promise you that it will be worth the wait.  🙂  The warm, gooey, dulce de leche delight in each flaky bite of these dulce de leche pastelitos will leave you wanting more.

    Dulce de Leche Pastelitos

    Ingredients

    • 1 package puff pastry sheets, thawed
    • 3/4 cup dulce de leche
    • 1 egg, beaten
    • 1-2 tbsp granulated sugar
    • mini chocolate chips (optional)

    Directions

    Preheat oven to 350°.  Line a large baking sheet with parchment paper.

    Lay the puff pastry sheets out on a solid surface.  Cut each sheet into 9 equal squares so that you’re left with 18 squares.  Add a spoonful of dulce de leche to the center of each square, then sprinkle with chocolate chips (if using).

    Brush the edges of each filled square with beaten egg, then top with another square of pastry sheet.  Gently press down to seal.  Brush the tops with the remaining beaten egg, then sprinkle with sugar.

    Bake in preheated oven for 25-30 minutes, or until golden brown.  Allow to cool on a wire rack for at least 20 minutes before consuming.  Store leftover dulce de leche pastelitos in an airtight container after completely cooled.

  • Mango Madness in July – Part 3 (2016 Chapter)

    Mango Madness in July – Part 3 (2016 Chapter)

    Another year, another Mango Season in South Florida.  This is now my third Mango Madness post, as I did this in 2014 and 2015 with great success.  But for those of you just tuning in, I will fill you in.  During Mango Season, I find myself getting a large quantity of mangoes that I don’t always know what to do with.  I mean, mangoes are great to eat just as-is, but there are only so many you can have.  Plus, it doesn’t take long for them to go from “just right” to overripe, after which the only thing you can really do is puree it and use it somehow.  That was the start of Mango Madness.

    As each year goes by, it gets harder for me to think of things to do with mango that I haven’t done the previous year.  I spent most of May and June fretting about whether Mango Madness would be as good as previous years, as my brain reserves were running low.  But, thanks to Google, feedback from friends and family, and random “Eureka!” moments, I have managed to make the 2016 chapter of Mango Madness just as prolific as the last two!

    So, what are some new things that I made with mango this year?  Check it out!

    mango lassi

    Mango Lassi is a accompaniment to spicy food, or just a healthy pick-me-up at any time of the day.  Plus, since it’s basically just a mango and yogurt smoothie, it’s super easy to make.  Just blend equal parts mango puree and plain yogurt together, then sweeten to taste with honey.  I like to bottle it to take to work.

    20160628_211755

    Take the classic Strawberry Cream Cake and make it a Mango Cream Cake!  Just replace the strawberries with chopped mango and add a little bit of mango puree to the whipped cream.

    20160711_215519

    Mango Pastelitos already have a dedicated blog post here, and they’re worth trying out!

    20160710_195620

    Mango pastry cream is delicious on its own, but also has many uses.  Plus, it’s also a good way to use up a large amount of milk that you may be looking to find a use for.  I used this recipe as a guide, but made a few changes.  I used fresh mango pulp instead of canned, omitted the cardamom and saffron, and used vanilla extract instead of vanilla bean paste.  I also went light on the vanilla so that it didn’t overpower the mango flavor.

    20160711_080402


    With all of that mango pastry cream lying around, I had the idea to make little mango tarts.  But, being too lazy to make tart shells, I went ahead and filled store-bought phyllo cups with the cream, and then topped each “tart” with a fresh raspberry.  Simple AND delicious.

    20160627_214548

    Mango mousse is delicious, refreshing, and only uses four ingredients.  Whip 3/4 cup of heavy cream until soft peaks form.  Add 1 tbsp piping gel, then continue to whip until stuff peaks form.  Fold in 3/4 cup mango puree and 1/4 tsp vanilla extract, pour into serving cups, and refrigerate until set.  Yummy!

    20160625_220632

    Mango Ice Cream Cake!  The name should say it all, but I will elaborate.  It’s a batch of mango ice cream sitting on top of a blondie.  Top with some fresh raspberry sauce, and you’ve got a winning dessert that can be made in advance!

    20160717_161834

    Mango macaron ice cream sandwiches!  Using BraveTart’s macaron recipe, I made mango macaron shells by adding 3/4 oz of freeze dried mango to the macaron batter.  Make some mango ice cream (my favorite recipe is this one) and freeze it in a 13″ x 9″ pan.  Once frozen, cut circles of ice cream about the size of your macaron shells, and sandwich one round of ice cream between two macaron shells.

    20160718_190358

    Replace the peaches in your favorite peach cobbler recipe (I used this one) with mango, and you’ve got yourself a mango cobbler!  Since mango is incredibly sweet, I also reduce the sugar in the fruit filling by half.

    I love Mango Madness because it really challenges me to be creative and think outside of the box sometimes.  Sometimes, it’s even like a race to see how many things I can make before the mangoes go bad.  There are things that I would never have thought to make before that I now wonder how I did without.  But, the stakes are raised for next year.  Will I be able to conjure up some new, mango-centric recipes for next year’s Mango Madness?  I guess I had better start brainstorming now!

    A big thank you to everyone that supplied me with mangoes this year.  As you can see, they were put to good use.  Until next year!

  • Mango and Cheese Pastries (Pastelitos)

    Mango and Cheese Pastries (Pastelitos)

    Skip to Recipe
    This is my third Mango Season working in a place that affords me access to a large supply of mangoes during this time of the year in Miami.  I had been racking my brain for ideas on what to make with mango that I had never made before, and my brain reserves were getting low.  Then, during a conversation with one of my sisters, she asks “Why not make mango pastelitos?”  Mango pastries!?  My head exploded.

    For those of you that are not “in the know,” a pastelito is a Cuban pastry that is typically made with puff-pastry type of dough and can be filled with sweet or savory fillings.  Pretty much any Latin bakery or cafeteria worth its salt in South Florida will sell them, so it’s completely mind-boggling as to why it never even occurred to me to try a mango spin on these popular treats.  The most popular fillings are guava, guava and cheese, cheese, and ground beef.  My absolute favorite is the guava and cheese, which is the one that inspired this recipe.  Since guava is super-sweet, just like mango, it seemed to make sense to just swap out the guava with mango.  It sounded crazy at first, but it WORKED.  The sweetness of the mango was offset by the cream cheese, which also gave a creamy richness to complement the buttery flakiness of the puff pastry.  Best of all, they’re super-easy to make.

    20160710_182843

    Start by cooking some diced mango with brown sugar and a little bit of lemon juice.  Simmer the mango mixture for 25-30 minutes, until the liquid thickens and becomes syrupy in consistency.  Remove from the heat and allow to cool completely.  You can even make this a day or two ahead of time and refrigerate until ready to use.

    20160710_200814

    After that, the only other things you need are some puff pastry and a brick of cream cheese.  Make your life easier by using cold cream cheese.

    20160710_204734

    Defrost the puff pastry per the package directions.  Lay the sheets of puff pastry out on your pan lined with parchment, a baking mat, or a floured surface.  Cut each sheet it into thirds, then add three small pieces of cream cheese evenly spaced apart on 3 of the thirds.  Leave room around the sides to close the pastry.

    20160710_204910

    Add a spoonful of mango filling on top of each piece of cream cheese.  If you didn’t cook your mango filling long enough, you might get some runoff.  Don’t worry, it won’t impact the pastries much.  Brush the edges and between the filling with egg wash or water.

    20160710_205201

    Place the other three pieces of puff pastry over the ones that have the filling.

    20160710_205545

    Cut them into squares and pinch them closed.  The egg wash should help the tops and bottoms stick together.  Brush them with additional egg wash or simple syrup, if desired.

    20160710_205719

    Then, into a preheated oven they go!

    20160710_212711

    Please resist the urge to dig in as soon as they come out of the oven.  The filling is HOT, and you might hurt yourself.  They do taste best when they are warm, though.

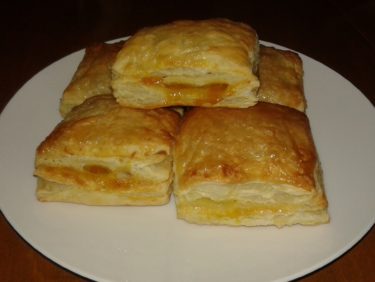
    mango pastries

    Simple, right?  But, so delicious.  These pastries just scream “Miami” in so many ways.  The recipe for the mango filling makes enough to fill about 27 pastries, so scale up or down accordingly.  You can easily find other uses for any leftover filling, but I bet you’ll simply wind up making more pastries once these disappear in mere moments.  I bet it would be great on pancakes or waffles, too.

    Mango and Cheese Pastries (Pastelitos de Mango y Queso)

    Ingredients

    For the Mango Filling:

    • 2 1/2 cups mango, diced small
    • 1/4 cup light brown sugar
    • 1/2 tsp lemon juice

    For the pastries:

    • 1 package frozen puff pastry sheets, thawed
    • 4oz cream cheese, cold
    • Egg wash (optional)

    Directions

    Make the mango filling:

    In a small saucepan, heat mango, brown sugar, and lemon juice over medium to medium-high heat until mixture is about to boil.  Reduce heat and simmer for 25-30 minutes, or until the liquid has thickened to a syrupy consistency.

    Remove from heat and allow to cool completely before using.

    Make the pastries:

    Preheat oven to 350°.  Line a large baking sheet with parchment paper.

    Lay out the puff pastry sheets on a flat, nonstick surface and cut each sheet into thirds.  Set three of the thirds aside.

    Cut small rectangles of cream cheese and add three to each third of puff pastry sheet, spacing them out evenly on the strip and leaving room around the edges of the dough.  Add a spoonful of mango on top of each piece of cream cheese.

    Brush the edges of dough and between each mound of filling with egg wash or water, then top with the remaining 3 sheets of puff pastry dough.  Cut each strip into thirds so that one mound of filling is at the center of each square, then pinch the sides down to seal.  Place the squares on the baking sheet lined with parchment, leaving space between the pastries.  Brush the tops with additional egg wash or simple syrup.

    Bake for 25-30 minutes, or until golden brown.  Remove from oven and allow to cool at least 20 minutes before eating.  Any leftover mango pastries can be stored in an airtight container after they cool completely.

    Makes 9 pastries