Category: Desserts

  • Pressure Cooker Mango Creme Brulee

    Pressure Cooker Mango Creme Brulee

    Skip to Recipe

    Mango creme brulee is a Mango Madness staple, and I have been making it since I first started experimenting with mango a few years ago.  Since I was getting so many mangoes anyway, I decided to try adapting the recipe to make in my Instant Pot electric pressure cooker.  It took a few tries, but I was able to get a smooth and creamy mango creme brulee!  You still need to do all of the stovetop work, but cooking them in a pressure cooker takes the guess work out of getting the perfect texture.

    Put your egg yolks in a measuring cup or small mixing bowl, then whisk them and set them aside.  Heat your cream, sugar, and mango chunks over medium to medium high heat.  As the cream heats, you will notice that it will start to change color as the mango releases juices into the cream.  When the cream starts to simmer, using a potato masher (or a fork, if you don’t have one) to gently mash the cooked mango so that it releases a little bit more flavor into the cream.  Then, remove the mango chunks using a slotted spoon and discard them.  Remove the cream from the heat and get your egg yolks ready.

    Temper the egg yolks by gradually adding some of the hot cream mixture into the yolks.   When you have incorporated about a third of the hot cream mixture into the yolks, whisk them into the pot with the rest of the cream mixture.  Strain the mixture into a heat-proof bowl, stir in the vanilla, then divide it evenly among 6 4oz custard cups.  Cover them with foil and arrange them in two layers in the liner of your pressure cooker (filled with 1 cup of water at the bottom).  Cover, seal, and cook on Manual (High Pressure) for  minute, and then allow the pressure to release naturally for 10 minutes before you release any remaining pressure.

    Remove the custards, uncover them, and allow them to cool completely on a wire rack.  When they’re cool, cover them and refrigerate for at least 4 hours or up to 3 days.

    When you are about to serve them, sprinkle about 1 teaspoon of sugar over the surface of the custard.  Tilt the custard cup around to make sure that the entire surface is covered, then use a torch to melt the sugar on the surface of the creme brulee until it bubbles and turns amber.  Let the custards cool for at least 5 minutes before you dig in.

    This is a great dessert if you want to impress!  Smooth, creamy, with just the right touch of mango flavor.

    Pressure Cooker Mango Creme Brulee

    Ingredients

    • 2 cups heavy cream
    • 2 cups fresh mango slices
    • 6 tbsp sugar, plus more for torching
    • 4 egg yolks
    • 1/2 tsp vanilla extract

    Directions

    Pour 1 cup of water into the liner of your pressure cooker.  Whisk your egg yolks in a heat-proof measuring cup or small bowl and set aside.

    Heat the cream, mango, and sugar in a saucepan over medium heat.  When the cream mixture is just about to simmer, lightly mash the mango, then allow the mixture to simmer for about 5 minutes (do not boil).  Remove from heat and use a slotted spoon to scoop out the mango pieces and discard them.

    Slowly add the hot cream mixture to your egg yolks, 1-2 tablespoons at a time, whisking constantly.  Once about 1/3 of the cream mixture has been added to the eggs, incorporate the egg mixture into the remaining hot cream mixture.  Strain using a fine mesh strainer, then stir in the vanilla.

    Divide the mixture equally among 6 4oz ramekins.  Cover with foil, then arrange in two layers on trivets in the pressure cooker.  Cover, seal, and cook on Manual (High Pressure) for 1 minute, and then allow the pressure to release naturally for 10 minutes.  Remove custards from pressure cooker and allow to cool completely on a wire rack, then cover and refrigerate for at least 4 hours.

    To serve, sprinkle a thin layer of sugar over the top of each custard, then use a kitchen torch to melt the sugar until it browns and forms a crispy top.  Allow the creme brulee to sit for 5 minutes after melting the sugar, then enjoy.

    Makes 6 servings

  • Mango Ice Cream (Egg-Free)

    Mango Ice Cream (Egg-Free)

    Skip to Recipe
    Mango Season is on FIRE, and the season just getting started.  My usual mango suppliers have been extra generous with me this season, and I make sure that their mangoes do not go to waste.   Some of the fruits get eaten as-is.  Other mangoes get sliced or chopped and used in cakes and fillings.  I puree and strain those that are too far gone to slice, but not far enough to go in the trash.  Then, I use that mango puree in all sorts of ways.  This is where mango ice cream comes in.

    When I first started Mango Madness, I always made mango ice cream using a custard-base.  This guaranteed the smooth and creamy consistency that I love in my ice creams.  Recently, I read somewhere that you can achieve that same creamy texture by making ice cream with condensed milk.  Something about the condensed milk mimics the properties of a custard base, which ensures a smooth and creamy product without ever turning on your stove.  The ice cream base comes together in a matter of minutes, and mangoes that would have otherwise gone ignored are reborn as a delicious mango ice cream!

    Smooth, creamy, refreshing mango ice cream.  And, with very little effort!  As the Barefoot Contessa would say, “How bad can that be?”

    And so, there you have it.  Be advised, though, that homemade ice cream doesn’t last as long as store-bought.  So, eat it fast.  Otherwise, it can get freezer burn.

    Mango Ice Cream (Egg Free)

    Ingredients

    • 1 1/2 cups heavy cream
    • 1 1/2 cups strained mango puree
    • 1 can sweetened condensed milk
    • 1/2 tsp vanilla extract

    Directions

    In a medium bowl, gently stir all of the ingredients together.  Cover and refrigerate until very cold.

    When cold, freeze in your ice cream maker according to the manufacturer’s directions.  Store the mango ice cream in a freezer-safe container.

    Makes about 1 1/2 quarts

  • Pressure Cooker Mango Key Lime Pie

    Pressure Cooker Mango Key Lime Pie

    Skip to Recipe
    It has been raining nonstop here in South Florida for the past 2 weeks or so.  The upside to this rain is that it has been knocking the mangoes out of trees prematurely, which means that mango season has started a little early this year.  My friends and my coworkers have all been generous with their stashes, so mangoes haven’t been in short supply for me.  One particular coworker and I have a verbal agreement where he will let me have first pick of his surplus mangoes every season as long as he gets a mango key lime pie.  Of course, I always deliver.  This year, though, I decided to try making it in my Instant Pot.  It was a smashing success, so I decided to share.

    Mix your crust ingredients and press them into the bottom and halfway up the sides of a greased 7-inch springform pan, then set aside.  If you’d like, you can line the bottom with parchment paper to make it easier to get out of the pan.  I also like to bake my crust for about 5 minutes in the oven at 350, but that is totally optional.  Whisk the rest of your ingredients together in a small mixing bowl, and then pour the mixture into your prepared crust.  Cover the pan with foil, place it on a trivet, and lower it into your pressure cooker liner (filled with 1 cup of water).  Cover, seal, and cook on Manual (High Pressure) for 10 minutes.  When the time is up, allow the pressure to release naturally for an additional 10 minutes before you release the remaining pressure.  Remove your pan and uncover.  The top should be shiny with no jiggle.

    Let the pie cool completely in the pan, then cover and refrigerate it for at least 4 hours before you serve it.

    Maybe you can make your crust look prettier than mine, eh?

    Serving a pie cooked in a springform pan is actually easier than serving it in a traditional pie pan.  There is a lot less hassle when digging your spatula underneath a slice.  You can’t make as big a pie, though, so choose who to share with wisely.

    Pressure Cooker Mango Key Lime Pie

    Ingredients

    • 1 cup graham cracker crumbs
    • 1 tbsp sugar
    • 3 tbsp butter, melted
    • 1 can sweetened condensed milk
    • 1/3 cup key lime juice (or use 1/4 cup if you like it less tart)
    • 1/4 cup mango puree
    • 1 egg
    • 1 egg yolk

    Directions

    Grease a 7-inch springform pan and line the bottom with parchment paper (if desired).  Pour 1 cup of water into the liner of your pressure cooker.

    Combine the graham cracker crumbs, sugar, and melted butter, then press onto the bottom and halfway up the sides of your prepared pan.  Set aside (you can also bake at 350 for about 5 minutes prior to filling).

    Whisk the remaining ingredients together in a small mixing bowl, then pour into your prepared crust.  Cover with foil and place on a trivet in the liner of your pressure cooker.

    Cover, seal, and cook on Manual (High Pressure) for 10 minutes, then allow the pressure to release naturally for an additional 10 minutes before releasing the remaining pressure.  Remove pie from pressure cooker, uncover, and allow to cool completely.  Refrigerate for at least 4 hours before serving.

    Makes about 8 servings.

  • Caramel Ice Cream

    Caramel Ice Cream

    Skip to Recipe
    A friend of mine once told me the difference between a “cook” and a “chef.”  To her, a “cook” follows recipes and a “chef” can tweak and adjust a recipe to create something new.  I thought of those words when I came up with this caramel ice cream recipe.  Truth be told, the idea came to me one day while I was making some burnt caramel custards.  As I was heating the cream on the stove, I thought to myself, “what if I added milk and threw this in the ice cream maker?”  And, one day, I did just that.  The rest is history.

    As with most of my ice cream recipes, this caramel ice cream starts with making custard using egg yolks.  I find that custard-based ice creams are richer and creamier than their egg-free cousins.

    Place your egg yolks in a mixing bowl and whisk until smooth, then set aside.  Heat your cream in a small saucepan with half a vanilla bean (split and seeds scraped) until it starts to simmer.  Reduce the heat and let keep warm while you melt the sugar.

    Place your sugar in a heavy-bottomed saucepan and cook over medium heat until the sugar melts and turns deep amber.  Remove it from the heat and pour in the warm cream, a little bit at a time.  The mixture will steam and possibly splatter, so use caution.  At this point, you will likely still have some clumps of hardened sugar in your mixture.  If this happens, return the pot to the heat and reduce the heat to medium-low, stirring the mixture gently until no clumps of hardened sugar remain.

    When that is done, remove the pot from the heat again and stir the hot cream mixture into your whisked egg yolks, a little bit at a time.  Once about 1/3 of the cream mixture has been added to the yolks, pour the yolk  mixture into the pan with the remaining cream mixture.

    Return to the heat and cook on medium to medium-low, whisking constantly, until the mixture thickens and coats the back of a spoon.  Do not let the mixture come to a boil!  While this cooks, pour your milk into a medium bowl and set a strainer over it.  When the custard mixture is done, remove it from the heat and slowly pour it through the strainer into the bowl with the milk.  Do not do this too fast, or you might make the milk curdle.

    Cover this mixture and refrigerate for 4 hours or until the mixture is sufficiently chilled.  I usually leave it overnight.  When ready, freeze the mixture in your ice cream maker according to the manufacturer’s directions, then transfer to a freezer-safe container and freeze until firm.

    This ice cream tastes great on its own, but also works great with all sorts of toppings.  Try chocolate sauce or candied peanuts.

    Caramel Ice Cream

    Ingredients

    • 2 cups heavy cream
    • 2 cups milk
    • 1 cup granulated sugar
    • 6 egg yolks
    • 1 vanilla bean, split and seeds scraped (or 2 tsp vanilla extract)

    Directions

    In a small saucepan, heat the cream and vanilla bean over Medium heat until the cream starts to come to a simmer.  Reduce heat to Low to keep warm.  Whisk egg yolks in a small mixing bowl and set aside.

    In a medium saucepan, heat the sugar over Medium heat until the sugar melts and turns a deep amber color.  Remove from heat, then take the hot cream mixture, remove the vanilla bean, and slowly pour into the melted sugar mixture.  Careful, as the mixture might splatter.  If clumps of hardened caramel remain, return mixture to heat (reduce to medium-low) and stir until the mixture is smooth and no clumps remain.  While this cooks, pour the milk into a medium bowl and set a fine mesh strainer over it.

    Remove the mixture from the heat and whisk into the egg yolks, a little bit at a time.  When about 1/3 of the mixture has been added to the yolks, add the yolk mixture to the saucepan.  Return to the heat and cook on medium to medium-low, whisking constantly, until the mixture thickens and coats the back of a spoon.  Slowly strain the mixture into the bowl with the milk (not too fast, or the milk might curdle).  Cover and refrigerate until completely chilled (usually takes about 4 hours).  When ready, freeze the ice cream according to the manufacturer’s directions for your ice cream maker.  Transfer the caramel ice cream to a freezer-safe container and freeze until firm.

    Makes about 1 1/2 quarts.

  • Caramel Apple Slab Pie

    Caramel Apple Slab Pie

    Skip to Recipe
    I have a lot of “rules” when it comes to food.  I think that most of us do.  I guess that you can also call them “preferences,” but I a pretty solid set of guidelines for what I will and will not eat.  For the most part, cooked fruit is on the “will not eat” list, but there are exceptions.  I won’t eat cooked berries in a pie, but I might eat them in a sauce over cheesecake.  Cooked apples are on my “no” list, except when the dessert also includes caramel.  And, most fruit pies in general are off the table because the crust (which is the best part for me) is simply there to hold a mountain of hot fruit mush.  This is one of the many reasons why this caramel apple slab pie caught my attention.  Not only did it meet one of my exceptions (cooked apples are paired with caramel), but the apples are not piled high on a crust.  This makes the fruit to crust ratio more even, and a LOT more appealing to me.  I say this as the person that scoops out most of the apples in an apple pie or turnover so that she gets more crust.

    Until recently, I didn’t even know that slab pies existed.  But, they are a novel idea.  They are great for potlucks, easier to cut and serve, and the leftovers are usually easier to store.  This caramel apple slab pie was a collaboration between myself and a few of my friends.  It is basically exactly what it says it is.  You get some chopped spiced apples and pour them into a crust-covered sheet pan, sprinkle with crumb topping, then drizzle with caramel after it has been baked.  Overall, I think we did pretty well!

    We used premade pie crust, because it’s quicker than making our own and it guaranteed a more uniform crust thickness.  One package of refrigerated pie crust contains 2 round discs of crust, so we pieced them together the best way that we could to cover the entire pan.

    After my apples were peeled, cored, and sliced, I tossed with in lemon juice.  Then, I added the sugar, flour, and spices and mixed until they were all combined.  Once that’s done, spread the mixture evenly in the prepare sheet pan.

    The last step before baking is the crumb topping.  Get the topping ingredients into a bowl, then use a pastry cutter (or two forks) to cut the butter into the dry ingredients until you get a coarse, crumbly mixture.  Crumble this mixture over the apples, then bake for about 45 minutes or until the topping is golden brown.  Set the slab pie on a cooling rack while you make the caramel sauce.

    Combine butter, brown sugar, and heavy cream with a pinch of salt in a small saucepan.  Cook them over medium heat, stirring constantly, until the mixture starts to thicken, about 10 minutes.  If you drop some of the caramel in a bowl of ice water, the caramel should hold it’s shape somewhat instead of dissolving.  When it reaches this stage, remove it from the heat and stir in the vanilla.  Let it cool for 5-10 minutes before you pour it over the slab pie.

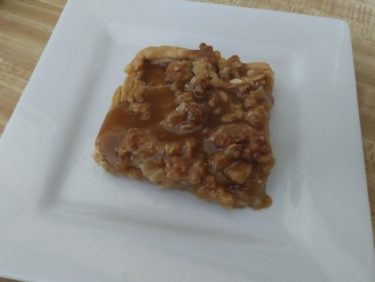
    It’s not the prettiest dessert you’ll ever see, but it sure is tasty!  Let the slab pie cool just enough so that it doesn’t fall apart when you slice it, but it’s best served warm.  Unless you’re one of those weirdos that prefers cold pie.

    And, if you are feeling indulgent, serve it with a scoop of ice cream.  A plain vanilla ice cream works, but we also learned that cream cheese ice cream also pairs wonderfully with a piece of this dessert.  The subtle cream cheese tang in the ice cream sets off the tang of the granny smith apples, but is tempered by the sweet caramel.

    Make sure you refrigerate your leftovers!

    Caramel Apple Slab Pie

    (Adapted from The Recipe Critic)

    Ingredients

    For the pie filling

    • 1 package refrigerated pie crust (or make your own pie crust)
    • 3 1/2 lbs Granny Smith apples (or your favorite apple), peeled, cored, and sliced
    • 2/3 cup granulated sugar
    • 1/3 cup all purpose flour
    • 1 1/2 tsp ground cinnamon
    • 1/2 tsp ground nutmeg
    • 1 tbsp lemon juice

    For the crumb topping

    • 1 cup rolled oats
    • 1 cup packed brown sugar
    • 1/2 cup (1 stick) cold butter, cut into cubes
    • 1/2 cup all purpose flour

    For the caramel sauce

    • 1 cup packed brown sugar
    • 1/4 cup (1/2 stick) butter
    • 1/2 cup heavy cream
    • 1 tsp vanilla extract
    • a pinch of salt

    Directions

    Prepare the crust and filling:

    Pre-heat oven to 375 degrees F.  Unroll pie crust according to package directions.  Cover the bottom of an ungreased 15 x 10 inch cookie sheet with the pie crust, cutting and piecing together as needed.

    Place your apples in a large bowl and toss with lemon juice.  Add the remaining filling ingredients and stir until thoroughly combined.  Spread evenly into prepared cookie sheet and set aside.

    Prepare the crumb topping:

    In a medium bowl, stir the rolled oats, brown sugar, and flour.  Using a pastry cutter or fork, cut the cubed butter into the dry mixture until the mixture resembles coarse crumbs.  Crumble over the apples in the cookie sheet.

    Bake for 45 minutes, or until the crumb topping is golden brown and the apples are tender.  Remove from oven and set on a wire rack while you make the caramel sauce.

    Make the caramel sauce:

    In a small saucepan, heat the butter, brown sugar, cream, and salt over medium heat until the mixture comes to a soft boil.  Cook for 7-10 minutes, stirring constantly, until the mixture has thickened.  The caramel should stay together if you pour a little bit in a bowl of ice water.  Remove from heat and stir in the vanilla extract.  Allow to cool for 5-10 minutes, then slowly drizzle over the slab pie.

    Makes about 18 servings

  • Pressure Cooker Flan

    Pressure Cooker Flan

    Skip to Recipe

    Flan is one of my favorite desserts EVER.  I blame the Latina in me.  I can’t help it.

    I still remember when I first learned how to make it.  It wasn’t easy.  I overcooked it many times before I finally got the hang of the ideal temperature and cook time.  When I moved, I’d have to re-learn in order to get it just right with the new oven.  I was baking flan in a water bath for about an hour and a half.  It was torture!  So, you can imagine my delight when I discovered that flan cooks quicker AND easier in an electric pressure cooker.

    I mean, seriously!  Rich, velvety smooth flan every single time.  No air bubbles.  No graininess.  Just flan perfection.

    A friend of mine asked me to teach her how to make this.  I decided to do even better and post the step-by-step instructions on the blog.  And, after some additional requests for the recipe started rolling in, here it is!

    I use a flanera (flan pan) for my flans.  I have also had success with round ceramic or glass baking dishes.  Just make sure that you use the oven-safe kind.

    Start by making your sugar syrup.  Heat the sugar in a small saucepan over medium heat.  Swirl the pan occasionally to redistribute the sugar, but do not stir it until it starts to turn deep amber and most of the sugar has melted.  At this point, use a heat-proof spatula to stir the sugar until the last solid clumps are melted, then remove it from the heat and add 2 tbsp of water.  Be careful, because it will steam and might splatter.  Once you can get close enough, stir the sugar and water until it’s all combined, then pour it into your flan mold.  If you want, you can also tilt the mold around a little bit to get some of the sugar to coat the sides.

    Next, we make the custard mixture.  All you need is half-and-half, condensed milk, eggs, and vanilla extract.  Combine them in a blender, then pour the mixture into the sugar-coated flan mold.  Cover the mold, place on a trivet, then lower into your electric pressure cooker (filled with 1 cup of water).  Seal and cook on Manual (High Pressure) for 12 minutes, then do another 12 minutes of Natural Release.  Remove the flan and uncover.  The center of the flan should still be slightly jiggly, as it will firm up as it cools. Once it has cooled completely, cover it and refrigerate until it’s ready to serve.  The minimum should be 4 hours, but it’s preferable to leave it overnight.

    When you are ready to serve, run a thin knife along the edge of the flan, then invert onto a serving plate.

    Then, be rewarded with creamy flan goodness.

    If you like a firmer flan, you can add an additional egg or two to the flan mixture.  You can also adjust the amount of vanilla extract, but I feel like this amount gives it a great flavor.

    Pressure Cooker Flan

    Ingredients

    • 1/2 cup granulated white sugar
    • 2 tbsp water
    • 2 cups half-and-half (or milk)
    • 1 14oz can sweetened condensed milk
    • 3 eggs
    • 1 tbsp vanilla extract
    • Required equipment: a flan pan (this one is what I have)

    Directions

    In a small saucepan, heat white sugar over medium heat until all of the sugar has melted and turned amber.  Remove from heat and carefully add the 2 tbsp of water (watch out for the steam).  Stir until all of the water has mixed in, then pour into your flan mold or round baking dish.  Set aside to cool while you make the flan mixture.

    Combine the eggs, half-and-half, condensed milk, and vanilla in a blender.  Blend until combined and no streaks remain.  Gently pour into your prepared flan mold, then cover.

    Pour 1 cup of water in the liner of your electric pressure cooker.  Place the flan mold on a trivet in the liner, then seal and cook on Manual (High Pressure) for 12 minutes.  After time is up, turn off the pressure cooker and allow the pressure to release naturally for another 12 minutes.  Remove flan from pressure cooker and uncover (flan should be slightly jiggly in the center, but not watery).  Allow to cool completely, then refrigerate for at least 4 hours (preferably overnight) before serving.

    Makes about 8 servings.

    Note: To make an Irish Cream Flan, replace 1/2 cup of half-and-half with 1/2 cup of your favorite brand of Irish Cream and reduce the vanilla extract to 1 teaspoon.  Do NOT use milk, or your flan might curdle.

    To make a dulce de leche flan, replace the can of condensed milk with a can of dulce de leche.

  • Pressure Cooker Burnt Caramel Custard

    Pressure Cooker Burnt Caramel Custard

    Skip to Recipe
    It’s no secret that one of my primary motivations for getting myself an Instant Pot was to make foolproof flan.  And, sure enough, my flan pan is one of my most-used accessories.  However, making custards in individual ramekins had always been a crapshoot, with the likelihood of having overcooked custard was pretty high.  I had been seeing a lot of posts about people making custards and creme brulee in their pressure cookers, and I was still a bit skeptical that I could really get the right texture in any way other than the “slow and painful way” of baking in a water bath.  Still, when I wound up with too much heavy cream nearing its expiration date one day, I took the plunge and tried creme brulee in the Instant Pot.  And, I have never looked back.  This burnt caramel custard  is basically a creme brulee without the sugary crust.  Instead, the caramelized sugar flavor is infused into the cream before it’s cooked, also giving the custard a light caramel color.

    Place your egg yolks in a bowl with a pinch of salt and whisk them until they’re slightly foamy.  While you’re doing this, infuse your cream with the vanilla bean.  Heat the cream over medium heat with the vanilla bean and seeds.  When it starts to simmer, remove it from the heat and set it aside.  Leave the vanilla bean in there for now so that the cream continues to absorb the flavor.

    While the cream rests, take place your sugar in another small saucepan and heat it over medium heat until it melts and turns deep amber.  Then, remove it from the heat and slowly pour in your cream mixture.  Be careful, because it might splatter, but stir it constantly so that the sugar doesn’t harden before you finish adding the cream.  If some of the sugar does end up hardening, though, just place the pot back on stove on medium-low and stir until all of the sugar has melted.  Then, take your cream mixture and add it to your egg yolks, a little bit at a time.  Once you have incorporated about 1/3 of the mixture into your yolks, you can slowly pour the remaining cream mixture into the yolk mixture, whisking to combine.

    Strain the mixture evenly into 6 custard cups.  Add 1 cup of water to the liner of your pressure cooker.  Cover each custard cup with foil, then place in the liner of your pressure cooker in 2 layers.  Seal, then cook for 1 minute on High Pressure.  When the timer goes off, turn off the pressure cooker and allow the pressure to release naturally for 10 minutes before releasing the remaining pressure.  Remove the custards, uncover, and set on a wire rack to cool completely, then refrigerate for at least 4 hours.

    After your custards have set in the fridge, they can be served as is directly from the refrigerator.  If you wish, you can also garnish with whipped cream or fresh berries, but it’s delicious on its own.

    If done correctly, any custard (creme caramel, creme brulee, pot de creme) will have a smooth and creamy consistency.  It should not have any lumps or bubbles, or that’s a pretty good indication that your custard is overcooked.

    These can be made up to 2 days before serving, so they are a great make-ahead dessert.  If they last that long, that is.

    Pressure Cooker Burnt Caramel Custard

    Ingredients

    • 2 cups heavy cream
    • 1/2 vanilla bean, split lengthwise and seeds scraped
    • 4 egg yolks
    • 7 tbsp sugar
    • a pinch of salt

    Directions

    In a medium bowl, whisk the egg yolks with a pinch of salt until slightly foamy.  Set aside.

    In a small saucepan, heat the cream with the vanilla bean and seeds over medium heat.  When the mixture starts to simmer, remove from heat and set aside.

    In a separate small saucepan, heat the sugar over medium heat until it melts and turns deep amber.  Remove from heat and, then remove vanilla bean from the hot cream mixture and slowly pour it into the melted sugar, stirring constantly until smooth.  The mixture will bubble vigorously, so be careful.

    Temper your egg yolk mixture by gradually adding in the hot cream mixture, a little bit at a time, whisking constantly.  When about 1/3 of the cream mixture has been incorporated into the yolks, pour the remaining hot cream mixture into the yolk mixture and whisk until smooth.  Strain the mixture evenly among 6 4oz ramekins.

    Pour 1 cup of water into the liner of your electric pressure cooker.  Cover your filled ramekins with foil and arrange in 2 layers on wire racks in the liner.  Cover, seal, and cook on High Pressure for 1 minute.  After the time goes off, allow the pressure to release naturally for 10 minutes before releasing any remaining pressure.  Remove the ramekins from the pressure cooker, uncover, and allow to cool completely on a wire rack.  Then, refrigerate for at least 4 hours before serving.

    Makes 6 servings


  • Blueberry Panna Cotta

    Blueberry Panna Cotta

    Skip to Recipe
    Panna cotta, Italian for “cooked cream,” is the name of a dessert that is made taking sweetened cream and setting it with gelatin.  It is typically set in a mold that is then inverted before serving, but it can also be served without unmolding in a pretty glass or serving dish.  The beauty of panna cotta is that it tastes fancy without a whole lot of effort or skill required, so it’s a great dessert for hosting nice dinners at home or for a group.  Plus, the base of a panna cotta is just cream, which means it’s a great blank canvas for adding other flavors to it.

    While I was on a rigorous diet over the summer, I bought some frozen blueberries to add to my healthy smoothies in the mornings.  Soon after, I fell off the wagon, and the blueberries sat forgotten in my freezer for weeks.  It wasn’t until I started running out of space in my freezer and started trying to use or purge some of the contents that I found the blueberries in there again, and decided to try to make something with them.  Since the texture of cooked berries is not something that I generally enjoy, I decided to use them to infuse some cream and make blueberry panna cotta.  It was so good that some of my coworkers still talk about it, so I decided to share the recipe.

    You start by macerating the blueberries.  That is, sprinkle some sugar on them and let them soften and release some of their juices.  After that, cook them over medium heat until they just start to simmer, then lower the heat and add the gelatin.  Once the gelatin has dissolved, add half of the cream and stir until the cream is hot.  Don’t let it start to boil or simmer, or the fat in the cream might start to separate and you’ll wind up with an oily film on your finished product.  Just let it get hot, then mash the blueberries a little more to get more of the juice out before passing the mixture through a strainer and into a bowl with the other half of the cream.  Stir in the vanilla extract.

    You mixture might have some flecks from the blueberries.  If you prefer, you can pass the blueberry panna cotta mixture through a finer strainer to get rid of these.

    Otherwise, pour the mixture into your prepared molds or cups.  If you’re planning to unmold the panna cotta, lightly coat the inside of your molds with a neutral oil before filling with the panna cotta mixture.  Then, pop them in the fridge until they are set.  This should take about 3-4 hours.  Panna cotta should be eaten cold, so they should remain in the fridge until you’re ready to eat them.

    If you’re unmolding them, you can do so by running a thin knife along the edge of your mold, then inverting onto a plate.  You might have to shake it out, as they like to stick sometimes.  You can serve with additional fresh berries if you like, but it tastes great on its own as well.  I didn’t have any blueberries, so I served it with blackberries.

    Blueberry Panna Cotta

    So creamy!

    Unlike flan and other custard desserts, panna cotta is best served the same day or not more than a day later.  Otherwise, they start to dry out due to the gelatin.  So, plan accordingly.

    Blueberry Panna Cotta

    Ingredients

    • 2 cups blueberries (can be fresh or frozen)
    • 1/3 cup sugar
    • 2 cups heavy cream
    • 1 tbsp gelatin
    • 1 1/2 tsp vanilla extract

    Directions

    Place the blueberries and  the sugar in a medium saucepan.  Let them sit for at least 10 minutes (but preferably 30), then heat the blueberry/sugar mixture over medium heat until the sugar dissolves and the mixture is just starting to simmer.

    Reduce heat to medium-low, then sprinkle the gelatin over the mixture.  Let it sit for about a minute, then gently continue heating and stirring the mixture for about 5 minutes or until the gelatin has dissolved.

    Add 1 cup of the cream, and continue stirring until the cream is heated through.  Do not allow the cream to start to simmer or boil.  Gently mash the blueberries in the cream mixture so that they release some additional juice.

    Strain the mixture into a bowl with the other 1 cup of cream, then stir in the vanilla extract.  Divide equally between your serving dishes or molds, then refrigerate until set (about 3-4 hours).  Serve cold.

  • Pumpkin Spice Rum Cake

    Pumpkin Spice Rum Cake

    Skip to Recipe
    Two years ago, I came up with a red velvet rum cake to make at my boss’s request.  For the fun of it, I started looking into what other types of bundt cake would hold up to a generous soaking of rum syrup.  I tried chocolate pound cake, but it was kind of a mess.  My next attempt featured pumpkin, since it’s that season and all.  To my surprise, a Pumpkin Spice Rum Cake is just what the doctor ordered.  And, since I normally use spiced rum in my rum cakes anyway, it was like a perfect marriage of fall flavors and a boozy punch.  It would also be a nice change of pace from the pies that grace so many Thanksgiving tables.

    Start by sifting your dry ingredients, then beating the sugar and oil together until it’s well-combined.  Then add the eggs, one at a time.  Once all of the eggs are incorporated, mix in the pumpkin, then alternately add the flour mixture and rum until you have a smooth batter.  Pour into your well-greased bundt pan.

    About 15 minutes before the cake is done baking, start making your rum syrup by melting butter, sugar, and water in a pan over medium to medium-high heat.  Bring to a large simmer, stirring until all of the sugar dissolves, then remove from heat and carefully stir in the rum.  When the cake is done, remove from the oven, poke holes all over with a toothpick or skewer, then slowly pour the rum syrup over it.  You may have to pour the syrup in stages, waiting until the cake absorbs most of it before pouring more onto it.  Once you have poured all of the rum syrup over the cake, let it sit for about 5 to 10 minutes until it has absorbed all of the liquid.

    Once all of the liquid has been absorbed, flip your cake over onto a cake board of baking dish.  Do not wait until the cake cools completely, or it might stick to the pan and break while you are trying to get it out.  It won’t be any less delicious, but it won’t be very pretty.

    I have heard that rum cakes gets better as it ages, so it’s best to let it sit for a few days before enjoying.  I honestly can’t tell you whether or not that is true, because mine never last that long.  I do recommend to let it sit for at least a day, though.  This will give gravity time to do its thing and distribute that boozy goodness.  I think it also gives the cake time for the flavors to blend and mellow.

    Thanks to the alcohol in the cake, this cake stays pretty fresh for a while, so there is no need to refrigerate if you plan on serving it within a few days.

    Pumpkin Spice Rum Cake

    Ingredients

    For the Cake

    • 3 1/4 cups all purpose flour
    • 4 eggs
    • 1 1/2 cups granulated sugar
    • 1 1/4 cups brown sugar
    • 1 1/2 tbsp pumpkin pie spice
    • 1/2 tsp salt
    • 2 tsp baking powder
    • 1/2 tsp baking soda
    • 1 15oz can pumpkin puree
    • 1 cup vegetable oil
    • 1 tsp vanilla extract
    • 1/2 cup rum

    For the Rum Syrup

    • 1 cup sugar
    • 1/2 cup (1 stick) butter
    • 2 tbsp water
    • 3/4 cup rum

    Directions

    Preheat oven to 350 degrees Farenheit.  Generously grease a 12-cup bundt pan.  Set aside.  Sift together the flour, baking powder, baking soda, pumpkin pie spice, and salt.

    In the bowl of a stand mixer, mix the oil white, sugar, and brown sugar until the sugar is coated and there are no clumps.  Add the eggs, one at a time, beating well after each addition.  Mix in the pumpkin and vanilla extract.  Add the flour alternately with the rum, beginning and ending with the flour, beating well after each addition.  Do not overbeat. Pour batter into prepared bundt pan.

    Bake at 350 degrees for 65 to 80 minutes, or until a toothpick inserted near the center comes out clean.  About 10 minutes before the cake is done, start making the rum syrup (instructions in next paragraph) and set aside.  When the cake is done, remove it from oven and set on a wire rack.  Poke holes in the cake using toothpick or wooden skewer, then slowly pour the hot rum syrup over the cake while it’s still in the pan.  Let cake sit in the pan for 5-10 minutes to absorb the liquid, then remove from pan by inverting onto a cake board or serving dish.  Allow to cool completely before storing.

    To make the rum syrup: Heat butter, sugar, and water in a small saucepan over medium to medium-high heat, stirring constantly.  Once the butter has completely melted, continue cooking, stirring frequently, until the mixture comes to a simmer and the sugar is completely dissolved.  Remove from heat and carefully add the rum, stirring until combined.

  • Peanut Butter Ice Cream (Egg-Free)

    Peanut Butter Ice Cream (Egg-Free)

    Skip to Recipe

    I have a weird relationship with peanut butter.  I don’t go nutso over peanut butter things the way that some people do.  In fact, when people would ask me, I used to say that I don’t like peanut butter all that much.  But, lately, I have been gaining a greater appreciation for it.  I don’t think that I necessarily dislike peanut butter, but maybe that some applications of it are just a bit too much for me.  Peanut butter cups, for instance, aren’t my first choice of candy.  Peanut butter ice cream, on the other hand, has won me over.

    I normally make a custard base when making ice cream, but there are times when I just don’t feel like being bothered with all of that.  For those times, I have an alternate method of making peanut butter ice cream.  It is slightly less creamy than the custard-based kind, but it’s also slightly less work.  Plus, it still tastes fantastic with a warm brownie or as an ice cream sandwich.

    The first thing you want to do is melt your peanut butter with the milk and sugar.  Once it’s all melted, but before the mixture can actually come to a boil, remove it from the heat and pour it into a bowl filled with your heavy cream.  Refrigerate this until it’s nice and cold (you can put it in an ice bath to speed up the process), and then freeze in your ice cream maker.  After that, store it in an airtight container in the freezer for at least a couple of hours to let it set into ice cream.

    Whether you like it plain, drizzled with hot fudge, or smothered in toppings, this peanut butter ice cream is sure to please any peanut butter lover in your life.  You can mix in chocolate chips or chopped peanut butter chips into the ice cream if you like it chunky, too.

    Peanut Butter Ice Cream

    Ingredients

    • 3/4 cup creamy peanut butter
    • 1 1/2 cups milk
    • 1 1/2 cups heavy cream
    • 1/2 cup sugar
    • 1/2 tsp vanilla extract

    Directions

    Pour heavy cream into a medium bowl.  Set aside.

    In a medium saucepan, combine the peanut butter, milk, and sugar.  Cook over medium heat, stirring occasionally, until the sugar has dissolved and the peanut butter has melted.

    Remove from heat and pour into the bowl with the heavy cream.  Stir in the vanilla extract.  Cover and refrigerate until cold, then freeze in your ice cream maker according to manufacturer’s directions.  Pour into freezer-safe container and freeze for 4 hours or until firm.

    Makes about 1 1/2 quarts.