Category: Desserts

  • Pressure Cooker Red Velvet Flan

    Pressure Cooker Red Velvet Flan

    Skip to Recipe

    My boss hates flan, but loves anything red velvet.  When I asked her what she thought of a red velvet flan, she was like “H’mm…I might try that.”Sadly, Google wasn’t very helpful in locating a recipe for red velvet flan that looked promising.  So, I devised my own.

    Making a red velvet flan posed a bit of a challenge at first.  The two primary flavors that come together to make that classic and recognizable “red velvet” flavor are cocoa powder and buttermilk.  So, I knew that I wanted to include buttermilk in the flan, but in a way that wouldn’t make it curdle or taste too sour.  I found that I could safely replace a fourth of the milk with buttermilk, and replaced the rest of the milk with half-and-half so that the additional fat content would discourage curdling.

    Since owning a pressure cooker, flan is one of the many dishes that I have discovered that a pressure cooker excels at making.  The moist heat of the pressure gives it a smooth and silky texture in about half the time of oven baking.  I highly recommend using a flanera (flan plan), which has a lid that locks in place to protect your flan.  I know some people use a pyrex dish or cake pan covered in foil, and that should also work.  You can also bake the flan in the oven if you don’t have a pressure cooker.  Just bake at 350° for about an hour in a water bath.

    Melt the sugar in a saucepan over medium to medium-high heat.  Once the sugar is melted and dark amber, remove from heat and add water.  It will bubble, steam, and sizzle furiously, so be careful.  Once you can get your hand close, stir until the water and sugar are combined, and then pour it into your flan mold.

    The rest of the ingredients can go in your blender.

    And blend until smooth.

    Pour this mixture in your prepared flan pan (or making dish) and cover in foil.  Place on a trivet in your pressure cooker filled with about 1 cup of water, then cook on manual (high pressure) for 12 minutes.  After the time is up, allow the pressure to release naturally for another 10-15 minutes, then release any remaining pressure (if any) and remove the flan from the pressure cooker.  Uncover and allow to cool completely before refrigerating.  Let is refrigerate at least overnight before you remove the red velvet flan from the pan.

    Red Velvet Flan

    The food coloring kind of bleeds into the caramel and dyes it red, which I think adds some visual impact.

    red velvet flan slice

    There are a few air bubbles here and there, but the overall texture of this red velvet flan is very smooth and creamy.  Best of all, it tastes like actual red velvet!

    Red Velvet Flan

    Ingredients

    • 1/2 cup white sugar
    • 2 tbsp water
    • 1 can sweetened condensed milk
    • 1 1/2 cups half-and-half
    • 1/2 cup buttermilk
    • 2 tbsp cocoa powder
    • 1 tbsp red food coloring
    • 1 tsp vanilla extract

    Directions

    In a saucepan over medium heat, heat the sugar until it melts and turns medium amber.  Remove from heat and add the water (careful, as it may splatter), stirring until combined.  Quickly pour the mixture into a flan pan or baking dish.  Set aside.

    Using a blender, combine the condensed milk, half-and-half, buttermilk, cocoa powder, vanilla extract, and food coloring until smooth and uniform.  Pour mixture into prepared pan and cover.  Set pan on a trivet and lower into pressure cooker filled with 1 cup of water.

    Cook on Manual (High Pressure) for 12 minutes, then allow the pressure to release naturally for 10-15 minutes.  Remove the flan from the pressure cooker, uncover, and allow to cool completely on a wire rack.  Refrigerate 8 hours or overnight before serving.

    To unmold: Run a thin bladed knife around the inside of the flan pan to loosen the flan, then invert onto a baking dish (or a deep plate).  Lift the flan pan upward off the dish, shaking gently to loosen the flan.

    Oven Directions: Same as above, except use an 8″ or 9″ round pan.  Bake uncovered in a water bath at 350° for about an hour, or until center is only slightly jiggly.

  • Caramel Apple Bundt Cake

    Caramel Apple Bundt Cake

    Skip to Recipe

    Lately, I have been rethinking my aversion to cooked fruit.  Those of you that are close to me know that I am always complaining about mushy fruit in desserts, like apple or berries.  And, those of you that only know me through this blog are probably now just realizing why this blog has so few pies, tarts, etc.  I am slowly starting to realize that my issue isn’t necessarily with all types of cooked fruit, but with canned fruit or the fruit in mass-produced pastries and pies (which is probably also canned).  It’s very much a texture thing with me, so cooking fruit at home gives me greater control over the texture and any other aspects that may make the fruit unpleasant for me.

    Before my gradual acceptance of including cooked fruit in desserts, there were a few exceptions.  Apples cooked in “apple pie filling” were meh, but apples cooked in CARAMEL SAUCE were a win.  I would normally serve it over cheesecakes or ice cream, but one day I found myself wondering if I could incorporate the caramel apples into a cake.  To be more specific, I decided to make a caramel apple bundt cake.  After a few experiments, several of which were failures, I came up with a recipe that worked for me.  The caramel apples still sink to the bottom of the pan, meaning that they end up at the top of the bundt cake.  But, I decided that it doesn’t matter.   The cake is delicious anyway.

    Make Caramel Apple Filling

    The first step is to make the caramel apple filling.  Melt some butter in a pan, then add chopped apples (sprinkle them with cinnamon, if you want).  Cook until they start to soften and are coated in butter, then add the sugar and continue cooking until the sugar melts.  Use a slotted spoon or strainer to strain the apples out of the pan and set aside.  Continue cooking until it starts to turn dark amber, then remove from heat and add the cream.  If it looks thin, you can return it to the heat and keep cooking after that so that it continues to thicken.  Once it’s done, remove from heat and stir in the apples.

    It’s best to make this a day in advance and refrigerate so that it gets firm.  It will be easier to fill the bundt with a firmer filling.

    makecaramelapplecake

    Once you’re ready, you can make your batter for the caramel apple bundt cake.  Cream the butter and sugar until fluffy, then add the eggs one at a time until combined.  Add your (pre-sifted) dry ingredients alternately with your liquid, then pour all but about 1 cup of the batter into your greased bundt pan.  Using the back of a spoon or a small spatula, trace a small “moat” in the center of the bundt.  Fill it with the apple filling, taking care that it doesn’t spill over towards the edges of the pan.  Top with the remaining batter and gently spread it across.  It doesn’t have to cover all of the apples.  The cake rises during baking, and that will take care of that.

    DSCN4538

    Into the oven it goes!

    DSCN4531

    When it’s done, let the caramel apple bundt cake cool in the bundt pan for no more than 10 mins before inverting.  If any of the caramel apple filling leaked out, you don’t want it to harden and make your cake get stuck to the pan.

    Plated caramel apple bundt cake

    You can see parts of the caramel apple filling had started to poke out, but who cares?  It’s delicious!

    Sliced caramel apple bundt cake

    I could never get the apples to stay in the middle of the cake, but it tastes great regardless!

    Slice of caramel apple bundt cake

    Check out those thinly sliced apples floating around up there!  The caramel apple bundt cake can be served warm or at room temperature.  I have never had issues storing this cake at room temperature, but feel free to refrigerate if you are squeamish about that sort of thing.

    Caramel Apple Bundt Cake

    Ingredients

    For the Caramel Apple Filling

    • 1/2 cup ((1 stick) butter
    • 1 cup granulated sugar
    • 4 medium Granny Smith apples, peeled and chopped
    • 1/2 cup heavy cream
    • 1/2 tsp cinnamon (optional)

    For the cake

    • 1 cup butter, softened
    • 2 cups brown sugar
    • 4 eggs, room temperature
    • 1 cup buttermilk (or regular milk)
    • 1 teaspoon vanilla extract
    • 3 cups all-purpose flour
    • 1/2 teaspoon baking powder
    • 1/2 teaspoon baking soda
    • 1 pinch salt


    Directions

    Make the caramel apples

    Melt the butter in a large skillet over medium-high heat. Add the apples and cinnamon (if using).  Cook, stirring, until they are coated with butter, about 2 minutes. Add the sugar and stir until the sugar dissolves and the liquid starts to boil, about 3 minutes.

    Using a slotted spoon, transfer the apples to a bowl. Reduce the heat to medium and cook the remaining liquid, stirring often, until it turns a deep amber. Remove the skillet from the heat to stop the cooking and add the cream. Be careful, as the cream may splatter. Return the skillet to the heat and bring it to a boil, whisking constantly. Remove the sauce from the heat and stir in the apples. Allow to cool until lukewarm.  Store in an airtight container in the refrigerator until ready to use.

    Make the cake

    Preheat oven to 350°F.  Generously grease your bundt pan (or spray with cooking spray)

    Sift together flour, baking powder, baking soda, and salt. Set aside.

    Beat butter and brown sugar until fluffy. Add eggs, one at a time, mixing well after each addition. Mix in the vanilla.

    Gradually add flour mixture, alternating with buttermilk. Begin and end with flour mixture. Mix just until combined.  Do not overmix!

    Transfer batter to prepared bundt pan, reserving about 1 cup of matter. Trace a small trench in the center of the cake batter and fill with chilled caramel apple filling (you will have some left over).  Top with remaining cake batter and gently spreading to cover most of the filling.  Bake for 55-70 minutes, or until a toothpick inserted into center comes out clean.  Remove from oven and allow to cool in pan for no more than 10 minutes before inverting.


  • Pressure Cooker Red Velvet Cheesecake

    Pressure Cooker Red Velvet Cheesecake

    This is a quickie post due to popular demand.  I made this red velvet cheesecake last week with mixed results, but Valentine’s Day is right upon us and I REALLY wanted to have this cheesecake as my go-to.  So I tried again today with a few adjustments and got it just right!  I posted a picture to an Instant Pot group on Social Media and got several requests for the recipe, so here it is!

    If you don’t know what an Instant Pot is, you’re missing out!  I won’t bore you with the details, mostly because everything there is to know is already available online and said more eloquently.  Google is your friend.  Suffice to say that making cheesecake in the Instant Pot (or any electric pressure cooker) is something that I only discovered a month or two ago, but it’s been GREAT!  If you’re new to making cheesecakes in an Instant Pot, I recommend checking out this link for reference.  It will point you in the right direction.
    [Skip to recipe]

    DSCN4432

    Start by preparing your pan.  Mix your cookie crumbs with melted butter and press onto the bottom of a well-greased cheesecake pan.  This is a 7in cheesecake pan with a removable bottom.  It fits perfectly into the Instant Pot!

    preparecheesecakebatter

    Then, make your cheesecake batter.  Use your preferred method.  I like using a blender or food processor because I am lazy, but some people do it with a stand mixer of by hand.  That is also fine.  Once you have your smooth batter, pour it into your prepared baking pan.  While you’re making your batter, prepare your Instant Pot by pouring about a cup of water into the pot and placing the trivet in there, then press the Saute button to allow the water to come to a simmer.  Fashion a sling out of foil and place it underneath your pan, then use it to lower your cheesecake into the Instant Pot.

    DSCN4446

    Once your pan is in the pot, turn the Instant Pot off, cover and seal it, and then set it to Manual for 20-25 minutes, depending on your preferred texture.  I set it to 23 minutes and then did a 15 minute Natural Release.

    DSCN4451

    Once time is up, you can open your Instant Pot and use the foil sling as handles to pull the red velvet cheesecake out.  Make sure you check for doneness.  If it’s still wobbly, you can put it back in and cook for a few more minutes.  Blot any condensation on the surface of the cheesecake with paper towels.  Afterwards, allow it to cool completely and then refrigerate until firm.

    Red velvet cheesecake

    There you have it!  Beautiful and delicious Instant Pot red velvet cheesecake!  Top with dollops of whipped cream for a dessert to impress, and it will look like you slaved all day over it!  Don’t worry, I won’t tell.

    Red velvet cheesecake

    Ingredients

    • 1 cup Oreo cookie crumbs
    • 1 tbsp butter, melted
    • 2 8oz packages cream cheese, room temperature
    • 2 eggs, room temperature
    • 1/2 cup sugar
    • 1/2 cup buttermilk, room temperature
    • 1 1/2 tbsp Dutch processed cocoa powder
    • 1/2 tsp vanilla extract
    • 1 tbsp red food coloring
    • 1/2 tsp white vinegar

    Directions

    Prepare the Instant Pot by adding 1 cup of water and a trivet or steaming rack to the inner pot.

    Combine the cookie crumbs and melted butter and press onto the bottom of a 7in springform or cheesecake pan.  If you’d like, you can pre-bake for 5 minutes at 350°, but this is not required.

    Set the Instant Pot to the Saute function.  In a food processor, combine the cream cheese, eggs, sugar, and cocoa powder.  Blend until almost combined.  Add the buttermilk, food coloring, and vanilla extract and mix until smooth.  Mix in the vinegar.

    Pour the cheesecake batter into the prepared baking pan.  When the water in the Instant Pot has started to simmer, place the cheesecake pan in the inner pot.  Press cancel.  Cover and seal the Instant Pot and set it to Manual for 20-25 minutes, then Natural Release for 15 minutes.  Open the lid carefully to avoid water dripping onto the cheesecake.  Remove cheesecake from pot and blot the cheesecake with paper towels to remove condensation.

    Allow to cool completely on a wire rack, then refrigerate the red velvet cheesecake at least 4 hours before serving.


  • Heath Bar Pound Cake

    Heath Bar Pound Cake

    Skip to recipe
    When I was younger, Heath bars were one of my mother’s favorite candy bars.  I am pretty sure that I inherited my love of caramel from her, and chocolate covered crunchy toffee is right up her alley.  She has always had an obsession with crunchy things.  She likes her cookies crunchy instead of chewy, and chews ice so much that I often joked that she probably has undiagnosed Pica.  I prefer caramel over toffee, but that certainly doesn’t mean I will turn down a Heath bar if it’s presented to me.  And, it definitely won’t stop me from grabbing a bag of Heath bars to make into a pound cake.

    As with most recipes that contain candy, I came up with this recipe around Halloween as a means to use up by abundance of leftover Halloween candy.  It worked out so well that I have made it several times since, and always to rave reviews.  It’s basically just a caramel pound cake batter with Heath bar pieces mixed in for a double dose of buttery caramel goodness.  And, since it’s a pound cake, there’s no frosting to mess around with.  It doesn’t NEED any.

    heathbarcake1

    Start with your oils and your sugars.  Beat them until they are soft and creamy, and then incorporate the eggs, one at a time.  Beat after adding each egg.  While you’re doing this, you can sift your dry ingredients and crush your candy bars.  I unwrapped them and put them in a ziploc bag, then crushed them with a rolling pin.

    heathbarcake2

    Add the dry ingredients alternately with the milk, mixing to get a smooth batter.  Once all of the dry and wet ingredients are mixed in, fold in the Heath bar pieces.

    dscn4004

    Heath bar goodness!  Pour this batter into a greased Bundt pan and bake.

    dscn4005

    You want to let it cool for about 10 minutes before removing from the pan, but not more more than that.  It will be easier to take it out of the pan while the chocolate pieces are still kind of melty, so that it’s less likely that they will stick to the pan and make it difficult to unmold.

    dscn4012

    You can’t tell from the photo, but this cake smells AMAZING!  I find it best served warm, but it also tastes just fine at room temperature.  I hope you like this cake as much as I do!

    Heath Bar Pound Cake

    Ingredients

    • 1 cup butter, softened
    • 1/2 cup vegetable oil
    • 2 cups packed brown sugar
    • 1 cup white sugar
    • 5 eggs
    • 3 cups all-purpose flour
    • 1/2 tsp baking powder
    • 1 tsp vanilla extract
    • 1 cup milk (or buttermilk, if you have it)
    • 1-2 cups chopped Heath bar pieces

    Directions

    Preheat oven to 325° F. Grease and flour a large Bundt pan, or spray with nonstick cooking spray.

    Cream together the butter, oil, brown sugar, and white sugar. Add eggs one at a time, beating well after each addition. Stir in 1 teaspoon vanilla.

    Sift the flour and baking powder. Add alternately with milk to the creamed mixture. Gently fold the Heath Bar pieces into the batter. Pour into prepared pan.

    Bake in preheated oven for 60 to 90 minutes, or until a toothpick inserted into the center comes out clean. Let stand in pan 10 minutes, and then turn out onto a wire rack and cool completely.


  • Irish Cream Brownie Trifles

    Irish Cream Brownie Trifles

    Skip to recipe
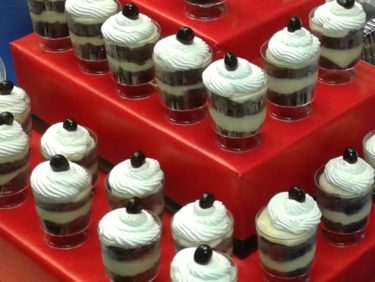
    The title says it all, but I will say it again: Irish Cream Brownie Trifles.  Pieces of brownie are layered with Irish Cream pastry cream, then topped with a swirl of whipped cream and garnished with a chocolate covered espresso bean.  Itty, bitty bites of happiness in an itty, bitty dish.  Who could ask for more?

    Broke Baker veterans are probably already aware that, every year, my employer throws a bake-off during the holidays.  Any employees that can bake, or have relatives that can bake, are encouraged to enter. The result is a day full of cakes, pies, and all sorts of other treats.

    This was my third year entering.  My coworkers once advised that, in order to win, your dessert needs to contain alcohol.  I scoffed at the idea, although I still made Eggnog Mini Cheesecakes that had rum in both the cheesecake and the caramel sauce for the first year.  The 2014 winner was a Coquito Rum Cake, which I took to mean that the judges are more partial to desserts with latin-inspired flavors.  So, last year I took this knowledge at face value and made Chocolate Coquito Macarons.   While the judges found them to be good, a Coquito Flan took the title.  I heard through the grapevine that my macarons were considered good, but that they didn’t think they really qualified as “dessert.”  So, for 2016, I went into this armed with the knowledge that my entry had to both contain alcohol and represent the traditional idea of a “dessert.”

    I went with Irish cream because it’s sweet and translates easily into dessert form.  I considered cake, cheesecake, and even mousse when I was thinking of what to make.  Ultimately, I decided on making trifles because they seemed like the most unique option.  Plus, serving them in disposable mini cups from the local party supply store made for a nice presentation without a whole lot of messing around with icing or complex decorating.  The trifles are a bit time-consuming, but they are not particularly labor-intensive.  All you have to do is bake a thin layer of brownie, cut it into small circles, and then layer it in mini trifle dishes with the pastry cream.  A dollop of whipped cream finishes it off.  They just require a little bit of planning so that you have all of the components ready to go in the right order.  In the end, I got First Place in Presentation (for the third year in a row), but nothing in Taste except for a pat on the back from several judges for the deliciousness of my trifles.  And, since they DID receive a warm reception, I decided to share the recipe with you all.

    The recipe below makes enough brownie for about 2 dozen mini trifle cups filled with brownie circles, but about enough pastry cream for 36 trifles total.  What I usually do is chop up the brownie scraps and use that to layer the last dozen.  You could also always make a regular-sized trifle with it by just cutting a regular pan of brownies into cubes and layering it with the cream.


    20161216_085442

    Irish Cream Brownie Trifles

    Ingredients

    • 3/4 recipe batch of brownie batter (from a 13″ x 9″ pan recipe)
    • 1 cup sugar
    • 6 large egg yolks (I used 3 whole eggs)
    • 6 tbsp cornstarch
    • 1/2 tsp salt
    • 3 3/4 cups half-and-half
    • 3/4 cup Irish Cream
    • 1 tsp vanilla extract
    • 1 1/2 cups sweetened whipped cream (optional)

    Directions

    Make the pastry cream:

    Place the half-and-half, irish cream, and sugar in a saucepan over medium heat.

    In a separate bowl, whisk the egg yolks, salt, and cornstarch until there are no clumps and mixture is pale in color.  Set aside.

    When the saucepan mixture is about to come to a boil, remove from heat.  Slowly add the hot mixture to the egg yolk mixture, 1/4 cup at a time, whisking constantly.  Once about half of the hot mixture has been added to the yolk mixture, pour the yolk mixture into the saucepan with the rest of the hot mixture.  Return to heat and continue to cook, stirring or whisking constantly, until mixture has properly thickened.

    Remove from heat and strain the mixture into a heat-proof bowl.  Add the vanilla and stir gently to combine.  Cover with plastic wrap and refrigerate for several hours or overnight before using.

    Make the brownie:

    Preheat oven to 350°.  Line a 10″ x 15″ jelly roll pan with parchment paper.  Spread the brownie batter evenly into the jelly roll pan, then bake for10-15 minutes or until a toothpick inserted in the center comes out clean.  Allow to cool completely on a wire rack before using.

    Assemble the trifles:

    Using a cookie or biscuit cutter the same size as the opening of your trifle cups, cut the cooled brownie into circles.  Place one circle into the bottom of a trifle cup, then spoon or pipe a small amount of pastry cream on top of it.  Place another brownie circle on top of the cream and gently push it down until there are no gaps between the brownie and the cream.  Spoon or pipe additional pastry cream until it reaches the top of the cup, then gently tap the bottom of the cup against the counter to let the cream settle.  When you run out of brownie circles, you can cut up the brownie scraps and layer those in the cups.  Repeat the process until either no brownie or pastry cream remains.  Top with whipped cream, if desired.

    Makes about 3 dozen

  • Dulce de Leche Pastelitos

    Dulce de Leche Pastelitos

    Skip to Recipe
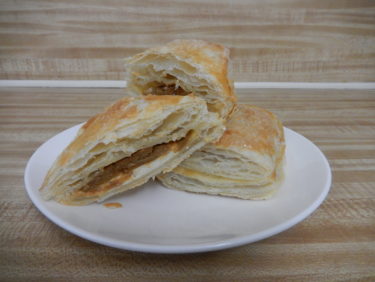
    Ever since a recent experience using puff pastry, I have been dying to find another use for it.  The problem is, I’m not a particularly big fan of cooked fruit fillings, as evidenced by the lack of fruit pies and the like on my blog.  I kept wondering what I could put in the puff pastry, until it dawned on me one day.  It probably helped that it was around the time that I come upon a giant, Costco-sized jar of dulce de leche, but it’s still amazing that it took me that long to think of it.  After all, dulce de leche is exceptionally sweet, which is perfect for a crust like puff pastry that is not too sweet.  The flavors balance each other out perfectly.  You can even add semisweet chocolate chips to the filling for an added twist.  Best of all, they’re super easy to make!  Unless you’re going to make your puff pastry and dulce de leche from scratch, that is.  Otherwise, what takes the longest is waiting for the frozen puff pastry to thaw.

    assembly

    Start by thawing your puff pastry.  Once it’s thawed, open it up into flat squares and cut each square into 9 pieces so that you have 18 squares total.  Add a spoonful of dulce de leche into 9 of the squares (add some chocolate chips if you want, as well).  Brush the outer edges with beaten egg, then place a second square on top and press firmly (but gently) to seal.  Brush the tops with additional beaten egg, then sprinkle with sugar.

    dscn4094

    Afterwards, they go into the oven!

    dscn4100

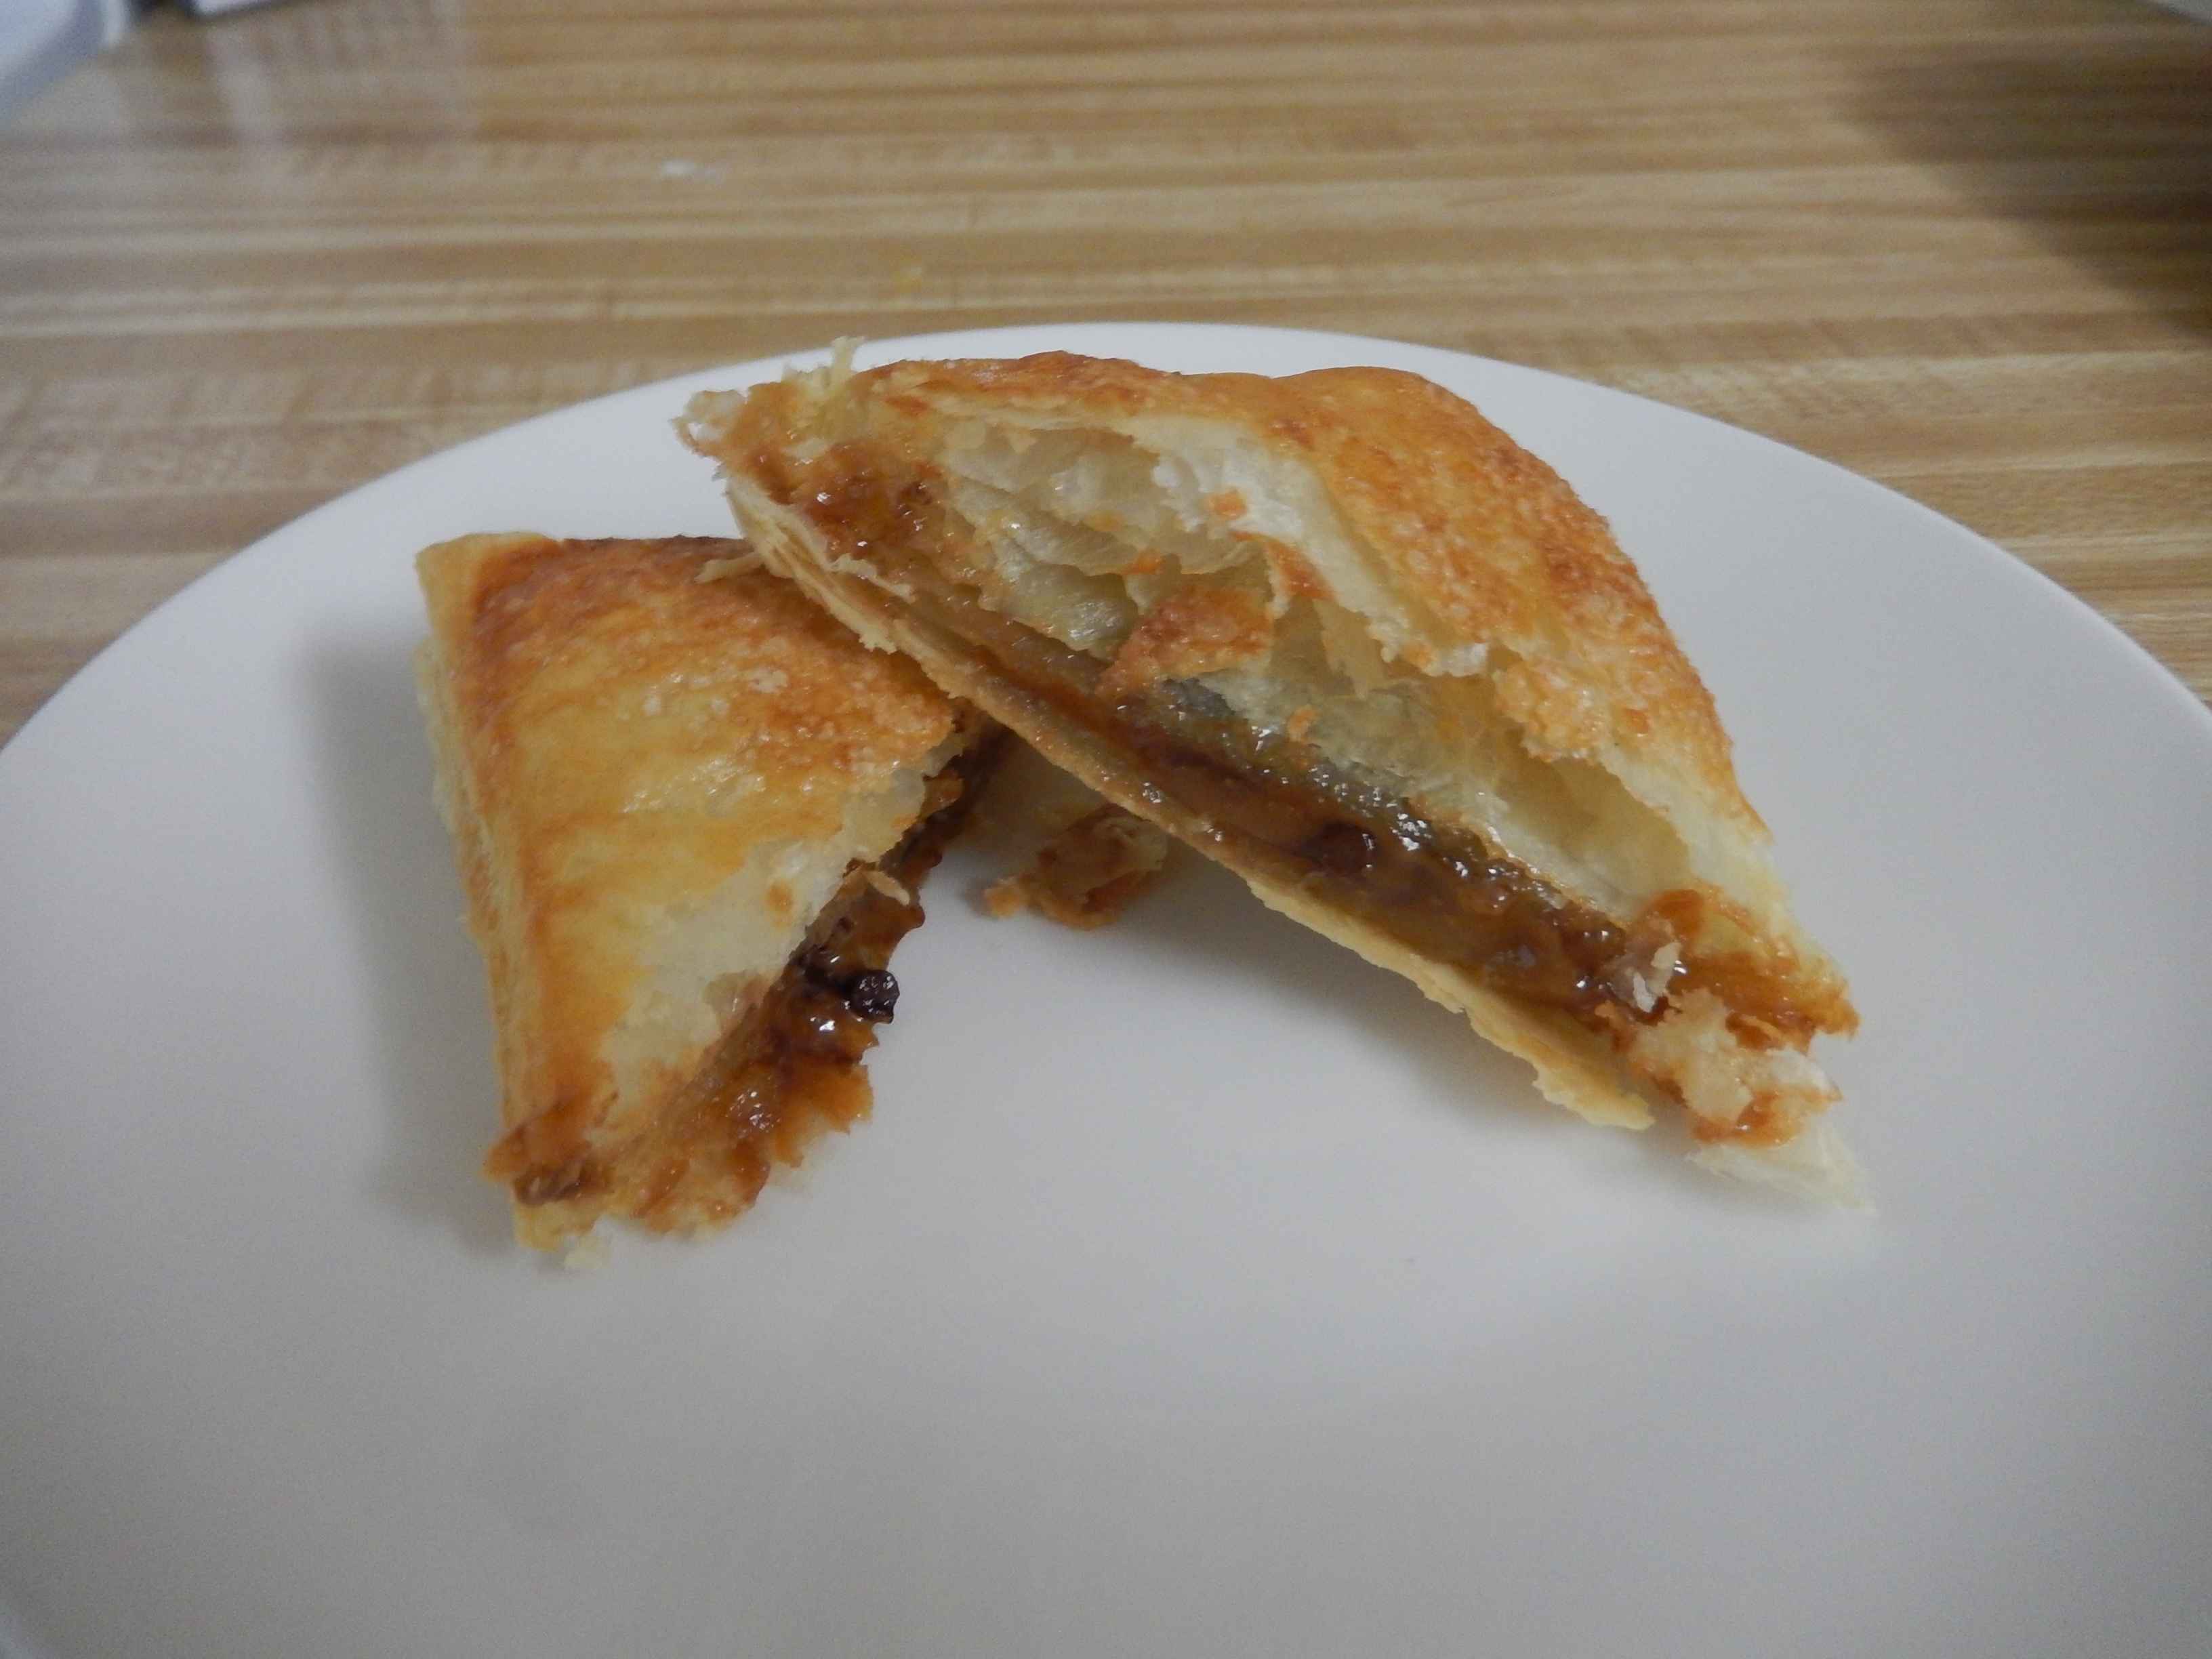
    Despite how delicious they look, resist the urge to immediately bite into one of these.  The filling is HOT.  Like, “burn your face” hot.  “Molten lava volcanic eruption” hot.  It will hurt you.  You will burn your tongue and it will take some of the enjoyment away from eating it.  Let them sit at least 20 minutes before you brave an attempt at eating one.  Take it from someone who had to rub an ice cube on her tongue (but ate it anyway).

    dscn4109

    But…I promise you that it will be worth the wait.  🙂  The warm, gooey, dulce de leche delight in each flaky bite of these dulce de leche pastelitos will leave you wanting more.

    Dulce de Leche Pastelitos

    Ingredients

    • 1 package puff pastry sheets, thawed
    • 3/4 cup dulce de leche
    • 1 egg, beaten
    • 1-2 tbsp granulated sugar
    • mini chocolate chips (optional)

    Directions

    Preheat oven to 350°.  Line a large baking sheet with parchment paper.

    Lay the puff pastry sheets out on a solid surface.  Cut each sheet into 9 equal squares so that you’re left with 18 squares.  Add a spoonful of dulce de leche to the center of each square, then sprinkle with chocolate chips (if using).

    Brush the edges of each filled square with beaten egg, then top with another square of pastry sheet.  Gently press down to seal.  Brush the tops with the remaining beaten egg, then sprinkle with sugar.

    Bake in preheated oven for 25-30 minutes, or until golden brown.  Allow to cool on a wire rack for at least 20 minutes before consuming.  Store leftover dulce de leche pastelitos in an airtight container after completely cooled.

  • Dulce de Leche Bundt Cake

    Dulce de Leche Bundt Cake

    Skip to Recipe
    I never understood the allure of Costco until I borrowed a membership card from a coworker to help out a friend.  My presence there was merely as an escort, but I wound up leaving $60 poorer from just arbitrarily throwing things in my cart that looked good and was priced significantly lower than I could get it in regular stores.

    That is how I wound up with a giant jar of dulce de leche.  I even mulled over my decision to purchase for a while before I finally went ahead and left it in my shopping cart.  The last time that I waited too long to finish a jar of dulce de leche, it dried out and got crusty.  Was I really going to be able to use all of it in time?  It really kills me to waste food, and I have a few friends that would probably never forgive me if I let perfectly good dulce de leche go to waste.

    Enter this dulce de leche bundt cake.  I honestly don’t even remember what I was looking for when I came across this cake.  I probably Googled “recipes that use dulce de leche” or something along those lines.  Before I knew it, I had made this cake 3 times and was asking for someone with a Costco card to pick up another jar of dulce de leche for me.  Despite being a dulce de leche-centric cake, it’s not overwhelmingly sweet.  The small pocket of dulce de leche is supposed to be closer to the middle of the cake, but it doesn’t matter.  It is still a great cake and is not terribly difficult to make.  Using all brown sugar adds to the cake’s a subtle caramel flavor.

    dscn3832

    First, you want to sift your dry ingredients and set them aside.

    prepbatter

    Next, you make the batter.  Cream your butter and brown sugar together, then add some of the dulce de leche.  Once the dulce de leche is sufficiently combined, beat in the eggs one at a time.  Add vanilla extract.  Blend in the flour alternately with the milk, beginning and ending with flour.

    fillbundt

    Pour about 3/4 of the mixture into a well-greased bundt pan.  Gently add the remaining dulce de leche into the center of the batter, then pour the remaining batter into the pan.  After that, into the oven it goes!

    dscn3970

    About an hour later, you’ve got a beautiful bundt cake.

    20160911_140833

    With a surprise little pocket of dulce de leche inside!

    Since it’s a bundt cake, it’s great for potlucks and similar events.  I bet it would be great with ice cream, but it never lasts long enough for me to find out.  Give this cake a try!

    Dulce de Leche Bundt Cake

    (Adapted from Ambrosia)

    Ingredients

    • 1 1/2-1 3/4 cups dulce de leche, divided
    • 1 cup (2 sticks) unsalted butter, at room temperature
    • 1 cup dark brown sugar, packed
    • 4 eggs, at room temperature
    • 2 teaspoons vanilla extract
    • 1 cup whole milk
    • 1 tablespoon baking powder
    • 1/2 teaspoon baking soda
    • 1/2 teaspoon salt
    • 3 cups all-purpose flour

    Directions

    Preheat the oven to 350° F.  Grease a 12-cup Bundt pan.

    Sift the flour, baking powder, baking soda, and salt, into a bowl and set aside.  In the bowl of a standard electric mixer, combine the butter and brown sugar, and cream until light and fluffy. Once creamed , add 1 cup of dulce de leche.  Mix well, then add the eggs, one at a time, mixing well with each addition. Add in the vanilla extract.

    With the mixer on low speed, alternate adding the dry ingredients and milk, beginning and ending with the dry ingredients mixture.  Beat until just combined.  Do not overbeat!

    Add about 3/4 of the cake batter into the prepared Bundt pan.  Add the remaining 1/2-3/4 cup dulce de leche in a ring around the center of the pan.  Evenly distribute the remaining cake batter in the pan, and gently smooth out the top with a spatula. Don’t press down or tap the pan against the counter to keep your filling from sinking too much.

    Bake in the center rack of the oven at 350° for 50-60 minutes, or until a toothpick inserted near the center comes out clean.  Let the cake cool in the pan for 15-20 minutes, then remove from pan and allow dulce de leche bundt cake to cool completely on a wire rack.

  • Twix Brownies

    Twix Brownies

    Skip to Recipe
    The part of me that wants to create delicious things is often at war with the side of me that is lazy as heck.  Sometimes, I want cake, but I want to nap just a little bit more.  Other times, it’s the other way around.  There are days where I can totally spend hours preparing an elaborate cake, and days where I want something tasty without spending too much time in the kitchen.

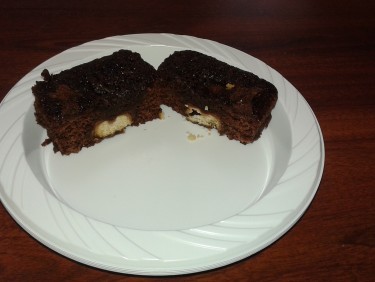
    I am not ashamed to admit that, months after racking up on clearance Halloween candy, I was still going through the bags and trying to come up with creative uses for the candy.  This recipe came about in a bout of exasperation at having run out of neat ideas for the candy.  I mean, I could just EAT it, but where’s the fun in that!?  Instead, I just started adding candy bars to different batters and seeing what happened.  Brownies are great for that because the batter is thick enough to suspend pieces of candy in.  These, however, are more of a “brownie with a surprise in the middle.”  Imagine biting into what you think is just a regular brownie and finding the chewy, crunchy goodness of a Twix bar?  Yum!

    This recipe comes together pretty easily.  I used a dessert squares pan so that they would all be the same size, and to elimiate the danger of having brownies that did not have any Twix in them after being cut into squares.  Grease each cavity with a little bit of butter or oil.

    DSCN1887

    Then lay a Twix at the bottom of each cavity.

    DSCN1888

    Fill with brownie batter.

    DSCN1892

    And BAKE!

    20151119_104653

    That’s pretty much it.  To make things even easier, you could use boxed brownie mix if you so desired.  If you don’t have a dessert squares pan, you can also use an 8″ square pan.

    Twix Brownies

    Ingredients

    • ½ cup (1 stick) butter, melted
    • 1 cup granulated sugar
    •  ¼ cup cocoa powder
    • 2 eggs
    • ¾ cup all-purpose flour
    • ¼ tsp baking powder
    • ½ tsp vanilla extract
    • 12 Fun Size Twix bars, unwrapped

    Directions

    Preheat oven to 350ºF.  Grease a 12-cavity dessert bar pan.  Place 1 Twix bar in the middle of each cavity.  Set aside.

    Combine the melted butter and sugar together in a medium bowl.  Stir in the remaining ingredients in the order that they are listed, mixing well with each addition.  Divide batter evenly between the 12 cavities of the bar pan.

    Bake in preheated oven for 15-18 minutes, or until a toothpick inserted near the center comes out with only fudgy crumbs.  Allow to cool completely on a wire rack before removing from pan.

  • Mango Madness in July – Part 3 (2016 Chapter)

    Mango Madness in July – Part 3 (2016 Chapter)

    Another year, another Mango Season in South Florida.  This is now my third Mango Madness post, as I did this in 2014 and 2015 with great success.  But for those of you just tuning in, I will fill you in.  During Mango Season, I find myself getting a large quantity of mangoes that I don’t always know what to do with.  I mean, mangoes are great to eat just as-is, but there are only so many you can have.  Plus, it doesn’t take long for them to go from “just right” to overripe, after which the only thing you can really do is puree it and use it somehow.  That was the start of Mango Madness.

    As each year goes by, it gets harder for me to think of things to do with mango that I haven’t done the previous year.  I spent most of May and June fretting about whether Mango Madness would be as good as previous years, as my brain reserves were running low.  But, thanks to Google, feedback from friends and family, and random “Eureka!” moments, I have managed to make the 2016 chapter of Mango Madness just as prolific as the last two!

    So, what are some new things that I made with mango this year?  Check it out!

    mango lassi

    Mango Lassi is a accompaniment to spicy food, or just a healthy pick-me-up at any time of the day.  Plus, since it’s basically just a mango and yogurt smoothie, it’s super easy to make.  Just blend equal parts mango puree and plain yogurt together, then sweeten to taste with honey.  I like to bottle it to take to work.

    20160628_211755

    Take the classic Strawberry Cream Cake and make it a Mango Cream Cake!  Just replace the strawberries with chopped mango and add a little bit of mango puree to the whipped cream.

    20160711_215519

    Mango Pastelitos already have a dedicated blog post here, and they’re worth trying out!

    20160710_195620

    Mango pastry cream is delicious on its own, but also has many uses.  Plus, it’s also a good way to use up a large amount of milk that you may be looking to find a use for.  I used this recipe as a guide, but made a few changes.  I used fresh mango pulp instead of canned, omitted the cardamom and saffron, and used vanilla extract instead of vanilla bean paste.  I also went light on the vanilla so that it didn’t overpower the mango flavor.

    20160711_080402


    With all of that mango pastry cream lying around, I had the idea to make little mango tarts.  But, being too lazy to make tart shells, I went ahead and filled store-bought phyllo cups with the cream, and then topped each “tart” with a fresh raspberry.  Simple AND delicious.

    20160627_214548

    Mango mousse is delicious, refreshing, and only uses four ingredients.  Whip 3/4 cup of heavy cream until soft peaks form.  Add 1 tbsp piping gel, then continue to whip until stuff peaks form.  Fold in 3/4 cup mango puree and 1/4 tsp vanilla extract, pour into serving cups, and refrigerate until set.  Yummy!

    20160625_220632

    Mango Ice Cream Cake!  The name should say it all, but I will elaborate.  It’s a batch of mango ice cream sitting on top of a blondie.  Top with some fresh raspberry sauce, and you’ve got a winning dessert that can be made in advance!

    20160717_161834

    Mango macaron ice cream sandwiches!  Using BraveTart’s macaron recipe, I made mango macaron shells by adding 3/4 oz of freeze dried mango to the macaron batter.  Make some mango ice cream (my favorite recipe is this one) and freeze it in a 13″ x 9″ pan.  Once frozen, cut circles of ice cream about the size of your macaron shells, and sandwich one round of ice cream between two macaron shells.

    20160718_190358

    Replace the peaches in your favorite peach cobbler recipe (I used this one) with mango, and you’ve got yourself a mango cobbler!  Since mango is incredibly sweet, I also reduce the sugar in the fruit filling by half.

    I love Mango Madness because it really challenges me to be creative and think outside of the box sometimes.  Sometimes, it’s even like a race to see how many things I can make before the mangoes go bad.  There are things that I would never have thought to make before that I now wonder how I did without.  But, the stakes are raised for next year.  Will I be able to conjure up some new, mango-centric recipes for next year’s Mango Madness?  I guess I had better start brainstorming now!

    A big thank you to everyone that supplied me with mangoes this year.  As you can see, they were put to good use.  Until next year!

  • Mango Tres Leches

    Mango Tres Leches

    Traditionally, a tres leches cake is a sponge cake that is soaked with a syrup made of three types of milk and then topped with either whipped cream or meringue.  I “mango-fied” the recipe by replacing some of the milk with mango juice, adding mango puree to the topping, and then topping it with some fresh mango chunks.

    20160717_191201

    This recipe is a bit of an impromptu recipe post.  My boss is in town this entire week and had requested a belated birthday cake.  Although she originally had a specific cake in mind, I convinced her to allow me to make something with mango, as I have been getting a generous supply of mangoes this season from my usual sources.  After remembering that she loves tres leches, I decided to try making a mango tres leches again this year.  If you may recall, it was featured in last year’s Mango Madness post, but there were a few issues with that recipe that I hoped to work through this time around.  Thankfully, I think I got the kinks worked out for this version of the mango tres leches, as it was so well-received at the office that I got a few requests for the recipe.  So, here it is.  Since I didn’t  anticipate actually posting this to the blog, I didn’t take pictures of the step-by-step process as I normally do.  Hopefully, the directions are clear enough.

    Mango Tres Leches

    Ingredients

    For the Cake

    • 6 eggs, separated
    • 1 ½ cups granulated sugar
    • 1 ½ cups all-purpose flour
    • 1 tsp baking powder
    • ½ tsp salt
    • 6 tbsp milk
    • 1 tsp vanilla extract

    For the Milk Syrup

    • 1 1/4 cups milk
    • 1 cup mango juice (or mango nectar)
    • 1 can sweetened condensed milk
    • 1 can evaporated milk

    For the Mango Whipped Cream

    • 1 cup heavy whipping cream
    • 1 tbsp confectioners’ sugar
    • 2 1/2 tbsp piping gel
    • 1/3 cup mango puree
    • 1/4 tsp vanilla extract
    • 2-3 cups chopped mango

    Directions

    Make the cake:

    Preheat oven to 325 degrees. Grease a 13” x 9” rectangular baking pan

    In the large bowl of a stand mixer, beat the egg whites until foamy. Gradually add the sugar and increase the speed.

    While the eggs are beating, sift the dry ingredients into a medium bowl.

    Beat the egg whites until stiff peaks form, and then add the yolks one by one. Add the vanilla extract.

    Remove bowl from mixer and fold in the dry ingredients alternately with the milk, beginning and ending with the dry mixture. Pour into prepared baking pan

    Bake for 35-40 minutes or until a toothpick inserted in the center comes out clean.

    Combine all of the ingredients for the milk syrup in a blender.  Slowly pour mixture over the hot cake, pausing as needed to allow the cake to absorb the liquid.  Allow to cool completely before frosting.

    Make the Mango Whipped Cream:

    In the bowl of a stand mixer, whip the cream and sugar until soft peaks form.  Add the piping gel and continue beating until stiff peaks form.  Add the vanilla extract.

    Gently fold in the mango puree until no streaks remain, then spread evenly over the top of the cooled cake.  Top with mango chunks.

    Refrigerate until ready to serve, preferably overnight.

    Makes about 24 servings