Category: Desserts

  • Mango and Cheese Pastries (Pastelitos)

    Mango and Cheese Pastries (Pastelitos)

    Skip to Recipe
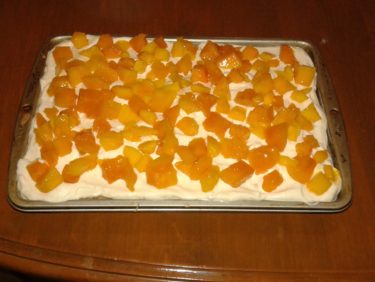
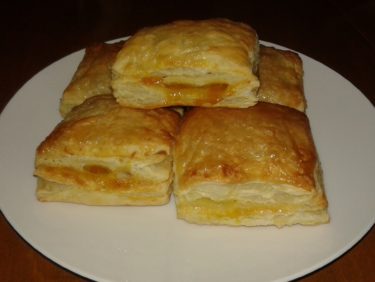
    This is my third Mango Season working in a place that affords me access to a large supply of mangoes during this time of the year in Miami.  I had been racking my brain for ideas on what to make with mango that I had never made before, and my brain reserves were getting low.  Then, during a conversation with one of my sisters, she asks “Why not make mango pastelitos?”  Mango pastries!?  My head exploded.

    For those of you that are not “in the know,” a pastelito is a Cuban pastry that is typically made with puff-pastry type of dough and can be filled with sweet or savory fillings.  Pretty much any Latin bakery or cafeteria worth its salt in South Florida will sell them, so it’s completely mind-boggling as to why it never even occurred to me to try a mango spin on these popular treats.  The most popular fillings are guava, guava and cheese, cheese, and ground beef.  My absolute favorite is the guava and cheese, which is the one that inspired this recipe.  Since guava is super-sweet, just like mango, it seemed to make sense to just swap out the guava with mango.  It sounded crazy at first, but it WORKED.  The sweetness of the mango was offset by the cream cheese, which also gave a creamy richness to complement the buttery flakiness of the puff pastry.  Best of all, they’re super-easy to make.

    20160710_182843

    Start by cooking some diced mango with brown sugar and a little bit of lemon juice.  Simmer the mango mixture for 25-30 minutes, until the liquid thickens and becomes syrupy in consistency.  Remove from the heat and allow to cool completely.  You can even make this a day or two ahead of time and refrigerate until ready to use.

    20160710_200814

    After that, the only other things you need are some puff pastry and a brick of cream cheese.  Make your life easier by using cold cream cheese.

    20160710_204734

    Defrost the puff pastry per the package directions.  Lay the sheets of puff pastry out on your pan lined with parchment, a baking mat, or a floured surface.  Cut each sheet it into thirds, then add three small pieces of cream cheese evenly spaced apart on 3 of the thirds.  Leave room around the sides to close the pastry.

    20160710_204910

    Add a spoonful of mango filling on top of each piece of cream cheese.  If you didn’t cook your mango filling long enough, you might get some runoff.  Don’t worry, it won’t impact the pastries much.  Brush the edges and between the filling with egg wash or water.

    20160710_205201

    Place the other three pieces of puff pastry over the ones that have the filling.

    20160710_205545

    Cut them into squares and pinch them closed.  The egg wash should help the tops and bottoms stick together.  Brush them with additional egg wash or simple syrup, if desired.

    20160710_205719

    Then, into a preheated oven they go!

    20160710_212711

    Please resist the urge to dig in as soon as they come out of the oven.  The filling is HOT, and you might hurt yourself.  They do taste best when they are warm, though.

    mango pastries

    Simple, right?  But, so delicious.  These pastries just scream “Miami” in so many ways.  The recipe for the mango filling makes enough to fill about 27 pastries, so scale up or down accordingly.  You can easily find other uses for any leftover filling, but I bet you’ll simply wind up making more pastries once these disappear in mere moments.  I bet it would be great on pancakes or waffles, too.

    Mango and Cheese Pastries (Pastelitos de Mango y Queso)

    Ingredients

    For the Mango Filling:

    • 2 1/2 cups mango, diced small
    • 1/4 cup light brown sugar
    • 1/2 tsp lemon juice

    For the pastries:

    • 1 package frozen puff pastry sheets, thawed
    • 4oz cream cheese, cold
    • Egg wash (optional)

    Directions

    Make the mango filling:

    In a small saucepan, heat mango, brown sugar, and lemon juice over medium to medium-high heat until mixture is about to boil.  Reduce heat and simmer for 25-30 minutes, or until the liquid has thickened to a syrupy consistency.

    Remove from heat and allow to cool completely before using.

    Make the pastries:

    Preheat oven to 350°.  Line a large baking sheet with parchment paper.

    Lay out the puff pastry sheets on a flat, nonstick surface and cut each sheet into thirds.  Set three of the thirds aside.

    Cut small rectangles of cream cheese and add three to each third of puff pastry sheet, spacing them out evenly on the strip and leaving room around the edges of the dough.  Add a spoonful of mango on top of each piece of cream cheese.

    Brush the edges of dough and between each mound of filling with egg wash or water, then top with the remaining 3 sheets of puff pastry dough.  Cut each strip into thirds so that one mound of filling is at the center of each square, then pinch the sides down to seal.  Place the squares on the baking sheet lined with parchment, leaving space between the pastries.  Brush the tops with additional egg wash or simple syrup.

    Bake for 25-30 minutes, or until golden brown.  Remove from oven and allow to cool at least 20 minutes before eating.  Any leftover mango pastries can be stored in an airtight container after they cool completely.

    Makes 9 pastries

  • Snickers Cheesecake Cake

    Snickers Cheesecake Cake

    Skip to Recipe
    I honestly don’t think that I need to say anything about this cake.  The name says it all.  But, I’ll say something anyway.  You take three things that make the world a better place (chocolate cake, cheesecake, and Snickers bars), put them together, and create magic.  This cake is one of a few of the “cheesecake cake” cakes that I have made, and I am sure that it won’t be the last.

    I found this recipe for Snickers cheesecake cake when I was looking for things to do with the bags of Halloween candy that I had amassed during the post-holiday clearance sales.  I have made it twice since then, and both times it got rave reviews.  I did have to tweak the recipe a bit, but I almost always do that anyway.

    makecheesecake

    Start by making your cheesecake.  Beat the cream cheese and sugar until it’s smooth.  Add the eggs, one at a time, and then the sour cream.  Add the vanilla extract, then fold in the chopped Snickers pieces.  Pour the batter into your prepared pan and bake until almost set.  Let cool completely on a wire rack, then chill.  You will want to do this at least a few hours in advance, but preferably a day before.  Cheesecake actually freezes very well, so you could even make it a week in advance and freeze it.  The more firm the cheesecake is, the easier it will be to handle when assembling your cake.

    assemblecakeBake two chocolate cake layers in pans of the same size as the cheesecake.  Let them cool completely, then place one layer on a cake tray or serving dish.  Spread a thin layer of chocolate ganache over it, and then place the cheesecake layer on top.  Spread some ganache over the cheesecake and then place the second cake layer over it.  Pour the remaining chocolate ganache over the cake, letting it run over the sides.


    snickersfrosting

    One of the things that sets this cake apart is the Snickers frosting.  It’s made by melting Snickers and butter together, and then adding this melted Snickers mixture into powdered sugar with a little bit of milk.  This is where I made the biggest change to the original recipe, I think.  Following the Snickers frosting recipe exactly gave me a cake that looked like this…

    DSCN1711

    The frosting was just a runny mess.  Refrigeration didn’t help much, and neither did the whipped cream that I tried to use to hide the unsightliness of the cake.  However, halving the Snickers frosting recipe, and reducing the amount of milk added, let to my second attempt looking like THIS…

    Snickers Cheesecake Cake

    What a difference, right?!!

    This Snickers cheesecake cake is definitely a lot of work to make, but the end-result is a piece of heaven in every bite.  I suggest trying to make it at least once.  You won’t be disappointed.

    Snickers Cheesecake Cake

    (adapted from recipe on IAmBaker.net)

    Ingredients

    For the Cake

    • 1 recipe for 2-layer chocolate cake (recommended recipe here)

    For the Cheesecake

    • 2 8oz packages of cream cheese, softened
    • 1/2 cup granulated sugar
    • 1/4 cup sour cream
    • 1/2 tsp vanilla extract
    • 2 cups chopped Snickers pieces (about 16 Fun Size bars)

    For the Ganache

    • 4.5oz bittersweet chocolate, chopped
    • 1/2 cup heavy cream
    • 1/2 tbsp coffee liqueur (optional)

    For the Snickers Frosting

    • 5 Fun Size Snickers bars
    • 1/2 stick butter
    • 1 1/2 cups powdered sugar
    • 1-2 tbsp milk

    Directions

    Make the cheesecake

    Pre-heat the oven to 350° F.  Grease your round baking pan.

    In the bowl of a stand mixer, beat the cream cheese and sugar until smooth.  Add the eggs, one at a time, beating well after each addition.  Stir in the vanilla extract and sour cream, then fold in the chopped Snickers.  Pour into the prepared baking pan.

    Bake for about 30 minutes, or until the center is set.  Allow to cool completely, then refrigerate or freeze until ready to use.

    Make the cake

    Bake your chocolate cake according to recipe indications, then allow to cool completely on a wire rack.

    Make the Ganache

    Place the chopped chocolate in a heat-proof bowl.  In a small saucepan, heat the cream until it is just about to boil.  Pour the heated cream over the chopped chocolate, then gently stir until all of the chocolate is melted and the mixture is smooth.  Stir in the coffee liqueur, if using.

    Make the Snickers Frosting

    Sift the powdered sugar into a medium bowl.  In small saucepan, melt the Snickers and butter over low heat, stirring often.  Pour the melted Snickers mixture over the powdered sugar, then stir until the sugar dissolves.  Add 1 tbsp of milk and stir.  If your frosting is still too thick, add the second tbsp of milk.

    Assembly

    Place one chocolate cake layer on a cake board or cake platter.  Spread a thin layer of chocolate ganache over the top of the cake, then remove the Snickers cheesecake from the milk and place it on top.  Spread another thin layer of chocolate ganache over the cheesecake layer, then quickly place the second chocolate cake layer on top (if you don’t work quickly, the ganache might harden before you can place the cake on top, and then the layers won’t stick together as well). Pour the remaining ganache over the top of the cake, allowing it to run over the sides, and then pour the Snickers frosting over that.  Garnish with whipped cream and additional Snickers pieces, if desired.  Refrigerate until ready to serve, preferably overnight.

  • Mocha Macaron Ice Cream Sandwiches

    Mocha Macaron Ice Cream Sandwiches

    Skip to Recipe
    Do you ever think that you have a great idea, and then Google it to find out that your idea has been done repeatedly already?  Well, ice cream and macarons are both things that leave me with the same problem.  I made ice cream and am stuck with leftover egg whites after using the yolks for the custard base.  I make macarons, and now I’m stuck with egg yolks that I need to find a use for.  For a while, macarons were the direct result of having recently made ice cream, and vice versa.  Then, it occurs to me “Hey, why not combine the macarons and ice cream TOGETHER!?”  After all, it’s no secret that macaron shells are very freezer-friendly, so being part of a frozen dessert would not diminish the quality of this cookie.  Lo and behold, it had already been done, and there was plenty of online research material to prepare me for my own efforts.  And, after reading up on it, and a few YouTube videos, I finally decided to try it out.  The results were so spectacular that these quickly became one of my most requested desserts.  Chocolate macaron shells are still the only macaron shells that I can get to turn out well a reliably.  So, all of my flavor combinations were always based around a chocolate macaron shell.  To date, one of the favorite combinations among my friends is the chocolate macaron shells with coffee ice cream.  So, mocha!

    I have had many requests for the recipe, and it’s been sitting on the shelf for a while.  Truth be told, I kept making the macaron ice cream sandwiches with the intention of photographing the process for the blog post.  But, I somehow always end up forgetting to take pictures.  Macarons and ice cream are both fairly time-sensitive recipes that require use of both hands, which makes photographing difficult.

    Be warned, these aren’t really something that you can make on a whim or spur of the moment.  This requires some planning, since the ice cream has to be sufficiently set before you can begin.  The good thing is that, since it’s ice cream, you can make it way in advance and plan to make the macarons up to a few days afterwards.  Or, you can use store-bought ice cream, like a chump.  But, you’re not a chump.  You are all about doing everything from scratch, or you wouldn’t even be here, right!?

    So, here we go!  You start by making the ice cream, preferably at least a day in advance.

    138_beattheyolks

    In a small mixing bowl, whisk some egg yolks and sugar until light in color.  Set aside.

    138_heatthecream

    Heat the milk and coffee granules in a saucepan over medium heat.  Once the milk starts to simmer, remove from the heat and slowly add the hot milk mixture to the egg yolk and sugar mixture, about ¼ cup at a time, whisking constantly.  Once about half of the hot liquid had been added to the egg yolks, pour the egg mixture into the saucepan with the remaining milk mixture, whisking the entire time.

    138_cookthecustard

    Return to the stove and continue cooking, whisking constantly, until mixture thickens and coats the back of a spoon.  Pour through a fine mesh strainer (this ensures a perfectly smooth mixture) into a medium bowl with the heavy cream.  Add the vanilla extract and stir until combined.  Cover with plastic wrap and refrigerate until completely chilled.  You can help the ice cream along by putting the bowl into another bowl filled with ice water and stirring the mixture every 30 minutes or so.

    138_icecream

    Once the custard has chilled, freeze in an ice cream maker according to the manufacturer’s instructions.  Pour the frozen ice cream into a 13″ x 9″ lined with aluminum foil (heavy-duty if you have it), cover, then freeze until the ice cream hardens.

    138_macarons

    You can make any chocolate macaron batter that you like, but Chowhound’s recipe has given me great results.  The important thing here is the size of your macaron shells.  Take whatever cookie/biscuit cutter that you are going to use for your ice cream sandwiches and trace out circles on a piece of parchment big enough to fit your baking pan.  I went one step further and made a template sized for my baking pan, then took it to Kinkos to have it printed and laminated to use over and over again.  Considering how often I have been making these, it was definitely a worthwhile investment.  A 2 ¼” circle is a pretty good size for an ice cream sandwich, but you can choose whatever size you wish.  I find that the baking time is the same for ice cream sandwich sized macaron shells as it is for standard sized macaron shells, but do check them for doneness and adjust baking time as needed.

    138_assembly

    When the macaron shells are baked and cooled, you can start assembling your ice cream sandwiches.  Pair up your macaron shells and place them on a tray.  Take your cookie or biscuit cutter and cut a circle of ice cream out of the pan, then place it over a flat side of a macaron shell and top with another macaron shell to form a sandwich.  Repeat the process until you run out of macaron shells, working quickly so that the ice cream doesn’t get too soft to work with.  Scoop the leftover ice cream into an airtight container and store in the freezer.  Or, just eat it right out of the pan.  Your choice.

    138_storage

    Store them in an airtight container and freeze until ready to consume.  I normally let them sit at least overnight, but a few hours should be enough.  I also rarely have any left more than a week or so.

    macaron ice cream sandwiches

    Next stop: heaven.

    It seems like a lot of work, but the hardest part is getting your macarons to come out properly.  If you’ve already mastered macaron-making, then this should be no problem.  Don’t be afraid.  If I can do it, anyone can!

    Mocha Macaron Ice Cream Sandwiches

    Ingredients

    • 1 batch of chocolate macaron batter (recommended recipe here)
    • 2 cups heavy cream
    • 2 cups whole milk
    • 2 heaping tablespoons instant coffee granules
    • 6 egg yolks
    • 3/4 cup granulated sugar
    • 1/2 tsp vanilla extract

    Directions

    In a small mixing bowl, whisk the egg yolks and sugar until the mixture is light in color.  Set aside.

    In a small saucepan, heat the milk and coffee granules over medium heat until the coffee has dissolved and the mixture is about to come to a boil.  Remove from heat and slowly pour the hot milk mixture into the egg yolk mixture, 1/4 cup at a time, whisking constantly.  Once about 1/3 of the mixture has been added, pour the egg yolk mixture into the remaining hot milk mixture in the saucepan.  Make sure you keep stirring!

    Pour the heavy cream into a medium-sized bowl, then return the milk mixture to the heat.  Continue cooking the mixture over medium heat, whisking constantly, until the mixture thickens and coats the back of a spoon.  Remove from heat and pour through a fine mesh strainer into the bowl that contains the cream.  Add the vanilla extract and stir gently until smooth.  Cover and refrigerate until the mixture is cold.

    Remove the bowl with the custard mixture from the refrigerator and freeze the custard according to your ice cream maker’s instructions.  Pour the soft ice cream into a foil lined 13″ x 9″ pan and spread evenly.  Cover and freeze for 4 hours or until the ice cream is firm.

    While the ice cream is freezing, take the macaron batter and transfer it to a piping bag.  Pipe the macaron batter into circles of the size that you wish your ice cream sandwiches to be (I recommend 2 ¼”), then rest and bake according to the recipe’s directions.  Allow to cool completely before beginning the assembly process.

    To assemble the ice cream sandwiches, pair up the macaron shells, then remove the pan of ice cream from the freezer.  Place one macaron per pair flat side up.  Using a biscuit cutter that is the same size as the macaron shells, cut out a round of ice cream.  Place a round of ice cream on the flat side of the macaron shell, then top with the other macaron shell.  Repeat the process until you are either out of macaron shells or out of ice cream, working quickly to keep the ice cream from getting too soft (if this happens, put the pan back in the freezer until the ice cream firms up again).  Transfer the ice cream sandwiches to an airtight container and freeze for 4 hours or until ready to serve.


  • Caramel Macchiato Cupcakes

    Caramel Macchiato Cupcakes

    Skip to Recipe
    I have a love/hate relationship with coffee.  While I like coffee-flavored things, I don’t actually like to drink coffee.  Some people like that black, unsweetened concoction to just punch them in the face with caffeine.  I, on the other hand, prefer to add enough sweeteners and flavorings that I almost forget that I am drinking coffee.  My favorite “coffee additive” is caramel, because caramel is awesome.  So, it’s no wonder that caramel macchiatos are my favorite coffee beverage.  This cupcake is an homage to this beverage.  As an added bonus, the presentation of these caramel macciato cupcakes makes so you can fool people into thinking that they’re actual drinks.  Pretty neat for an April Fool’s Day post, no?

    (more…)

  • Snickers Brownie Peanut Butter Ice Cream Cake

    Snickers Brownie Peanut Butter Ice Cream Cake

    Skip to Recipe
    One day, about a year or two ago, a recipe for a Snickers Brownie Peanut Butter Ice Cream Cake showed up on my news feed.  After I picked my jaw up off the floor, I made a mental note to try making it someday.  Then, I forgot about it until I happened to get my hands on a bunch of Halloween candy (you remember that, don’t you?) and was looking for things to make with it.  Snickers, brownie, and ice cream…what could possibly be wrong with that!?  After making this Snickers ice cream cake once, it quickly became one of my most requested desserts.  I’ve made it several times since then, and finally decided to share the recipe.

    Now, we all know that I can never leave a recipe well enough alone.  It’s not that this Snickers ice cream cake recipe isn’t probably great on its own, but there’s always a way to tweak it to suit my style.  For one, while the layers look nice, I just don’t have the patience to go through all of that.  Since I only have one springform pan, that would make the process take longer.  Secondly, the “ice cream” used in the recipe isn’t true ice cream.  I decided that this recipe deserved some peanut butter ice cream made from scratch.

    peanutbuttericecream

    The first thing you should do is make the custard for the ice cream.  Heat the cream, milk, sugar, and peanut butter until the peanut butter is melted and the mixture starts to simmer.  Whisk some egg yolks, and then temper the egg yolks by gradually adding hot liquid to the egg yolks.  Once you’ve added about 1/3 of it into the yolks, pour the yolk mixture into the rest of the liquid in the pot and return to the heat.  Continue cooking, whisking constantly, until the mixture thickens and coats the back of a spoon.  Strain the mixture into a bowl, and then pour the strained mixture into a bowl with the rest of the cream.  Add vanilla extract, then cover and refrigerate.  It’s going to need time to chill, so make sure you give yourself enough time.  You can also let it refrigerate overnight.

    DSCN1804

    To expedite the chilling time, I usually place the bowl of custard in an ice bath.  With this method, the custard is usually sufficiently chilled in about 2 hours.

    brownie

    A half batch of brownie batter makes the proper thickness of brownie for a 9″ round springform pan.  Let the brownie layer cool completely, then put it in the freezer until it’s ready to use.

    DSCN1807

    Get your Snickers chopped and ready to go while you wait.  Try not to eat all of it before you can assemble your cake.

    DSCN1818

    Pour the chilled peanut butter custard into an ice cream maker and churn.  Mine is usually done in 15-20 minutes.

    assemble

    When the ice cream is done, sprinkle some Snickers pieces over the brownie layer, then spread the ice cream over the it.  Sometimes, I also drizzle some caramel sauce over this layer.  Top with the remaining Snickers pieces, and gently press them down into the ice cream.  Freeze for about an hour, and then cover with plastic wrap and freeze for at least 4 hours or overnight.

    20151114_203805

    Depending on how well your freezer works, you might need to run a hot knife around the edge of the cake to get it out of the pan.

    4304

    Drizzle each piece with caramel sauce sauce and hot fudge sauce, then let the compliments roll in.

    IMG_0158

    You can also make the cake in a 13 x 9 pan using 3/4 batch of brownie batter.  The ice cream layer will be slightly thinner, but still adequate.

    Snickers ice cream cake

    Honestly, can you really say no to this?

    Since this is a frozen cake, it’s a great make-ahead dessert for a group.

    Snickers Brownie Peanut Butter Ice Cream Cake

    (Adapted from this recipe)

    Ingredients

    For the Ice Cream (adapted from recipe from Brown Eyed Baker)

    • 1 cup whole milk
    • ¾ cup granulated sugar
    • ½ cup creamy peanut butter
    • 2 cups heavy cream, divided
    • Pinch of salt
    • 6 egg yolks
    • 1 teaspoon vanilla extract

    For the Brownie (adapted from recipe from Allrecipes.com)

    • 1 cup white sugar
    • 1/2 cup butter, melted
    • 1/4 cup cocoa powder
    • 1/2 teaspoon vanilla extract
    • 2 eggs
    • 3/4 cups all-purpose flour, with about 1 tbsp of flour removed
    • 1/4 teaspoon baking powder
    • 1/4 teaspoon salt

    Additional ingredients

    • 1 11.5 ounce package Snickers miniatures, unwrapped and chopped
    • caramel sauce
    • hot fudge sauce

    Directions

    Make the ice cream custard

    Warm the milk, sugar, peanut butter, 1 cup of the heavy cream and the salt in a medium saucepan over medium-low heat, stirring until the sugar is dissolved and the peanut butter has melted. Continue cooking until the mixture comes to a slight simmer, bubbling around the edges of the pan.  Remove from heat.

    Whisk the egg yolks in a medium bowl. Slowly pour the warmed milk mixture into the egg yolks, 1/4 cup at a time, whisking constantly. Once you have incorporated about 1/3 of the milk mixture, pour it back into the saucepan with the remaining milk mixture.

    Place the saucepan back over medium heat and whisk constantly until the mixture thickens and coats the back of a spoon, a few minutes.

    Pour the custard through a fine-mesh strainer into a clean bowl, and then stir it into the cream. Stir in the vanilla extract, cover, and transfer the custard to the refrigerator until completely chilled, at least 8 hours or overnight.

    Make the brownie

    Preheat oven to 350°.  Spray a 9″ springform pan with nonstick cooking spray.

    Combine the butter and sugar until combined.  Add the cocoa powder and mix well.  Add the eggs, one at a time, beating well with each addition.  Stir in the dry ingredients and stir until just combined (do not overmix).  Stir in the vanilla.

    Pour into prepared springform pan and bake for 20-30 minutes, or until toothpick inserted in the center only has a few fudgy crumbs.  Allow to cool completely on a wire rack, then freeze in the pan until ready to use.

    Assembly

    Freeze the chilled peanut butter custard in an ice cream maker according to the manufacturer’s directions.

    Sprinkle about 1/3 of the Snickers pieces over the brownie.  You can also pour some caramel sauce over them, but this is optional.

    When the ice cream is ready, spoon it over the brownie and Snickers, spreading it evenly.  Spinkle with the remaining Snickers pieces, gently pressing them down into the ice cream.  Refrigerate for about an hour, then cover with plastic wrap and refrigerate for at least 4 hours, but preferably overnight.

    To serve, remove Snickers ice cream cake from the springform pan and cut into slices with a knife run through hot water.  Drizzle each slice with caramel and hot fudge sauce.


  • Red Velvet Ice Cream Sandwiches

    Red Velvet Ice Cream Sandwiches

    Skip to Recipe
    Okay, I lied.  I am totally posting a “red” recipe in February for Valentine’s Day.  But, I got inspired and decided that this recipe deserved a posting.  I mean, they’re HEART-SHAPED!  What other month of the year could I get away with this!?  Exactly.  Besides, it’s kind of cheating because it’s simply combining two existing recipes.

    These ice cream sandwiches are made with brownie, but you can also use blondie or cookie dough for the outside, if you prefer.  The star of the show is the red velvet ice cream sandwiched in the middle.  Out of so many things red velvet that exist in the world, this ice cream is a personal favorite.

    (more…)

  • Caramel Pumpkin Oatmeal Bars

    Caramel Pumpkin Oatmeal Bars

    Skip to Recipe
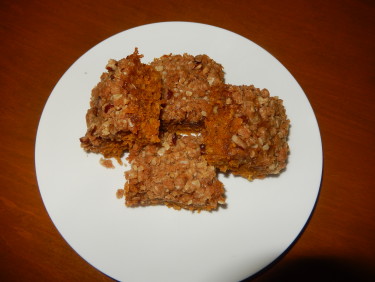
    I know what you’re probably thinking.  “Why is she posting pumpkin desserts in January?”  You have a point.  I could have waited until Fall rolls around again, and posted this then.  But, that would have meant that you, my loyal followers, would not know the existence of this little squares of heaven for almost another year.  I just couldn’t have that. (more…)

  • Chocolate Coquito Macarons

    Chocolate Coquito Macarons

    Ah, macarons.  They are such wonderful and enigmatic things.  The first time that I tasted a macaron was at a chocolate festival.  There was a French bakery showcasing these delicate meringue and almond flour confections, and it was love at first bite.  Since then, they hold a special place in my heart.

    Making them, on the other hand, can probably bring a seasoned chef to tears.  Even an experienced baker can botch these things.  It seems like it takes equal amounts of skill and luck to get the almond flour, meringue, and sugar to come together in just the right way.  The meringue has to be stiff, but not too stiff.  The batter can’t be overmixed or undermixed.  The weather can’t be too humid.  The stars need to align.  The baking gods need to smile upon you. You need to say a prayer.

    I honestly don’t know what possessed me to try making them the first time.  Perhaps I am just a glutton for punishment.  Still, I tried, and failed.  Then, I tried and failed again.  And, I kept trying and trying.  Then, I would sometimes succeed, but I still fail most of the time. (more…)

  • Red Velvet Rum Cake

    Red Velvet Rum Cake

    Skip to Recipe
    Every now and then, my boss flies into town and pays her subordinates a visit.  During her most recent visit, one of my colleagues and I were dealing with an ongoing project, and she was feeling fairly overwhelmed.  As a joke, she asked our boss to approve the shipment of a cake just for her (she works out in California) to boost her morale.  Unbeknownst to her, my boss thought that this was a good idea, and asked me to make one to ship to her.

    Drinking on the job is, for obvious reasons, frowned upon.  But, there’s nothing stopping us from sending the booze in the form of a cake.  But, my boss reminds me that my colleague’s favorite cake is red velvet.  Yes, but red velvet cake needs the cream cheese icing, which would never survive a trip without professional food packaging.  A rum cake is much more likely to make it to its destination with little to no deterioration in quality, because of the alcohol content helping to keep it fresh.  My boss ponders a bit, then asks “Well, could you make a red velvet rum cake?”

    Why didn’t I think of that sooner? (more…)

  • Malted Chocolate Cheesecake

    Malted Chocolate Cheesecake

    Skip to Recipe
    After Halloween, I did something really stupid.  I went to the store and perused the racks with the clearance Halloween candy, and ended up leaving with enough candy to last me several months.  Normally, this isn’t really a problem.  I have a candy jar at my desk at work that was always in constant need of refills.  But, then they moved me to an isolated cubicle on a mostly empty floor, and the candy jar remained untouched.

    What’s a woman to do with a bunch of leftover Halloween candy?  Eating it would be a simple answer, but so pedestrian.  Besides, I easily had at least 20 bags of candy lying around.  So, I decided to start getting creative.  This malted milk ball cheesecake was inspired by the Whoppers candies that I sifted out of a giant variety bag of candy.  The cheesecake itself doesn’t contain any Whoppers, but it’s a light chocolate cheesecake flavored with malt. (more…)