Category: Recipes

Recipes

  • Pumpkin Cinnamon Rolls

    Pumpkin Cinnamon Rolls

    Skip to recipe
    I owe all of you a sincere apology.  I really wanted to have this recipe posted before Thanksgiving, because it’s such an ideal breakfast for the holiday.  Unfortunately, things happened, and here we are.

    I originally made these to get rid of some leftover pumpkin that I had been using for another project.  They were so good that I decided that I wanted to post them to the blog as a special Thanksgiving post.  Well, Thanksgiving has come and gone, but I still think that this recipe is worth a post.  In fact, I did make these for my sister’s family as I am visiting them in Phoenix as a special After Thanksgiving breakfast treat.  Needless to say, my nieces love me.

    Special thanks to my sister and her family for allowing me to take over their kitchen.  Also, because I am the first one to use the bread machine that I bought her as an early Christmas gift.  I don’t think she minded at all, though.

    20161126_073434

    Add the ingredients in the bread machine according to the manufacturer’s directions. Then, set it to the Dough Cycle and let the machine do its thing.

    20161126_083036

    When the dough is almost done, mix together the brown sugar and the spices.

    20161126_090556

    Once the dough cycle is complete, your dough will be ready for rolling.

    20161126_090836

    Drop the dough onto a floured surface and sprinkle with more flour.

    20161126_091236

    Roll the dough out into a rectangle.  Or, as close to a rectangle as you can get.

    20161126_091708

    Then brush with softened butter…

    20161126_092000

    …and sprinkle evenly with the brown sugar and spice mixture.

    20161126_092435

    Roll the dough into a cylinder and cut into 12 equal pieces.  Unfortunately, my part-time photographer for the day was one of my nieces, who wasn’t exactly honest when she told me that she knew how to take photos.  So, we missed the pictures of me rolling and cutting the dough.

    20161126_100008

    Let them rise in a warm place until doubled in size.  This should take about an hour.

    20161126_102648

    Bake them for about 20 minutes, or until lightly browned.

    20161126_103051

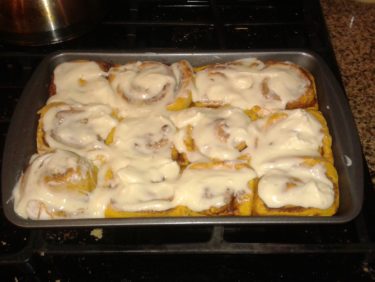
    Top the rolls with cream cheese icing while they are still hot.  I once also topped them with a caramel icing to accommodate someone that hates cream cheese. That was also good, but I think that the cream cheese icing is better.

    If you don’t have a bread machine, you can still make these by replacing the bread machine yeast with active dry yeast and kneading/rising by hand.  The process will be a little more involved, but it can be done!  I sometimes also use pre-mixed Pumpkin Pie Spice instead of the individual spices with great results.

    Pumpkin Cinnamon Rolls

    (Adapted from Taste of Home Recipe)

    Ingredients

    • 3-3 1/2 cups flour
    • 1 package (2 1/4 tsp) bread machine yeast or instant yeast
    • 3/4 cup pumpkin puree
    • 1/2 cup warm milk
    • 2 tbsp sugar
    • 2 tbsp butter, melted
    • 1/2 tsp salt
    • 1 egg, lightly beaten
    • 1 cup brown sugar
    • 4 tbsp butter, softened
    • 1 tbsp ground cinnamon
    • 1/2 tsp ground nutmeg
    • 1/4 tsp ground cloves
    • 1/4 tsp ground allspice
    • 1-1 1/2 cups cream cheese icing

    Directions

    Add the first 8 ingredients to the bowl of the bread machine according to manufacturer’s directions.  Set the machine to the Dough cycle and turn on.  Meanwhile, combine the brown sugar, cinnamon, nutmeg, cloves, and allspice.

    When the dough cycle is complete, turn the dough out onto a floured surface.  Sprinkle with additional flour and roll into a rectangle approximately 12″ x 16″.  Brush with the softened butter, then sprinkle with the brown sugar and spice mixture.

    Roll the dough into a log and cut into 12 equal pieces.  Place the pieces in a greased 13″ x 9″ baking pan.  Cover and allow to rise in a warm place until doubled in size, about 1 hour.

    Once risen, bake at 350° for 20-25 minutes, or until golden brown.  Top hot rolls with cream cheese icing.  Serve warm.

    Makes 12 servings

  • Bacon, Beer, and Three-Cheese Risotto

    Bacon, Beer, and Three-Cheese Risotto

    Skip to recipe
    I love my friends, but they are a bunch of enablers.  Instead of going outside or having a life, I prefer to spend my free time trying new things out in the kitchen.  They are happy to oblige, always providing me with recipes that caught their eye or that they think I would be interested in.  Of course, it serves their own interests as well, since they normally get to consume the finished product.  I’m not complaining.  I have discovered some pretty delicious things by having a friend plant the seed.

    One such friend, who is practically “vegetarian except for bacon,” sent me this recipe, which immediately caught my attention.  Bacon, beer, and three-cheese risotto!  I love carbs, bacon, and cheese.  What could possibly be bad about combining them all into one, steaming bowl of creamy risotto?  Nothing, that’s what.  I challenge anyone to refute that.  So, I agreed to give this recipe a shot.  And, of course, she was more than happy to come and “assist” and critique the finished product.  Quality control is an important job, you know!  But, thanks to the extra set of hands, I managed to catch some shots of the process to making this decadent dish.

    20160918_133740

    Now, I am normally a pretty ad-hoc cook, but risotto is a fairly time-sensitive dish that requires constant attention.  You really can’t step away to chop a shallot or grate cheese while it simmers, so mise en place (prepping everything and having it ready to go before you start cooking) is critical.  So, before you get started, make sure all of your ingredients are prepped and ready to go.  You can heat up your broth or stock while this is happening.

    20160918_134008

    While your cooking liquid is warming up, you can start cooking the bacon.  Make sure you lower the heat on the liquid as soon as it starts to simmer.  You don’t want to add boiling broth/stock to your risotto.

    cookthebacon

    Fry the bacon until it’s nice and crispy, and then strain the bacon out and set it aside.  Do not clean out your pan.  Just pour out all except for about a tablespoon of the bacon fat.

    addingliquids

    So, we’re leaving the fond-crusted pan as-is and dumping our chopped shallots in there, then the garlic once the shallots are soft.  Once the garlic is starting to get fragrant, throw in the rice and let it brown a little.  Add the beer, and cook until the rice absorbs most of it.  Then, reduce the heat and start adding the hot stock/broth, one ladle at a time.  Let the rice absorb most of the liquid before adding another ladle, continuing to stir gently.  It will take about 20-30 minutes for the rice to cook, so be patient and don’t rush it.  If you run out of liquid and the rice is still not cooked through, you can add some hot water and continue stirring until it’s the desired consistency.

    finishingtouches

    Once the rice is the desired consistency, add the cheeses and stir until they are melted.  The original recipe uses Parmesan and cheddar, but we added a bit of Gruyere to give it some additional bite.  Add the bacon after that, then season with salt and pepper to taste.

    20160918_142630

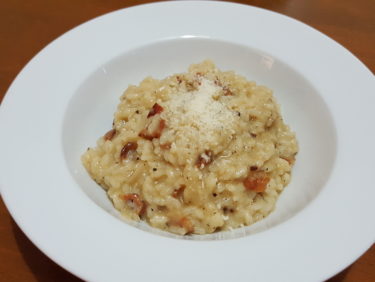
    Dinner is served!  See those dark flecks of solidified bacon drippings floating around in there? That’s concentrated flavor!

    If you’re feeling fancy, garnish with an extra sprinkle of cheese or some chopped parsley or chives.  But, I’m not fancy.  I’m hungry.

    EDIT 10/28/2017: I recently discovered that this can also be made in a pressure cooker, which saves a lot of effort.

    Bacon, Beer, and Three-Cheese Risotto

    Ingredients

    • 1 cup uncooked Arborio rice (add in extra 1/2 cup if using a pressure cooker)
    • 6 slices of bacon, cut into small pieces
    • 1/2 bottle of beer (I use lager)
    • 1 shallot, diced
    • 2 garlic cloves, minced
    • 1 quart broth or stock of your choice (I use Vegetable or Chicken Stock)
    • 1/2 cup cheddar cheese
    • 1/4 cup Parmesan cheese
    • 1/4 cup Gruyere cheese
    • salt and pepper to taste

    Directions

    Pour chicken broth in a small pot, and let it sit on a gentle heat.

    In a large sauté pan, cook bacon to render the fat. Once crispy, remove from pan and set aside.  Leaving about 1 tbsp of the bacon fat in the pan.  In the bacon fat, add the shallot. Cook until translucent, then add the garlic and cook until fragrant. Add the rice and stir to coat the grains in the fat. Cook for about 2 minutes.

    Once the grains begin to brown slightly, pour in the beer. Stir and let simmer. Once the liquid is mostly absorbed, add a large ladle of the hot broth/stock. Continue to stir until the liquid is mostly absorbed. Repeat the process until the grains are creamy and cooked through.

    Lower the heat and stir in the cheeses and cooked bacon. Remove from heat and serve.

    To make in a pressure cooker: Follow the same steps as the stovetop recipe, except use the liner of your electric pressure cooker on the Saute/Browning setting, until you get to the part where you add the beer.

    Once the rice has absorbed most of the beer, add in the entire 4 cups of broth or stock.  Cover and seal your pressure cooker, then cook on Manual (High Pressure) for 6-7 minutes.   Immediately release the pressure, uncover, and remove the liner from the pot.  Stir the rice with the liquid until it starts to thicken.  Add the cheese, a little bit at a time, until all of the cheese is melted and risotto is creamy.  Stir in the cooked bacon and serve immediately.

  • Chicken Karaage

    Chicken Karaage

    Skip to recipe
    Anime and people who watch anime often get a bad rap.  Anime fans are often associated with weirdos or basement dwellers.  Anime itself is often written off as either childish or too “adult.”  Granted, they can be both, and sometimes at the exact same time!  Still, every now and then, an anime comes along that sticks some tidbits of knowledge into its plot, whether subtly or shoving it in your face.  That is one of my favorite things about animes about food and cooking.  Most cooking shows on TV nowadays have devolved into circus sideshows of contests to see how horribly they can mess with cooks and still get them to make something edible.  It’s not really about the food anymore, which is a shame.

    So, when Shokugeki no Soma (Food Wars in English) came along, I was eager to check it out.  The story centers around the son of a diner owner that is sent to a highly elite culinary school at the start of his high school career.  Given anime’s penchant for making even the most mundane tasks appear epic and grandiose, hilarity ensures.  Soma, the titular hero, often creates food so delicious that it elicits borderline NSFW reactions from anyone that eats it.  There’s plenty of shots of delicious-looking animated food, amusing gags, and even tentacles (if you’re into that sort of thing).  But, most of all, there are loads and loads of recipe ideas and tips.  Which brings us to this post…

    Towards the end of the first season, our hero is pitted against an evil chicken karaage (fried chicken) franchise that is threatening to put the shopping district where his father’s diner resides out of business. Naturally, it’s up to our plucky hero and his high school friends to save the day for the helpless adult business owners.  In order to see what they’re up against, they decide to check out their competitor.  In an episode aptly named “Sensual Fried Chicken,” they discover the wonder that is this juicy and tender chicken as the manager gleefully gloats about how awesome her chicken is.  After some experimentation, they manage to “defeat” this fried chicken by transforming it into a fried chicken wrap that can be eaten “on the go,” but the flavors of the chicken itself gave them a run for their money.

    Watching the reactions to the chicken both made my mouth water and made me want to try making this at home.  And, after investing in an extra-fancy deep fryer, I found the perfect excuse to give it a shot.  This web page gave me a starting point, and I made a few educated guesses as to the quantities of each ingredients that wound up working very well.  I started with making the competitor’s chicken recipe, because it looked less complicated than Soma’s “winning” recipe.  The chicken ended up being so good that I don’t think I will ever bother trying the other one.  I did tweak it a bit to match my tastes, but it’s still great.  My first attempt at this chicken was made using chicken breast, and it was the absolute juiciest chicken breast that I have ever made or eaten.  Once I crunched through the crispy exterior, the chicken juices basically danced in my mouth.  Since then, I have switched to chicken thighs, but I wouldn’t be against using chicken breast again if that’s the only thing that I could get my hands on.

    makemarinade

    The marinade is simple to make and doesn’t contain any ingredients that are hard to find.  Just throw everything in a blender or food processor and whir until it’s all pulverized.

    cutchicken

    I used boneless skinless chicken thighs for this.  You are welcome to use chicken breast as well.  Both will yield tender and juicy results, but I just find that chicken thighs are extra succulent when paired with this marinade.  Cut the chicken into bite sized pieces (think chicken nugget sized) and place in a plastic freezer bag.  Pour the marinade into the bag and shake so that all of the chicken gets covered in the marinade.  Refrigerate this for at least 4 hours, but ideally overnight.

    breadandfry

    About 30 minutes prior to frying, remove the marinated chicken from the fridge and allow to sit at room temperature.  Preheat your fry oil.  In a bowl, season your potato starch with salt and pepper and stir to combine.  Dredge the chicken pieces on the potato starch.  There’s no need to dip them in egg or milk, as the marinade is moist enough to get the starch to cling.  So, just roll then in the starch and keep moving.

    The frying process is in two parts.  You fry them once, then remove them from the oil and let them rest for a few minutes before frying them again.  This is the key to an extra-crispy exterior.  Note that you don’t need a deep fryer with a basket to make this chicken, as long as wherever you are frying has a way for you to monitor the temperature of the frying oil.  No one wants a greasy, soggy crust.

    dscn4197

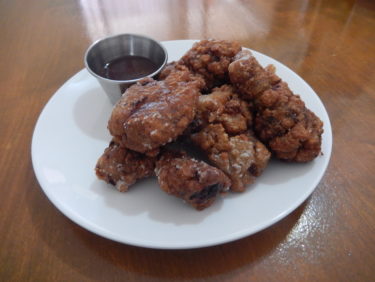
    These crunchy and juicy tidbits of chicken are delicious enough to stand on their own, but also pair well with a dipping sauce.  Sweet chili garlic dipping sauce is a personal favorite, but don’t take my word for it.  Try it for yourself!

    Who says anime is only for kids!?

    Chicken Karaage (AKA Sensual Fried Chicken)

    Ingredients

    • 1/2 large white onion
    • 1/2 medium apple
    • 3 cloves garlic
    • 3/4 cup soy sauce
    • 1 1in piece of fresh ginger
    • 1/4 tsp nutmeg
    • 1/2 tsp chili powder
    • 1 tsp ground black pepper
    • 2 lbs boneless skinless chicken thighs, fat trimmed
    • 1-2 cups potato starch (or corn starch)
    • salt and pepper to taste

    Directions

    Combine the first 8 ingredients in a blender or food processor (chop the apple and onion as needed to make it fit) and blend until mostly smooth.

    Cut the chicken into bite sized pieces (about 2 inches) and place in a freezer bag.  Pour the marinade over the chicken pieces, seal the bag, and shake to combine.  Refrigerate until ready to use, at least 4 hours.

    About 30 minutes prior to frying, remove chicken from refrigerator and allow to sit at room temperature.  Add potato starch to a bowl and season with salt and pepper.

    Preheat frying oil to 375 degrees.  Dredge the chicken pieces in the potato starch and fry for 2 minutes.  Remove from oil and allow to rest 3-5 minutes, then fry for an additional 2 minutes.  Drain on wire rack or paper towels and serve hot.


  • Dulce de Leche Pastelitos

    Dulce de Leche Pastelitos

    Skip to Recipe
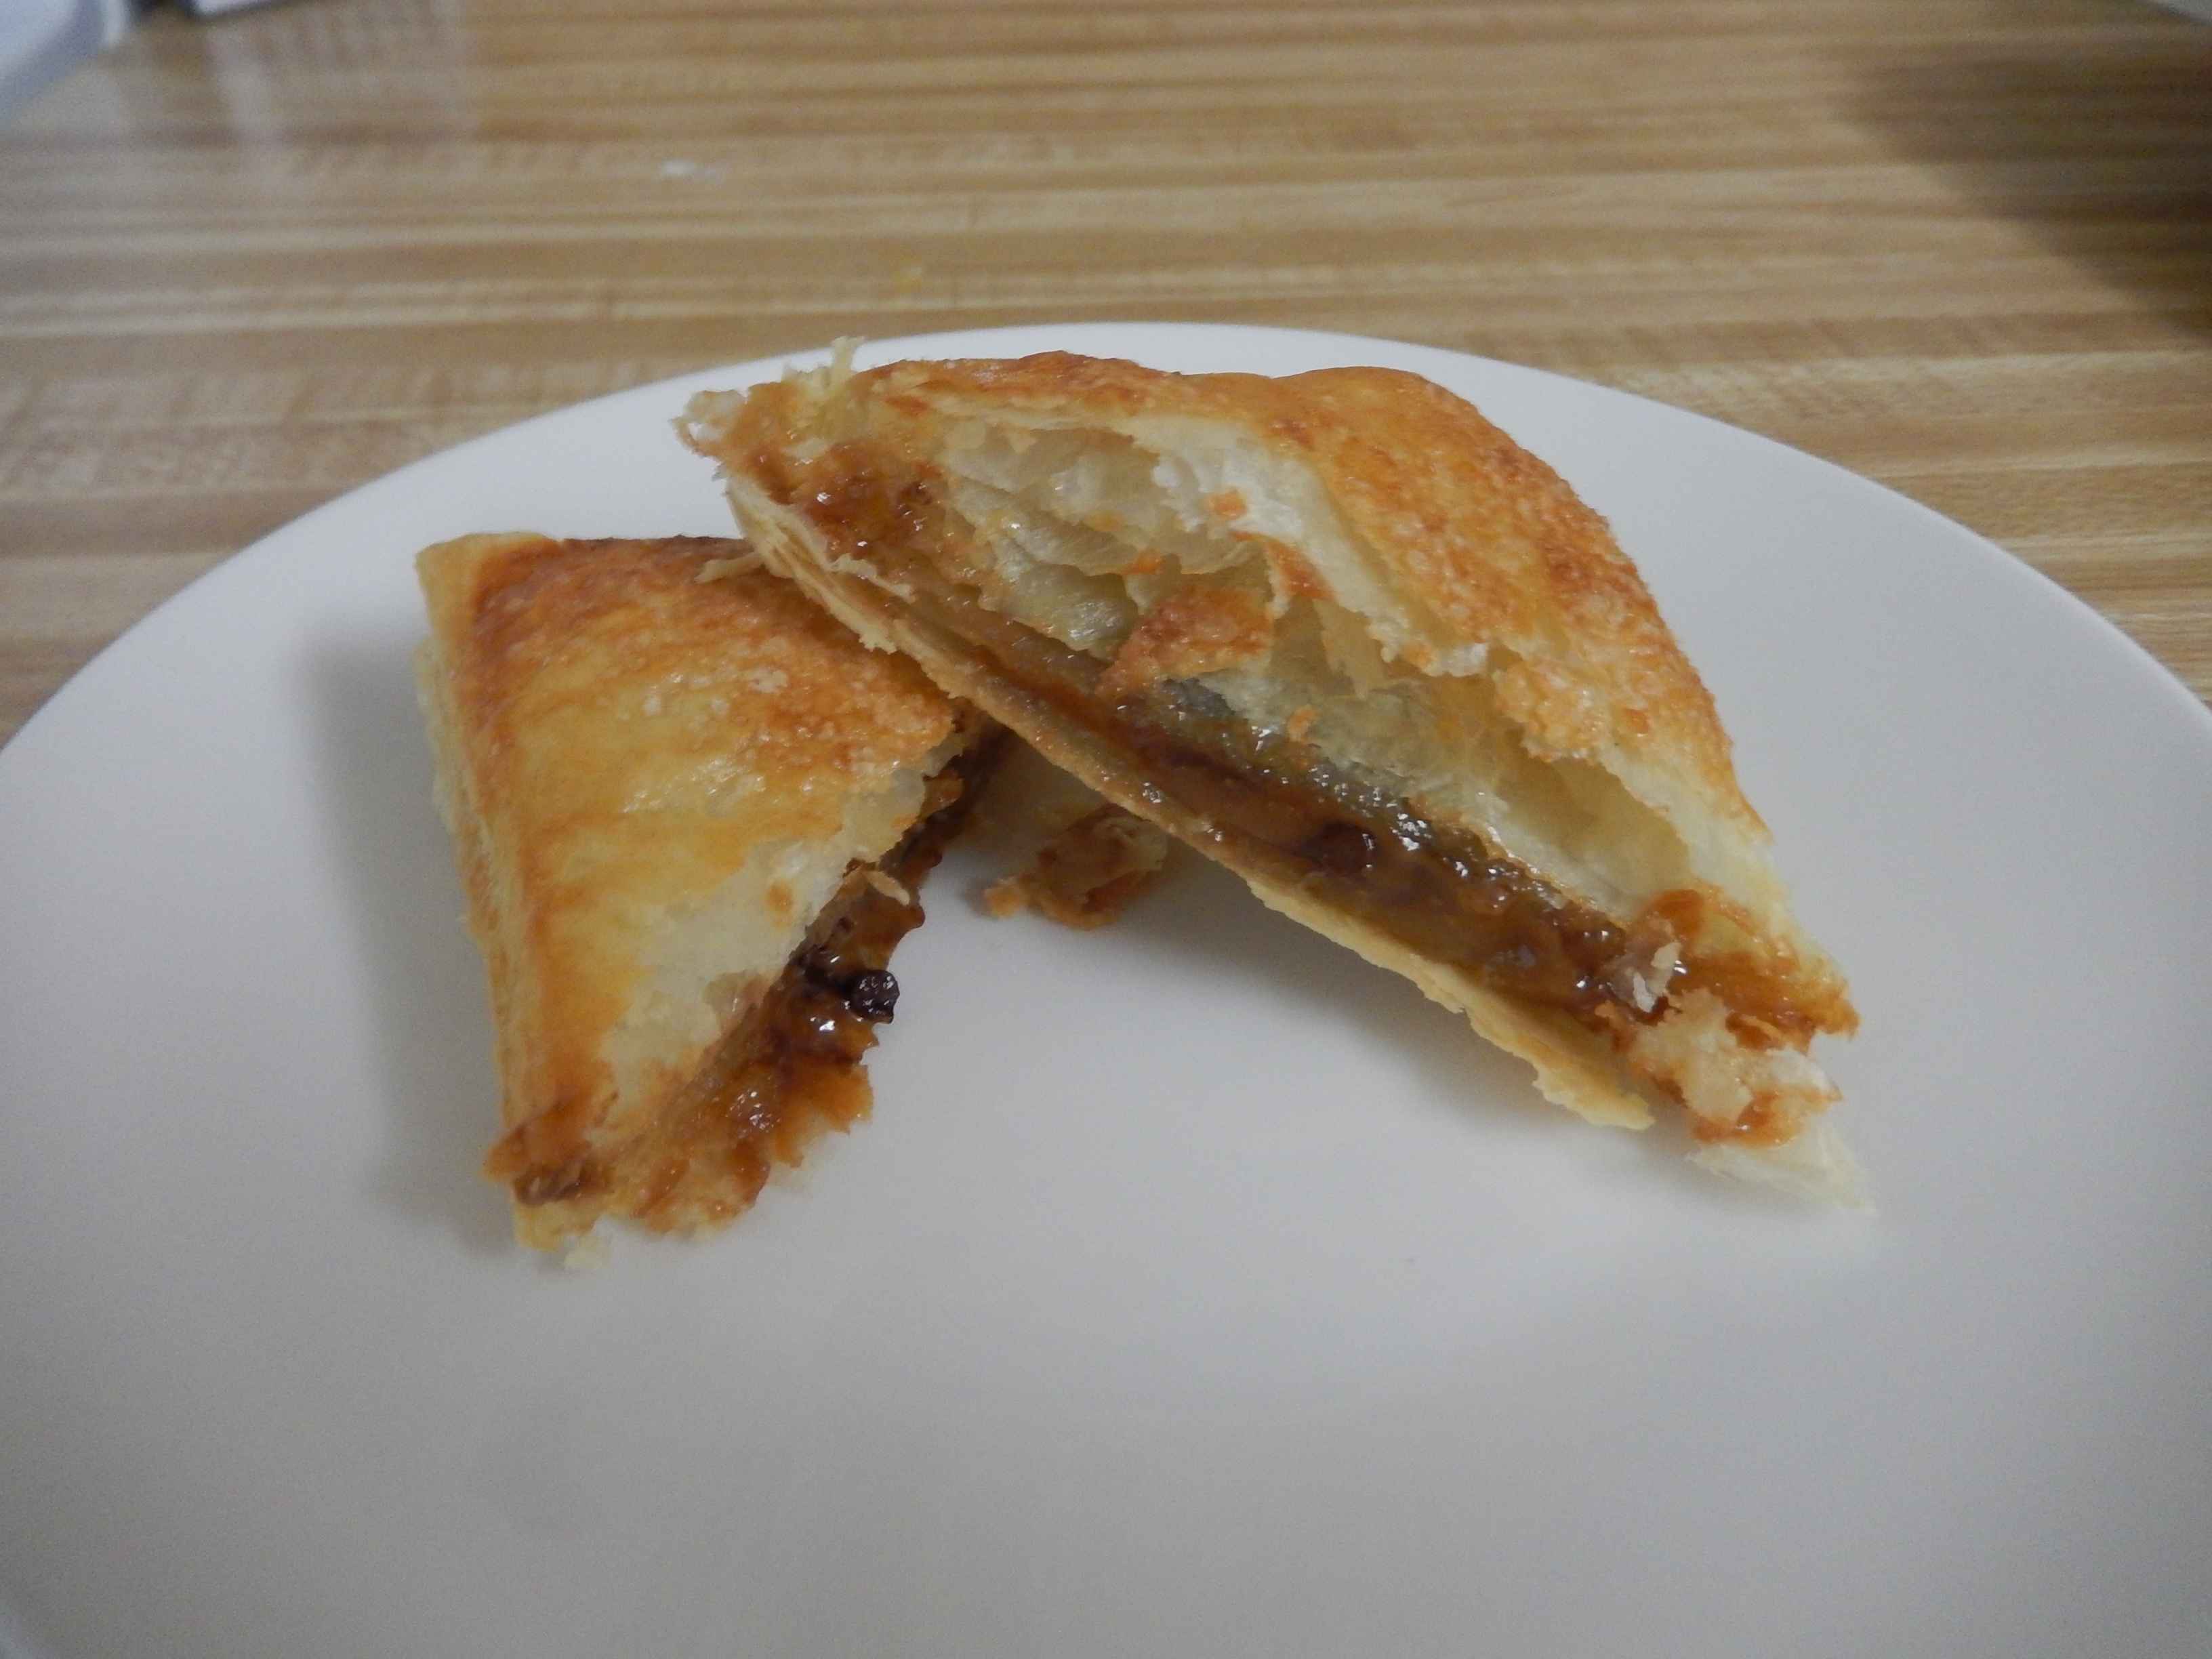
    Ever since a recent experience using puff pastry, I have been dying to find another use for it.  The problem is, I’m not a particularly big fan of cooked fruit fillings, as evidenced by the lack of fruit pies and the like on my blog.  I kept wondering what I could put in the puff pastry, until it dawned on me one day.  It probably helped that it was around the time that I come upon a giant, Costco-sized jar of dulce de leche, but it’s still amazing that it took me that long to think of it.  After all, dulce de leche is exceptionally sweet, which is perfect for a crust like puff pastry that is not too sweet.  The flavors balance each other out perfectly.  You can even add semisweet chocolate chips to the filling for an added twist.  Best of all, they’re super easy to make!  Unless you’re going to make your puff pastry and dulce de leche from scratch, that is.  Otherwise, what takes the longest is waiting for the frozen puff pastry to thaw.

    assembly

    Start by thawing your puff pastry.  Once it’s thawed, open it up into flat squares and cut each square into 9 pieces so that you have 18 squares total.  Add a spoonful of dulce de leche into 9 of the squares (add some chocolate chips if you want, as well).  Brush the outer edges with beaten egg, then place a second square on top and press firmly (but gently) to seal.  Brush the tops with additional beaten egg, then sprinkle with sugar.

    dscn4094

    Afterwards, they go into the oven!

    dscn4100

    Despite how delicious they look, resist the urge to immediately bite into one of these.  The filling is HOT.  Like, “burn your face” hot.  “Molten lava volcanic eruption” hot.  It will hurt you.  You will burn your tongue and it will take some of the enjoyment away from eating it.  Let them sit at least 20 minutes before you brave an attempt at eating one.  Take it from someone who had to rub an ice cube on her tongue (but ate it anyway).

    dscn4109

    But…I promise you that it will be worth the wait.  🙂  The warm, gooey, dulce de leche delight in each flaky bite of these dulce de leche pastelitos will leave you wanting more.

    Dulce de Leche Pastelitos

    Ingredients

    • 1 package puff pastry sheets, thawed
    • 3/4 cup dulce de leche
    • 1 egg, beaten
    • 1-2 tbsp granulated sugar
    • mini chocolate chips (optional)

    Directions

    Preheat oven to 350°.  Line a large baking sheet with parchment paper.

    Lay the puff pastry sheets out on a solid surface.  Cut each sheet into 9 equal squares so that you’re left with 18 squares.  Add a spoonful of dulce de leche to the center of each square, then sprinkle with chocolate chips (if using).

    Brush the edges of each filled square with beaten egg, then top with another square of pastry sheet.  Gently press down to seal.  Brush the tops with the remaining beaten egg, then sprinkle with sugar.

    Bake in preheated oven for 25-30 minutes, or until golden brown.  Allow to cool on a wire rack for at least 20 minutes before consuming.  Store leftover dulce de leche pastelitos in an airtight container after completely cooled.

  • Dulce de Leche Bundt Cake

    Dulce de Leche Bundt Cake

    Skip to Recipe
    I never understood the allure of Costco until I borrowed a membership card from a coworker to help out a friend.  My presence there was merely as an escort, but I wound up leaving $60 poorer from just arbitrarily throwing things in my cart that looked good and was priced significantly lower than I could get it in regular stores.

    That is how I wound up with a giant jar of dulce de leche.  I even mulled over my decision to purchase for a while before I finally went ahead and left it in my shopping cart.  The last time that I waited too long to finish a jar of dulce de leche, it dried out and got crusty.  Was I really going to be able to use all of it in time?  It really kills me to waste food, and I have a few friends that would probably never forgive me if I let perfectly good dulce de leche go to waste.

    Enter this dulce de leche bundt cake.  I honestly don’t even remember what I was looking for when I came across this cake.  I probably Googled “recipes that use dulce de leche” or something along those lines.  Before I knew it, I had made this cake 3 times and was asking for someone with a Costco card to pick up another jar of dulce de leche for me.  Despite being a dulce de leche-centric cake, it’s not overwhelmingly sweet.  The small pocket of dulce de leche is supposed to be closer to the middle of the cake, but it doesn’t matter.  It is still a great cake and is not terribly difficult to make.  Using all brown sugar adds to the cake’s a subtle caramel flavor.

    dscn3832

    First, you want to sift your dry ingredients and set them aside.

    prepbatter

    Next, you make the batter.  Cream your butter and brown sugar together, then add some of the dulce de leche.  Once the dulce de leche is sufficiently combined, beat in the eggs one at a time.  Add vanilla extract.  Blend in the flour alternately with the milk, beginning and ending with flour.

    fillbundt

    Pour about 3/4 of the mixture into a well-greased bundt pan.  Gently add the remaining dulce de leche into the center of the batter, then pour the remaining batter into the pan.  After that, into the oven it goes!

    dscn3970

    About an hour later, you’ve got a beautiful bundt cake.

    20160911_140833

    With a surprise little pocket of dulce de leche inside!

    Since it’s a bundt cake, it’s great for potlucks and similar events.  I bet it would be great with ice cream, but it never lasts long enough for me to find out.  Give this cake a try!

    Dulce de Leche Bundt Cake

    (Adapted from Ambrosia)

    Ingredients

    • 1 1/2-1 3/4 cups dulce de leche, divided
    • 1 cup (2 sticks) unsalted butter, at room temperature
    • 1 cup dark brown sugar, packed
    • 4 eggs, at room temperature
    • 2 teaspoons vanilla extract
    • 1 cup whole milk
    • 1 tablespoon baking powder
    • 1/2 teaspoon baking soda
    • 1/2 teaspoon salt
    • 3 cups all-purpose flour

    Directions

    Preheat the oven to 350° F.  Grease a 12-cup Bundt pan.

    Sift the flour, baking powder, baking soda, and salt, into a bowl and set aside.  In the bowl of a standard electric mixer, combine the butter and brown sugar, and cream until light and fluffy. Once creamed , add 1 cup of dulce de leche.  Mix well, then add the eggs, one at a time, mixing well with each addition. Add in the vanilla extract.

    With the mixer on low speed, alternate adding the dry ingredients and milk, beginning and ending with the dry ingredients mixture.  Beat until just combined.  Do not overbeat!

    Add about 3/4 of the cake batter into the prepared Bundt pan.  Add the remaining 1/2-3/4 cup dulce de leche in a ring around the center of the pan.  Evenly distribute the remaining cake batter in the pan, and gently smooth out the top with a spatula. Don’t press down or tap the pan against the counter to keep your filling from sinking too much.

    Bake in the center rack of the oven at 350° for 50-60 minutes, or until a toothpick inserted near the center comes out clean.  Let the cake cool in the pan for 15-20 minutes, then remove from pan and allow dulce de leche bundt cake to cool completely on a wire rack.

  • Twix Brownies

    Twix Brownies

    Skip to Recipe
    The part of me that wants to create delicious things is often at war with the side of me that is lazy as heck.  Sometimes, I want cake, but I want to nap just a little bit more.  Other times, it’s the other way around.  There are days where I can totally spend hours preparing an elaborate cake, and days where I want something tasty without spending too much time in the kitchen.

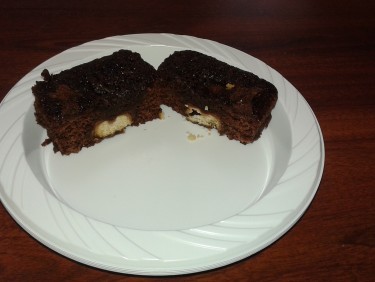
    I am not ashamed to admit that, months after racking up on clearance Halloween candy, I was still going through the bags and trying to come up with creative uses for the candy.  This recipe came about in a bout of exasperation at having run out of neat ideas for the candy.  I mean, I could just EAT it, but where’s the fun in that!?  Instead, I just started adding candy bars to different batters and seeing what happened.  Brownies are great for that because the batter is thick enough to suspend pieces of candy in.  These, however, are more of a “brownie with a surprise in the middle.”  Imagine biting into what you think is just a regular brownie and finding the chewy, crunchy goodness of a Twix bar?  Yum!

    This recipe comes together pretty easily.  I used a dessert squares pan so that they would all be the same size, and to elimiate the danger of having brownies that did not have any Twix in them after being cut into squares.  Grease each cavity with a little bit of butter or oil.

    DSCN1887

    Then lay a Twix at the bottom of each cavity.

    DSCN1888

    Fill with brownie batter.

    DSCN1892

    And BAKE!

    20151119_104653

    That’s pretty much it.  To make things even easier, you could use boxed brownie mix if you so desired.  If you don’t have a dessert squares pan, you can also use an 8″ square pan.

    Twix Brownies

    Ingredients

    • ½ cup (1 stick) butter, melted
    • 1 cup granulated sugar
    •  ¼ cup cocoa powder
    • 2 eggs
    • ¾ cup all-purpose flour
    • ¼ tsp baking powder
    • ½ tsp vanilla extract
    • 12 Fun Size Twix bars, unwrapped

    Directions

    Preheat oven to 350ºF.  Grease a 12-cavity dessert bar pan.  Place 1 Twix bar in the middle of each cavity.  Set aside.

    Combine the melted butter and sugar together in a medium bowl.  Stir in the remaining ingredients in the order that they are listed, mixing well with each addition.  Divide batter evenly between the 12 cavities of the bar pan.

    Bake in preheated oven for 15-18 minutes, or until a toothpick inserted near the center comes out with only fudgy crumbs.  Allow to cool completely on a wire rack before removing from pan.

  • Mango Madness in July – Part 3 (2016 Chapter)

    Mango Madness in July – Part 3 (2016 Chapter)

    Another year, another Mango Season in South Florida.  This is now my third Mango Madness post, as I did this in 2014 and 2015 with great success.  But for those of you just tuning in, I will fill you in.  During Mango Season, I find myself getting a large quantity of mangoes that I don’t always know what to do with.  I mean, mangoes are great to eat just as-is, but there are only so many you can have.  Plus, it doesn’t take long for them to go from “just right” to overripe, after which the only thing you can really do is puree it and use it somehow.  That was the start of Mango Madness.

    As each year goes by, it gets harder for me to think of things to do with mango that I haven’t done the previous year.  I spent most of May and June fretting about whether Mango Madness would be as good as previous years, as my brain reserves were running low.  But, thanks to Google, feedback from friends and family, and random “Eureka!” moments, I have managed to make the 2016 chapter of Mango Madness just as prolific as the last two!

    So, what are some new things that I made with mango this year?  Check it out!

    mango lassi

    Mango Lassi is a accompaniment to spicy food, or just a healthy pick-me-up at any time of the day.  Plus, since it’s basically just a mango and yogurt smoothie, it’s super easy to make.  Just blend equal parts mango puree and plain yogurt together, then sweeten to taste with honey.  I like to bottle it to take to work.

    20160628_211755

    Take the classic Strawberry Cream Cake and make it a Mango Cream Cake!  Just replace the strawberries with chopped mango and add a little bit of mango puree to the whipped cream.

    20160711_215519

    Mango Pastelitos already have a dedicated blog post here, and they’re worth trying out!

    20160710_195620

    Mango pastry cream is delicious on its own, but also has many uses.  Plus, it’s also a good way to use up a large amount of milk that you may be looking to find a use for.  I used this recipe as a guide, but made a few changes.  I used fresh mango pulp instead of canned, omitted the cardamom and saffron, and used vanilla extract instead of vanilla bean paste.  I also went light on the vanilla so that it didn’t overpower the mango flavor.

    20160711_080402


    With all of that mango pastry cream lying around, I had the idea to make little mango tarts.  But, being too lazy to make tart shells, I went ahead and filled store-bought phyllo cups with the cream, and then topped each “tart” with a fresh raspberry.  Simple AND delicious.

    20160627_214548

    Mango mousse is delicious, refreshing, and only uses four ingredients.  Whip 3/4 cup of heavy cream until soft peaks form.  Add 1 tbsp piping gel, then continue to whip until stuff peaks form.  Fold in 3/4 cup mango puree and 1/4 tsp vanilla extract, pour into serving cups, and refrigerate until set.  Yummy!

    20160625_220632

    Mango Ice Cream Cake!  The name should say it all, but I will elaborate.  It’s a batch of mango ice cream sitting on top of a blondie.  Top with some fresh raspberry sauce, and you’ve got a winning dessert that can be made in advance!

    20160717_161834

    Mango macaron ice cream sandwiches!  Using BraveTart’s macaron recipe, I made mango macaron shells by adding 3/4 oz of freeze dried mango to the macaron batter.  Make some mango ice cream (my favorite recipe is this one) and freeze it in a 13″ x 9″ pan.  Once frozen, cut circles of ice cream about the size of your macaron shells, and sandwich one round of ice cream between two macaron shells.

    20160718_190358

    Replace the peaches in your favorite peach cobbler recipe (I used this one) with mango, and you’ve got yourself a mango cobbler!  Since mango is incredibly sweet, I also reduce the sugar in the fruit filling by half.

    I love Mango Madness because it really challenges me to be creative and think outside of the box sometimes.  Sometimes, it’s even like a race to see how many things I can make before the mangoes go bad.  There are things that I would never have thought to make before that I now wonder how I did without.  But, the stakes are raised for next year.  Will I be able to conjure up some new, mango-centric recipes for next year’s Mango Madness?  I guess I had better start brainstorming now!

    A big thank you to everyone that supplied me with mangoes this year.  As you can see, they were put to good use.  Until next year!

  • Mango Tres Leches

    Mango Tres Leches

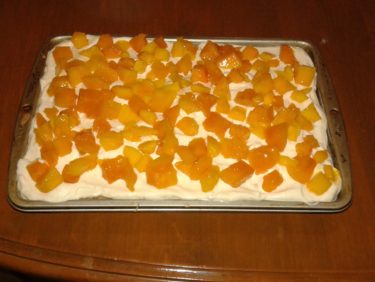
    Traditionally, a tres leches cake is a sponge cake that is soaked with a syrup made of three types of milk and then topped with either whipped cream or meringue.  I “mango-fied” the recipe by replacing some of the milk with mango juice, adding mango puree to the topping, and then topping it with some fresh mango chunks.

    20160717_191201

    This recipe is a bit of an impromptu recipe post.  My boss is in town this entire week and had requested a belated birthday cake.  Although she originally had a specific cake in mind, I convinced her to allow me to make something with mango, as I have been getting a generous supply of mangoes this season from my usual sources.  After remembering that she loves tres leches, I decided to try making a mango tres leches again this year.  If you may recall, it was featured in last year’s Mango Madness post, but there were a few issues with that recipe that I hoped to work through this time around.  Thankfully, I think I got the kinks worked out for this version of the mango tres leches, as it was so well-received at the office that I got a few requests for the recipe.  So, here it is.  Since I didn’t  anticipate actually posting this to the blog, I didn’t take pictures of the step-by-step process as I normally do.  Hopefully, the directions are clear enough.

    Mango Tres Leches

    Ingredients

    For the Cake

    • 6 eggs, separated
    • 1 ½ cups granulated sugar
    • 1 ½ cups all-purpose flour
    • 1 tsp baking powder
    • ½ tsp salt
    • 6 tbsp milk
    • 1 tsp vanilla extract

    For the Milk Syrup

    • 1 1/4 cups milk
    • 1 cup mango juice (or mango nectar)
    • 1 can sweetened condensed milk
    • 1 can evaporated milk

    For the Mango Whipped Cream

    • 1 cup heavy whipping cream
    • 1 tbsp confectioners’ sugar
    • 2 1/2 tbsp piping gel
    • 1/3 cup mango puree
    • 1/4 tsp vanilla extract
    • 2-3 cups chopped mango

    Directions

    Make the cake:

    Preheat oven to 325 degrees. Grease a 13” x 9” rectangular baking pan

    In the large bowl of a stand mixer, beat the egg whites until foamy. Gradually add the sugar and increase the speed.

    While the eggs are beating, sift the dry ingredients into a medium bowl.

    Beat the egg whites until stiff peaks form, and then add the yolks one by one. Add the vanilla extract.

    Remove bowl from mixer and fold in the dry ingredients alternately with the milk, beginning and ending with the dry mixture. Pour into prepared baking pan

    Bake for 35-40 minutes or until a toothpick inserted in the center comes out clean.

    Combine all of the ingredients for the milk syrup in a blender.  Slowly pour mixture over the hot cake, pausing as needed to allow the cake to absorb the liquid.  Allow to cool completely before frosting.

    Make the Mango Whipped Cream:

    In the bowl of a stand mixer, whip the cream and sugar until soft peaks form.  Add the piping gel and continue beating until stiff peaks form.  Add the vanilla extract.

    Gently fold in the mango puree until no streaks remain, then spread evenly over the top of the cooled cake.  Top with mango chunks.

    Refrigerate until ready to serve, preferably overnight.

    Makes about 24 servings

  • Mango and Cheese Pastries (Pastelitos)

    Mango and Cheese Pastries (Pastelitos)

    Skip to Recipe
    This is my third Mango Season working in a place that affords me access to a large supply of mangoes during this time of the year in Miami.  I had been racking my brain for ideas on what to make with mango that I had never made before, and my brain reserves were getting low.  Then, during a conversation with one of my sisters, she asks “Why not make mango pastelitos?”  Mango pastries!?  My head exploded.

    For those of you that are not “in the know,” a pastelito is a Cuban pastry that is typically made with puff-pastry type of dough and can be filled with sweet or savory fillings.  Pretty much any Latin bakery or cafeteria worth its salt in South Florida will sell them, so it’s completely mind-boggling as to why it never even occurred to me to try a mango spin on these popular treats.  The most popular fillings are guava, guava and cheese, cheese, and ground beef.  My absolute favorite is the guava and cheese, which is the one that inspired this recipe.  Since guava is super-sweet, just like mango, it seemed to make sense to just swap out the guava with mango.  It sounded crazy at first, but it WORKED.  The sweetness of the mango was offset by the cream cheese, which also gave a creamy richness to complement the buttery flakiness of the puff pastry.  Best of all, they’re super-easy to make.

    20160710_182843

    Start by cooking some diced mango with brown sugar and a little bit of lemon juice.  Simmer the mango mixture for 25-30 minutes, until the liquid thickens and becomes syrupy in consistency.  Remove from the heat and allow to cool completely.  You can even make this a day or two ahead of time and refrigerate until ready to use.

    20160710_200814

    After that, the only other things you need are some puff pastry and a brick of cream cheese.  Make your life easier by using cold cream cheese.

    20160710_204734

    Defrost the puff pastry per the package directions.  Lay the sheets of puff pastry out on your pan lined with parchment, a baking mat, or a floured surface.  Cut each sheet it into thirds, then add three small pieces of cream cheese evenly spaced apart on 3 of the thirds.  Leave room around the sides to close the pastry.

    20160710_204910

    Add a spoonful of mango filling on top of each piece of cream cheese.  If you didn’t cook your mango filling long enough, you might get some runoff.  Don’t worry, it won’t impact the pastries much.  Brush the edges and between the filling with egg wash or water.

    20160710_205201

    Place the other three pieces of puff pastry over the ones that have the filling.

    20160710_205545

    Cut them into squares and pinch them closed.  The egg wash should help the tops and bottoms stick together.  Brush them with additional egg wash or simple syrup, if desired.

    20160710_205719

    Then, into a preheated oven they go!

    20160710_212711

    Please resist the urge to dig in as soon as they come out of the oven.  The filling is HOT, and you might hurt yourself.  They do taste best when they are warm, though.

    mango pastries

    Simple, right?  But, so delicious.  These pastries just scream “Miami” in so many ways.  The recipe for the mango filling makes enough to fill about 27 pastries, so scale up or down accordingly.  You can easily find other uses for any leftover filling, but I bet you’ll simply wind up making more pastries once these disappear in mere moments.  I bet it would be great on pancakes or waffles, too.

    Mango and Cheese Pastries (Pastelitos de Mango y Queso)

    Ingredients

    For the Mango Filling:

    • 2 1/2 cups mango, diced small
    • 1/4 cup light brown sugar
    • 1/2 tsp lemon juice

    For the pastries:

    • 1 package frozen puff pastry sheets, thawed
    • 4oz cream cheese, cold
    • Egg wash (optional)

    Directions

    Make the mango filling:

    In a small saucepan, heat mango, brown sugar, and lemon juice over medium to medium-high heat until mixture is about to boil.  Reduce heat and simmer for 25-30 minutes, or until the liquid has thickened to a syrupy consistency.

    Remove from heat and allow to cool completely before using.

    Make the pastries:

    Preheat oven to 350°.  Line a large baking sheet with parchment paper.

    Lay out the puff pastry sheets on a flat, nonstick surface and cut each sheet into thirds.  Set three of the thirds aside.

    Cut small rectangles of cream cheese and add three to each third of puff pastry sheet, spacing them out evenly on the strip and leaving room around the edges of the dough.  Add a spoonful of mango on top of each piece of cream cheese.

    Brush the edges of dough and between each mound of filling with egg wash or water, then top with the remaining 3 sheets of puff pastry dough.  Cut each strip into thirds so that one mound of filling is at the center of each square, then pinch the sides down to seal.  Place the squares on the baking sheet lined with parchment, leaving space between the pastries.  Brush the tops with additional egg wash or simple syrup.

    Bake for 25-30 minutes, or until golden brown.  Remove from oven and allow to cool at least 20 minutes before eating.  Any leftover mango pastries can be stored in an airtight container after they cool completely.

    Makes 9 pastries

  • Snickers Cheesecake Cake

    Snickers Cheesecake Cake

    Skip to Recipe
    I honestly don’t think that I need to say anything about this cake.  The name says it all.  But, I’ll say something anyway.  You take three things that make the world a better place (chocolate cake, cheesecake, and Snickers bars), put them together, and create magic.  This cake is one of a few of the “cheesecake cake” cakes that I have made, and I am sure that it won’t be the last.

    I found this recipe for Snickers cheesecake cake when I was looking for things to do with the bags of Halloween candy that I had amassed during the post-holiday clearance sales.  I have made it twice since then, and both times it got rave reviews.  I did have to tweak the recipe a bit, but I almost always do that anyway.

    makecheesecake

    Start by making your cheesecake.  Beat the cream cheese and sugar until it’s smooth.  Add the eggs, one at a time, and then the sour cream.  Add the vanilla extract, then fold in the chopped Snickers pieces.  Pour the batter into your prepared pan and bake until almost set.  Let cool completely on a wire rack, then chill.  You will want to do this at least a few hours in advance, but preferably a day before.  Cheesecake actually freezes very well, so you could even make it a week in advance and freeze it.  The more firm the cheesecake is, the easier it will be to handle when assembling your cake.

    assemblecakeBake two chocolate cake layers in pans of the same size as the cheesecake.  Let them cool completely, then place one layer on a cake tray or serving dish.  Spread a thin layer of chocolate ganache over it, and then place the cheesecake layer on top.  Spread some ganache over the cheesecake and then place the second cake layer over it.  Pour the remaining chocolate ganache over the cake, letting it run over the sides.


    snickersfrosting

    One of the things that sets this cake apart is the Snickers frosting.  It’s made by melting Snickers and butter together, and then adding this melted Snickers mixture into powdered sugar with a little bit of milk.  This is where I made the biggest change to the original recipe, I think.  Following the Snickers frosting recipe exactly gave me a cake that looked like this…

    DSCN1711

    The frosting was just a runny mess.  Refrigeration didn’t help much, and neither did the whipped cream that I tried to use to hide the unsightliness of the cake.  However, halving the Snickers frosting recipe, and reducing the amount of milk added, let to my second attempt looking like THIS…

    Snickers Cheesecake Cake

    What a difference, right?!!

    This Snickers cheesecake cake is definitely a lot of work to make, but the end-result is a piece of heaven in every bite.  I suggest trying to make it at least once.  You won’t be disappointed.

    Snickers Cheesecake Cake

    (adapted from recipe on IAmBaker.net)

    Ingredients

    For the Cake

    • 1 recipe for 2-layer chocolate cake (recommended recipe here)

    For the Cheesecake

    • 2 8oz packages of cream cheese, softened
    • 1/2 cup granulated sugar
    • 1/4 cup sour cream
    • 1/2 tsp vanilla extract
    • 2 cups chopped Snickers pieces (about 16 Fun Size bars)

    For the Ganache

    • 4.5oz bittersweet chocolate, chopped
    • 1/2 cup heavy cream
    • 1/2 tbsp coffee liqueur (optional)

    For the Snickers Frosting

    • 5 Fun Size Snickers bars
    • 1/2 stick butter
    • 1 1/2 cups powdered sugar
    • 1-2 tbsp milk

    Directions

    Make the cheesecake

    Pre-heat the oven to 350° F.  Grease your round baking pan.

    In the bowl of a stand mixer, beat the cream cheese and sugar until smooth.  Add the eggs, one at a time, beating well after each addition.  Stir in the vanilla extract and sour cream, then fold in the chopped Snickers.  Pour into the prepared baking pan.

    Bake for about 30 minutes, or until the center is set.  Allow to cool completely, then refrigerate or freeze until ready to use.

    Make the cake

    Bake your chocolate cake according to recipe indications, then allow to cool completely on a wire rack.

    Make the Ganache

    Place the chopped chocolate in a heat-proof bowl.  In a small saucepan, heat the cream until it is just about to boil.  Pour the heated cream over the chopped chocolate, then gently stir until all of the chocolate is melted and the mixture is smooth.  Stir in the coffee liqueur, if using.

    Make the Snickers Frosting

    Sift the powdered sugar into a medium bowl.  In small saucepan, melt the Snickers and butter over low heat, stirring often.  Pour the melted Snickers mixture over the powdered sugar, then stir until the sugar dissolves.  Add 1 tbsp of milk and stir.  If your frosting is still too thick, add the second tbsp of milk.

    Assembly

    Place one chocolate cake layer on a cake board or cake platter.  Spread a thin layer of chocolate ganache over the top of the cake, then remove the Snickers cheesecake from the milk and place it on top.  Spread another thin layer of chocolate ganache over the cheesecake layer, then quickly place the second chocolate cake layer on top (if you don’t work quickly, the ganache might harden before you can place the cake on top, and then the layers won’t stick together as well). Pour the remaining ganache over the top of the cake, allowing it to run over the sides, and then pour the Snickers frosting over that.  Garnish with whipped cream and additional Snickers pieces, if desired.  Refrigerate until ready to serve, preferably overnight.