Category: Recipes

Recipes

  • Moros (Cuban-style Black Beans and Rice)

    Moros (Cuban-style Black Beans and Rice)

    Skip to Recipe
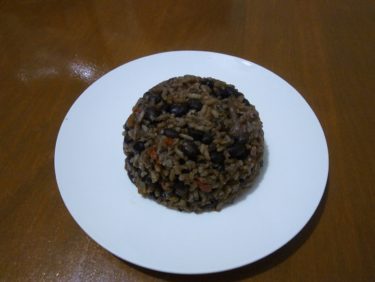
    Growing up in Miami, Fl has given me a healthy love of Cuban food.  Moros is a personal favorite of mine, and will always be my side dish of choice when dining at a Cuban restaurant.  Moros, short for moros y cristianos, is a dish in which rice is cooked with black beans, and gets its name from the wars between the dark skinned Moors (moros) and the light skinned Spaniards (cristianos) from the Eighth Century.

    Before owning an Instant Pot, all of my previous attempts at cooking beans had always ended in failure.  I tried all of the tips and tricks that I got online or from word of mouth, and nothing yielded me a tender bean.    I only ever successfully made moros using canned black beans, and it just was never the same as what I would get in the restaurants.  Now, nine months after getting my pot, I’m cooking all sorts of beans and not once has there been a failure.  I finally set out to reconfigure my moros recipe to use dried beans, and it has been a huge success.

    You will start by cooking the beans.  Add the beans, bay leaves, ham hock, chunked green pepper, 4 cloves of minced garlic, and some salt to the pot.  Pour in a quart of chicken stock, then seal and cook for 20 minutes at high pressure.  Allow the pressure to release naturally.  While this is happening, you can prep the rest of your ingredients.

    When the beans are done, drain them (save the bean liquid) and discard the bay leaves and green pepper.  If you used a meaty ham hock, remove the meat from the bone and chop it up for later use.  Wash and dry your pot liner and return to the pot.

    Set the pressure cooker to Saute (Browning) function, then adjust to the highest setting.  When it’s ready, add the bacon and cook until it is brown and crispy.  Take the bacon out of the pot (leave the fat), set aside, and then add the onions and peppers in with the bacon fat.  When they start to soften, add the garlic and seasonings, and cook until fragrant.  Add your vinegar.  Add enough water to the bean liquid to make 3 cups of liquid, then add that to the pot.  Adjust seasoning as needed, then stir in the washed rice and the beans.  Cover, seal, then switch the pot to the Rice setting and cook.  When the cooking cycle is done, allow the pressure to release naturally.

    Fluff your finished moros with a fork, then stir in the bacon.  If you have any meat from your ham hock, add that as well.

    You can serve moros as a side dish for your favorite Cuban entrees, such as lechon asado, palomilla steak, or masas de puerco.  However, this moros is so hearty and flavorful that it can easily stand alone as a meal.  The jalapeno adds a nice punch to the flavor profile, but feel free to leave it out for a mild version.

    This recipe makes a LOT, so it’s great for large families, parties, or make-ahead freezer meals.  Leftovers reheat great!

    Moros (Cuban-style Black Beans and Rice)

    Ingredients

    • 1 green pepper, cut into large chunks
    • 1 cup diced green pepper
    • 1 cup diced red pepper
    • 2 cups diced onion
    • 10 garlic cloves, minced or crushed
    • 1 pound dried black beans, rinsed and picked over to remove any stones
    • 1 quart chicken stock or broth
    • 1 smoked ham hock
    • 2 bay leaves
    • 5 teaspoons salt, or to taste
    • 4 slices thick bacon, cut into 1/2-inch pieces
    • 1 jalapeño pepper, stemmed and finely chopped (optional)
    • 1/2 tbsp dried oregano
    • 2 tsp ground cumin
    • 1 teaspoon freshly ground black pepper
    • 2 tablespoons red wine vinegar
    • 3 cups long grain white rice, rinsed

    Directions

    In the liner of the pressure cooker, add the dried beans, chunked green pepper, 4 cloves of minced garlic, 2 tsp salt, bay leaves, and ham hock.  Pour in the chicken stock, then seal and cook on Manual (high pressure) for 20 minutes.  Allow the pressure to release naturally.  Drain the beans, reserving the liquid, then set aside along with the ham hock (remove meat from bone and chop up) and discard the bay leaves and green pepper pieces.  Wash and dry the pressure cooker liner, then return to the pot.

    Set the pot to Saute (Browning).  When ready, add the bacon and cook until brown and crispy.  Using a slotted spoon, remove the bacon and set aside.  In the hot bacon fat that’s still in the pot, saute the diced onions, diced green peppers, diced red peppers, and chopped jalapeno (if using) until softened.  Add the remaining garlic, oregano, cumin, , salt and pepper, stirring until fragrant.  Add the vinegar.  Take the reserved bean liquid and add enough water to make 3 cups of liquid total.  Add this to the pot, then stir.  Taste and adjust seasoning as needed.  You will want it to taste over-seasoned, because it will mellow out once you add the rice.

    Add the rinsed rice and cooked beans, then stir to combine.  Seal the pot once more and switch to the Rice setting, allowing pressure to release naturally after the cooking cycle is complete.  Uncover, fluff rice with fork, and stir in the crispy bacon and chopped meat from the ham hock.  Serve hot.

    Makes about 5 quarts.

  • Dulce de Leche Ice Cream

    Dulce de Leche Ice Cream

    Skip to Recipe
    When it comes to frozen treats, I always lean more towards frozen custard instead of ice cream, because I prefer the creamier consistency.  And, since learning how to make ice cream at home, I have always sought out recipes that incorporate egg yolks into the ice cream base, because I know that this will net me a creamy texture that I adore.

    The problem with using egg yolks, of course, means you end up with egg whites that you then have to find a use for.  Sometimes, I just don’t want to deal with that.  And, over time, I have found a few instances where making the ice cream egg-free still yields a creamy and luscious end product.  This dulce de leche ice cream is one of those.

    I make this dulce de leche ice cream often, because it comes together fairly easily and contains ingredients that I almost always have on-hand.  If I have milk or cream that is rapidly approaching its expiration date, ice cream is one of my go-to solutions to this predicament.

    The first thing you need to do is heat your dulce de leche on the stove with the milk.  You want to dissolve the dulce de leche so that it fully incorporates into the ice cream mixture.

    Once all of the dulce de leche has melted, you’re left with a thick, caramel colored mixture.

    Pour this mixture, along with your heavy cream, into a heat-proof bowl.  Add the vanilla extract, and stir to combine.  Cover and refrigerate until the mixture is cold.  You can speed this up by setting your bowl into a larger bowl full of ice, but I usually just let the mixture refrigerate overnight.

    When the mixture is ready, you can freeze it according to the manufacturer’s directions for your ice cream maker, then store it in the freezer until ready to serve.

    A few hours of patience while you wait for it to set will reward you with some smooth, creamy ice cream that is just bursting with dulce de leche flavor in every bite.

    You can buy premade canned dulce de leche, or make your own out of a can of condensed milk.  I haven’t yet tried this with dulce de leche that is made from scratch, but I imagine that it would also work.

    Dulce de Leche Ice Cream

    Ingredients

    • 1 14oz can dulce de leche (about 1 1/3 cups)
    • 1 1/2 cups milk
    • 1 1/2 cups heavy cream
    • 1/4 tsp vanilla extract

    Directions

    In a small saucepan, combine the dulce de leche and the milk.  Cook over medium to medium-low heat, stirring frequently, until the dulce de leche has melted and mixture is uniform and free of clumps.

    Pour mixture into a heat-proof bowl, and gently stir in the cream and vanilla extract.  Cover and refrigerate until very cold, then freeze in your ice cream maker according to manufacturer’s directions.  Transfer ice cream to a freezer-safe container, then freeze until set.

    Makes about 1.5 quarts


  • Pressure Cooker Puerco Pibil

    Pressure Cooker Puerco Pibil

    Skip to Recipe
    Puerco Pibil, also known as Cochinita Pibil, is Yucatan-style barbecued pork.  The name comes from the cooking method of the pork.  Traditionally, it’s cooked in a Mayan oven called a pib, a hole in the ground lined with hot stones.  My first exposure to puerco pibil was watching a Robert Rodriguez movie (you might already know which one I’m talking about), in which one of the characters raves about the dish.  Mr. Rodriguez even shares a recipe for it in the DVD commentary.  Naturally, not everyone has access to a hole in the ground to roast a pork, so the recipe typically roasted the pork in the oven.  My first attempt left me with tasty pork that was kind of dry.  My subsequent attempts swapped the oven for my slow cooker, which made a much more tender pork.  However, I got rid of my slow cooker once I bought my Instant Pot, and I was just too scared to try to reproduce this dish in there.  Until now.

    What was usually several hours of waiting for my puerco pibil took about 90 minutes in the pressure cooker, and that includes the time to come to pressure and then to release the pressure.  Best of all, it comes together very easily, despite the fairly long list of ingredients.  If you wanted to, you could also swap out the spices for premade Achiote paste, but I haven’t found that in my area.

    You’ll want to marinate your pork for at least 4 hours, but preferably overnight.  Once you’re ready to cook, line your pressure cooker with about 3 layers of banana leaves.   Stagger them as much as possible, because you want to keep as much water out.  Add your chunks of pork, then fold the leaves over so that they cover the pork.  Pour 1 cup of water into the pot, then cover and seal.

    Tender, juicy, and delicious puerco/cochinita pibil!  You can serve it with pickled onions and tortillas, or sometimes I just eat it with rice.

    If you can’t find sour oranges, you can mix equal parts orange juice and vinegar to use in this recipe.  I have also used lemon juice in this and it’s still very tasty.

    Pressure Cooker Cochinita Pibil

    Ingredients

    • 2 1/2 lbs boneless pork butt (Boston Butt roast)
    • 2 1/2 tbsp annatto seeds
    • 1 tsp cumin seeds
    • 1/2 tbsp black peppercorns
    • 4-5 allspice berries
    • 3 whole cloves
    • 1 habanero pepper (can use jalapeno for less spicy)
    • 1 tbsp salt
    • 4 cloves garlic
    • 1/2 cup Seville orange juice (naranja agria/bitter orange)
    • 3 limes, juiced
    • 1 tbsp tequila
    • 3-4 banana leaves

    Directions

    Cut the pork into 2in chunks.  Place in a large ziploc bag or shallow baking dish.

    Using a spice or coffee grinder, grind the annatto seeds, cumin seeds, peppercorns, allspice, and cloves to a powder.  Add this, along with the remaining ingredients (minus the banana leaves) to a blender and blend until combined.  Pour over the pork, then allow to marinate at least 4 hours, but preferably overnight.

    When the meat is finished marinating, line the pressure cooker liner with 3-4 banana leaves.  They should be along enough to hang over the sides of the pot.  Place the pork with the marinade in the center of the leaves, then fold them over until the pork is completely covered.  Pour 1 cup of water into the pressure cooker.

    Cover and seal the pressure cooker, then cook on Manual (High Pressure) for 60 minutes.  Afterwards, allow the pressure to release naturally for 15 minutes, then release any remaining pressure.  Uncover, remove the pork, and serve with pan juices.

    *NOTE: you can substitute the spices for pre-made Achiote paste, if you prefer.
    To make this lower in carbs, you can replace the Seville orange juice with lemon juice

  • Mango Madness in July – Part 4 (2017 Chapter)

    Mango Madness in July – Part 4 (2017 Chapter)

    My first year at my current job, I was amazed at the massive influx of mangoes during mango season.  It was like homeowners couldn’t get rid of them fast enough.  That’s how Mango Madness was born, and Mango Season every year since then has been dedicated to mango-fying anything that I can think of.  Mango Madness 2017 will be no different.

    Sadly, my most reliable and prolific mango supplier was relocated.  I expected this to make getting my hands on mangoes a little harder than usual.  Instead, I had quite a steady stream of mangoes headed my way.  I guess word has gotten around about my Mango Mad Scientist antics, so everyone knows that any surplus of mangoes will get put to good use in my house.  Ha!

    So, what new things did I make for Mango Madness 2017?  Here we go!

    Mango salsa goes great on a lot of savory dishes, including jerk chicken chili!  Just combine diced mango with lime juice, salt, pepper, cumin powder, and cilantro.  The sweetness of the mango really offsets the heat of the chili, and completes the chili’s Caribbean flair.

    Mango Suspiro Limeno is a deliciously innovative way to eat the classic Peruvian dessert.  It’s normally too sweet for me, but the mango seems to cut some of that sweetness out.

    If you’re looking for something to cool you down in hot weather, try mango creamsicles.  They are cool, creamy, refreshing, and oh so delicious.  And, if you don’t own any popsicle molds, disposable cups work just as well.

    If you’re feeling fancy, try filling some puff pastry shells with mango pastry cream.  All it takes is some fresh berries and a dollop of whipped cream to make an impressive presentation.  Pro-tip: Heat the baking pan before you bake the puff pastry shells.  It makes them puff up so much higher.

    Believe it or not, mango is a great addition to BBQ sauce if you’re into sweet sauces.  Try mango BBQ sauce on ribs or brisket.  A friend of mine even put it on pasta and liked it.

    Mango upside down cake is best made with mango that doesn’t have a lot of fiber because it is easier to slice.  But, if you only have fibrous mangoes, don’t let that deter you.  The buttery, brown sugary top of the cake really elevates the mango.

    Mango compote makes a great topping for pound cakes and ice cream.  Or, stir it into your yogurt!

    If compotes aren’t your thing, you can try caramelized mango.  They’re spiked with a little bit of rum and flecked with vanilla bean seeds.  You can make it in chunks or in slices.  Either way, it’s a treat!  It would probably go great on some waffles or pancakes.

    Mango brownies are a bit out-of-the-box, but the mango actually complements the chocolate better than you might think.  The mango puree in the brownie batter makes them extra moist and fudgy.  You don’t taste the mango very much, so most people that don’t know that there’s mango in them will probably just know that there’s “something different” in them that they can’t quite put their finger on.

    You could color me shocked when I found out how well mango works in curry.  This mango chicken curry used mangoes they are slightly under-ripe so that they don’t make the curry too sweet.  Though, if your mangoes are too sweet, you can just add more acid to the curry sauce.  I bet you could also use shrimp instead of chicken!

    Mango Madness 2017 was another prolific time, and I continue to surprise myself with how many new things can be made with mango.  And, having different suppliers helped me to discover the best ways to use different types of mangoes.  Stringy and fibrous mango?  Puree, strain, and and make something with mango puree.  Smooth and firm mango?  Slice or dice and use the pieces in sauces or cakes.  Every year is a learning experience, and I can’t wait until 2018!

  • Pressure Cooker Red Enchilada Sauce

    Pressure Cooker Red Enchilada Sauce

    One of my favorite things to get at Mexican/Tex-Mex eateries is a burrito smothered in sauce.  Depending on the place, it’s either red sauce or green sauce, but definitely red sauce over green.  A friend of mine has been trying to recreate the red sauce from her favorite Mexican eatery.  While this recipe wasn’t an exact copy, it was close enough for me to enjoy the heck out of it.

    One of the steps in making a red enchilada sauce is to take your dried chiles and boil them for about half an hour to soften them up.  Being the lazy cook that I am, I thought to myself “why not just pressurize them with liquid and the rest of the ingredients for a fraction of that time?”  It was worth a shot, so I gave it a try and was pleasantly surprised that it worked very well.  I wound up making a second batch and sending a friend home with it.

    Skip to Recipe

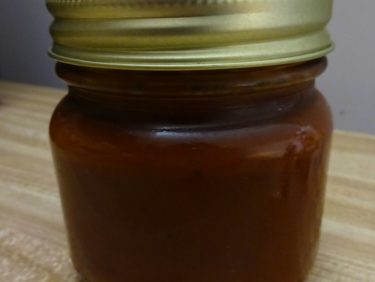
    She put it in a nice little jar to keep it fresh in her fridge.  I asked her to let me know how she likes it.  She let me know by sending me pictures of all of the things that she has been eating her enchilada sauce with.

    Taco Pie, which I found to be a bit boring on its own, is taken to a whole new level when topped with red enchilada sauce.  It really adds a new dimension to the dish without a whole lot of extra work.

    The following morning, it was a bagel topped with a fried egg drenched in the sauce.  Both she and her sister made sure that not a single drop of the red enchilada sauce went to waste.  The sauce didn’t last long, and she was asking me to share the recipe.  So, here it is!

    Pressure Cooker Red Enchilada Sauce

    Ingredients

    • 1 tbsp olive oil
    • 2 cups beef stock or broth
    • 2 oz dried guajillo chiles
    • 1 oz dried pasilla chiles
    • 1/2 yellow onion, chopped
    • 1 medium tomato, chopped
    • 2-3 garlic cloves, crushed
    • 1 tsp kosher salt
    • 1 tsp dried oregano
    • 1 tsp smoked paprika
    • 1/2 tsp cumin powder
    • 1 cinnamon stick (optional)

    Directions

    Remove the stems from the dried chiles.  Discard the seeds if desired.  Set aside.

    Set the pressure cooker to Saute and add the oil.  When hot, add the onions and cook until they start to soften and turn translucent.  Add the garlic and continue cooking until fragrant (about 2-3 minutes), then add the tomato.  Continue cooking until the tomato starts to release some of the liquid.

    Add the chiles, seasonings, beef broth/stock, and cinnamon stick (if using).  Seal the pressure cooker, switch the setting to Manual (high pressure), and set the timer to 10 minutes.  When the timer runs out, allow the pressure to release naturally.

    Remove the cinnamon stick and transfer the mixture to a blender and puree, then pass the puree through a mesh strainer to remove the pulp.  Serve hot, or allow to cool completely and refrigerate or freeze until ready to use.

    Makes about 1 quart.

  • Mango Upside Down Cake

    Mango Upside Down Cake

    Skip to Recipe

    Mango season is in full swing, and the creative juices are flowing!  Trying to figure out what to make with mango every year is often a challenge.  Often, however, an idea just pops into my head that makes me say “Why the heck didn’t I think of that before!?”  That was the case with this mango upside down cake.  While I was brainstorming with a coworker on what new things I could try making with mango this year, it just popped into my head.  I knew that I HAD to make it, and my brain wouldn’t let me stop thinking about it until I did.  My brain knows what it’s doing, because the cake turned out to be AWESOME.

    The mango upside down cake recipe makes a 13 x 9 inch pan, but I split it into two 9 inch round pans so that I could share with 2 separate groups of people.  Just be sure to split the topping ingredients between the two pans and adjust the baking time accordingly if you will be doing this.

    Stir some brown sugar into your pans of melted butter.  Spread it around as evenly as you can, and then lay your mango slices on top.  If your mangoes are too ripe, you might have some trouble getting clean mango slices like I did.  But, do the best that you can.  It will still taste great!

    Make the batter by creaming butter and brown sugar, then adding the egg.  Stir in the vanilla, and add your sifted dry ingredients alternately with mango pulp and milk.  Gently spread the batter into your prepared pans, and then bake.  Wait about 5 minutes, and then remove the cake from the pan.

    Don’t wait too long to unmold your cakes, or you run the risk if the brown sugar hardening.  Good luck getting your cakes out of the pan in one piece if that happens.

    I was initially kind of disappointed at the lack of height with the cake, until I realized that this meant that the mango topping to cake ratio made it so that the taste of the mango topping really stood out.  The buttery, sweet, caramelized mango topping is really what makes this cake stand out, so you don’t want to skimp on that.  I prefer mine warm, but it tastes good cold also.

    Mango Upside Down Cake

    Ingredients

    For the topping

    • 1/3 cup butter
    • 3/4 cup brown sugar
    • 5 cups mango slices (may be more of less depending on the size of the slices)

    For the cake

    • 2 cups all-purpose flour
    • 1 tbsp baking powder
    • 1/4 tsp salt
    • 1 cup packed brown sugar
    • 2/3 cup butter
    • 3 eggs
    • 2 tsp vanilla extract
    • 1/2 cup mango puree
    • 1/4 cup milk

    Directions

    Preheat oven to 350° F.

    While the oven is preheating, place an ungreased 13″ x 9″ baking pan with 1/3 cup of butter, allowing the butter to melt in the pan in the oven.  Remove the pan from the oven and stir in 3/4 cup brown sugar, then spread the mixture as evenly as possible around the pan.  Arrange the sliced mango on top of the brown sugar/butter mixture and set aside.  Sift together the dry cake ingredients.

    In the bowl of a stand mixer, cream the butter and brown sugar.  Add the eggs, one at a time, beating well with each addition.  Stir in the vanilla extract.  Add the dry ingredients alternately with the mango puree and milk, beating well with each addition.  Gently spread the batter over the mango slices in the pan.

    Bake in preheated oven for 35-40 minutes (25-30 minutes if using 9″ round pans), or until a toothpick inserted in the center comes out clean.  Let cake rest on a wire rack for about 5 minutes, then loosen the cake from the pan and invert the cake onto a serving platter.  Allow to cool at least 20 minutes before serving.

    Makes 1 13″ x 9″ rectangle cake or 2 9″ round cakes.

  • Red Velvet Lava Cake

    Red Velvet Lava Cake

    Another Fourth of July, approaches.  In addition to another year to celebrate our nation’s independence, it’s yet another reason to eat things that are red, white, blue, or a combination of all three.  Normally, this means flag cakes or tri-color jello molds, but I am thinking out of the box this year.  I’m thinking red velvet lava cake. This definitely isn’t the type of dessert that you’d plan to bring to a neighborhood barbecue or cookout, but it will impress nonetheless.  Besides, who ever really wants to eat a boxed cake mix sheet cake topped with Cool Whip, anyway?

    You can make red velvet lava cake in your oven or in your Instant Pot (pressure cooker).  I personally prefer the texture of an oven-baked lava cake, but I know that others prefer the moist, custard-like consistency of an Instant Pot lava cake.  Make sure that you play around with the cook times until you get the center as runny as you like it.

    If you REALLY want to stick to the red velvet theme, this treat is best enjoyed with a scoop of cream cheese ice cream.  Yes, it does exist.  Otherwise, vanilla ice cream also works.

    I was tempted to add a few blueberries to the plate to tie it in with the red, white, and blue, but I just didn’t think that the flavors would come together for this one.

    Red Velvet Lava Cake

    (adapted from Gretchen’s Bakery)

    Ingredients

    • 4 tbsp (1/2 stick) butter
    • 3 tbsp buttermilk
    • 2 eggs
    • 3 egg yolks
    • 1 1/4 cups bittersweet chocolate,chopped
    • 1/2 cup flour
    • 1/2 cup powdered sugar
    • a pinch of salt
    • red gel food coloring as needed

    Directions

    Preheat oven to 375°.  Generously grease 5 4oz ramekins.

    Melt the chocolate and the butter in the microwave or over a double boiler.  Stir in the buttermilk.  Sift the flour, salt, and sugar together and set aside.

    In a separate bowl, whisk the eggs and yolks.  Gradually add in the chocolate mixture to the egg yolks, a little bit at a time to keep from scrambling the eggs.  Add in the food coloring until the mixture is the desired color.  Stir in the flour mixture and whisk until smooth.

    Divide batter evenly between the greased ramekins.  Bake in the preheated oven for 14-18 minutes.  Serve immediately by inverting onto a plate to remove from the ramekin.

    To make in the Instant Pot, fill the pot with 1 cup of water, place the ramekins on a trivet, and cook on Manual (High Pressure) for 5-7 minutes.

    Makes 5 servings

  • Buffalo Shrimp and Blue Cheese Grits

    Buffalo Shrimp and Blue Cheese Grits

    Skip to recipe

    Shrimp and grits are something that I have only recently tried, and was pretty ambivalent towards.  I guess it just didn’t click because it’s not something that I grew up eating.  But, during a conversation at work one day, we were talking about what foods could and could not be made “buffalo-style,” and that’s when a light bulb went on in my head.  What about buffalo shrimp and blue cheese grits?  My coworkers’ eyes just lit up.

    Naturally, I wasn’t the first one that had ever thought up such an idea, so it was not difficult to find a recipe for buffalo shrimp and blue cheese grits.  My version isn’t particularly flashy or fancy, but it’s tasty as heck.  Plus, making grits in a pressure cooker or Instant Pot makes this recipe a cinch.  The only thing that you really need to worry about is not overcooking your shrimp.

    Buffalo Shrimp and Blue Cheese Grits

    (Adapted from recipe at Food52)

    Ingredients

    For the Grits

    • 1 cup grits (can be white or yellow) – not Quick Cook or Instant Grits
    • 4 cups chicken broth or stock
    • 1 tbsp butter
    • 4 oz crumbled blue cheese
    • salt and pepper to taste

    For the Buffalo Shrimp

    • 1lb medium shrimp, peeled and deveined
    • 2 tbsp butter
    • 1/2 tsp paprika
    • 3 cloves garlic, minced
    • 1/2 cup buffalo sauce (can be homemade or store-bought)
    • salt and pepper to taste
    • juice of 1/4 lemon

    Directions

    Make the Grits

    To make in the Instant Pot: Set the pressure cooker to Saute – Normal.  When it reads HOT, melt the butter in the pot, then add the grits and stir to coat them in the butter.  Keep stirring the butter-coated grits until they turn fragrant.  Add the chicken stock and season with salt and pepper.  Turn off the Instant Pot, put the lead on and seal, and set to Manual (high pressure) for 25 minutes.  Allow the pressure to release naturally for 10-15 minutes, then release any remaining pressure.  Stir in the crumbled Blue cheese.

    To make on the stovetop: Melt butter in a medium saucepan over medium heat.  Add the grits, stirring to coat in butter.  Continue stirring until the grits start getting fragrant.  Add the chicken broth/stock and season with salt and pepper.  Bring to a brisk simmer, then reduce heat and allow to simmer for about 20 minutes, or until grits are the desired texture.  Remove from heat and stir in the Blue cheese.  Serve immediately.

    Make the Buffalo Shrimp

    Rinse the shrimp and pat dry.  Season with salt, pepper, and paprika.  Toss to coat.

    Heat a skillet on medium to medium-high.  Melt butter on hot skillet, then add shrimp.  Cook the shrimp, turning once, until almost opaque (you want them to be slightly undercooked at this point).  Using a slotted spoon, remove the shrimp and set aside.

    Add the garlic to the hot skillet and cook until fragrant (about 2-3 minutes).  Add the buffalo sauce and continue cooking until sauce begins to thicken and reduce (you may need to lower the heat if it looks like the sauce is starting to burn).  Return the shrimp to the pan and toss to coat in the sauce.  Cook 1-3 minutes until the shrimp are cooked through.  Remove from heat and add the lemon juice.  Serve on top of grits.

  • Pressure Cooker Coffee Dulce de Leche

    Pressure Cooker Coffee Dulce de Leche

    Dulce de leche is basically the product of sweetened milk that is cooked until it darkens and thickens.  Dulce de leche, or arequipe  as it’s known in Colombia, is getting more and more popular in the US.  And, with more households investing in a pressure cooker or Instant Pot, making it at home has never been easier.  However, during my most recent visit to Colombia, I came across something that I NEVER seen in the US: arequipe con cafe (coffee dulce de leche).  I mean, I guess it’s a no-brainer that Colombians would figure out how to add coffee flavor to this confection, but my head pretty much exploded when I saw it.  I brought some home for my friends, and their reaction was pretty much the same.

    For a good week, I mulled over how I could try to recreate something similar at home.  In the end, I decided to try combining condensed milk with brewed espresso.  My fellow Colombians would have a fit, of course.  Only lazy people make arequipe with condensed milk, and only if they don’t care how it tastes.  But, here in the US, I think that dulce de leche made out of condensed milk tastes just fine, and there’s no need to babysit a pot for hours on end!  I mean, there’s a time to spend hours making something the long and painful way, and there are times to empty a can into a jar, set it in a pressure cooker, and go watch TV.

    Empty one can of condensed milk into a canning jar, then add brewed espresso.  Stir until combined, then seal your jar and place it on a trivet in your pressure cooker.  Fill with water until the jar is about halfway submerged, then seal your pressure cooker.  Cook on High Pressure for 45 minutes, then allow the pressure to release naturally for about 10-15 minutes, then release any remaining pressure.

    Once it’s done, all you have to do is give it a quick whisk to break up any clumps, let it cool, and you’re good to go.  You can make ice cream with it, stir it into yogurt, use as a filling…the possibilities are endless!

    This should keep in the refrigerator for about 2 weeks, if it lasts that long.

    Coffee Dulce de Leche (Arequipe con Cafe)

    Ingredients

    • 1 can sweetened condensed milk
    • 1/4 cup brewed espresso

    Directions

    Pour sweetened condensed milk into a canning jar.  Stir in the espresso until smooth.  Seal the jar.

    Place the sealed jar on a trivet in the pressure cooker, then fill with water until the water reaches about halfway up the jar.

    Seal the pressure cooker, then cook on Manual (High Pressure) for 45 minutes.  Turn off the pressure cooker and allow the pressure to release naturally for 10-15 minutes, then release the remaining pressure.  Remove the jar from the pressure cooker using tongs or mitts, then carefully open the jar and whisk the dulce de leche to smooth out any clumps.  Allow to cool completely before refrigerating.

    Makes about 1 pint.

  • Peach Compote

    Peach Compote

    Since getting my Instant Pot, I have discovered how easy it is to make yogurt at home.  I make about two weeks’ worth of yogurt at a time and portion it out in jar to take to work with me.  Sometimes, I add fresh fruit, but more frequently I eat it with fruit compote.  Peach compote is one of my favorites, and is on heavy rotation at my house these days.

    You can start with fresh or frozen peaches.  I’m lazy, so I start with frozen.  Throw them in a medium-sized saucepan and sprinkle with sugar.  If I have it, I may also add a bit of lemon juice.  Turn the heat to medium and cook, stirring occasionally.  Once the peaches start to soften and the liquid is simmering, mash them while you continue cooking.  I use a potato masher or firm spoon or spatula to do this.  Continue to cook until the peach compote is thickened.  You should be able to drag your spatula across the bottom of the pan and see the bottom of the pan for a few seconds before the compote settles back again.  Once it’s thickened, remove from heat and allow to cool, then store in a mason jar or container.

    This peach compote recipe works with different types of fruit.  I have made this with mango, strawberries, raspberries, and blackberries with success.

    Add some  peach compote to the bottom of a jar or container, then layer with homemade yogurt, and you’ve got a homemade snack that is way better than the store bought stuff!  Plus, you know exactly what’s in it.  Enjoy!

    Peach Compote

    Ingredients

    • 1 lb fresh or frozen peaches slices
    • 2 tbsp sugar (more of less to taste)

    Directions

    In a medium saucepan, add the peaches and sugar.  Cook over medium heat, stirring occasionally, until peaches start to soften and liquid is simmering.  Starting mashing the fruit as it cooks.  Continue stirring and mashing the fruit until the compote has reduced and thickened to the desired consistency.  Allow to cool completely, and then refrigerate in an airtight container.

    Makes about 2 cups.