Category: Recipes

Recipes

  • Avocado Pickles

    Avocado Pickles

    Skip to Recipe
    Growing up in a Hispanic household, avocado is a mealtime staple.  My mother would often give us sliced avocado with lime and salt to go with our meals.  Now that I am an adult, eating avocado without an acidic component never tastes quite right to me.  The rich fattiness of this fruit just begs for that refreshing zing.  That is why, when someone introduced me to avocado pickles, I was sold.

    These are best made with Hass avocados.  I have tried them with other kinds, but the watery Florida avocados lacked the creamy fattiness required to cut through the acidic brine.  Make sure that you’re also using slightly firm avocados to make your avocado pickles, or they might break apart in the brine.

    To make the brine, heat all of your ingredients (except the avocado) in a small saucepan.  If you want your pickles to have more of a kick, you can open your chiles up to let out the seeds.  Otherwise, leave them whole.  Once it starts to simmer and all of the salt and sugar (if using) has dissolved, remove it from the heat and let it cool down.

    While your brine is heating, prep your avocados.  I cut these in slices, but sometimes I also do them in chunks.  Put the sliced or chopped avocado in a glass jar of your choice.  I find that two average-sized Hass avocados fit in one 16oz mason jar.

    After the brine has cooled enough, gently pour it over the avocados in the jars.  Fill it just enough so that the liquid reaches almost to the top of the jar when you put the lid on, but doesn’t spill out.  Remember that if your avocados are poking up out of the jar a little, they will push the brine level up when you press the lid down.  So, plan accordingly to avoid a mess.

    You’ll want to refrigerate the avocado pickles for at least an hour, but they will keep for up to a month in the refrigerator.  I find that I like them best after they sit for a few days.

    Avocado Pickles

    Ingredients

    • 4 firm Hass avocados, sliced or chopped
    • 1 cup apple cider vinegar
    • 1 cup water
    • 2 tbsp pickling salt (or kosher salt)
    • 2 tsp sugar (you can omit or substitute with your sweetener of choice)
    • 2 tbsp coriander seeds
    • 1 1/2 tsp whole black peppercorns
    • 2 dried chile de arbols

    Directions

    In a small saucepan, combine all of the ingredients except for the avocado.  Bring to a simmer, allowing the salt and sugar to dissolve, then remove from heat and allow to cool.

    Place the avocado pieces in 2 16oz mason jars (or 1 32oz jar), then pour the cooled brine over the avocado.  Seal, then refrigerate for one hour or until ready to consume.

  • Blueberry Panna Cotta

    Blueberry Panna Cotta

    Skip to Recipe
    Panna cotta, Italian for “cooked cream,” is the name of a dessert that is made taking sweetened cream and setting it with gelatin.  It is typically set in a mold that is then inverted before serving, but it can also be served without unmolding in a pretty glass or serving dish.  The beauty of panna cotta is that it tastes fancy without a whole lot of effort or skill required, so it’s a great dessert for hosting nice dinners at home or for a group.  Plus, the base of a panna cotta is just cream, which means it’s a great blank canvas for adding other flavors to it.

    While I was on a rigorous diet over the summer, I bought some frozen blueberries to add to my healthy smoothies in the mornings.  Soon after, I fell off the wagon, and the blueberries sat forgotten in my freezer for weeks.  It wasn’t until I started running out of space in my freezer and started trying to use or purge some of the contents that I found the blueberries in there again, and decided to try to make something with them.  Since the texture of cooked berries is not something that I generally enjoy, I decided to use them to infuse some cream and make blueberry panna cotta.  It was so good that some of my coworkers still talk about it, so I decided to share the recipe.

    You start by macerating the blueberries.  That is, sprinkle some sugar on them and let them soften and release some of their juices.  After that, cook them over medium heat until they just start to simmer, then lower the heat and add the gelatin.  Once the gelatin has dissolved, add half of the cream and stir until the cream is hot.  Don’t let it start to boil or simmer, or the fat in the cream might start to separate and you’ll wind up with an oily film on your finished product.  Just let it get hot, then mash the blueberries a little more to get more of the juice out before passing the mixture through a strainer and into a bowl with the other half of the cream.  Stir in the vanilla extract.

    You mixture might have some flecks from the blueberries.  If you prefer, you can pass the blueberry panna cotta mixture through a finer strainer to get rid of these.

    Otherwise, pour the mixture into your prepared molds or cups.  If you’re planning to unmold the panna cotta, lightly coat the inside of your molds with a neutral oil before filling with the panna cotta mixture.  Then, pop them in the fridge until they are set.  This should take about 3-4 hours.  Panna cotta should be eaten cold, so they should remain in the fridge until you’re ready to eat them.

    If you’re unmolding them, you can do so by running a thin knife along the edge of your mold, then inverting onto a plate.  You might have to shake it out, as they like to stick sometimes.  You can serve with additional fresh berries if you like, but it tastes great on its own as well.  I didn’t have any blueberries, so I served it with blackberries.

    Blueberry Panna Cotta

    So creamy!

    Unlike flan and other custard desserts, panna cotta is best served the same day or not more than a day later.  Otherwise, they start to dry out due to the gelatin.  So, plan accordingly.

    Blueberry Panna Cotta

    Ingredients

    • 2 cups blueberries (can be fresh or frozen)
    • 1/3 cup sugar
    • 2 cups heavy cream
    • 1 tbsp gelatin
    • 1 1/2 tsp vanilla extract

    Directions

    Place the blueberries and  the sugar in a medium saucepan.  Let them sit for at least 10 minutes (but preferably 30), then heat the blueberry/sugar mixture over medium heat until the sugar dissolves and the mixture is just starting to simmer.

    Reduce heat to medium-low, then sprinkle the gelatin over the mixture.  Let it sit for about a minute, then gently continue heating and stirring the mixture for about 5 minutes or until the gelatin has dissolved.

    Add 1 cup of the cream, and continue stirring until the cream is heated through.  Do not allow the cream to start to simmer or boil.  Gently mash the blueberries in the cream mixture so that they release some additional juice.

    Strain the mixture into a bowl with the other 1 cup of cream, then stir in the vanilla extract.  Divide equally between your serving dishes or molds, then refrigerate until set (about 3-4 hours).  Serve cold.

  • Pressure Cooker Pork “Al Pastor”

    Pressure Cooker Pork “Al Pastor”

    Skip to Recipe
    At its roots, al pastor style pork is basically Mexican shawarma.  The spit-grilled style of cooking the pork was brought to Mexico by Lebanese immigrants.  The rest is history.  Nowadays, tacos al pastor (which basically translates to “country-style tacos) are an ubiquitous taco truck staple.

    Traditionally, the method of cooking the al pastor pork is to roast a pork shoulder on a vertical spit with some pineapple rings.  The fat that drip from the pork crisps up the outer layers of the pork, which is then shaved off and served on a corn tortilla with some pineapple salsa, cilantro, and onions.  For the home cook, this is probably a lot more than one is prepared to undertake.  Fortunately, there are options.  I can’t take full credit for this discovery, as someone else discovered that you can get the flavors of al pastor pork in your pressure cooker for a fraction of the effort.  However, I did tinker around with the recipe until I got it to taste the way that I like it.  It may not be 100% authentic, but for delicious and flavorful pork tacos that can be made on a weeknight, these are well worth the trade-off.

    When doing al pastor meat for in the pressure cooker, the pineapple flavor is incorporated in the sauce that the meat is cooked in.  I find that fresh pineapple gives the best flavor, but you can use canned pineapple if you can’t find fresh in your area.

    Blend a cup of pineapple chunks with chipotle peppers in sauce, garlic, cumin, oregano, salt, and pepper.  It doesn’t have to be entirely smooth, but don’t leave any big chunks of anything in there.

    Heat the pressure cooker liner on the hottest Saute/Browning setting.  Lightly season the pork chunks with salt and pepper.  When the liner is hot, use it to brown your pork chunks on all sides, then remove them and set them aside.  You may have to do that in stages, because they probably won’t all fit at once.  After that, add the chopped onions to the pot and cook them until they start to soften.  Add your browned pork chunks back into the pot.

    Pour the pureed pineapple mixture over the pork and onions in the pot.  Seal, then change the setting on the pot to Manual (High Pressure) for 45 minutes.  When the timer goes off, allow the pressure to release for about 10 minutes before releasing the remaining pressure manually.  Remove the pork chunks, leaving the sauce, then set the pot back to the Saute/Browning setting.  Cook the liquid, stirring occasionally, until it’s reduced by about half.  While that’s going, brown your cooked pork chunks on all sides over a grill or in a hot skillet.  Chop or shred the meat and then return it to the pot with the liquid.  Continue to cook, stirring occasionally, for about 5 minutes or until the meat looks like it has absorbed some of the cooking liquid.  Turn the pressure cooker off and let the pork al pastor sit for at least 10 minutes before serving.

    These tacos al pastor may not be authentic, but they are darned good.  And, for those of us that don’t have a vertical spit or time, these are a great way to get your craving for good tacos taken care of at home.  Serve on corn tortillas with cilantro, onions, and lime wedges and you’re in for a treat!  The meat freezes beautifully, too, so feel free to make a big batch and save some for a rainy day.

    Pressure Cooker Pork “Al Pastor”

    Ingredients

    • 3lbs of boneless pork butt (Boston Butt Roast). cut into large chunks
    • 1 cup fresh pineapple chunks
    • 1 onion, chopped
    • 1 or 2 peppers from a can of chipotle peppers in adobo sauce (plus a spoonful or two of the sauce itself)
    • 3 cloves garlic
    • 1 tsp salt (more or less to taste)
    • 1/2 tsp black pepper
    • 1 tsp ground cumin
    • 1/2 tsp dried oregano
    • 2 tbsp olive oil

    Directions

    In a blender or food processor, mix your pineapple chunks, chipotle peppers with sauce, salt, pepper, garlic, cumin, and oregano until no large chunks remain.  Set aside.

    Preheat the liner of your pressure cooker using the Saute/Browning setting.  Season pork chunks with salt and pepper.  When the pot is hot, add the olive oil and brown the pork chunks on all sides in the liner (do this a few at a time so you don’t crowd the liner).  Remove the pork from the pot and set aside.

    Add the chopped onions to the pot and saute, stirring frequently, until they start to soften.  Return the pork chunks to the pot, then pour the blended pineapple sauce over the pork in the pot.  Cover, seal, and cook on Manual (High Pressure) for 45 minutes.  When the time is up, allow the pressure to release naturally for 10-15 minutes before manually releasing the remaining pressure.

    Remove pork chunks from the pot, leaving the cooking liquid.  Set the pot to Saute/Browning and allow the cooking liquid to come to a simmer.  Continue simmering until the liquid is reduced by about half.

    While the liquid reduces, char pork on all sides using a hot grill or skillet.  Remove from heat and chop or shred the pork.  Return the pork to the pot with the reduced cooking liquid, stirring to coat the pork.  Continue to simmer until the pork has absorbed some of the liquid, about 5 minutes.  Turn off the pressure cooker and allow to sit for 10 minutes before serving.

  • Pressure Cooker Rabo Encendido (Oxtail Stew)

    Pressure Cooker Rabo Encendido (Oxtail Stew)

    Skip to Recipe

    In my circle of friends, I am notorious for not being a particularly adventurous eater.  Keep those beef hearts and chicken feet away from me, and don’t even get me started on the time that I found out that beef tongue (something my mom made for us a lot growing up) was meant to be taken literally.  I mean, it’s not like “pigs in a blanket” means you’re eating blankets, right!?  With that in mind, I can’t really explain why I still love rabo encendido (oxtail stew) so much.  Yes, you’re technically eating a cow’s tail. I don’t care.  It’s delicious.

    According to my mother, she and my father first had rabo encendido at a Cuban restaurant long before I was born.  He liked it so much that he begged her to learn how to make it.  This was long before there was the Internet and sources to get copycat recipes from, so she just set out to figure it out on her own.  In the end, her version of rabo encendido is different than what you get at a traditional Cuban restaurant, but it’s what I grew up eating.  As a result, none of the versions that I get at Cuban restaurants ever tastes “right” to me.  So, thanks Mom for ruining my palate for the real thing, but I love you anyway because your version tastes better.  🙂

    Originally, making oxtails was a stovetop affair that took a good 6 hours.  Nowadays, I make them in my Instant Pot, and it makes the process MUCH faster.  I can get rabo encendido on the table for dinner on a weeknight after work, which is a VERY big deal.

    The base of the sauce is made from tomato, garlic, and red pepper.  Just throw this into a blender with white wine and puree.  Add your oxtails to the liner of your pressure cooker and throw the chunks of green pepper and onion on top, along with the bay leaves.  Pour the tomato and red pepper puree over the ingredients in the pressure cooker liner, then add the seasonings.  Seal the pressure cooker and set to 45 minutes.  When the timer goes off, allow the pressure to release naturally for another 15-20 minutes, then release any remaining pressure.

    When it is safe to open the pressure cooker, do so and remove the cooked oxtails and vegetables, but leave the liquid in the pressure cooker liner.  Set the oxtails aside and discard the cooked onions and peppers.  Skim as much fat as you can from the cooking liquid, then set the pressure cooker to Saute/Browning on the highest possible setting, allowing the liquid to come to a simmer.  When the liquid is simmering, add the cooked oxtails and continue heating until the sauce has reduced by about half.

    This results in oxtails that are tender, but may still have a little bit of resistance near the bone.  This is how I like them, but if you like them to be completely falling apart then you might want to add another 10-15 minutes of pressure-keeping time.  Either way, they will be flavorful and delicious!  I like to serve them with a side of white rice, and sometimes I’ll fry up some sweet plantains if I have them.

    Pressure Cooker Rabo Encendido (Oxtail Stew)

    Ingredients

    • 3 lbs oxtails
    • 1 medium onion, cut into large chunks
    • 1 green pepper, cut into large chunks
    • 1 red bell pepper
    • 2 Roma tomatoes
    • 4 cloves of garlic
    • 2 bay leaves
    • 1 packet Goya seasoning (the kind that says “con Azafran”)
    • 1/2 tsp ground cumin
    • 1 tbsp vinegar (I use red wine vinegar)
    • 1 tbsp hot sauce
    • 1 cup white cooking wine
    • 1 8oz can Spanish-style tomato sauce
    • salt and pepper to taste

    Directions

    Using a blender, blend the tomato, red pepper, garlic, and white wine until a coarse puree is formed.

    In the liner of the pressure cooker, combine the oxtails, green pepper, onions, bay leaves, Goya seasoning, cumin, hot sauce, vinegar, and salt and pepper.  Pour the red pepper and tomato puree over the ingredients in the pressure cooker, then cover and seal.

    Cook on Manual (High pressure) for 45-60 minutes (depending on desired tenderness), then allow the pressure to release naturally for about 15-20 minutes before releasing the remaining pressure.  Open the pressure cooker and remove the oxtails and vegetables, but leaving the liquid in the liner.  Discard the vegetables and set the oxtails aside.  Strain as much fat from the cooking liquid in the liner as you can.

    Add the tomato sauce to the liquid in the pot, then set the pressure cooker to the highest Saute/Browning setting.  When the liquid starts to simmer, return the oxtails to the pot.  Continue cooking until the liquid has reduced by about half, then taste and adjust seasonings if necessary.  Serve hot.

    Makes about 4 servings.

  • Pumpkin Spice Rum Cake

    Pumpkin Spice Rum Cake

    Skip to Recipe
    Two years ago, I came up with a red velvet rum cake to make at my boss’s request.  For the fun of it, I started looking into what other types of bundt cake would hold up to a generous soaking of rum syrup.  I tried chocolate pound cake, but it was kind of a mess.  My next attempt featured pumpkin, since it’s that season and all.  To my surprise, a Pumpkin Spice Rum Cake is just what the doctor ordered.  And, since I normally use spiced rum in my rum cakes anyway, it was like a perfect marriage of fall flavors and a boozy punch.  It would also be a nice change of pace from the pies that grace so many Thanksgiving tables.

    Start by sifting your dry ingredients, then beating the sugar and oil together until it’s well-combined.  Then add the eggs, one at a time.  Once all of the eggs are incorporated, mix in the pumpkin, then alternately add the flour mixture and rum until you have a smooth batter.  Pour into your well-greased bundt pan.

    About 15 minutes before the cake is done baking, start making your rum syrup by melting butter, sugar, and water in a pan over medium to medium-high heat.  Bring to a large simmer, stirring until all of the sugar dissolves, then remove from heat and carefully stir in the rum.  When the cake is done, remove from the oven, poke holes all over with a toothpick or skewer, then slowly pour the rum syrup over it.  You may have to pour the syrup in stages, waiting until the cake absorbs most of it before pouring more onto it.  Once you have poured all of the rum syrup over the cake, let it sit for about 5 to 10 minutes until it has absorbed all of the liquid.

    Once all of the liquid has been absorbed, flip your cake over onto a cake board of baking dish.  Do not wait until the cake cools completely, or it might stick to the pan and break while you are trying to get it out.  It won’t be any less delicious, but it won’t be very pretty.

    I have heard that rum cakes gets better as it ages, so it’s best to let it sit for a few days before enjoying.  I honestly can’t tell you whether or not that is true, because mine never last that long.  I do recommend to let it sit for at least a day, though.  This will give gravity time to do its thing and distribute that boozy goodness.  I think it also gives the cake time for the flavors to blend and mellow.

    Thanks to the alcohol in the cake, this cake stays pretty fresh for a while, so there is no need to refrigerate if you plan on serving it within a few days.

    Pumpkin Spice Rum Cake

    Ingredients

    For the Cake

    • 3 1/4 cups all purpose flour
    • 4 eggs
    • 1 1/2 cups granulated sugar
    • 1 1/4 cups brown sugar
    • 1 1/2 tbsp pumpkin pie spice
    • 1/2 tsp salt
    • 2 tsp baking powder
    • 1/2 tsp baking soda
    • 1 15oz can pumpkin puree
    • 1 cup vegetable oil
    • 1 tsp vanilla extract
    • 1/2 cup rum

    For the Rum Syrup

    • 1 cup sugar
    • 1/2 cup (1 stick) butter
    • 2 tbsp water
    • 3/4 cup rum

    Directions

    Preheat oven to 350 degrees Farenheit.  Generously grease a 12-cup bundt pan.  Set aside.  Sift together the flour, baking powder, baking soda, pumpkin pie spice, and salt.

    In the bowl of a stand mixer, mix the oil white, sugar, and brown sugar until the sugar is coated and there are no clumps.  Add the eggs, one at a time, beating well after each addition.  Mix in the pumpkin and vanilla extract.  Add the flour alternately with the rum, beginning and ending with the flour, beating well after each addition.  Do not overbeat. Pour batter into prepared bundt pan.

    Bake at 350 degrees for 65 to 80 minutes, or until a toothpick inserted near the center comes out clean.  About 10 minutes before the cake is done, start making the rum syrup (instructions in next paragraph) and set aside.  When the cake is done, remove it from oven and set on a wire rack.  Poke holes in the cake using toothpick or wooden skewer, then slowly pour the hot rum syrup over the cake while it’s still in the pan.  Let cake sit in the pan for 5-10 minutes to absorb the liquid, then remove from pan by inverting onto a cake board or serving dish.  Allow to cool completely before storing.

    To make the rum syrup: Heat butter, sugar, and water in a small saucepan over medium to medium-high heat, stirring constantly.  Once the butter has completely melted, continue cooking, stirring frequently, until the mixture comes to a simmer and the sugar is completely dissolved.  Remove from heat and carefully add the rum, stirring until combined.

  • Cuban-Style Black Beans

    Cuban-Style Black Beans

    Skip to Recipe

    With all of the hurricanes and traveling going on, I haven’t been eating very well lately.  That’s not to say that I haven’t had a lot of DELICIOUS food these past few weeks, but my stomach was long overdue for a break.  This weekend, I just wanted something simple.  Something that helped me feel like I was truly back home here in Miami.  I wanted black beans.

    Truth be told, I had tried making black beans several times in the past using the stovetop method that I got from my mother, as well as other methods I found through online research. Every single attempt was a failure.  It wasn’t until the Instant Pot came into my life that I was able to make beans without a crunchy center.  And, once I got the bean technique down, the recipe adaptations soon followed.

    If you have looked at my moros recipe, then you will probably notice that these are very similar.  Actually, my moros recipe was adapted from this recipe for Cuban style black beans, which was itself an adaptation of my mother’s recipe for black beans and a few recipes that I found online and what I remember about the black beans served at my favorite Cuban restaurants.  Most of them use chicharrones (fried pork belly), but I’m using bacon because it’s easier to work with.

    We start by cooking the beans.  Throw the dried beans in your electric pressure cooker with a quartered green pepper, a few cloves of garlic, 2 bay leaves, and a ham hock.  Add 8 cups of water and 2 tsp of salt. You can also replace the water with chicken broth or stock, but make sure to adjust the salt accordingly.  In this batch, I used water and chicken bullion, and hardly needed any additional salt.

    Seal and cook on High Pressure for 25 minutes, and then allow the pressure to release naturally.  Open the pressure cooker and discard the green pepper, bay leaves, and garlic.  Remove the ham hock, chop any meat left on it, and set it aside.  Take about 1 cup of beans from the pot and mash them up in a bowl or cup, then return to the pot and set it to Saute/Browning and simmer the beans (stirring frequently to keep them from sticking) while you are doing the next steps.  This is where the process is a little bit different than moros.

    While the beans are simmering, make the sofrito.  Have all of your sofrito ingredients prepped and ready to go.  Cook the chopped bacon in a skillet or saute pan over medium to medium high heat until it’s crispy.  Remove the bacon from the pan and set it aside, but leave the bacon grease behind.  Note that you do not have to use the bacon if you don’t want to.  You can skip that part and heat 2 tbsp of olive oil in your pan, if you prefer.Add the diced onions, red peppers, and green peppers.  Cook until the vegetables start to turn translucent, then add the garlic and the seasonings.  Continue to cook, stirring, until fragrant, then add vinegar.  Take your sofrito and pour it into the pot of simmering beans.  Taste it and adjust the seasoning as needed, then continue simmering until the beans are the desired thickness.  Stir in the cooked bacon and chopped ham bits.

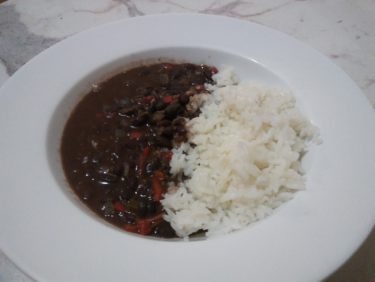
    You can enjoy the black beans on their own as a soup, or you can serve along with white rice.  The black beans also freeze incredibly well, so you can make a big batch and then freeze parts of it for the future.  Sometimes I also add chopped cilantro for a bit of zing.  I have also added jalapeno and poblano pepper if I want it to have a kick.

    Cuban-Style Black Beans

    Ingredients

    • 1lb dried black beans
    • 1 green pepper, quartered
    • 1 smoked ham hock
    • 2 bay leaves
    • 10 cloves of garlic (5 whole and 5 minced)
    • 4 strips thick cut bacon, chopped (or 2 tbsp olive oil)
    • 1 cup diced green pepper
    • 1 cup diced red pepper
    • 2 cups diced white onion
    • 1/2 tsp oregano
    • 1/2 tbsp cumin powder
    • 3 tsp salt (more or less to taste)
    • 1 tsp black pepper
    • 2 tbsp red wine vinegar
    • 8 cups of water (or chicken broth/stock)

    Directions

    Combine the beans, quartered green pepper, ham hock, bay leaves, 5 cloves of garlic, water (or broth/stock), and 2 teaspoons of salt (adjust if using broth/stock) in the liner of your electric pressure cooker.  Cover, seal, and cook on Manual (High Pressure) for 25 minutes.  Allow the pressure to release naturally, then open and discard the bay leaves, green pepper, and garlic.  Remove the ham hock, chop up any meat remaining on it, and set aside.

    Using a slotted spoon, remove about 1 cup of beans from the pot.  Mash them with a fork, then return to the pot.  Set the pressure cooker to Saute/Browning, and bring to a simmer, stirring often to keep the beans from sticking to the bottom.

    In a large skillet or saute pan, cook the bacon until crispy.  Remove the bacon from the pan using a slotted spoon and set aside, but leave the bacon grease.  Add the diced onion, diced green pepper, and diced red pepper to the hot pan with the bacon grease and cook, stirring occasionally, until the onions start to turn translucent.  Add the minced garlic and the spices.  Cook until fragrant.  Add the vinegar and continue to cook for an additional 1 or 2 minutes.

    Remove the sauteed vegetable mixture from the heat and pour into the pot of simmering beans.  Taste and adjust seasoning as needed.  Continue simmering until the desired thickness, then stir in the bacon and chopped ham hock.  Turn off pressure cooker and allow the beans to sit for 10-15 minutes before serving.

  • Peanut Butter Ice Cream (Egg-Free)

    Peanut Butter Ice Cream (Egg-Free)

    Skip to Recipe

    I have a weird relationship with peanut butter.  I don’t go nutso over peanut butter things the way that some people do.  In fact, when people would ask me, I used to say that I don’t like peanut butter all that much.  But, lately, I have been gaining a greater appreciation for it.  I don’t think that I necessarily dislike peanut butter, but maybe that some applications of it are just a bit too much for me.  Peanut butter cups, for instance, aren’t my first choice of candy.  Peanut butter ice cream, on the other hand, has won me over.

    I normally make a custard base when making ice cream, but there are times when I just don’t feel like being bothered with all of that.  For those times, I have an alternate method of making peanut butter ice cream.  It is slightly less creamy than the custard-based kind, but it’s also slightly less work.  Plus, it still tastes fantastic with a warm brownie or as an ice cream sandwich.

    The first thing you want to do is melt your peanut butter with the milk and sugar.  Once it’s all melted, but before the mixture can actually come to a boil, remove it from the heat and pour it into a bowl filled with your heavy cream.  Refrigerate this until it’s nice and cold (you can put it in an ice bath to speed up the process), and then freeze in your ice cream maker.  After that, store it in an airtight container in the freezer for at least a couple of hours to let it set into ice cream.

    Whether you like it plain, drizzled with hot fudge, or smothered in toppings, this peanut butter ice cream is sure to please any peanut butter lover in your life.  You can mix in chocolate chips or chopped peanut butter chips into the ice cream if you like it chunky, too.

    Peanut Butter Ice Cream

    Ingredients

    • 3/4 cup creamy peanut butter
    • 1 1/2 cups milk
    • 1 1/2 cups heavy cream
    • 1/2 cup sugar
    • 1/2 tsp vanilla extract

    Directions

    Pour heavy cream into a medium bowl.  Set aside.

    In a medium saucepan, combine the peanut butter, milk, and sugar.  Cook over medium heat, stirring occasionally, until the sugar has dissolved and the peanut butter has melted.

    Remove from heat and pour into the bowl with the heavy cream.  Stir in the vanilla extract.  Cover and refrigerate until cold, then freeze in your ice cream maker according to manufacturer’s directions.  Pour into freezer-safe container and freeze for 4 hours or until firm.

    Makes about 1 1/2 quarts.

  • Pressure Cooker Chocolate and Irish Cream Flan

    Pressure Cooker Chocolate and Irish Cream Flan

    Skip to Recipe

    One of my older sisters doesn’t make it a secret that she really doesn’t know how to cook.  It’s not that she is proud of it, but she is just very matter-of-fact about it.  Since getting married, though, she has decided to make more of an effort in learning her way around the kitchen.  So, for last Christmas, she asked for an Instant Pot as a gift, for which the family happily obliged.  She was ecstatic when she received it, and then proceeded to stuff it in her closet, too afraid to use it.

    Fast forward to present-day, and I decided to take advantage of my plans to visit her in Houston to give her a crash course on the Art of the Instant Pot.  Of the many recipes that I think that someone should have up their sleeves, an easy dessert that’s potluck-friendly is one of them.  I told her we were going to make flan, and she didn’t seem all that excited.  So, I decided to sweeten the pot and appeal to her past life as a bartender.  I proposed that we make a chocolate and Irish Cream flan, and that definitely got her attention.  When she sat down and tasted the fruit of our labors, she said that it was the best flan that she has ever had in her life.

    At home, I have a flan pan (flanera) that I use to make flans.  However, my sis doesn’t have one, so we used a glass baking dish.  The flan was a little bit too soft in the middle, so I would add another 2 minutes or so of pressure keeping time if you’re going to use glass to make your flan.  And remember, oven-safe glass only!

    You can omit the cocoa powder to make just an Irish Cream flan, and you can also replace the Irish Cream with additional half-and-half to make this just a chocolate flan.

    Pressure Cooker Chocolate and Irish Cream Flan

    Ingredients

    • 1/2 cup sugar
    • 2 tbsp water
    • 1 can sweetened condensed milk
    • 1 1/2 cups half and half
    • 1/2 cup Irish Cream
    • 3 eggs
    • 1/4 cup unsweetened cocoa powder (preferably Dutch-processed if you have it)

    Directions

    In a small saucepan, melt the sugar over medium heat, stirring frequently.  When the sugar has melted and turned amber, remove from heat and add the 2 tbsp of water (careful, it will steam and splatter).  Carefully stir until the sugar and water are combined, then pour into the bottom of a flan pan or round baking dish.  Set aside to cool.

    In a blender, add the remaining ingredients, then blend at medium speed until combined.  Pour over the cooled caramelized sugar in the flan pan or baking dish.

    Pour 1 cup of water into the liner of your pressure cooker.  Cover your flan pan or baking dish, place on a trivet, then lower into the liner of your pressure cooker.  Seal and cook on Manual (High Pressure) for 12 minutes (add another 2 minutes or so if using a glass baking dish), then allow the pressure to release naturally for another 12 minutes before removing the the flan from the pressure cooker.  Allow to cool completely, then refrigerate for at least 4 hours, but preferably overnight.

    To serve, run a thin knife along the edge of the flan, then flip the pan over onto a plate, gently shaking the flan loose.

    Makes about 8 servings

  • Buffalo Chicken Sandwich

    Buffalo Chicken Sandwich

    Florida has an almost unhealthy obsession with Publix subs.  Don’t get me wrong, this grocery store chain does make some pretty darn good subs, but not worth the almost fanatical loyalty that they seem to have won from Floridians.  Usually, a Publix sub for me is a quick meal for when I spent too much time grocery shopping and no longer feel like cooking.  The notable exception to this rule is the buffalo chicken sub.  The buffalo chicken sub is basically the Publix chicken tenders sub doused with buffalo sauce and sprinkled with crumbled blue cheese.  I shamelessly admit to looking out in the Weekly Ad for their chicken tenders sub to go on sale in order to have an excuse to indulge.

    Unfortunately for me, the availability of this “Publix sub hack” is not guaranteed.  Sometimes, the deli doesn’t have any buffalo sauce or blue cheese.  Sometimes, the deli worker refuses to make it because they have no idea that they’re allowed to do this.  Regardless of why I don’t get my fix, I finally came to the realization that I should try to make my own version at home.  After all, the formula is pretty simple: breaded chicken breast meat, buffalo sauce, and crumbled blue cheese on a sandwich roll.  Viola, buffalo chicken sandwich!

    My ideal chicken wings are not breaded before they are fried.  However, boneless chicken breasts are definitely helped along by a good breading if they are going to get coated in buffalo sauce.  Make sure that the recipe that you use to bread your chicken breasts doesn’t have too many spices or seasonings in it.  You don’t want the seasonings in the breading to interfere with the taste of the buffalo sauce.  Save those fancy herbs and spices for when you’re making a Southern friend chicken sandwich.

    Buffalo Chicken Sandwich

    Ingredients

    • 4 breaded and fried chicken breasts (such as this recipe)
    • 1/2 cup buffalo sauce (can be store-bought or homemade)
    • 1/2 cup crumbled blue cheese
    • 4 sandwich rolls

    Directions

    Slice the sandwich rolls lengthwise and toast lightly.  Pour buffalo sauce into a wide, shallow dish.  Set aside.

    Fry chicken according to your preferred recipe.  When the chicken is done, use tongs to remove from the oil and immediately set in the dish filled with buffalo sauce, flipping to coat both sides.  Transfer chicken breasts to sandwich rolls, and sprinkle each with 2 tbsp crumbled blue cheese.  Serve immediately.

  • Pressure Cooker Peanut Butter Cheesecake

    Pressure Cooker Peanut Butter Cheesecake

    Skip to Recipe
    I hosted my first “Instant Pot Party” recently for a few friends that wanted some pointers on how to make the most out of their appliance.  One of my friends wanted to make a peanut butter cheesecake, and already had a recipe in mind.  Having made that same recipe before with some changes, I told her the changes that I recommended on the recipe.  Surprisingly, she trusted me enough to go along with them.  Not only was she pleased with the results, but she asked me to document the adjusted recipe so that she could have it handy.

    You can add chocolate chips to the peanut butter cheesecake if you want and it doesn’t affect the cook time.  I prefer smooth cheesecakes, so I typically leave them out unless I am bringing the cheesecake to a group event.  Cheesecakes always taste best after they sit in the fridge for at least a day, so be sure you plan on making this at least a day in advance.

    Prepare your crust, press it into your prepared cheesecake pan, and then pop it into the freezer while you prepare your cheesecake batter.  Start with the cream cheese and sugar.  Cream it with your electric mixer until fluffy, then mix in the eggs.  Next, add the peanut butter and vanilla extract, then mix until just combined.  Pour the batter into your cheesecake pan, place the pan on a trivet, then lower it into your pressure cooker filled with about 1 1/2 cups of simmering water.  Cook on Manual for 23 minutes, then natural release for 12 more minutes before releasing the rest of the pressure and removing the peanut butter cheesecake from the pressure cooker.

    When the cheesecake is completely cool, you’ll want to refrigerate it for several hours before removing it from the pan.  At this point, you can make the ganache.  I make it by heating my cream and chocolate in the microwave in 20-second bursts until the chocolate is almost completely melted, then let it melt the rest of the way while I stir.  If you prefer to make ganache the traditional way, just bring your cream to a boil on the stove, pour the boiling cream over your chopped chocolate in a heatproof bowl, then stir until all of the chocolate is melted and the mixture is creamy.  Let the ganache sit until it’s fairly thick, but still pourable.  This is what will get you those attractive drips when you pour it over the cheesecake.

    As a finishing touch, you can garnish with mini peanut butter cups.  You can also chop them up and sprinkle them on top of your peanut butter cheesecake.

    You can also double the cheesecake ingredients and oven-bake this in a 9in round springform pan if you’re feeding a crowd.  Bake in a hot water bath at 350 degrees for about an hour, or until the center is only slightly jiggly.

    Pressure Cooker Peanut Butter Cheesecake

    (Adapted from this recipe from Pressure Cooking Today)

    Ingredients

    • 1 cup crushed Oreo crumbs
    • 1 tbsp butter, melted
    • 16oz cream cheese, softened
    • 1/2 cup white sugar
    • 2 eggs, room temperature
    • 1/2 cup creamy peanut butter
    • 1/2 tsp vanilla extract
    • 3/4 cup semisweet chocolate chips (optional)
    • 3/4 cup bittersweet chocolate pieces
    • 1/2 cup heavy cream
    • peanut butter cups for garnish (optional)

    Directions

    Grease a 7in round cheesecake pan.  Mix the Oreo crumbs and melted butter until the crumbs are moistened all the way through.  Press the mixture onto the bottom of your prepared cheesecake pan, then freeze until ready to use.

    Cream the sugar and cream cheese using an electric mixer.  Add the eggs, one at a time, beating well with each addition.  Add the peanut butter and vanilla extract and continue mixing until just combined.  Do not overmix.  Fold in the semisweet chocolate chips, if using.  Pour mixture into your prepared baking pan.

    Add 1 1/2 cups of water to the liner of your electric pressure cooker, then set to the Saute/Browning setting.  When the water comes to a simmer, set your cheesecake on a trivet and lower it into the pressure cooker.  Cover, seal, and change the setting to cook on Manual (High Pressure) for 23 minutes.  When the time is up, allow the pressure to release naturally for 12 minutes, then release any remaining pressure.  Remove the cheesecake from the pressure cooker and allow to cool completely, then refrigerator at least 4 hours.

    Place heavy cream and bittersweet chocolate in a microwave-safe dish or measuring cup.  Microwave for 20-second intervals, stirring gently between intervals, until the chocolate is almost completely melted, then continue stirring until the chocolate melts completely.  Allow mixture to cool until thick before pouring onto your peanut butter cheesecake, then garnish with peanut butter cups if desired.

    Makes about 8 servings.