Blog

  • Shilla Korean BBQ (A Review)

    Shilla Korean BBQ (A Review)

    Korean BBQ is a popular method of grilling meat in Korean cuisine.  It is very similar to Japanese yakiniku.  With both types of cuisine, meats are brought to your table, where you can cook them to your liking on a grill that is built into the table. The main differences are that Korean BBQ meats are usually marinated large pieces of meat, while yakiniku features small pieces of meat that have not been marinated.  Shilla Korean BBQ stands out as one of the few sources to enjoy Korean BBQ, because Miami doesn’t have very many Korean BBQ restaurants.

    All of the meals at Shilla come with some traditional banchan (side dishes).  The have kimchi, pickled vegetables, bean sprouts, and some sort of fermented fish.  I normally ignore the banchan, although the pickled vegetables are a good palate cleanser sometimes.

    Your proteins are brought out already prepped and ready for grilling.  We got bulgogi (marinated sirloin strips) and shrimp.  The orders include white rice and some raw veggies to grill along with your meats.

    Shilla uses infrared grills.  I’m not sure if this has any impact on the end result, but our meat was delicious.  It’s hard to judge a restaurant when you are technically cooking the meat yourself. The marinade that was used for the steak has a great flavor, but I wish that the grill had seared the steak a little better.

    If you’re not in the mood to cook your own food, Shilla Korean BBQ also has plenty of pre-made options available.  I ordered a dolsot bibimap (stone pot rice with beef and vegetables).  The bibimap is served in a hot stone pot that toasts the rice and makes it a little bit crunchy.  This means that it gets even better as it sits.  They also provide a side of spicy sauce to add to it.  I’m a wuss, so I don’t use it.

    Shlla Korean BBQ is a great place to enjoy some good Korean BBQ.  They don’t seem to have any large tables, so it’s best to come with a small group.

    For more information on Shilla Korean BBQ, please visit their web site at http://www.sushicafeshillakoreanbbq.com/

  • Pressure Cooker Mac and Cheese

    Pressure Cooker Mac and Cheese

    Skip to Recipe
    There are two types of people in the world: those who like their mac and cheese creamy, and crazy people.  Seriously, whenever I hear someone tell me that they like it when they have to cut their mac and cheese out of the pan with a knife, I’m just like “What’s wrong with you?”  The tendency to dry out mac and cheese is the entire reason that I normally avoid baked mac and cheeses.  I know that it’s not impossible to get a creamy mac and cheese out of the oven, but let’s be realistic here.  How many people do YOU know that can accomplish this?

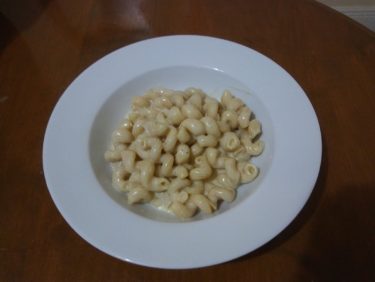
    In case it wasn’t already apparent, I have always preferred the stovetop style of mac and cheese.  There is just something so comforting about a bowl of this creamy pasta goodness.  The problem, though, is what a pain it is to get the right consistency of your cheese sauce on the stove.  I thought that I would just have to resign myself to a lifetime of lumpy mac and cheese.  That is, until I discovered a way to make it in my electric pressure cooker. Not only is it basically foolproof, but it is also a fraction of the effort.  No draining your pasta.  No cooking a roux.  Just you, a pot, and MAGIC!

    Add the pasta, water, butter, and seasonings in the liner of your pressure cooker.  Cover, seal, and cook on High Pressure for 4 minutes.  When the time is up, manually release the pressure, but keep the cooker on the Keep Warm setting.  Stir in your cream cheese, letting it melt and coat the pasta.  After that, add the milk, then the cheeses.  Make sure you add the cheese a little at a time so that it melts evenly.

    In the end, you’ve got yourself a creamy and delicious mac and cheese that took very little effort to make.

    When making this mac and cheese, it is best to shred your own cheese.  Pre-shredded cheeses are usually coated with starch or contain other ingredients that may affect the texture of your finished product.

    Pressure Cooker Mac and Cheese

    Ingredients

    • 1 lb dry elbow macaroni (I use corkscrew pasta)
    • 4 tbsp unsalted butter
    • 1 quart water
    • 2 tsp Dijon mustard
    • 1 tbsp hot sauce
    • 1/2 tsp onion powder
    • 1 tsp salt
    • 1/2 tsp ground pepper
    • 1 cup whole milk
    • 8 oz cream cheese, cut into cubes (you can also use Mascarpone cheese)
    • 8 oz white cheddar cheese, shredded
    • 8 oz Monterey Jack cheese, shredded

    Directions

    Add the dry elbow pasta followed by the butter, water, ground mustard, kosher salt, granulated onion or onion powder, black pepper, and cayenne pepper to the bowl of the Instant Pot. Secure the lid and set the vent to “sealing”.

    Cook on “Manual” (High Pressure) for 4 minutes. When the 4 minutes is up, leave the pot on Keep Warm and manually release the pressure.

    Open the lid and add the cubed cream cheese. Stir gently but thoroughly until the cream cheese is melted.

    Add the milk and stir until combined. Add the shredded cheeses, a little bit at a time, until all of the cheese is melted and smooth. Serve immediately.

  • Caramel Ice Cream

    Caramel Ice Cream

    Skip to Recipe
    A friend of mine once told me the difference between a “cook” and a “chef.”  To her, a “cook” follows recipes and a “chef” can tweak and adjust a recipe to create something new.  I thought of those words when I came up with this caramel ice cream recipe.  Truth be told, the idea came to me one day while I was making some burnt caramel custards.  As I was heating the cream on the stove, I thought to myself, “what if I added milk and threw this in the ice cream maker?”  And, one day, I did just that.  The rest is history.

    As with most of my ice cream recipes, this caramel ice cream starts with making custard using egg yolks.  I find that custard-based ice creams are richer and creamier than their egg-free cousins.

    Place your egg yolks in a mixing bowl and whisk until smooth, then set aside.  Heat your cream in a small saucepan with half a vanilla bean (split and seeds scraped) until it starts to simmer.  Reduce the heat and let keep warm while you melt the sugar.

    Place your sugar in a heavy-bottomed saucepan and cook over medium heat until the sugar melts and turns deep amber.  Remove it from the heat and pour in the warm cream, a little bit at a time.  The mixture will steam and possibly splatter, so use caution.  At this point, you will likely still have some clumps of hardened sugar in your mixture.  If this happens, return the pot to the heat and reduce the heat to medium-low, stirring the mixture gently until no clumps of hardened sugar remain.

    When that is done, remove the pot from the heat again and stir the hot cream mixture into your whisked egg yolks, a little bit at a time.  Once about 1/3 of the cream mixture has been added to the yolks, pour the yolk  mixture into the pan with the remaining cream mixture.

    Return to the heat and cook on medium to medium-low, whisking constantly, until the mixture thickens and coats the back of a spoon.  Do not let the mixture come to a boil!  While this cooks, pour your milk into a medium bowl and set a strainer over it.  When the custard mixture is done, remove it from the heat and slowly pour it through the strainer into the bowl with the milk.  Do not do this too fast, or you might make the milk curdle.

    Cover this mixture and refrigerate for 4 hours or until the mixture is sufficiently chilled.  I usually leave it overnight.  When ready, freeze the mixture in your ice cream maker according to the manufacturer’s directions, then transfer to a freezer-safe container and freeze until firm.

    This ice cream tastes great on its own, but also works great with all sorts of toppings.  Try chocolate sauce or candied peanuts.

    Caramel Ice Cream

    Ingredients

    • 2 cups heavy cream
    • 2 cups milk
    • 1 cup granulated sugar
    • 6 egg yolks
    • 1 vanilla bean, split and seeds scraped (or 2 tsp vanilla extract)

    Directions

    In a small saucepan, heat the cream and vanilla bean over Medium heat until the cream starts to come to a simmer.  Reduce heat to Low to keep warm.  Whisk egg yolks in a small mixing bowl and set aside.

    In a medium saucepan, heat the sugar over Medium heat until the sugar melts and turns a deep amber color.  Remove from heat, then take the hot cream mixture, remove the vanilla bean, and slowly pour into the melted sugar mixture.  Careful, as the mixture might splatter.  If clumps of hardened caramel remain, return mixture to heat (reduce to medium-low) and stir until the mixture is smooth and no clumps remain.  While this cooks, pour the milk into a medium bowl and set a fine mesh strainer over it.

    Remove the mixture from the heat and whisk into the egg yolks, a little bit at a time.  When about 1/3 of the mixture has been added to the yolks, add the yolk mixture to the saucepan.  Return to the heat and cook on medium to medium-low, whisking constantly, until the mixture thickens and coats the back of a spoon.  Slowly strain the mixture into the bowl with the milk (not too fast, or the milk might curdle).  Cover and refrigerate until completely chilled (usually takes about 4 hours).  When ready, freeze the ice cream according to the manufacturer’s directions for your ice cream maker.  Transfer the caramel ice cream to a freezer-safe container and freeze until firm.

    Makes about 1 1/2 quarts.

  • Miss Saigon (A Review)

    Miss Saigon (A Review)

    Vietnamese food is pretty hard to come by in South Florida.  In fact, it is rare enough that I had never actually tried any Vietnamese food until I was in my twenties.  There was this little hole in the wall around the corner from an office in North Miami Beach where I worked as a receptionist at the time.  I recall always getting the same thing, too.  I would get the Vietnamese crunchy noodles.  I’m pretty sure that I was addicted to them for a while.

    Since moving to the southern part of Miami Dade County, I had not seen Vietnamese food again until I found Miss Saigon.  Well, I didn’t find Miss Saigon as much as it was a regular lunch spot for several of my new coworkers, including a Vietnamese one.  It’s tucked away in a strip mall in Pinecrest, close to the Dadeland South Metrorail station.

    Thai iced tea is a must whenever I pay a visit.  I first thought it was strange to serve a popular Thai drink in a non-Thai restaurant.  I have since discovered that almost every Asian restaurant in the area does it, so it’s not that weird.  Some places don’t make it as strong as I’d like, but the one at Miss Saigon is bold and sweet.

    My entree of choice is almost always the lemongrass beef.  The lemongrass beef is these succulent stir fried strips of beef with spices and just a hint of curry.  It does come buried in onions, which aren’t my favorite thing, but I just move them to one side.  They have offered to make it for me without the onions. However, I feel like they play a big part in what gives this dish a great depth of flavor.  The dish does tend to be a little bit on the greasy side sometimes.  That aromatic oiliness is perfect for moistening your side of rice, though.

    Normally, I don’t get any dessert when I come here.  This day, we got the Thai donuts because we were there for a birthday.  For those that have never had a Thai donut, I think I would describe it as similar to an elephant ear in taste and texture.  They are typically enjoyed with condensed milk, either dipped or drizzled.  They’re a nice treat for after dinner, but a little heavy if you had a big dinner.

    I cannot vouch for the authenticity of Miss Saigon, but everything that I have tried on their menu has been tasty.  The services is friendly, and the food always tastes fresh.  It’s definitely worth checking out if you’re looking for something different.

  • Pressure Cooker Boneless BBQ Pork Ribs

    Pressure Cooker Boneless BBQ Pork Ribs

    Skip to Recipe
    When you’re a working adult, you sometimes don’t have time to prepare an elaborate meal.  Sure, I would love to have the time and energy to make a lasagna from scratch on a weeknight, but the reality is that it’s a miracle that I even pack tomorrow’s lunch before bed some days.  Let’s face it, there are just going to be some days where your need for a hot meal can be overridden if it means putting in more effort than just opening a few jars and dumping things in a pot.  That’s where these boneless BBQ pork ribs come in.

    Originally, I had picked up a pack of boneless pork ribs at the grocery store to make some bacon wrapped ribs.  Well, when the weekend rolled around, I decided that I really didn’t feel like babysitting a smoker (and then cleaning it afterward).  So, I wound up cooking them in the pressure cooker instead.  As it turns out, they were pretty tasty and flavorful when cooked this way, and came together with hardly any effort.

    Arrange your dry-rubbed ribs in the liner of your pressure cooker.  Add some apple cider vinegar and your favorite barbecue sauce, then seal and cook for 15-20 minutes.  When the timer goes off, let the pressure release naturally for about 10 minutes before you release any remaining pressure.

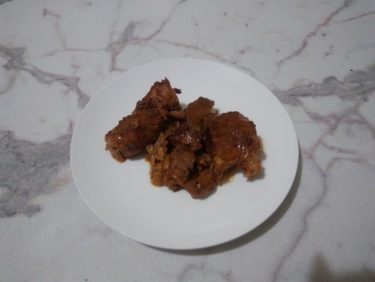
    When they are done, your ribs will have released a lot of liquid.  Just set the pot to Saute (Browning) and let the liquid reduce for a few minutes.  For me, it usually takes about 10 minutes to get the right consistency.

    Check out that thick, bubbling goodness!

    And there you have it.  Easy, right?  Just serve with your favorite side, and you’re good to go!

    Pressure Cooker Boneless BBQ Pork Ribs

    Ingredients

    • 1 1/2 lbs boneless pork ribs (I get the ones labeled “country style”)
    • 2 tbsp of your favorite BBQ rub (more or less to taste)
    • 1/4 cup apple cider vinegar
    • 1/2 cup of your favorite BBQ sauce

    Directions

    Sprinkle seasoning over pork ribs, turning to cover all sides.  Place in a single layer in the liner of your pressure cooker.  Add the vinegar and BBQ sauce on top.

    Cover and seal the pressure cooker.  Cook on Manual (High Pressure) for 15-20 minutes (depending on the thickness of the ribs).  Allow the pressure to release naturally for about 10 minutes before releasing the remaining pressure.  Uncover and set the pressure cooker to the Saute setting.  Let the ribs simmer until the sauce has reduced.

    Makes about 4 servings

    Note: To make this low-carb, use low-carb BBQ rub and low-card BBQ sauce

  • Caramel Apple Slab Pie

    Caramel Apple Slab Pie

    Skip to Recipe
    I have a lot of “rules” when it comes to food.  I think that most of us do.  I guess that you can also call them “preferences,” but I a pretty solid set of guidelines for what I will and will not eat.  For the most part, cooked fruit is on the “will not eat” list, but there are exceptions.  I won’t eat cooked berries in a pie, but I might eat them in a sauce over cheesecake.  Cooked apples are on my “no” list, except when the dessert also includes caramel.  And, most fruit pies in general are off the table because the crust (which is the best part for me) is simply there to hold a mountain of hot fruit mush.  This is one of the many reasons why this caramel apple slab pie caught my attention.  Not only did it meet one of my exceptions (cooked apples are paired with caramel), but the apples are not piled high on a crust.  This makes the fruit to crust ratio more even, and a LOT more appealing to me.  I say this as the person that scoops out most of the apples in an apple pie or turnover so that she gets more crust.

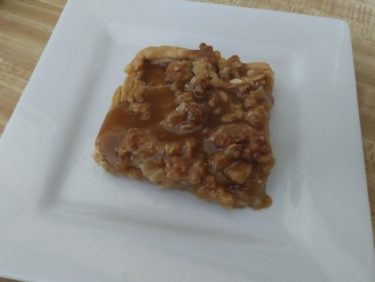
    Until recently, I didn’t even know that slab pies existed.  But, they are a novel idea.  They are great for potlucks, easier to cut and serve, and the leftovers are usually easier to store.  This caramel apple slab pie was a collaboration between myself and a few of my friends.  It is basically exactly what it says it is.  You get some chopped spiced apples and pour them into a crust-covered sheet pan, sprinkle with crumb topping, then drizzle with caramel after it has been baked.  Overall, I think we did pretty well!

    We used premade pie crust, because it’s quicker than making our own and it guaranteed a more uniform crust thickness.  One package of refrigerated pie crust contains 2 round discs of crust, so we pieced them together the best way that we could to cover the entire pan.

    After my apples were peeled, cored, and sliced, I tossed with in lemon juice.  Then, I added the sugar, flour, and spices and mixed until they were all combined.  Once that’s done, spread the mixture evenly in the prepare sheet pan.

    The last step before baking is the crumb topping.  Get the topping ingredients into a bowl, then use a pastry cutter (or two forks) to cut the butter into the dry ingredients until you get a coarse, crumbly mixture.  Crumble this mixture over the apples, then bake for about 45 minutes or until the topping is golden brown.  Set the slab pie on a cooling rack while you make the caramel sauce.

    Combine butter, brown sugar, and heavy cream with a pinch of salt in a small saucepan.  Cook them over medium heat, stirring constantly, until the mixture starts to thicken, about 10 minutes.  If you drop some of the caramel in a bowl of ice water, the caramel should hold it’s shape somewhat instead of dissolving.  When it reaches this stage, remove it from the heat and stir in the vanilla.  Let it cool for 5-10 minutes before you pour it over the slab pie.

    It’s not the prettiest dessert you’ll ever see, but it sure is tasty!  Let the slab pie cool just enough so that it doesn’t fall apart when you slice it, but it’s best served warm.  Unless you’re one of those weirdos that prefers cold pie.

    And, if you are feeling indulgent, serve it with a scoop of ice cream.  A plain vanilla ice cream works, but we also learned that cream cheese ice cream also pairs wonderfully with a piece of this dessert.  The subtle cream cheese tang in the ice cream sets off the tang of the granny smith apples, but is tempered by the sweet caramel.

    Make sure you refrigerate your leftovers!

    Caramel Apple Slab Pie

    (Adapted from The Recipe Critic)

    Ingredients

    For the pie filling

    • 1 package refrigerated pie crust (or make your own pie crust)
    • 3 1/2 lbs Granny Smith apples (or your favorite apple), peeled, cored, and sliced
    • 2/3 cup granulated sugar
    • 1/3 cup all purpose flour
    • 1 1/2 tsp ground cinnamon
    • 1/2 tsp ground nutmeg
    • 1 tbsp lemon juice

    For the crumb topping

    • 1 cup rolled oats
    • 1 cup packed brown sugar
    • 1/2 cup (1 stick) cold butter, cut into cubes
    • 1/2 cup all purpose flour

    For the caramel sauce

    • 1 cup packed brown sugar
    • 1/4 cup (1/2 stick) butter
    • 1/2 cup heavy cream
    • 1 tsp vanilla extract
    • a pinch of salt

    Directions

    Prepare the crust and filling:

    Pre-heat oven to 375 degrees F.  Unroll pie crust according to package directions.  Cover the bottom of an ungreased 15 x 10 inch cookie sheet with the pie crust, cutting and piecing together as needed.

    Place your apples in a large bowl and toss with lemon juice.  Add the remaining filling ingredients and stir until thoroughly combined.  Spread evenly into prepared cookie sheet and set aside.

    Prepare the crumb topping:

    In a medium bowl, stir the rolled oats, brown sugar, and flour.  Using a pastry cutter or fork, cut the cubed butter into the dry mixture until the mixture resembles coarse crumbs.  Crumble over the apples in the cookie sheet.

    Bake for 45 minutes, or until the crumb topping is golden brown and the apples are tender.  Remove from oven and set on a wire rack while you make the caramel sauce.

    Make the caramel sauce:

    In a small saucepan, heat the butter, brown sugar, cream, and salt over medium heat until the mixture comes to a soft boil.  Cook for 7-10 minutes, stirring constantly, until the mixture has thickened.  The caramel should stay together if you pour a little bit in a bowl of ice water.  Remove from heat and stir in the vanilla extract.  Allow to cool for 5-10 minutes, then slowly drizzle over the slab pie.

    Makes about 18 servings

  • Burger Battle 2018

    Burger Battle 2018

    Burger Battle returned for the ninth year in a row.  I had to travel last year and wasn’t in town for the event, but I was super excited about going this year!  They moved the event to March instead of May.  Weather-wise, that seemed like a good call.  However, it also looks like it didn’t give restaurants as much time to prepare, because the list of contenders was noticeably shorter.  What was usually a 20-ish burger chomping marathon topped out at 11 burgers this year.  Still, a good time was had by all, and there were plenty of unique burger offerings to keep things interesting.

    So, who were my favorites?  Let’s see!

    Burgers 1 – 4

    • Burger 1: The Friendly Ghost from BrgrStop
      • A custom 1855 Angus all natural beef blend with housemade ghost pepper pineapple jam, ghost pepper jack cheese, Farmland bacon, and jalapeno pineapple chutney
      • This was the first stand that I came across, and I almost skipped it because I didn’t want the ghost pepper to destroy my taste buds for the evening.  I tried it anyway, and was blown away.  The sweetness of the pineapple tempered the heat of the ghost pepper and made it more of a sharp kick instead of “third degree burn.”  This wound up being my favorite burger of the night.
    • Burger 2: The Irish Breakfast Burger from Bokampers
      • Signature beef blend burger with Proper bacon, Irish banger, shoestring fries, worcestershire ketchup and topped with a quail egg
      • My first thought when I tried this burger was “Wow…quail eggs taste a lot different than chicken eggs.”  Still, the egg kind of overshadowed the taste of everything else.
    • Burger 3: The Ushi Jackman Ranch “Red Wagyu” beef burger with Meyers Dark Rum Demi Glaze shot from Pelican Grand Beach Resort
      • A burger with dry aged crisp prosciutto, vidalia onion jam, house special sauce, homemade pickle, aged cheddar, beefsteak tomato, and shredded lettuce on an 85% FA-House Challah Sesame Seed Bun
      • It was kind of a cool and fun thing to do to inject rum directly into your burger.  The dark rum was a good choice, because it really brought out the flavors in the rest of the ingredients.
    • Burger 4: The Stormy from Tucker Duke’s
      • A burger with Alabama white pepper sauce, barbecue sauce, cheddar cheese, and potato sticks on an onion roll
      • This was a pretty safe burger, but it wasn’t bad.

    Burgers 5-8

    • Burger 5: The Bold City Burger from Metro Diner (Winner Best Bar and Grill Burger)
      • A burger with Provel cheese, caramelized onions, bacon, sausage, fried jalapenos, lettuce, tomato, and garlic aioli on a brioche bun
      • This burger had too much going on for my taste.
    • Burger 6: The Nutella Waffle Burger from Gulfstream Park
      • A burger with pepper jack cheese, chipotle aioli, and maple syrup between two Nutella waffles
      • I’m not really on board with “sweet and salty” combinations, so the Nutella waffle “buns” really threw me off with this burger.  There is a chance that it would have worked better for me if the waffles were plain.
    • Burger 7: The Carolina Jack Burger from Burger Craze (Winner Best Burger Joint Burger)
      • A burger with North Carolina barbecue sauce, pepper jack cheese, bacon, and an onion ring
      • One of my former bosses used to say “Keep it simple, stupid.”  This burger did just that, and it paid off.
    • Burger 8: The South Florida from Rok:Brgr (Winner Best Burger AND People’s Choice)
      • Special blend burger (brisket, short rib, and chuck) with oxtail marmalade, manchego cheese, piquillo pepper aioli, and crispy potato strings
      • In previous years, Rok:Brgr was almost always my top choice.  Ever since they changed their beef patties, though, I just can’t get past the taste of the new meat.  That was no different at this event, and the toppings couldn’t change that for me.  I’m a little sad that they won, because this means that the patties are here to stay.

    Burgers 9-11

    • Burger 9: The Mushroom and Swiss Burger from Hard Rock Cafe
      • Pretty self explanatory, but the chef was sure to point out that the mushrooms were cooked in white wine and thyme
      • I’m usually not into mushrooms on my burger, but this one was pretty good.  The mushrooms were very flavorful, so I guess that white wine and thyme was worth the mention.
    • Burger 10: The JWB Shallot Burger from JWB (Winner Best Knife and Fork Burger)
      • A burger with caramelized shallots, mustard seeds, port wine, bacon, pickled cucumber, and aged Vermont cheddar
      • This was my second favorite burger of the evening.  I don’t even like pickles on my burger, but something about that pickled cucumber really stood out.  It gave the burger this refreshing sensation that lingered after every bite.
    • Burger 11: The Pincho Burger from Pincho Factory
      • A chuck patty with lettuce, tomato, cheese, potato sticks, and Pincho sauce
      • This isn’t the first time that Pincho Factory features their Pincho Burger at a burger competition.  While it’s a pretty standard burger, I have never liked the sauce that they put on it, so it never really works for me.
    • “Burger” 12: Since there weren’t an even number of entries remaining, enjoy a picture of the adorable hamburger macarons that were provided by Gulfstream Park.  They were too cute, but I was also too full to try one.

    While smaller than previous years, Burger Battle 2018 was no less fun.  I can’t wait to go back next year!

  • Hamburger House Party 2018

    Hamburger House Party 2018

    Hamburger House Party returns again.  And, despite my strict diet, I wasn’t about to miss out.  This event is organized by Burger Beast, and it certainly didn’t disappoint.  The burgers flowed like champagne, and there was something for all palates.

    As usual, my goal was to try them all and make an informed decision about which burgers were my favorites.  So, here we go!

    Burgers 1-4

    • Burger 1: The 0% Vegetarian from Twisted Fork Kitchen
      • Signature patty topped with short rib, maple bacon jam, Gruyere cheese, and Cipollini onions on a brioche bun
      • I have no idea what was going on with the bun.  If I had to guess, I would say it was dyed with squid ink.  It was a pretty good burger, though.
    • Burger 2: Tom’s Classic American Cheeseburger from Tom’s NFL
      • A ground chuck burger topped with flat leaf lettuce, beefsteak tomato, red onion, American cheese, and garlic basil aioli on a Kaiser roll.
      • This was definitely a classic burger.  Unfortunately, this also meant that it didn’t stand out among all of the other, more unique options
    • Burger 3: The Jupiña Express from Pincho Factory
      • Signature burger patty topped with smoked Gruyere, Jupiña caramelized onions, papitas, and cilantro sauce on a brioche bun
      • I can’t tell you how shocking it is to me that cooking onions in pineapple soda would be so incredibly delicious.  It really brought a sweet note to the burger that was rounded out by the smokey Gruyere cheese.  This burger got my vote for the evening.
    • Burger 4: The Grim Reaper from Killer Melts
      • Signature patty topped with bacon, melted cheddar cheese, red pepper jelly, and chipotle aioli on a toasted Martin’s potato roll
      • The only thing that I remember about this burger is that it was SPICY.

    Burgers 5-8

    • Burger 5: The Madlove Super Champ Burger from Madlove
      • Special blend burger topped with 3 cheeses, applewood maple glazed bacon, butter lettuce, plum tomatoes, sliced avocado, candied jalapeno, chipotle aioli, and buttered onions
      • I think that the toppings overpowered the burger, which might have just been because it got condensed into a slider size.  Still, it felt a little bit unbalanced
    • Burger 6: The Mofongo Burger from Chefs on the Run
      • 80/20 Angus churrasco burger topped with Chef Jodrick’s mofongo, Applewood smoked bacon, Kerrygold Dubliner white cheddar cheese, Chimichurri aioli, pickled red onions, rugged sauce, and smoked churrasco
      • The flavor of the mofongo on this burger was amazing, and I could have eaten it by itself.  But, in a burger, it made it incredibly heavy when you combined it with the bun.  There was just too much starch going on.
    • Burger 7: The Basic “B” from Orange Bear Grill
      • Custom burger blend topped with bacon habanero jam, white cheddar cheese, garlic aioli, and housemade pickles on Martin’s potato roll
      • This was a pretty standard burger, but I felt like the pickles kind of overpowered everything else on the burger.
    • Burger 8: The Burger and the Beast from Jr’s Gourmet Burgers – Judge’s Award Winner
      • Jr’s signature burger topped with grilled onions, American cheese, and pink sauce
      • All I tasted was the pink sauce, which very obviously has mayo in it (which I don’t like).  Considering some of the more creative burgers that were features, I’m a bit disappointed that they won.

    Burgers 9-12

    • Burger 9: The Hemingway from Bottoms Up Gastropub and Tap Bar
      • Bourbon-infused burger patty with red wine sauteed spinach and mushrooms, pickled onions, Apple Bourbon bacon jam, and Blue Cheese butter finished with Balsamic aioli
      • I took one look at everything going on with this burger and thought “this is going to be too much.”  Surprisingly, though, it WORKED!  It tasted like a fancy steakhouse dinner on a bun.
    • Burger 10: The Pig-Mento Burger from Boyce General Store
      • Burger topped with homemade jalapeno pimento cheese, pig candy bacon, and spicy dill pickle
      • At the ripe old age of 36, I still have not grown to appreciate pimento cheese.
    • Burger 11: El Tumbe from Boss Burger and Brew
      • Chuck, brisket, and short rib blended burger patty topped with Muenster cheese, Guava paste, herb cream cheese, and bacon
      • Their sign didn’t mention the fried egg on the burger.  Combined with guava paste, that didn’t work for me at all.
    • Burger 12: The Booze Burger from Toasted
      • Beef burger topped with Blue cheese, candied bacon, and pinot caramelized onions
      • This burger was pretty good, but it didn’t stand out compared to the competition.

    Burgers 13-16

    • Burger 13: The Bird and Bone Burger from Bird and Bone
      • Double Angus beef patty, bacon, onion, Florida cheddar cheese, House-Made pickle, and comeback sauce on Zak the Baker Brioche
      • I recently discovered this place as a reliable source for quality fried chicken in Miami, so I was excited to try their burger.  It was a pretty reliable burger, too.  It had all of the classic toppings that one would expect on a burger, but I think that they played it a little bit safe.
    • Burger 14: Mondays Remedy Burger from Hate Mondays Tavern (People’s Choice Winner)
      • Brisket/Angus beef burger topped with bacon and cheese on a sweet bun
      • I think that this was supposed to be similar to a Luther burger, because the “bun” resembled a glazed donut.  The combination didn’t quite work for me.
    • Burger 15: The Samba Burger from Luz! Camera Burger
      • Beef burger patty topped with Brazilian cheese (Minas Padrao, beef jerky (carne seca) cooked with sugar cane brandy (Cachaca) and mixed with crispy fried kale
      • Flavor-wise, this was one of the most interesting burgers of the night.  The only thing that didn’t work for me was the texture of the beef jerky in the burger.  The last thing you want to taste in a burger is dry meat.
    • Burger 16: The Can’t Fuggettaboutit from Adam’s Filling Station on Wheels
      • Burger topped with Genoa salami, homemade fried cheese sticks, Arrabiata spread, and roasted almond pesto sauce on a garlicky toasted bun
      • When I saw that gigantic cheese stick sandwiched between the burger toppings, I got really excited.  The burger itself was a little bit bland, though, so it sadly didn’t deliver the complex flavors that the toppings promised.

    Burgers 17 and 18

    • Burger 17: The Monster Burger from O’Daly’s Delight Cafe
      • Seasoned ground beef burger patty topped with lettuce, tomato, smoked bacon, BBQ sauce, and housemade pink sauce on a pretzel bun
      • This is another burger that I probably would have liked if they hadn’t smothered it in pink sauce
    • Burger 18: The Guavanator by MIA Beer Company
      • Custom blend burger topped with tangy bourbon guava sauce, bacon, crispy onions, and gouda cheese
      • I think that they succeeded in making the extreme sweetness of guava work in a burger, possibly because the bourbon cut through the sweetness.
    • Burger 19: The K.O.R from King of Racks
      • A brisket/sirloin burger topped with smoked bacon, cheddar cheese, caramelized onions, chives, and their award-winning chili
      • I hadn’t realized until I was back home looking at my photos that I forgot to taste this burger.  It makes me very sad, because this burger sounds amazing.

    The event also featured SugaPie, Burger Beast’s dessert competition.  It pitted several bakeries and sweet shops against each other.  The competition was fierce, too!

    The entries were (starting from top left):

    • The PB & Fudge Pie from The Pie Queen
    • The Breadman Surprise from Breadman Bakery
    • The Fruity Pebbles Cookie from Night Owl Cookies
    • The Cheesecake Pop from Hip Pops (they also had a popsicle called Cereal Killer, which was covered in Fruity Pebbles and Cinnamon Toast Crunch)
    • Bourbon Chocolate Cake from Sweetness Bake Shop
    • Ganache Flor de Cana Tres Leches from Empanada Harry’s (Judge’s Award Winner)
    • Bacon Chocolate Eclair from Pastries by Kat
    • Banana Ice Cream Pie from Frice Cream
    • Assorted Desserts from Casa Gioia (Guava Bundt Cake, Lemon Lime Meringue Mini Tart, Nutella Chocolate Chip Cookies, and Alfajores)

    My favorites were the PB & Fudge Pie, the Banana Ice Cream Pie, and the Cheesecake Popsicle.  If I hadn’t been so horrifically full, I would have gone back for seconds of these.

    This was worth breaking my diet, and I can’t wait until next year!

  • Pressure Cooker Flan

    Pressure Cooker Flan

    Skip to Recipe

    Flan is one of my favorite desserts EVER.  I blame the Latina in me.  I can’t help it.

    I still remember when I first learned how to make it.  It wasn’t easy.  I overcooked it many times before I finally got the hang of the ideal temperature and cook time.  When I moved, I’d have to re-learn in order to get it just right with the new oven.  I was baking flan in a water bath for about an hour and a half.  It was torture!  So, you can imagine my delight when I discovered that flan cooks quicker AND easier in an electric pressure cooker.

    I mean, seriously!  Rich, velvety smooth flan every single time.  No air bubbles.  No graininess.  Just flan perfection.

    A friend of mine asked me to teach her how to make this.  I decided to do even better and post the step-by-step instructions on the blog.  And, after some additional requests for the recipe started rolling in, here it is!

    I use a flanera (flan pan) for my flans.  I have also had success with round ceramic or glass baking dishes.  Just make sure that you use the oven-safe kind.

    Start by making your sugar syrup.  Heat the sugar in a small saucepan over medium heat.  Swirl the pan occasionally to redistribute the sugar, but do not stir it until it starts to turn deep amber and most of the sugar has melted.  At this point, use a heat-proof spatula to stir the sugar until the last solid clumps are melted, then remove it from the heat and add 2 tbsp of water.  Be careful, because it will steam and might splatter.  Once you can get close enough, stir the sugar and water until it’s all combined, then pour it into your flan mold.  If you want, you can also tilt the mold around a little bit to get some of the sugar to coat the sides.

    Next, we make the custard mixture.  All you need is half-and-half, condensed milk, eggs, and vanilla extract.  Combine them in a blender, then pour the mixture into the sugar-coated flan mold.  Cover the mold, place on a trivet, then lower into your electric pressure cooker (filled with 1 cup of water).  Seal and cook on Manual (High Pressure) for 12 minutes, then do another 12 minutes of Natural Release.  Remove the flan and uncover.  The center of the flan should still be slightly jiggly, as it will firm up as it cools. Once it has cooled completely, cover it and refrigerate until it’s ready to serve.  The minimum should be 4 hours, but it’s preferable to leave it overnight.

    When you are ready to serve, run a thin knife along the edge of the flan, then invert onto a serving plate.

    Then, be rewarded with creamy flan goodness.

    If you like a firmer flan, you can add an additional egg or two to the flan mixture.  You can also adjust the amount of vanilla extract, but I feel like this amount gives it a great flavor.

    Pressure Cooker Flan

    Ingredients

    • 1/2 cup granulated white sugar
    • 2 tbsp water
    • 2 cups half-and-half (or milk)
    • 1 14oz can sweetened condensed milk
    • 3 eggs
    • 1 tbsp vanilla extract
    • Required equipment: a flan pan (this one is what I have)

    Directions

    In a small saucepan, heat white sugar over medium heat until all of the sugar has melted and turned amber.  Remove from heat and carefully add the 2 tbsp of water (watch out for the steam).  Stir until all of the water has mixed in, then pour into your flan mold or round baking dish.  Set aside to cool while you make the flan mixture.

    Combine the eggs, half-and-half, condensed milk, and vanilla in a blender.  Blend until combined and no streaks remain.  Gently pour into your prepared flan mold, then cover.

    Pour 1 cup of water in the liner of your electric pressure cooker.  Place the flan mold on a trivet in the liner, then seal and cook on Manual (High Pressure) for 12 minutes.  After time is up, turn off the pressure cooker and allow the pressure to release naturally for another 12 minutes.  Remove flan from pressure cooker and uncover (flan should be slightly jiggly in the center, but not watery).  Allow to cool completely, then refrigerate for at least 4 hours (preferably overnight) before serving.

    Makes about 8 servings.

    Note: To make an Irish Cream Flan, replace 1/2 cup of half-and-half with 1/2 cup of your favorite brand of Irish Cream and reduce the vanilla extract to 1 teaspoon.  Do NOT use milk, or your flan might curdle.

    To make a dulce de leche flan, replace the can of condensed milk with a can of dulce de leche.

  • Cazuela de Mariscos (Colombian Seafood Stew)

    Cazuela de Mariscos (Colombian Seafood Stew)

    Skip to Recipe

    My mother has always been an amazing cook.  That is great news for me when I was living under her roof, but not so good news now that I live on my own.  Trying to recreate my favorite Colombian dishes from my childhood is always a challenge.  I’m typically not afraid of failing a once or twice on a recipe before I get it right.  However, for cazuela de mariscos (Colombian seafood stew), the price tag of the ingredients was enough to keep me from motivating myself to take the chance.  But, as my mother gets older, I feel like it is my duty to get the skills to recreate all of the dishes that she would make for the family.

    So, armed with my mother’s cazuela de mariscos, I set about the expensive task  of gathering all of the ingredients to make this.  And, ultimately, it turned out pretty well!  Score one for Kay, and for Colombian dishes to pass down to posterity.

    I posted a picture of this stew on social media and got so many requests for the recipe that it would have been a sin to keep from posting it on the blog.  The next time that I make this, I will try to take step-by-step photos so that you all can see the entire process.  I hope you enjoy it as much as I do!

    Make sure that you get your ingredients ready before starting.  The seafood will cook very quickly, so you won’t have time to chop vegetables once you start the process.

    Have 4 cups of hot (but not boiling) fish stock ready.  Homemade fish stock is best, but store bought will also work.

    Heat a large pot or Dutch oven over medium to medium-high heat.  Add butter and olive oil.  When the butter is melted, add diced onions and cook until the onions are soft and translucent.

    While the onions cook, you should blanche your shellfish.  Bring some heavily salted water to a boil, then add the shrimp, lobster, and squid.  Boil for 1-2 minutes, then drain.  You can stop the cooking process by soaking the shellfish in a bowl of ice water after boiling.  Sometimes, I skip this step if I don’t mind firmer shellfish.

    Once the onions are ready, add the garlic and saute for an additional minute before you add the red pepper.  Saute for another 5 minutes or so before you add your spices.  Stir until combined, then add the vinegar and continue cooking until the vinegar appears to have evaporated, then add the tomato sauce and stir to combine.

    Add the coconut cream, then stir and bring to a simmer.  Once the mixture starts to simmer, add the fish and cook until the fish has cooked through (about 5-8 minutes, depending on the size of your fish chunks).  Once that is done, add the hot fish stock and bring to a simmer again before you add your cooked shellfish.  Remove from heat and stir in the cilantro.

    If you want a thicker stew, you can add a cornstarch slurry before you remove from the heat.  Dissolve 1/4 cup of cornstarch in 1/2 cup of water (or extra fish stock, if you have it).  Slowly add this to the simmering stew until you get the desired thickness.  I’m trying to watch my carb intake, so I normally skip this part.

    Traditionally, cazuela de mariscos is served with a side of rice, but enjoy it however you life.  It’s a pretty hearty meal on its own.

    You can add additional seafood to this dish, or even take one of the seafood items if you don’t like it.  My mom has added octopus, mussels, and scallops to the stew in the past.  Just be sure to blanch your seafood prior to adding it to the stew in order to avoid some of the briney taste.  According to my mom, cazuela de mariscos also freezes well.  So, you can make a large batch and freeze for the future.

    Cazuela de Mariscos

    Ingredients

    • 1 quart fish stock (homemade is preferable), hot
    • 1lb snapper fillets, cut into large chunks
    • 1lb extra large shrimp, peeled and deveined
    • 1lb calamari rings
    • 10oz lobster tail, peeled, deveined, and cut into large chunks
    • 2 tbsp olive oil
    • 3 tbsp butter
    • 4 cloves garlic, crushed
    • 1 1/2 cups (approx 10 oz) diced white onion
    • 1/2 cup (approx 2.5 oz) diced red pepper
    • 1 packet Goya seasoning (with azafran)
    • 1 tbsp vinegar
    • 1 tsp onion powder
    • 1/2 tsp garlic powder
    • 1/2 tsp cumin powder
    • 1/2 tsp black pepper
    • 1 tsp salt (more or less to taste)
    • 1/4 cup Goya Spanish-style tomato sauce
    • 1 14oz can unsweetened coconut cream
    • 1/2 cup chopped cilantro

    Directions

    Bring a large pot of water with salt to a boil.  Add the shrimp, calamari, and lobster.  Boil for 1-2 minutes, then strain and transfer to a bowl filled with ice water.  Set aside.

    Heat a large pot or dutch oven on medium to medium high heat.  Add the butter and olive oil.  When the butter has melted, add the onion and saute until the onions are translucent.  Add the garlic, and saute for another minute or until fragrant.  Add the chopped red pepper and continue sauteeing until softened.

    Add the Goya seasoning, onion powder, garlic powder, cumin powder, pepper, and salt.  Stir until completely combined, then add the vinegar and cook until mostly evaporated.  Stir in the tomato sauce, then the coconut cream. Bring to a simmer.

    Add the fish chunks and cook, gently stirring occasionally, for 5-7 minutes or until the fish is cooked.  Stir in the fish stock, then the remaining cooked seafood.  Cook for an additional 1-2 minutes, then remove from the heat and stir in the chopped cilantro.  Serve hot.

    NOTE: You can also thicken the stew some more with a cornstarch slurry, if you like.