Blog

  • Cauliflower Pizza Crust

    Cauliflower Pizza Crust

    So, I’ve been on a diet for a few weeks, and it’s been rough at times.  We all know how much I love good food, so there’s been one heck of an adjustment period.  Still, it’s been interesting to try and find ways to enjoy a food that you crave but can no longer have, such as pizza.  I mean, when you’re off carbs, it really limits your options.  That’s where cauliflower pizza crust comes in.

    I came up with this recipe by taking what I liked about a handful of cauliflower crust recipes that I found online, and tweaking them so that they fit into my macro allotment on the current plan that I am on.  It’s still a work in progress, but I am sharing because a few people have asked for the recipe.  So, here it is!  I will try to update this post at a later date with pictures of the actual process.  I just wasn’t expecting requests for this recipe.

    Cauliflower Pizza Crust

    Ingredients

    • 3 cups frozen riced cauliflower
    • 1/4 cup shredded mozzarella cheese
    • 1/4 cup grated parmesan cheese
    • 1/2 tsp Italian seasoning
    • 1/2 tsp garlic powder
    • 1 egg
    • salt and pepper to taste

    Directions

    Cook the cauliflower rice according to the package directions (I used the microwave).  Let it cool for about 10 minutes.

    Preheat your oven to 400 degrees.  Line a baking sheet with parchment paper.

    Wrap your cauliflower in cheesecloth or a kitchen towel, then squeeze all of the liquid out until you are left with a slightly firm ball of cauliflower mush.  Transfer to a bowl and mix in your cheeses, egg, and seasonings.  Your mixture should resemble a loose dough.

    Spread the cauliflower mixture on your baking sheet, making a circular shape if you’d like.  Bake in the pre-heated oven for 25-30 minutes, or until the crust is slightly golden (you might need to flip it over to brown both sides).  Remove from oven, add desired toppings, then bake for another 7-10 minutes.

    Note: The macros for the entire crust are 13.4g protein, 7.9g fat, and 4.1g net carbs.  I usually eat half and save the other half for the next day.

  • Pressure Cooker Apple Risotto

    Pressure Cooker Apple Risotto

    Skip to Recipe
    Okay, so I know that I posted a recipe inspired by an anime last month, but I have to do it again.  In fact, this apple risotto is yet another recipe that came from the same anime (Shokegeki no Soma), which the protagonist makes in a breakfast-themed cooking duel against his father.  Although he loses the match to his father’s ramen bowl, the risotto definitely left a bigger impression.  The protagonist does it the “long and painful” way, AKA on the stovetop, but I was determined to make this in my Instant Pot.  “Work smarter, not harder”, right!?

    I made this for my friends recently, and didn’t have very high hopes.  Sweet and savory is typically not my jam, but I figured that apple risotto with bacon was basically just a fancy take on pork chops and applesauce.  Boy, did this blow my expectations out of the water!  Such a rich, creamy treat doesn’t deserve to be reserved just for breakfast.  The sweet and savory tones in the components of the dish seem to strike a perfect balance, so it doesn’t taste like a dessert that is trying to be an entree or vice versa.  Best of all, making it in a pressure cooker makes it so much easier to make!

    Start by gathering all of your ingredients.  Melt the butter in the liner of the pressure cooker on the Saute/Browning setting, then saute your onions in the butter.  When they are softened, add the rice and stir until the rice is coated in the melted butter.  Cook the rice/onion mixture until the rice becomes fragrant and starts to change color, then add some white wine and continue to cook until the rice has absorbed the wine.  Next, add the apple juice and your broth/stock of choice, then season with salt and pepper.  Cover, seal, and cook on Manual (High Pressure) for 6-7 minutes.  While the risotto is pressure-cooking, prep your apples.  Peel, core, and dice them, then toss them with the juice of a lemon.  When the pressure cooker timer goes off, release the pressure manually, then stir in your apples.  Last, stir in your mascarpone cheese and continue to stir until all of the cheese has melted into the risotto.

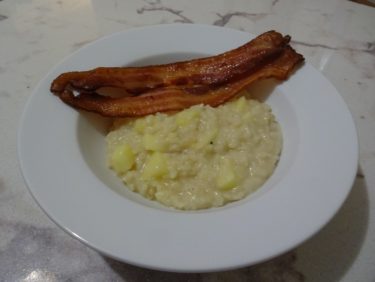
    Serve your risotto with some slices of crispy bacon, which adds a salty punch to counterpoint the sweet undertones of the apple in the risotto.  You can also sprinkle on some parmesan cheese, if you’d like.

    Risotto is usually best eaten fresh.  However, if you MUST reheat it, you can add a little bit of water before warming it in the microwave to keep it from getting too dry.

    Pressure Cooker Apple Risotto

    Ingredients

    • 2 Apples (I used Golden Delicious)
    • 1 lemon, juiced
    • 1 onion, diced
    • 2 cups Arborio rice
    • 3 cups of unfiltered apple juice
    • 3 cups chicken broth or stock
    • 4 tablespoons butter
    • 1/2 cup white wine
    • 4 oz mascarpone cheese
    • grated parmesan cheese (optional)
    • 1lb thick cut bacon
    • salt and pepper to taste

    Directions

    Cook the bacon according to your preferred cooking method (I use the oven).  Set aside.

    Set pressure cooker to Saute/Browning setting. When hot, add the butter. When the butter has melted, add the onions and saute until translucent, about 5 minutes. Add the rice, and stir to coat.  Continue cooking, stirring, until the rice starts to turn fragrant.

    Add the wine and continue to stir until the wine is absorbed.  Add the apple juice and chicken broth/stock, then season with salt and pepper to taste..  Cover, seal, and cook on High Pressure for 6-7 minutes.  Meanwhile, peel, core, and dice your apples.  Toss them in a bowl with the lemon juice, and set aside.

    When the pressure cooker timer goes off, release the pressure manually.  Stir in the apples, and then mascarpone cheese.  Continue to stir until the mascarpone cheese has fully melted and the apple risotto is creamy.  Serve immediately with a side of cooked bacon and topped with grated Parmesan cheese (if desired).

    Makes about 6 servings

  • Amaize (A Review)

    Amaize (A Review)

    My inner Colombian will always squeal in delight at the thought of eating an arepa.  Whether it’s plain and slathered in butter or split and stuffed with meat and/or cheese, I will have a hard time saying no.  It used to be that arepas were something that we got when our mother made them for us, or at a Colombian bakery.  Amaize, however, is aiming to bring these South American corn cakes to the South Florida mainstream.  This fast-casual restaurant, located in Doral (and now with a Davie location) features a selection of stuffed arepas and platters.

    Filling your arepas with all sorts of savory fillings is primarily a Venezuelan thing.  We Colombians typically do butter and cheese.  One thing we seem to agree on, though, is that Harina Pan (Pan brand corn flour) is definitely the way to go if you want your arepas to be the real deal.  Amaize has an entire wall dedicated to selling you everything that you need to make arepas at home.  Hint: you can also buy this corn flour at pretty much any grocery store in South Florida.

    Amaize lets you order an arepa a la carte, or add a side for a little extra.  I got the Shaggy (pulled beef with shredded Gouda cheese) and a side of chicken soup.  The arepa was meaty, cheesy deliciousness.  And, although they are a little hard to eat without making a mess, it is still satisfying.  Be warned, though, that the arepas are a bit smaller than they look.  If you’re a big eater, you might want to order two.

    For more information, please visit their web site at http://www.amaizeyou.com/

  • Bacon Wrapped Mashed Potatoes

    Bacon Wrapped Mashed Potatoes

    Skip to Recipe
    I don’t watch nearly as much anime as I used to in my younger days, but a show still gets me hooked occasionally.  Right now, Shokugeki no Soma (Food Wars) is that show.  This isn’t the first time that this show has inspired me to run to my kitchen to recreate one of the dishes featured on the show (chicken karaage, anyone?), but these bacon wrapped mashed potatoes were the gateway to the wonderful world of animated food cravings.  The protagonist makes a large one in the first episode and serves it with a soy-based sauce.  I took the general idea and made it into smaller loaves, and put an American spin by basting them in barbecue sauce.

    Now, wrapping potatoes in bacon is not a new thing, but what sets these apart is the addition of the onion and mushrooms into the mashed potato mix.  The mushrooms help the potato absorb all of the flavor from the fat that drips off of the bacon as these cook, infusing the potato loaves with that baconey goodness that all sane people love.

    First, you want to saute your onions, mushrooms, and garlic.  You want to cook them until they have released most of their liquid.

    Next, take some peeled and cooked potatoes and mash them in a bowl.  You can cook them however you wish.  I steamed mine, but you can also boil or bake them.

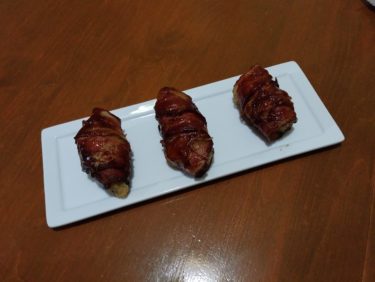
    Mix the sauteed mushrooms and onions into the mashed potatoes, then form them into little potato-shaped loaves.  Gently wrap each loaf in bacon.  Remember that bacon will shrink once it releases some fat, so don’t wrap them too tightly.  Give them some room to shrink without squishing the potato mixture underneath.  Tie the bacon (gently!) onto each loaf, then bake in your preheated oven until the bacon is the desired color.

    At this point, you can baste your loaves in your choice of barbecue sauce, then return to the oven for 10 minutes or so to let the sauce caramelize.

    So delicous!

    Now, I know that bacon wrapped mashed potatoes aren’t the healthiest thing around, but these are still great for the occasional treat.  They are always well-received at parties or gatherings.  They are a little time-consuming and require some patience, but that just means you won’t be tempted to make them often and run yourself to an early grave.  One day, I might try adding cheese to them.

    Bacon Wrapped Mashed Potatoes

    Ingredients

      • 2 lbs bacon
      • 2 lbs russet potatoes
      • 1 1/2 cups onion, diced
      • 1 1/2 cups crimini mushrooms, diced
      • 1 tbsp oil
      • 3 cloves garlic, minced
      • 1 cup of your favorite barbecue sauce (more or less to taste)
      • Salt and pepper to taste

    Directions

    Cook your potatoes using your preferred cooking method.  Remove the peels (if this wasn’t done prior to cooking), place in a bowl, and mash.  Set aside.

    Heat the oil in a medium skillet over medium to medium-high.  Add the onions and saute until they start to soften, about 3-5 minutes.  Add the garlic and cook until fragrant (about 1 minute), then add the mushrooms and cook until the mushrooms have softened and released most of their liquid.  Season with salt and pepper.  Set aside to cool slightly for 5-10 minutes.

    Preheat oven to 375 degrees.  Stir the onion mixture to the mashed potatoes, then season with salt and pepper to taste.  Form into about 12 equal loaves, then wrap lightly in bacon.  Gently fasten the bacon with kitchen twine.

    Bake on a wire rack over a cookie sheet for 45 minutes to an hour (turning every 15 minutes), or until the bacon has rendered and browned sufficiently.  Baste with barbecue sauce and continue to bake for an additional 10-15 minutes  Allow to cool on wire rack for 5-10 minutes before serving.

    Makes about 12 servings


  • Pressure Cooker Mac and Blue Cheese

    Pressure Cooker Mac and Blue Cheese

    Skip to Recipe
    My friends and I all love mac and cheese.  I mean, love.  And we’re not talking “passing cute notes in 8th grade Homeroom” puppy love.  I’m talking “would marry it if it were legal to marry inanimate objects” kind of love.  And, I thought I knew everything that I needed to know about mac and cheese, until one of my friends asked me if I had ever made it with more “exotic” cheese like goat cheese or blue cheese.  I hadn’t, but that conversation is how this Mac and Blue Cheese was born.  I made it my weekend mission to try and make a delicious mac and cheese with a blue cheese flavor that was present, but not overpowering.  So, armed with my pressure cooker, I went to work.  The results blew all of my taste-testers away, so I just had to share.

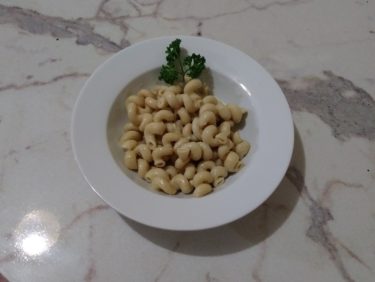
    There is something about this creamy pasta dish that takes the pungent flavor of blue cheese and mellows it down to a gentle note in the back of your taste buds.  In fact, the mac and cheese is mellow enough to be eaten as-is, but isn’t hurt in the slightest by a generous sprinkling of crumbled bacon for a salty punch.

    If you REALLY want to impress, though, try serving it topped with some boneless buffalo chicken.  It’s like elevating your favorite bar food.  When the tang of buffalo sauce meets the cooling factor of blue cheese, all sorts of magic happens in your palate.  And, no need for wet wipes!  For tips on making boneless buffalo chicken, check out my recipe here.

    This mac and cheese is best served fresh, but you can also reheat with a little bit of milk to get it creamy again.

    Pressure Cooker Mac and Blue Cheese

    Ingredients

    • 1 lb cavatappi pasta (or elbow macaroni)
    • 4 cups water
    • 4 tbsp butter
    • 2 tsp Dijon mustard
    • 1 tbsp hot sauce
    • 1/2 tsp salt
    • 1/2 tsp black pepper
    • 1/2 tsp onion powder
    • 1 cup milk
    • 8oz mascarpone cheese (or cream cheese)
    • 10 oz white cheddar cheese, shredded (about 2 1/2 cups)
    • 1 1/2 cups crumbled blue cheese

    Directions

    Combine the pasta, water, butter, Dijon mustard, hot sauce, salt, pepper, and onion powder in the liner of your electric pressure cooker.  Stir to combine.

    Cover and seal the pressure cooker, then cook on High Pressure for 4 minutes.  When the time is up, release the pressure manually.

    Open the pressure cooker, then add the mascarpone cheese, stirring until melted.  Stir in the milk, and then the cheeses, a little bit at a time, until melted and combined.  Serve the mac and blue cheese immediately.

  • PizzaRev (A Review)

    PizzaRev (A Review)

    Good pizza has always been hard to come by in Miami.  And, even pizza places that are great when they first open start to decline after a while sometimes, so the hunt for a good pie is a perpetual one.  I don’t consider myself an expert on pizza, but I know what I like in my pies.  I like fresh cheese, a tomato sauce that is not overpowering, and meat that doesn’t taste like it came out of drug store bag.  On all of these counts, PizzaRev delivered.

    PizzaRev’s menu style is not a new concept.  I typically refer to these kinds of places as “Chipotles for Pizza,” which seems like an accurate estimation.  You’ve got an assembly line setup where you can build your perfect pie, then take it back to your table piping hot.  What really makes or breaks these types of pizza joints is the quality of their ingredients.

    You can pick from four different types of sauces and an assortment of cheeses, including vegan cheese.  They also have baskets of breadsticks, but I didn’t try those.  Their tomato sauce is made with organic tomato.

    The next section is where you add the “heavy” toppings like meats.

    The last section is where you add the “lighter” toppings, like sprinklings of herbs or vegetables.  I like my pizzas simple, so I got pepperoni, basil, and garlic on mine.

    The end-product was an absolute beauty.  The crust is thin enough to let the flavors of the toppings shine through, but not so thin that your pizza just collapses if you try to pick up a slice.  The cheese at PizzaRev had that stretch that comes with any good pizza, and the sauce didn’t overpower the rest of the toppings.

    The counter service was nice, and the place is kept very clean.  I would definitely go back!

    For more information on PizzaRev, visit their web site at https://pizzarev.com/

  • Pressure Cooker Burnt Caramel Custard

    Pressure Cooker Burnt Caramel Custard

    Skip to Recipe
    It’s no secret that one of my primary motivations for getting myself an Instant Pot was to make foolproof flan.  And, sure enough, my flan pan is one of my most-used accessories.  However, making custards in individual ramekins had always been a crapshoot, with the likelihood of having overcooked custard was pretty high.  I had been seeing a lot of posts about people making custards and creme brulee in their pressure cookers, and I was still a bit skeptical that I could really get the right texture in any way other than the “slow and painful way” of baking in a water bath.  Still, when I wound up with too much heavy cream nearing its expiration date one day, I took the plunge and tried creme brulee in the Instant Pot.  And, I have never looked back.  This burnt caramel custard  is basically a creme brulee without the sugary crust.  Instead, the caramelized sugar flavor is infused into the cream before it’s cooked, also giving the custard a light caramel color.

    Place your egg yolks in a bowl with a pinch of salt and whisk them until they’re slightly foamy.  While you’re doing this, infuse your cream with the vanilla bean.  Heat the cream over medium heat with the vanilla bean and seeds.  When it starts to simmer, remove it from the heat and set it aside.  Leave the vanilla bean in there for now so that the cream continues to absorb the flavor.

    While the cream rests, take place your sugar in another small saucepan and heat it over medium heat until it melts and turns deep amber.  Then, remove it from the heat and slowly pour in your cream mixture.  Be careful, because it might splatter, but stir it constantly so that the sugar doesn’t harden before you finish adding the cream.  If some of the sugar does end up hardening, though, just place the pot back on stove on medium-low and stir until all of the sugar has melted.  Then, take your cream mixture and add it to your egg yolks, a little bit at a time.  Once you have incorporated about 1/3 of the mixture into your yolks, you can slowly pour the remaining cream mixture into the yolk mixture, whisking to combine.

    Strain the mixture evenly into 6 custard cups.  Add 1 cup of water to the liner of your pressure cooker.  Cover each custard cup with foil, then place in the liner of your pressure cooker in 2 layers.  Seal, then cook for 1 minute on High Pressure.  When the timer goes off, turn off the pressure cooker and allow the pressure to release naturally for 10 minutes before releasing the remaining pressure.  Remove the custards, uncover, and set on a wire rack to cool completely, then refrigerate for at least 4 hours.

    After your custards have set in the fridge, they can be served as is directly from the refrigerator.  If you wish, you can also garnish with whipped cream or fresh berries, but it’s delicious on its own.

    If done correctly, any custard (creme caramel, creme brulee, pot de creme) will have a smooth and creamy consistency.  It should not have any lumps or bubbles, or that’s a pretty good indication that your custard is overcooked.

    These can be made up to 2 days before serving, so they are a great make-ahead dessert.  If they last that long, that is.

    Pressure Cooker Burnt Caramel Custard

    Ingredients

    • 2 cups heavy cream
    • 1/2 vanilla bean, split lengthwise and seeds scraped
    • 4 egg yolks
    • 7 tbsp sugar
    • a pinch of salt

    Directions

    In a medium bowl, whisk the egg yolks with a pinch of salt until slightly foamy.  Set aside.

    In a small saucepan, heat the cream with the vanilla bean and seeds over medium heat.  When the mixture starts to simmer, remove from heat and set aside.

    In a separate small saucepan, heat the sugar over medium heat until it melts and turns deep amber.  Remove from heat and, then remove vanilla bean from the hot cream mixture and slowly pour it into the melted sugar, stirring constantly until smooth.  The mixture will bubble vigorously, so be careful.

    Temper your egg yolk mixture by gradually adding in the hot cream mixture, a little bit at a time, whisking constantly.  When about 1/3 of the cream mixture has been incorporated into the yolks, pour the remaining hot cream mixture into the yolk mixture and whisk until smooth.  Strain the mixture evenly among 6 4oz ramekins.

    Pour 1 cup of water into the liner of your electric pressure cooker.  Cover your filled ramekins with foil and arrange in 2 layers on wire racks in the liner.  Cover, seal, and cook on High Pressure for 1 minute.  After the time goes off, allow the pressure to release naturally for 10 minutes before releasing any remaining pressure.  Remove the ramekins from the pressure cooker, uncover, and allow to cool completely on a wire rack.  Then, refrigerate for at least 4 hours before serving.

    Makes 6 servings


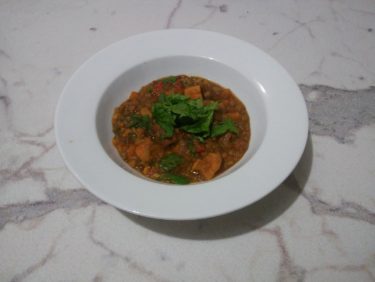
  • Pressure Cooker Moroccan Lentil Stew

    Pressure Cooker Moroccan Lentil Stew

    Skip to Recipe
    I was recently on a really strict diet that had a LOT of rules for what I could and could not eat, and when.  In these types of situations, you try to find things that pack a big flavor punch without a lot of added fat.  I came across this recipe for a Moroccan Lentil Soup during my frantic search for foods that wouldn’t bore me to tears on fat-free days.  And, making it in the Instant Pot makes it a cinch!  I does come out more like a stew than a soup when made in the Instant Pot, though. I don’t mind this at all, but you can also add more broth or stock at the end if you prefer some extra liquid.

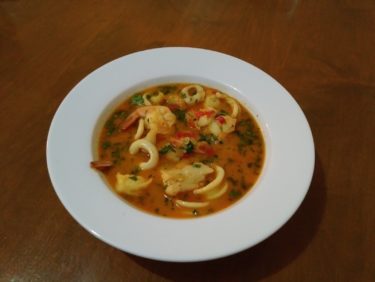
    Chopping your vegetables is the most difficult part of this Moroccan Lentil Stew.  Once that’s done, making this recipe is a breeze.  Just add all of your chopped veggies (minus the spinach), lentils, and spices into your pot.  Then, pour your broth or stock in and give it a gentle stir.  Seal the pressure cooker, and cook this on Manual (High Pressure) for 10 minutes.  Once the time is up, let the pressure release naturally, then open it up and sir in the chopped spinach.  Once the spinach has wilted, it’s ready to serve.

    This stew really hits the spot on cold days.  It’s also very satisfying, even though there’s no meat.  I like to make a batch and freeze in portions to have for later.

    Pressure Cooker Moroccan Lentil Stew

    Ingredients

    • 1 lb. sweet potatoes, peeled and cut into medium chunks
    • 1 cup carrots, chopped
    • 1 cup onions, chopped
    • 1 cup celery, chopped
    • 1 red bell pepper, diced
    • 6 cloves garlic, crushed
    • 1 1/2 cups green or brown lentils, rinsed and picked over
    • 2 tsp ground coriander
    • 2 tsp ground cumin
    • 2 tsp curry powder
    • 1/2 tsp smoked paprika
    • 1/2 tsp ground cinnamon
    • 1/2 tsp turmeric
    • ⅛ teaspoon ground nutmeg
    • 2 quarts chicken broth or stock (can also use vegetable)
    • 5oz baby spinach, roughly chopped
    • salt and pepper to taste
    • lemon wedges (for serving)

    Directions

    Combine all of the ingredients (except the spinach) in the liner of your electric pressure cooker.  Stir gently to combine.  Seal and set to cook on Manual (High Pressure) for 10 minutes.  When the time is up, allow the pressure to release naturally.  Open the pressure cooker and stir in the chopped spinach until wilted and combined.  Serve hot with a squeeze of lemon juice.

  • Avocado Pickles

    Avocado Pickles

    Skip to Recipe
    Growing up in a Hispanic household, avocado is a mealtime staple.  My mother would often give us sliced avocado with lime and salt to go with our meals.  Now that I am an adult, eating avocado without an acidic component never tastes quite right to me.  The rich fattiness of this fruit just begs for that refreshing zing.  That is why, when someone introduced me to avocado pickles, I was sold.

    These are best made with Hass avocados.  I have tried them with other kinds, but the watery Florida avocados lacked the creamy fattiness required to cut through the acidic brine.  Make sure that you’re also using slightly firm avocados to make your avocado pickles, or they might break apart in the brine.

    To make the brine, heat all of your ingredients (except the avocado) in a small saucepan.  If you want your pickles to have more of a kick, you can open your chiles up to let out the seeds.  Otherwise, leave them whole.  Once it starts to simmer and all of the salt and sugar (if using) has dissolved, remove it from the heat and let it cool down.

    While your brine is heating, prep your avocados.  I cut these in slices, but sometimes I also do them in chunks.  Put the sliced or chopped avocado in a glass jar of your choice.  I find that two average-sized Hass avocados fit in one 16oz mason jar.

    After the brine has cooled enough, gently pour it over the avocados in the jars.  Fill it just enough so that the liquid reaches almost to the top of the jar when you put the lid on, but doesn’t spill out.  Remember that if your avocados are poking up out of the jar a little, they will push the brine level up when you press the lid down.  So, plan accordingly to avoid a mess.

    You’ll want to refrigerate the avocado pickles for at least an hour, but they will keep for up to a month in the refrigerator.  I find that I like them best after they sit for a few days.

    Avocado Pickles

    Ingredients

    • 4 firm Hass avocados, sliced or chopped
    • 1 cup apple cider vinegar
    • 1 cup water
    • 2 tbsp pickling salt (or kosher salt)
    • 2 tsp sugar (you can omit or substitute with your sweetener of choice)
    • 2 tbsp coriander seeds
    • 1 1/2 tsp whole black peppercorns
    • 2 dried chile de arbols

    Directions

    In a small saucepan, combine all of the ingredients except for the avocado.  Bring to a simmer, allowing the salt and sugar to dissolve, then remove from heat and allow to cool.

    Place the avocado pieces in 2 16oz mason jars (or 1 32oz jar), then pour the cooled brine over the avocado.  Seal, then refrigerate for one hour or until ready to consume.

  • Blueberry Panna Cotta

    Blueberry Panna Cotta

    Skip to Recipe
    Panna cotta, Italian for “cooked cream,” is the name of a dessert that is made taking sweetened cream and setting it with gelatin.  It is typically set in a mold that is then inverted before serving, but it can also be served without unmolding in a pretty glass or serving dish.  The beauty of panna cotta is that it tastes fancy without a whole lot of effort or skill required, so it’s a great dessert for hosting nice dinners at home or for a group.  Plus, the base of a panna cotta is just cream, which means it’s a great blank canvas for adding other flavors to it.

    While I was on a rigorous diet over the summer, I bought some frozen blueberries to add to my healthy smoothies in the mornings.  Soon after, I fell off the wagon, and the blueberries sat forgotten in my freezer for weeks.  It wasn’t until I started running out of space in my freezer and started trying to use or purge some of the contents that I found the blueberries in there again, and decided to try to make something with them.  Since the texture of cooked berries is not something that I generally enjoy, I decided to use them to infuse some cream and make blueberry panna cotta.  It was so good that some of my coworkers still talk about it, so I decided to share the recipe.

    You start by macerating the blueberries.  That is, sprinkle some sugar on them and let them soften and release some of their juices.  After that, cook them over medium heat until they just start to simmer, then lower the heat and add the gelatin.  Once the gelatin has dissolved, add half of the cream and stir until the cream is hot.  Don’t let it start to boil or simmer, or the fat in the cream might start to separate and you’ll wind up with an oily film on your finished product.  Just let it get hot, then mash the blueberries a little more to get more of the juice out before passing the mixture through a strainer and into a bowl with the other half of the cream.  Stir in the vanilla extract.

    You mixture might have some flecks from the blueberries.  If you prefer, you can pass the blueberry panna cotta mixture through a finer strainer to get rid of these.

    Otherwise, pour the mixture into your prepared molds or cups.  If you’re planning to unmold the panna cotta, lightly coat the inside of your molds with a neutral oil before filling with the panna cotta mixture.  Then, pop them in the fridge until they are set.  This should take about 3-4 hours.  Panna cotta should be eaten cold, so they should remain in the fridge until you’re ready to eat them.

    If you’re unmolding them, you can do so by running a thin knife along the edge of your mold, then inverting onto a plate.  You might have to shake it out, as they like to stick sometimes.  You can serve with additional fresh berries if you like, but it tastes great on its own as well.  I didn’t have any blueberries, so I served it with blackberries.

    Blueberry Panna Cotta

    So creamy!

    Unlike flan and other custard desserts, panna cotta is best served the same day or not more than a day later.  Otherwise, they start to dry out due to the gelatin.  So, plan accordingly.

    Blueberry Panna Cotta

    Ingredients

    • 2 cups blueberries (can be fresh or frozen)
    • 1/3 cup sugar
    • 2 cups heavy cream
    • 1 tbsp gelatin
    • 1 1/2 tsp vanilla extract

    Directions

    Place the blueberries and  the sugar in a medium saucepan.  Let them sit for at least 10 minutes (but preferably 30), then heat the blueberry/sugar mixture over medium heat until the sugar dissolves and the mixture is just starting to simmer.

    Reduce heat to medium-low, then sprinkle the gelatin over the mixture.  Let it sit for about a minute, then gently continue heating and stirring the mixture for about 5 minutes or until the gelatin has dissolved.

    Add 1 cup of the cream, and continue stirring until the cream is heated through.  Do not allow the cream to start to simmer or boil.  Gently mash the blueberries in the cream mixture so that they release some additional juice.

    Strain the mixture into a bowl with the other 1 cup of cream, then stir in the vanilla extract.  Divide equally between your serving dishes or molds, then refrigerate until set (about 3-4 hours).  Serve cold.