Category: Pressure Cooker (Instant Pot)

Recipes that can be made in a pressure cooker or Instant Pot

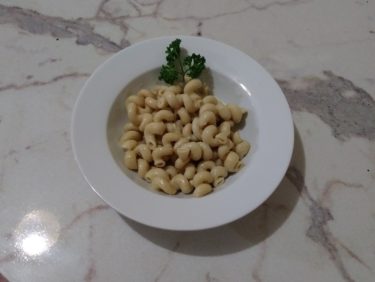
  • Pressure Cooker Mac and Blue Cheese

    Pressure Cooker Mac and Blue Cheese

    Skip to Recipe
    My friends and I all love mac and cheese.  I mean, love.  And we’re not talking “passing cute notes in 8th grade Homeroom” puppy love.  I’m talking “would marry it if it were legal to marry inanimate objects” kind of love.  And, I thought I knew everything that I needed to know about mac and cheese, until one of my friends asked me if I had ever made it with more “exotic” cheese like goat cheese or blue cheese.  I hadn’t, but that conversation is how this Mac and Blue Cheese was born.  I made it my weekend mission to try and make a delicious mac and cheese with a blue cheese flavor that was present, but not overpowering.  So, armed with my pressure cooker, I went to work.  The results blew all of my taste-testers away, so I just had to share.

    There is something about this creamy pasta dish that takes the pungent flavor of blue cheese and mellows it down to a gentle note in the back of your taste buds.  In fact, the mac and cheese is mellow enough to be eaten as-is, but isn’t hurt in the slightest by a generous sprinkling of crumbled bacon for a salty punch.

    If you REALLY want to impress, though, try serving it topped with some boneless buffalo chicken.  It’s like elevating your favorite bar food.  When the tang of buffalo sauce meets the cooling factor of blue cheese, all sorts of magic happens in your palate.  And, no need for wet wipes!  For tips on making boneless buffalo chicken, check out my recipe here.

    This mac and cheese is best served fresh, but you can also reheat with a little bit of milk to get it creamy again.

    Pressure Cooker Mac and Blue Cheese

    Ingredients

    • 1 lb cavatappi pasta (or elbow macaroni)
    • 4 cups water
    • 4 tbsp butter
    • 2 tsp Dijon mustard
    • 1 tbsp hot sauce
    • 1/2 tsp salt
    • 1/2 tsp black pepper
    • 1/2 tsp onion powder
    • 1 cup milk
    • 8oz mascarpone cheese (or cream cheese)
    • 10 oz white cheddar cheese, shredded (about 2 1/2 cups)
    • 1 1/2 cups crumbled blue cheese

    Directions

    Combine the pasta, water, butter, Dijon mustard, hot sauce, salt, pepper, and onion powder in the liner of your electric pressure cooker.  Stir to combine.

    Cover and seal the pressure cooker, then cook on High Pressure for 4 minutes.  When the time is up, release the pressure manually.

    Open the pressure cooker, then add the mascarpone cheese, stirring until melted.  Stir in the milk, and then the cheeses, a little bit at a time, until melted and combined.  Serve the mac and blue cheese immediately.

  • Pressure Cooker Burnt Caramel Custard

    Pressure Cooker Burnt Caramel Custard

    Skip to Recipe
    It’s no secret that one of my primary motivations for getting myself an Instant Pot was to make foolproof flan.  And, sure enough, my flan pan is one of my most-used accessories.  However, making custards in individual ramekins had always been a crapshoot, with the likelihood of having overcooked custard was pretty high.  I had been seeing a lot of posts about people making custards and creme brulee in their pressure cookers, and I was still a bit skeptical that I could really get the right texture in any way other than the “slow and painful way” of baking in a water bath.  Still, when I wound up with too much heavy cream nearing its expiration date one day, I took the plunge and tried creme brulee in the Instant Pot.  And, I have never looked back.  This burnt caramel custard  is basically a creme brulee without the sugary crust.  Instead, the caramelized sugar flavor is infused into the cream before it’s cooked, also giving the custard a light caramel color.

    Place your egg yolks in a bowl with a pinch of salt and whisk them until they’re slightly foamy.  While you’re doing this, infuse your cream with the vanilla bean.  Heat the cream over medium heat with the vanilla bean and seeds.  When it starts to simmer, remove it from the heat and set it aside.  Leave the vanilla bean in there for now so that the cream continues to absorb the flavor.

    While the cream rests, take place your sugar in another small saucepan and heat it over medium heat until it melts and turns deep amber.  Then, remove it from the heat and slowly pour in your cream mixture.  Be careful, because it might splatter, but stir it constantly so that the sugar doesn’t harden before you finish adding the cream.  If some of the sugar does end up hardening, though, just place the pot back on stove on medium-low and stir until all of the sugar has melted.  Then, take your cream mixture and add it to your egg yolks, a little bit at a time.  Once you have incorporated about 1/3 of the mixture into your yolks, you can slowly pour the remaining cream mixture into the yolk mixture, whisking to combine.

    Strain the mixture evenly into 6 custard cups.  Add 1 cup of water to the liner of your pressure cooker.  Cover each custard cup with foil, then place in the liner of your pressure cooker in 2 layers.  Seal, then cook for 1 minute on High Pressure.  When the timer goes off, turn off the pressure cooker and allow the pressure to release naturally for 10 minutes before releasing the remaining pressure.  Remove the custards, uncover, and set on a wire rack to cool completely, then refrigerate for at least 4 hours.

    After your custards have set in the fridge, they can be served as is directly from the refrigerator.  If you wish, you can also garnish with whipped cream or fresh berries, but it’s delicious on its own.

    If done correctly, any custard (creme caramel, creme brulee, pot de creme) will have a smooth and creamy consistency.  It should not have any lumps or bubbles, or that’s a pretty good indication that your custard is overcooked.

    These can be made up to 2 days before serving, so they are a great make-ahead dessert.  If they last that long, that is.

    Pressure Cooker Burnt Caramel Custard

    Ingredients

    • 2 cups heavy cream
    • 1/2 vanilla bean, split lengthwise and seeds scraped
    • 4 egg yolks
    • 7 tbsp sugar
    • a pinch of salt

    Directions

    In a medium bowl, whisk the egg yolks with a pinch of salt until slightly foamy.  Set aside.

    In a small saucepan, heat the cream with the vanilla bean and seeds over medium heat.  When the mixture starts to simmer, remove from heat and set aside.

    In a separate small saucepan, heat the sugar over medium heat until it melts and turns deep amber.  Remove from heat and, then remove vanilla bean from the hot cream mixture and slowly pour it into the melted sugar, stirring constantly until smooth.  The mixture will bubble vigorously, so be careful.

    Temper your egg yolk mixture by gradually adding in the hot cream mixture, a little bit at a time, whisking constantly.  When about 1/3 of the cream mixture has been incorporated into the yolks, pour the remaining hot cream mixture into the yolk mixture and whisk until smooth.  Strain the mixture evenly among 6 4oz ramekins.

    Pour 1 cup of water into the liner of your electric pressure cooker.  Cover your filled ramekins with foil and arrange in 2 layers on wire racks in the liner.  Cover, seal, and cook on High Pressure for 1 minute.  After the time goes off, allow the pressure to release naturally for 10 minutes before releasing any remaining pressure.  Remove the ramekins from the pressure cooker, uncover, and allow to cool completely on a wire rack.  Then, refrigerate for at least 4 hours before serving.

    Makes 6 servings


  • Pressure Cooker Moroccan Lentil Stew

    Pressure Cooker Moroccan Lentil Stew

    Skip to Recipe
    I was recently on a really strict diet that had a LOT of rules for what I could and could not eat, and when.  In these types of situations, you try to find things that pack a big flavor punch without a lot of added fat.  I came across this recipe for a Moroccan Lentil Soup during my frantic search for foods that wouldn’t bore me to tears on fat-free days.  And, making it in the Instant Pot makes it a cinch!  I does come out more like a stew than a soup when made in the Instant Pot, though. I don’t mind this at all, but you can also add more broth or stock at the end if you prefer some extra liquid.

    Chopping your vegetables is the most difficult part of this Moroccan Lentil Stew.  Once that’s done, making this recipe is a breeze.  Just add all of your chopped veggies (minus the spinach), lentils, and spices into your pot.  Then, pour your broth or stock in and give it a gentle stir.  Seal the pressure cooker, and cook this on Manual (High Pressure) for 10 minutes.  Once the time is up, let the pressure release naturally, then open it up and sir in the chopped spinach.  Once the spinach has wilted, it’s ready to serve.

    This stew really hits the spot on cold days.  It’s also very satisfying, even though there’s no meat.  I like to make a batch and freeze in portions to have for later.

    Pressure Cooker Moroccan Lentil Stew

    Ingredients

    • 1 lb. sweet potatoes, peeled and cut into medium chunks
    • 1 cup carrots, chopped
    • 1 cup onions, chopped
    • 1 cup celery, chopped
    • 1 red bell pepper, diced
    • 6 cloves garlic, crushed
    • 1 1/2 cups green or brown lentils, rinsed and picked over
    • 2 tsp ground coriander
    • 2 tsp ground cumin
    • 2 tsp curry powder
    • 1/2 tsp smoked paprika
    • 1/2 tsp ground cinnamon
    • 1/2 tsp turmeric
    • ⅛ teaspoon ground nutmeg
    • 2 quarts chicken broth or stock (can also use vegetable)
    • 5oz baby spinach, roughly chopped
    • salt and pepper to taste
    • lemon wedges (for serving)

    Directions

    Combine all of the ingredients (except the spinach) in the liner of your electric pressure cooker.  Stir gently to combine.  Seal and set to cook on Manual (High Pressure) for 10 minutes.  When the time is up, allow the pressure to release naturally.  Open the pressure cooker and stir in the chopped spinach until wilted and combined.  Serve hot with a squeeze of lemon juice.

  • Pressure Cooker Pork “Al Pastor”

    Pressure Cooker Pork “Al Pastor”

    Skip to Recipe
    At its roots, al pastor style pork is basically Mexican shawarma.  The spit-grilled style of cooking the pork was brought to Mexico by Lebanese immigrants.  The rest is history.  Nowadays, tacos al pastor (which basically translates to “country-style tacos) are an ubiquitous taco truck staple.

    Traditionally, the method of cooking the al pastor pork is to roast a pork shoulder on a vertical spit with some pineapple rings.  The fat that drip from the pork crisps up the outer layers of the pork, which is then shaved off and served on a corn tortilla with some pineapple salsa, cilantro, and onions.  For the home cook, this is probably a lot more than one is prepared to undertake.  Fortunately, there are options.  I can’t take full credit for this discovery, as someone else discovered that you can get the flavors of al pastor pork in your pressure cooker for a fraction of the effort.  However, I did tinker around with the recipe until I got it to taste the way that I like it.  It may not be 100% authentic, but for delicious and flavorful pork tacos that can be made on a weeknight, these are well worth the trade-off.

    When doing al pastor meat for in the pressure cooker, the pineapple flavor is incorporated in the sauce that the meat is cooked in.  I find that fresh pineapple gives the best flavor, but you can use canned pineapple if you can’t find fresh in your area.

    Blend a cup of pineapple chunks with chipotle peppers in sauce, garlic, cumin, oregano, salt, and pepper.  It doesn’t have to be entirely smooth, but don’t leave any big chunks of anything in there.

    Heat the pressure cooker liner on the hottest Saute/Browning setting.  Lightly season the pork chunks with salt and pepper.  When the liner is hot, use it to brown your pork chunks on all sides, then remove them and set them aside.  You may have to do that in stages, because they probably won’t all fit at once.  After that, add the chopped onions to the pot and cook them until they start to soften.  Add your browned pork chunks back into the pot.

    Pour the pureed pineapple mixture over the pork and onions in the pot.  Seal, then change the setting on the pot to Manual (High Pressure) for 45 minutes.  When the timer goes off, allow the pressure to release for about 10 minutes before releasing the remaining pressure manually.  Remove the pork chunks, leaving the sauce, then set the pot back to the Saute/Browning setting.  Cook the liquid, stirring occasionally, until it’s reduced by about half.  While that’s going, brown your cooked pork chunks on all sides over a grill or in a hot skillet.  Chop or shred the meat and then return it to the pot with the liquid.  Continue to cook, stirring occasionally, for about 5 minutes or until the meat looks like it has absorbed some of the cooking liquid.  Turn the pressure cooker off and let the pork al pastor sit for at least 10 minutes before serving.

    These tacos al pastor may not be authentic, but they are darned good.  And, for those of us that don’t have a vertical spit or time, these are a great way to get your craving for good tacos taken care of at home.  Serve on corn tortillas with cilantro, onions, and lime wedges and you’re in for a treat!  The meat freezes beautifully, too, so feel free to make a big batch and save some for a rainy day.

    Pressure Cooker Pork “Al Pastor”

    Ingredients

    • 3lbs of boneless pork butt (Boston Butt Roast). cut into large chunks
    • 1 cup fresh pineapple chunks
    • 1 onion, chopped
    • 1 or 2 peppers from a can of chipotle peppers in adobo sauce (plus a spoonful or two of the sauce itself)
    • 3 cloves garlic
    • 1 tsp salt (more or less to taste)
    • 1/2 tsp black pepper
    • 1 tsp ground cumin
    • 1/2 tsp dried oregano
    • 2 tbsp olive oil

    Directions

    In a blender or food processor, mix your pineapple chunks, chipotle peppers with sauce, salt, pepper, garlic, cumin, and oregano until no large chunks remain.  Set aside.

    Preheat the liner of your pressure cooker using the Saute/Browning setting.  Season pork chunks with salt and pepper.  When the pot is hot, add the olive oil and brown the pork chunks on all sides in the liner (do this a few at a time so you don’t crowd the liner).  Remove the pork from the pot and set aside.

    Add the chopped onions to the pot and saute, stirring frequently, until they start to soften.  Return the pork chunks to the pot, then pour the blended pineapple sauce over the pork in the pot.  Cover, seal, and cook on Manual (High Pressure) for 45 minutes.  When the time is up, allow the pressure to release naturally for 10-15 minutes before manually releasing the remaining pressure.

    Remove pork chunks from the pot, leaving the cooking liquid.  Set the pot to Saute/Browning and allow the cooking liquid to come to a simmer.  Continue simmering until the liquid is reduced by about half.

    While the liquid reduces, char pork on all sides using a hot grill or skillet.  Remove from heat and chop or shred the pork.  Return the pork to the pot with the reduced cooking liquid, stirring to coat the pork.  Continue to simmer until the pork has absorbed some of the liquid, about 5 minutes.  Turn off the pressure cooker and allow to sit for 10 minutes before serving.

  • Pressure Cooker Rabo Encendido (Oxtail Stew)

    Pressure Cooker Rabo Encendido (Oxtail Stew)

    Skip to Recipe

    In my circle of friends, I am notorious for not being a particularly adventurous eater.  Keep those beef hearts and chicken feet away from me, and don’t even get me started on the time that I found out that beef tongue (something my mom made for us a lot growing up) was meant to be taken literally.  I mean, it’s not like “pigs in a blanket” means you’re eating blankets, right!?  With that in mind, I can’t really explain why I still love rabo encendido (oxtail stew) so much.  Yes, you’re technically eating a cow’s tail. I don’t care.  It’s delicious.

    According to my mother, she and my father first had rabo encendido at a Cuban restaurant long before I was born.  He liked it so much that he begged her to learn how to make it.  This was long before there was the Internet and sources to get copycat recipes from, so she just set out to figure it out on her own.  In the end, her version of rabo encendido is different than what you get at a traditional Cuban restaurant, but it’s what I grew up eating.  As a result, none of the versions that I get at Cuban restaurants ever tastes “right” to me.  So, thanks Mom for ruining my palate for the real thing, but I love you anyway because your version tastes better.  🙂

    Originally, making oxtails was a stovetop affair that took a good 6 hours.  Nowadays, I make them in my Instant Pot, and it makes the process MUCH faster.  I can get rabo encendido on the table for dinner on a weeknight after work, which is a VERY big deal.

    The base of the sauce is made from tomato, garlic, and red pepper.  Just throw this into a blender with white wine and puree.  Add your oxtails to the liner of your pressure cooker and throw the chunks of green pepper and onion on top, along with the bay leaves.  Pour the tomato and red pepper puree over the ingredients in the pressure cooker liner, then add the seasonings.  Seal the pressure cooker and set to 45 minutes.  When the timer goes off, allow the pressure to release naturally for another 15-20 minutes, then release any remaining pressure.

    When it is safe to open the pressure cooker, do so and remove the cooked oxtails and vegetables, but leave the liquid in the pressure cooker liner.  Set the oxtails aside and discard the cooked onions and peppers.  Skim as much fat as you can from the cooking liquid, then set the pressure cooker to Saute/Browning on the highest possible setting, allowing the liquid to come to a simmer.  When the liquid is simmering, add the cooked oxtails and continue heating until the sauce has reduced by about half.

    This results in oxtails that are tender, but may still have a little bit of resistance near the bone.  This is how I like them, but if you like them to be completely falling apart then you might want to add another 10-15 minutes of pressure-keeping time.  Either way, they will be flavorful and delicious!  I like to serve them with a side of white rice, and sometimes I’ll fry up some sweet plantains if I have them.

    Pressure Cooker Rabo Encendido (Oxtail Stew)

    Ingredients

    • 3 lbs oxtails
    • 1 medium onion, cut into large chunks
    • 1 green pepper, cut into large chunks
    • 1 red bell pepper
    • 2 Roma tomatoes
    • 4 cloves of garlic
    • 2 bay leaves
    • 1 packet Goya seasoning (the kind that says “con Azafran”)
    • 1/2 tsp ground cumin
    • 1 tbsp vinegar (I use red wine vinegar)
    • 1 tbsp hot sauce
    • 1 cup white cooking wine
    • 1 8oz can Spanish-style tomato sauce
    • salt and pepper to taste

    Directions

    Using a blender, blend the tomato, red pepper, garlic, and white wine until a coarse puree is formed.

    In the liner of the pressure cooker, combine the oxtails, green pepper, onions, bay leaves, Goya seasoning, cumin, hot sauce, vinegar, and salt and pepper.  Pour the red pepper and tomato puree over the ingredients in the pressure cooker, then cover and seal.

    Cook on Manual (High pressure) for 45-60 minutes (depending on desired tenderness), then allow the pressure to release naturally for about 15-20 minutes before releasing the remaining pressure.  Open the pressure cooker and remove the oxtails and vegetables, but leaving the liquid in the liner.  Discard the vegetables and set the oxtails aside.  Strain as much fat from the cooking liquid in the liner as you can.

    Add the tomato sauce to the liquid in the pot, then set the pressure cooker to the highest Saute/Browning setting.  When the liquid starts to simmer, return the oxtails to the pot.  Continue cooking until the liquid has reduced by about half, then taste and adjust seasonings if necessary.  Serve hot.

    Makes about 4 servings.

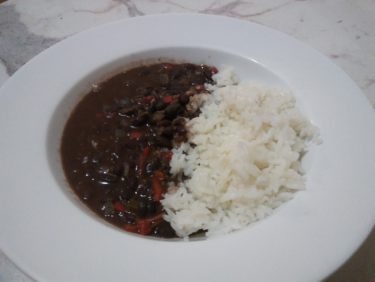
  • Cuban-Style Black Beans

    Cuban-Style Black Beans

    Skip to Recipe

    With all of the hurricanes and traveling going on, I haven’t been eating very well lately.  That’s not to say that I haven’t had a lot of DELICIOUS food these past few weeks, but my stomach was long overdue for a break.  This weekend, I just wanted something simple.  Something that helped me feel like I was truly back home here in Miami.  I wanted black beans.

    Truth be told, I had tried making black beans several times in the past using the stovetop method that I got from my mother, as well as other methods I found through online research. Every single attempt was a failure.  It wasn’t until the Instant Pot came into my life that I was able to make beans without a crunchy center.  And, once I got the bean technique down, the recipe adaptations soon followed.

    If you have looked at my moros recipe, then you will probably notice that these are very similar.  Actually, my moros recipe was adapted from this recipe for Cuban style black beans, which was itself an adaptation of my mother’s recipe for black beans and a few recipes that I found online and what I remember about the black beans served at my favorite Cuban restaurants.  Most of them use chicharrones (fried pork belly), but I’m using bacon because it’s easier to work with.

    We start by cooking the beans.  Throw the dried beans in your electric pressure cooker with a quartered green pepper, a few cloves of garlic, 2 bay leaves, and a ham hock.  Add 8 cups of water and 2 tsp of salt. You can also replace the water with chicken broth or stock, but make sure to adjust the salt accordingly.  In this batch, I used water and chicken bullion, and hardly needed any additional salt.

    Seal and cook on High Pressure for 25 minutes, and then allow the pressure to release naturally.  Open the pressure cooker and discard the green pepper, bay leaves, and garlic.  Remove the ham hock, chop any meat left on it, and set it aside.  Take about 1 cup of beans from the pot and mash them up in a bowl or cup, then return to the pot and set it to Saute/Browning and simmer the beans (stirring frequently to keep them from sticking) while you are doing the next steps.  This is where the process is a little bit different than moros.

    While the beans are simmering, make the sofrito.  Have all of your sofrito ingredients prepped and ready to go.  Cook the chopped bacon in a skillet or saute pan over medium to medium high heat until it’s crispy.  Remove the bacon from the pan and set it aside, but leave the bacon grease behind.  Note that you do not have to use the bacon if you don’t want to.  You can skip that part and heat 2 tbsp of olive oil in your pan, if you prefer.Add the diced onions, red peppers, and green peppers.  Cook until the vegetables start to turn translucent, then add the garlic and the seasonings.  Continue to cook, stirring, until fragrant, then add vinegar.  Take your sofrito and pour it into the pot of simmering beans.  Taste it and adjust the seasoning as needed, then continue simmering until the beans are the desired thickness.  Stir in the cooked bacon and chopped ham bits.

    You can enjoy the black beans on their own as a soup, or you can serve along with white rice.  The black beans also freeze incredibly well, so you can make a big batch and then freeze parts of it for the future.  Sometimes I also add chopped cilantro for a bit of zing.  I have also added jalapeno and poblano pepper if I want it to have a kick.

    Cuban-Style Black Beans

    Ingredients

    • 1lb dried black beans
    • 1 green pepper, quartered
    • 1 smoked ham hock
    • 2 bay leaves
    • 10 cloves of garlic (5 whole and 5 minced)
    • 4 strips thick cut bacon, chopped (or 2 tbsp olive oil)
    • 1 cup diced green pepper
    • 1 cup diced red pepper
    • 2 cups diced white onion
    • 1/2 tsp oregano
    • 1/2 tbsp cumin powder
    • 3 tsp salt (more or less to taste)
    • 1 tsp black pepper
    • 2 tbsp red wine vinegar
    • 8 cups of water (or chicken broth/stock)

    Directions

    Combine the beans, quartered green pepper, ham hock, bay leaves, 5 cloves of garlic, water (or broth/stock), and 2 teaspoons of salt (adjust if using broth/stock) in the liner of your electric pressure cooker.  Cover, seal, and cook on Manual (High Pressure) for 25 minutes.  Allow the pressure to release naturally, then open and discard the bay leaves, green pepper, and garlic.  Remove the ham hock, chop up any meat remaining on it, and set aside.

    Using a slotted spoon, remove about 1 cup of beans from the pot.  Mash them with a fork, then return to the pot.  Set the pressure cooker to Saute/Browning, and bring to a simmer, stirring often to keep the beans from sticking to the bottom.

    In a large skillet or saute pan, cook the bacon until crispy.  Remove the bacon from the pan using a slotted spoon and set aside, but leave the bacon grease.  Add the diced onion, diced green pepper, and diced red pepper to the hot pan with the bacon grease and cook, stirring occasionally, until the onions start to turn translucent.  Add the minced garlic and the spices.  Cook until fragrant.  Add the vinegar and continue to cook for an additional 1 or 2 minutes.

    Remove the sauteed vegetable mixture from the heat and pour into the pot of simmering beans.  Taste and adjust seasoning as needed.  Continue simmering until the desired thickness, then stir in the bacon and chopped ham hock.  Turn off pressure cooker and allow the beans to sit for 10-15 minutes before serving.

  • Pressure Cooker Chocolate and Irish Cream Flan

    Pressure Cooker Chocolate and Irish Cream Flan

    Skip to Recipe

    One of my older sisters doesn’t make it a secret that she really doesn’t know how to cook.  It’s not that she is proud of it, but she is just very matter-of-fact about it.  Since getting married, though, she has decided to make more of an effort in learning her way around the kitchen.  So, for last Christmas, she asked for an Instant Pot as a gift, for which the family happily obliged.  She was ecstatic when she received it, and then proceeded to stuff it in her closet, too afraid to use it.

    Fast forward to present-day, and I decided to take advantage of my plans to visit her in Houston to give her a crash course on the Art of the Instant Pot.  Of the many recipes that I think that someone should have up their sleeves, an easy dessert that’s potluck-friendly is one of them.  I told her we were going to make flan, and she didn’t seem all that excited.  So, I decided to sweeten the pot and appeal to her past life as a bartender.  I proposed that we make a chocolate and Irish Cream flan, and that definitely got her attention.  When she sat down and tasted the fruit of our labors, she said that it was the best flan that she has ever had in her life.

    At home, I have a flan pan (flanera) that I use to make flans.  However, my sis doesn’t have one, so we used a glass baking dish.  The flan was a little bit too soft in the middle, so I would add another 2 minutes or so of pressure keeping time if you’re going to use glass to make your flan.  And remember, oven-safe glass only!

    You can omit the cocoa powder to make just an Irish Cream flan, and you can also replace the Irish Cream with additional half-and-half to make this just a chocolate flan.

    Pressure Cooker Chocolate and Irish Cream Flan

    Ingredients

    • 1/2 cup sugar
    • 2 tbsp water
    • 1 can sweetened condensed milk
    • 1 1/2 cups half and half
    • 1/2 cup Irish Cream
    • 3 eggs
    • 1/4 cup unsweetened cocoa powder (preferably Dutch-processed if you have it)

    Directions

    In a small saucepan, melt the sugar over medium heat, stirring frequently.  When the sugar has melted and turned amber, remove from heat and add the 2 tbsp of water (careful, it will steam and splatter).  Carefully stir until the sugar and water are combined, then pour into the bottom of a flan pan or round baking dish.  Set aside to cool.

    In a blender, add the remaining ingredients, then blend at medium speed until combined.  Pour over the cooled caramelized sugar in the flan pan or baking dish.

    Pour 1 cup of water into the liner of your pressure cooker.  Cover your flan pan or baking dish, place on a trivet, then lower into the liner of your pressure cooker.  Seal and cook on Manual (High Pressure) for 12 minutes (add another 2 minutes or so if using a glass baking dish), then allow the pressure to release naturally for another 12 minutes before removing the the flan from the pressure cooker.  Allow to cool completely, then refrigerate for at least 4 hours, but preferably overnight.

    To serve, run a thin knife along the edge of the flan, then flip the pan over onto a plate, gently shaking the flan loose.

    Makes about 8 servings

  • Pressure Cooker Peanut Butter Cheesecake

    Pressure Cooker Peanut Butter Cheesecake

    Skip to Recipe
    I hosted my first “Instant Pot Party” recently for a few friends that wanted some pointers on how to make the most out of their appliance.  One of my friends wanted to make a peanut butter cheesecake, and already had a recipe in mind.  Having made that same recipe before with some changes, I told her the changes that I recommended on the recipe.  Surprisingly, she trusted me enough to go along with them.  Not only was she pleased with the results, but she asked me to document the adjusted recipe so that she could have it handy.

    You can add chocolate chips to the peanut butter cheesecake if you want and it doesn’t affect the cook time.  I prefer smooth cheesecakes, so I typically leave them out unless I am bringing the cheesecake to a group event.  Cheesecakes always taste best after they sit in the fridge for at least a day, so be sure you plan on making this at least a day in advance.

    Prepare your crust, press it into your prepared cheesecake pan, and then pop it into the freezer while you prepare your cheesecake batter.  Start with the cream cheese and sugar.  Cream it with your electric mixer until fluffy, then mix in the eggs.  Next, add the peanut butter and vanilla extract, then mix until just combined.  Pour the batter into your cheesecake pan, place the pan on a trivet, then lower it into your pressure cooker filled with about 1 1/2 cups of simmering water.  Cook on Manual for 23 minutes, then natural release for 12 more minutes before releasing the rest of the pressure and removing the peanut butter cheesecake from the pressure cooker.

    When the cheesecake is completely cool, you’ll want to refrigerate it for several hours before removing it from the pan.  At this point, you can make the ganache.  I make it by heating my cream and chocolate in the microwave in 20-second bursts until the chocolate is almost completely melted, then let it melt the rest of the way while I stir.  If you prefer to make ganache the traditional way, just bring your cream to a boil on the stove, pour the boiling cream over your chopped chocolate in a heatproof bowl, then stir until all of the chocolate is melted and the mixture is creamy.  Let the ganache sit until it’s fairly thick, but still pourable.  This is what will get you those attractive drips when you pour it over the cheesecake.

    As a finishing touch, you can garnish with mini peanut butter cups.  You can also chop them up and sprinkle them on top of your peanut butter cheesecake.

    You can also double the cheesecake ingredients and oven-bake this in a 9in round springform pan if you’re feeding a crowd.  Bake in a hot water bath at 350 degrees for about an hour, or until the center is only slightly jiggly.

    Pressure Cooker Peanut Butter Cheesecake

    (Adapted from this recipe from Pressure Cooking Today)

    Ingredients

    • 1 cup crushed Oreo crumbs
    • 1 tbsp butter, melted
    • 16oz cream cheese, softened
    • 1/2 cup white sugar
    • 2 eggs, room temperature
    • 1/2 cup creamy peanut butter
    • 1/2 tsp vanilla extract
    • 3/4 cup semisweet chocolate chips (optional)
    • 3/4 cup bittersweet chocolate pieces
    • 1/2 cup heavy cream
    • peanut butter cups for garnish (optional)

    Directions

    Grease a 7in round cheesecake pan.  Mix the Oreo crumbs and melted butter until the crumbs are moistened all the way through.  Press the mixture onto the bottom of your prepared cheesecake pan, then freeze until ready to use.

    Cream the sugar and cream cheese using an electric mixer.  Add the eggs, one at a time, beating well with each addition.  Add the peanut butter and vanilla extract and continue mixing until just combined.  Do not overmix.  Fold in the semisweet chocolate chips, if using.  Pour mixture into your prepared baking pan.

    Add 1 1/2 cups of water to the liner of your electric pressure cooker, then set to the Saute/Browning setting.  When the water comes to a simmer, set your cheesecake on a trivet and lower it into the pressure cooker.  Cover, seal, and change the setting to cook on Manual (High Pressure) for 23 minutes.  When the time is up, allow the pressure to release naturally for 12 minutes, then release any remaining pressure.  Remove the cheesecake from the pressure cooker and allow to cool completely, then refrigerator at least 4 hours.

    Place heavy cream and bittersweet chocolate in a microwave-safe dish or measuring cup.  Microwave for 20-second intervals, stirring gently between intervals, until the chocolate is almost completely melted, then continue stirring until the chocolate melts completely.  Allow mixture to cool until thick before pouring onto your peanut butter cheesecake, then garnish with peanut butter cups if desired.

    Makes about 8 servings.

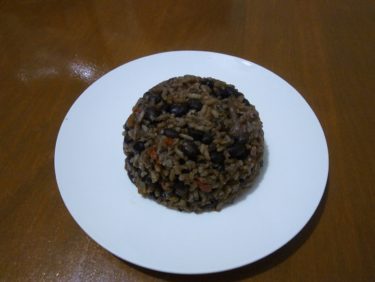
  • Moros (Cuban-style Black Beans and Rice)

    Moros (Cuban-style Black Beans and Rice)

    Skip to Recipe
    Growing up in Miami, Fl has given me a healthy love of Cuban food.  Moros is a personal favorite of mine, and will always be my side dish of choice when dining at a Cuban restaurant.  Moros, short for moros y cristianos, is a dish in which rice is cooked with black beans, and gets its name from the wars between the dark skinned Moors (moros) and the light skinned Spaniards (cristianos) from the Eighth Century.

    Before owning an Instant Pot, all of my previous attempts at cooking beans had always ended in failure.  I tried all of the tips and tricks that I got online or from word of mouth, and nothing yielded me a tender bean.    I only ever successfully made moros using canned black beans, and it just was never the same as what I would get in the restaurants.  Now, nine months after getting my pot, I’m cooking all sorts of beans and not once has there been a failure.  I finally set out to reconfigure my moros recipe to use dried beans, and it has been a huge success.

    You will start by cooking the beans.  Add the beans, bay leaves, ham hock, chunked green pepper, 4 cloves of minced garlic, and some salt to the pot.  Pour in a quart of chicken stock, then seal and cook for 20 minutes at high pressure.  Allow the pressure to release naturally.  While this is happening, you can prep the rest of your ingredients.

    When the beans are done, drain them (save the bean liquid) and discard the bay leaves and green pepper.  If you used a meaty ham hock, remove the meat from the bone and chop it up for later use.  Wash and dry your pot liner and return to the pot.

    Set the pressure cooker to Saute (Browning) function, then adjust to the highest setting.  When it’s ready, add the bacon and cook until it is brown and crispy.  Take the bacon out of the pot (leave the fat), set aside, and then add the onions and peppers in with the bacon fat.  When they start to soften, add the garlic and seasonings, and cook until fragrant.  Add your vinegar.  Add enough water to the bean liquid to make 3 cups of liquid, then add that to the pot.  Adjust seasoning as needed, then stir in the washed rice and the beans.  Cover, seal, then switch the pot to the Rice setting and cook.  When the cooking cycle is done, allow the pressure to release naturally.

    Fluff your finished moros with a fork, then stir in the bacon.  If you have any meat from your ham hock, add that as well.

    You can serve moros as a side dish for your favorite Cuban entrees, such as lechon asado, palomilla steak, or masas de puerco.  However, this moros is so hearty and flavorful that it can easily stand alone as a meal.  The jalapeno adds a nice punch to the flavor profile, but feel free to leave it out for a mild version.

    This recipe makes a LOT, so it’s great for large families, parties, or make-ahead freezer meals.  Leftovers reheat great!

    Moros (Cuban-style Black Beans and Rice)

    Ingredients

    • 1 green pepper, cut into large chunks
    • 1 cup diced green pepper
    • 1 cup diced red pepper
    • 2 cups diced onion
    • 10 garlic cloves, minced or crushed
    • 1 pound dried black beans, rinsed and picked over to remove any stones
    • 1 quart chicken stock or broth
    • 1 smoked ham hock
    • 2 bay leaves
    • 5 teaspoons salt, or to taste
    • 4 slices thick bacon, cut into 1/2-inch pieces
    • 1 jalapeño pepper, stemmed and finely chopped (optional)
    • 1/2 tbsp dried oregano
    • 2 tsp ground cumin
    • 1 teaspoon freshly ground black pepper
    • 2 tablespoons red wine vinegar
    • 3 cups long grain white rice, rinsed

    Directions

    In the liner of the pressure cooker, add the dried beans, chunked green pepper, 4 cloves of minced garlic, 2 tsp salt, bay leaves, and ham hock.  Pour in the chicken stock, then seal and cook on Manual (high pressure) for 20 minutes.  Allow the pressure to release naturally.  Drain the beans, reserving the liquid, then set aside along with the ham hock (remove meat from bone and chop up) and discard the bay leaves and green pepper pieces.  Wash and dry the pressure cooker liner, then return to the pot.

    Set the pot to Saute (Browning).  When ready, add the bacon and cook until brown and crispy.  Using a slotted spoon, remove the bacon and set aside.  In the hot bacon fat that’s still in the pot, saute the diced onions, diced green peppers, diced red peppers, and chopped jalapeno (if using) until softened.  Add the remaining garlic, oregano, cumin, , salt and pepper, stirring until fragrant.  Add the vinegar.  Take the reserved bean liquid and add enough water to make 3 cups of liquid total.  Add this to the pot, then stir.  Taste and adjust seasoning as needed.  You will want it to taste over-seasoned, because it will mellow out once you add the rice.

    Add the rinsed rice and cooked beans, then stir to combine.  Seal the pot once more and switch to the Rice setting, allowing pressure to release naturally after the cooking cycle is complete.  Uncover, fluff rice with fork, and stir in the crispy bacon and chopped meat from the ham hock.  Serve hot.

    Makes about 5 quarts.

  • Pressure Cooker Puerco Pibil

    Pressure Cooker Puerco Pibil

    Skip to Recipe
    Puerco Pibil, also known as Cochinita Pibil, is Yucatan-style barbecued pork.  The name comes from the cooking method of the pork.  Traditionally, it’s cooked in a Mayan oven called a pib, a hole in the ground lined with hot stones.  My first exposure to puerco pibil was watching a Robert Rodriguez movie (you might already know which one I’m talking about), in which one of the characters raves about the dish.  Mr. Rodriguez even shares a recipe for it in the DVD commentary.  Naturally, not everyone has access to a hole in the ground to roast a pork, so the recipe typically roasted the pork in the oven.  My first attempt left me with tasty pork that was kind of dry.  My subsequent attempts swapped the oven for my slow cooker, which made a much more tender pork.  However, I got rid of my slow cooker once I bought my Instant Pot, and I was just too scared to try to reproduce this dish in there.  Until now.

    What was usually several hours of waiting for my puerco pibil took about 90 minutes in the pressure cooker, and that includes the time to come to pressure and then to release the pressure.  Best of all, it comes together very easily, despite the fairly long list of ingredients.  If you wanted to, you could also swap out the spices for premade Achiote paste, but I haven’t found that in my area.

    You’ll want to marinate your pork for at least 4 hours, but preferably overnight.  Once you’re ready to cook, line your pressure cooker with about 3 layers of banana leaves.   Stagger them as much as possible, because you want to keep as much water out.  Add your chunks of pork, then fold the leaves over so that they cover the pork.  Pour 1 cup of water into the pot, then cover and seal.

    Tender, juicy, and delicious puerco/cochinita pibil!  You can serve it with pickled onions and tortillas, or sometimes I just eat it with rice.

    If you can’t find sour oranges, you can mix equal parts orange juice and vinegar to use in this recipe.  I have also used lemon juice in this and it’s still very tasty.

    Pressure Cooker Cochinita Pibil

    Ingredients

    • 2 1/2 lbs boneless pork butt (Boston Butt roast)
    • 2 1/2 tbsp annatto seeds
    • 1 tsp cumin seeds
    • 1/2 tbsp black peppercorns
    • 4-5 allspice berries
    • 3 whole cloves
    • 1 habanero pepper (can use jalapeno for less spicy)
    • 1 tbsp salt
    • 4 cloves garlic
    • 1/2 cup Seville orange juice (naranja agria/bitter orange)
    • 3 limes, juiced
    • 1 tbsp tequila
    • 3-4 banana leaves

    Directions

    Cut the pork into 2in chunks.  Place in a large ziploc bag or shallow baking dish.

    Using a spice or coffee grinder, grind the annatto seeds, cumin seeds, peppercorns, allspice, and cloves to a powder.  Add this, along with the remaining ingredients (minus the banana leaves) to a blender and blend until combined.  Pour over the pork, then allow to marinate at least 4 hours, but preferably overnight.

    When the meat is finished marinating, line the pressure cooker liner with 3-4 banana leaves.  They should be along enough to hang over the sides of the pot.  Place the pork with the marinade in the center of the leaves, then fold them over until the pork is completely covered.  Pour 1 cup of water into the pressure cooker.

    Cover and seal the pressure cooker, then cook on Manual (High Pressure) for 60 minutes.  Afterwards, allow the pressure to release naturally for 15 minutes, then release any remaining pressure.  Uncover, remove the pork, and serve with pan juices.

    *NOTE: you can substitute the spices for pre-made Achiote paste, if you prefer.
    To make this lower in carbs, you can replace the Seville orange juice with lemon juice