Category: Pressure Cooker (Instant Pot)

Recipes that can be made in a pressure cooker or Instant Pot

  • Pressure Cooker Mango Chicken Curry

    Pressure Cooker Mango Chicken Curry

    Skip to Recipe
    Every now and then, an Instant Pot owner gets asked, “Why convert a tried and true oven/stovetop recipe to the IP?”  Sometimes, the answer is to save time.  Other times, the answer is to wash fewer dishes.  And, a lot of times, the answer is something a little unexpected: “Because I can.”  That is how I wound up with this mango chicken curry.

    I stumbled across a recipe for mango chicken curry a year or two ago during Mango Madness.  I think that it was one of my very first ventures into using mangoes in savory dishes.  It was an instant hit with my friends, and gets requested a lot.  The original recipe called for stovetop preparation.  I wanted to try to convert it to an IP recipe.  The challenge with that, of course, is that pressure cooking often leaves things a bit watery.  I got around that by using coconut cream instead of coconut milk, then reducing the sauce a bit at the end.

    Prep your ingredients first.  This will make things much easier when you get started.

    Heat the oil in your electric pressure cooker set to the Saute/Browning setting.  When the cooker reads Hot, add your dry spices and stir to coat them in oil.  Do this quickly or your spices can burn.  Add the chopped onions and peppers next, stirring to coat them in the spice and oil mixture.  Saute for 2-3 minutes, then add the garlic and ginger and keep sauteeing for another 2 minutes.  Add the mango, then stir to combine.  Stir in the vinegar and the water, then season with salt and pepper.

    As a little side interlude, having two instant pots is GREAT for situations like this.  Your curry can cook in one pot while your rice cooks in the other.

    Place your chicken thighs over your mixture.  Cover and seal your pressure cooker, then cook on Manual (High Pressure) for 15 minutes.  You can also use the Poultry setting to get the same result.  When the time is up, release the pressure manually.  Uncover and remove the chicken from the pot.  Chop or shred the chicken and set it aside.  Stir the coconut cream into the liquid remaining in the pot.  Using an immersion blender, puree the cooked vegetables and fruit.  Set the pressure cooker back to the Saute setting and let the sauce come to a simmer.  Simmer the sauce for 5-10 minutes, or until it thickens.  Add the chicken back to the sauce and give it another stir.  Check your seasonings and add more salt and pepper if needed.

    In my house, we like our curry served with a side of white rice.  I bet it would also be great with some warm, buttery naan bread.  Is your mouth watering yet?

    If you don’t have an immersion blender, you can also puree your sauce in a conventional blender.  Just return it to the pot to reduce after you’re finished blending it.

    Pressure Cooker Mango Chicken Curry

    Ingredients

    • 3lbs boneless skinless chicken thighs
    • 3-4 cups fresh mango slices
    • 2 tbsp oil
    • 2 medium onions, roughly chopped
    • 1 red bell pepper, roughly chopped
    • 4 tbsp minced ginger
    • 4 garlic cloves, minced
    • 4 tbsp yellow curry powder
    • 1 tsp ground cumin
    • 1/2 tbsp garam masala
    • 1/4 cup cider vinegar
    • 1/4 cup water
    • 1 13.5oz can of coconut cream
    • Salt and pepper to taste

    Directions

    Heat the oil in the liner of your pressure cooker using the Saute/Browning setting.

    When the cooker reads Hot, add the spices and stir to coat with oil.  Add the chopped onions and peppers and cook for 2-3 minutes until just beginning to soften.  Add the garlic and ginger and cook until fragrant, about 1-2 minutes.  Stir in the mango slices, and then the water and the vinegar.  Season with salt and pepper.

    Lay the chicken on top of the vegetable/mango mixture.  Cover, seal, then cook on Manual (High Pressure) for 15 minutes.  When the timer runs out, release the remaining pressure manually.  Remove the chicken from the pot.  Chop or shred it and set it aside.

    Stir the coconut cream into the liquid remaining in the pot.  Puree the vegetables and fruit using an immersion blender.  Turn the cooker back to the Saute/Browning setting and allow the sauce to come to a simmer.  Cook the sauce until it thickens, about 5-10 minutes.  Serve hot.


  • Pressure Cooker Thai Iced Tea

    Pressure Cooker Thai Iced Tea

    Skip to Recipe
    Thai iced tea is basically dessert in a glass, and is great for soothing the burn from that hot and spicy Thai food that you might be enjoying.  Here in South Florida, practically any Asian restaurant serves Thai iced tea nowadays.  There are just so many of them that serve more than one type of Asian food.

    I think I first had Thai iced tea at a Japanese/Thai joint.  Someone else at the table ordered one, and it looked so good when it came to the table that I followed suit.  After basically inhaling my glass, and many more in subsequent visits, I eventually tried making my own at home.  I started with the Thai iced tea bags, which were basically like drinking Thai tea flavored water.  I eventually found the bags of Thai tea dust at one of my local Asian grocery stores, but getting the right flavor still eluded me.  Eventually, the game-changer came at a Vietnamese restaurant, when a server leaned over and whispered to me that the secret is that it needs to be STRONG and have enough sugar to suspend the half-and-half.  I won’t name the restaurant or the server, because I don’t want to get him in trouble for giving away secrets, but I thank him to this day.

    I used to make this on the stovetop, but just to try I decided to make it in the electric pressure cooker.  It made the flavor MUCH more intense with the same amount of tea leaves, so this will be how I make it from now on.

    Pressure Cooker Thai Iced Tea

    Ingredients

    • 6 cups water
    • 1 cup sugar
    • 1 cup Thai tea dust
    • Half-and-Half or evaporated milk for serving

    Directions

    Combine the water, sugar, and Thai tea dust in the liner of your pressure cooker.  Cover, seal, and cook on Manual (High Pressure) for 1 minute.  Allow the pressure to release naturally for 15 minutes before releasing any remaining pressure.

    Strain the tea through a mesh strainer, then through a coffee filter (I use a reusable coffee filter).  Let it cool at room temperature, then refrigerate until cold.

    To serve, add some ice to a glass then pour tea until it reaches about 2/3 of the way up.  Gently pour your evaporated milk or half-and-half to layer and fill the rest of the glass.  Enjoy!

    Makes about 1.5 quarts

    Stovetop directions:

    In a medium saucepan, bring the water and the sugar to a boil.  Remove from heat and stir in the tea dust.  Let stand for 10-15 minutes, then strain the tea through a mesh strainer and then through a coffee filter.  Allow to cool, then refrigerate until cold.

  • Pressure Cooker Mango Creme Brulee

    Pressure Cooker Mango Creme Brulee

    Skip to Recipe

    Mango creme brulee is a Mango Madness staple, and I have been making it since I first started experimenting with mango a few years ago.  Since I was getting so many mangoes anyway, I decided to try adapting the recipe to make in my Instant Pot electric pressure cooker.  It took a few tries, but I was able to get a smooth and creamy mango creme brulee!  You still need to do all of the stovetop work, but cooking them in a pressure cooker takes the guess work out of getting the perfect texture.

    Put your egg yolks in a measuring cup or small mixing bowl, then whisk them and set them aside.  Heat your cream, sugar, and mango chunks over medium to medium high heat.  As the cream heats, you will notice that it will start to change color as the mango releases juices into the cream.  When the cream starts to simmer, using a potato masher (or a fork, if you don’t have one) to gently mash the cooked mango so that it releases a little bit more flavor into the cream.  Then, remove the mango chunks using a slotted spoon and discard them.  Remove the cream from the heat and get your egg yolks ready.

    Temper the egg yolks by gradually adding some of the hot cream mixture into the yolks.   When you have incorporated about a third of the hot cream mixture into the yolks, whisk them into the pot with the rest of the cream mixture.  Strain the mixture into a heat-proof bowl, stir in the vanilla, then divide it evenly among 6 4oz custard cups.  Cover them with foil and arrange them in two layers in the liner of your pressure cooker (filled with 1 cup of water at the bottom).  Cover, seal, and cook on Manual (High Pressure) for  minute, and then allow the pressure to release naturally for 10 minutes before you release any remaining pressure.

    Remove the custards, uncover them, and allow them to cool completely on a wire rack.  When they’re cool, cover them and refrigerate for at least 4 hours or up to 3 days.

    When you are about to serve them, sprinkle about 1 teaspoon of sugar over the surface of the custard.  Tilt the custard cup around to make sure that the entire surface is covered, then use a torch to melt the sugar on the surface of the creme brulee until it bubbles and turns amber.  Let the custards cool for at least 5 minutes before you dig in.

    This is a great dessert if you want to impress!  Smooth, creamy, with just the right touch of mango flavor.

    Pressure Cooker Mango Creme Brulee

    Ingredients

    • 2 cups heavy cream
    • 2 cups fresh mango slices
    • 6 tbsp sugar, plus more for torching
    • 4 egg yolks
    • 1/2 tsp vanilla extract

    Directions

    Pour 1 cup of water into the liner of your pressure cooker.  Whisk your egg yolks in a heat-proof measuring cup or small bowl and set aside.

    Heat the cream, mango, and sugar in a saucepan over medium heat.  When the cream mixture is just about to simmer, lightly mash the mango, then allow the mixture to simmer for about 5 minutes (do not boil).  Remove from heat and use a slotted spoon to scoop out the mango pieces and discard them.

    Slowly add the hot cream mixture to your egg yolks, 1-2 tablespoons at a time, whisking constantly.  Once about 1/3 of the cream mixture has been added to the eggs, incorporate the egg mixture into the remaining hot cream mixture.  Strain using a fine mesh strainer, then stir in the vanilla.

    Divide the mixture equally among 6 4oz ramekins.  Cover with foil, then arrange in two layers on trivets in the pressure cooker.  Cover, seal, and cook on Manual (High Pressure) for 1 minute, and then allow the pressure to release naturally for 10 minutes.  Remove custards from pressure cooker and allow to cool completely on a wire rack, then cover and refrigerate for at least 4 hours.

    To serve, sprinkle a thin layer of sugar over the top of each custard, then use a kitchen torch to melt the sugar until it browns and forms a crispy top.  Allow the creme brulee to sit for 5 minutes after melting the sugar, then enjoy.

    Makes 6 servings

  • Pressure Cooker Mango Pulled Pork

    Pressure Cooker Mango Pulled Pork

    Skip to Recipe
    Mango Season continues here in South Florida, and I am lucky to have plenty of donors giving me a steady supply of mangoes.  I’m usually not much of a risk-taker with ingredients.  I am too just cheap to accept that I might have to throw food away if it doesn’t work out.  Mango Season is a little bit different, because all of the free mangoes means that I won’t feel as bad if an experiment doesn’t work out.  And, since Mango Madness has been going on for a few years, I have been getting better at figuring out what works and what doesn’t.  So, while making mango pulled pork was kind of risky, I felt confident that the flavor combination would probably work out.  And, I wasn’t wrong!

    My favorite kind of BBQ sauces are the ones that are slightly sweet, so the sweetness of the mango actually complimented the savory pork.  However, you will want to avoid pairing it with a sweet BBQ sauce so that your pulled pork doesn’t get overly sweet.  I think that a slightly spicy BBQ sauce works well to balance out the sweetness of the fruit.

    Get all of your ingredients ready, then heat the liner of your pressure cooker on the Saute/Browning setting.  Cut your pork butt into large chunks and season with BBQ rub.  When the liner is sufficiently hot, work in batches and brown your pork chunks for about 1-2 minutes on each side.  Once all of the pork chunks have been browned, return them to the pot, add the remaining ingredients (except the BBQ sauce).  Cover, seal, and cook on Manual (High Pressure) for 55 minutes, then allow the pressure to release naturally before opening the pressure cooker.

    Remove the pork chunks and set them aside.  Strain the liquid from the pressure cooker, but save the cooked fruit and vegetables.  Shred the pork and return it to the liner.  Blend the cooked onion/mango mixture with your choice of BBQ sauce, then pour it back over the shredded pork.  Mix it well before serving.

    You can eat the pork as-is, but you can also make pulled pork sandwiches or sliders.  So yummy!

    Pressure Cooker Mango Pulled Pork

    Ingredients

    • 4lbs Boston butt roast, cut into large chunks
    • 1 tbsp BBQ rub
    • 1 large onion, quartered
    • 2 cups ripe mango chunks
    • 4 cloves of garlic
    • 1 tbsp olive oil
    • 1/4 cup apple cider vinegar
    • 1 cup spicy BBQ sauce (I used honey chipotle)

    Directions

    Heat the liner of your pressure cooker on the Saute/Browning setting.  Season the pork chunks with BBQ rub.

    When the liner is hot, brown the pork chunks on all sides in the liner, working in batches.  When all of the pork chunks have been browned, return all of the pork to the pressure cooker.  Add the remaining ingredients (except for the BBQ sauce).  Cover, seal, and cook on Manual (High Pressure) for 55 minutes.  When the timer runs out, allow the pressure to release manually.

    Uncover and remove the pork and shred it.  Strain the liquid in the pot, but keep the solids.  Place the solids in a blender along with the BBQ sauce and blend until smooth.  Return the pork to the pot, then stir in the BBQ sauce.  Serve immediately.

  • Pressure Cooker Mango Chile Sauce

    Pressure Cooker Mango Chile Sauce

    Skip to Recipe
    The great thing about Mango Season in South Florida is that you can usually get your hands on more mangoes than you know what to do with.  The bad part about Mango Season in South Florida is that you can usually get your hands on more mangoes than you know what to do with.  Mango Season is one of those times where being the daughter of third-worlders kicks in.  The thought of letting any mango go to waste is just appalling.  Still, finding a use for mangoes that are a little too ripe to eat as is can be a challenge.  Typically, it’s best to use them cooked or pureed.  Therefore, this is why making a mango chile sauce was a great idea.

    The hardest part about this sauce is prepping the ingredients.  Once your mangoes are peeled and cut and your other veggies are chopped, it’s simply a matter of dumping everything into your pressure cooker and letting it do its thing.  When it’s cooked, just puree the sauce, add a cornstarch slurry to thicken, and you’re done!

    You can use other types of chiles, if you wish.  For the best color, you’ll want to stick to red chiles.  Still, you can customize it to your preferred heat level and flavor profile by picking a different kind of pepper.

    Pressure Cooker Mango Chile Sauce

    (Adapted from this recipe)

    Ingredients

    • 3-4 cups fresh mango slices
    • 1 yellow bell pepper, roughly chopped
    • 4 red jalapeño peppers, roughly chopped (remove seeds if desired)
    • 3 cloves of garlic, minced
    • 1/2 tsp salt
    • 1 cup sugar
    • 1 cup apple cider vinegar
    • 1 lime, juiced
    • 2 tbsp cornstarch, dissolved in about 4 tbsp of water

    Directions

    Add all of the ingredients except for the cornstarch to the liner of your pressure cooker.  Cover, seal, and cook on Manual (high pressure) for 10 minutes.

    When the cook time is done, manually release the pressure.  Open the pot, and puree the cooked mixture using an immersion blender.  Switch the pressure cooker to the Saute/Browning setting on the lowest level, then add your cornstarch and water mixture, stirring constantly. until mixture has thickened and starts to bubble.  Turn off the pressure cooker and remove the liner to transfer the sauce to jars.  Store in the refrigerator until ready to use.

    Makes about 6 cups.

  • Pressure Cooker Mango Key Lime Pie

    Pressure Cooker Mango Key Lime Pie

    Skip to Recipe
    It has been raining nonstop here in South Florida for the past 2 weeks or so.  The upside to this rain is that it has been knocking the mangoes out of trees prematurely, which means that mango season has started a little early this year.  My friends and my coworkers have all been generous with their stashes, so mangoes haven’t been in short supply for me.  One particular coworker and I have a verbal agreement where he will let me have first pick of his surplus mangoes every season as long as he gets a mango key lime pie.  Of course, I always deliver.  This year, though, I decided to try making it in my Instant Pot.  It was a smashing success, so I decided to share.

    Mix your crust ingredients and press them into the bottom and halfway up the sides of a greased 7-inch springform pan, then set aside.  If you’d like, you can line the bottom with parchment paper to make it easier to get out of the pan.  I also like to bake my crust for about 5 minutes in the oven at 350, but that is totally optional.  Whisk the rest of your ingredients together in a small mixing bowl, and then pour the mixture into your prepared crust.  Cover the pan with foil, place it on a trivet, and lower it into your pressure cooker liner (filled with 1 cup of water).  Cover, seal, and cook on Manual (High Pressure) for 10 minutes.  When the time is up, allow the pressure to release naturally for an additional 10 minutes before you release the remaining pressure.  Remove your pan and uncover.  The top should be shiny with no jiggle.

    Let the pie cool completely in the pan, then cover and refrigerate it for at least 4 hours before you serve it.

    Maybe you can make your crust look prettier than mine, eh?

    Serving a pie cooked in a springform pan is actually easier than serving it in a traditional pie pan.  There is a lot less hassle when digging your spatula underneath a slice.  You can’t make as big a pie, though, so choose who to share with wisely.

    Pressure Cooker Mango Key Lime Pie

    Ingredients

    • 1 cup graham cracker crumbs
    • 1 tbsp sugar
    • 3 tbsp butter, melted
    • 1 can sweetened condensed milk
    • 1/3 cup key lime juice (or use 1/4 cup if you like it less tart)
    • 1/4 cup mango puree
    • 1 egg
    • 1 egg yolk

    Directions

    Grease a 7-inch springform pan and line the bottom with parchment paper (if desired).  Pour 1 cup of water into the liner of your pressure cooker.

    Combine the graham cracker crumbs, sugar, and melted butter, then press onto the bottom and halfway up the sides of your prepared pan.  Set aside (you can also bake at 350 for about 5 minutes prior to filling).

    Whisk the remaining ingredients together in a small mixing bowl, then pour into your prepared crust.  Cover with foil and place on a trivet in the liner of your pressure cooker.

    Cover, seal, and cook on Manual (High Pressure) for 10 minutes, then allow the pressure to release naturally for an additional 10 minutes before releasing the remaining pressure.  Remove pie from pressure cooker, uncover, and allow to cool completely.  Refrigerate for at least 4 hours before serving.

    Makes about 8 servings.

  • Pressure Cooker Mac and Cheese

    Pressure Cooker Mac and Cheese

    Skip to Recipe
    There are two types of people in the world: those who like their mac and cheese creamy, and crazy people.  Seriously, whenever I hear someone tell me that they like it when they have to cut their mac and cheese out of the pan with a knife, I’m just like “What’s wrong with you?”  The tendency to dry out mac and cheese is the entire reason that I normally avoid baked mac and cheeses.  I know that it’s not impossible to get a creamy mac and cheese out of the oven, but let’s be realistic here.  How many people do YOU know that can accomplish this?

    In case it wasn’t already apparent, I have always preferred the stovetop style of mac and cheese.  There is just something so comforting about a bowl of this creamy pasta goodness.  The problem, though, is what a pain it is to get the right consistency of your cheese sauce on the stove.  I thought that I would just have to resign myself to a lifetime of lumpy mac and cheese.  That is, until I discovered a way to make it in my electric pressure cooker. Not only is it basically foolproof, but it is also a fraction of the effort.  No draining your pasta.  No cooking a roux.  Just you, a pot, and MAGIC!

    Add the pasta, water, butter, and seasonings in the liner of your pressure cooker.  Cover, seal, and cook on High Pressure for 4 minutes.  When the time is up, manually release the pressure, but keep the cooker on the Keep Warm setting.  Stir in your cream cheese, letting it melt and coat the pasta.  After that, add the milk, then the cheeses.  Make sure you add the cheese a little at a time so that it melts evenly.

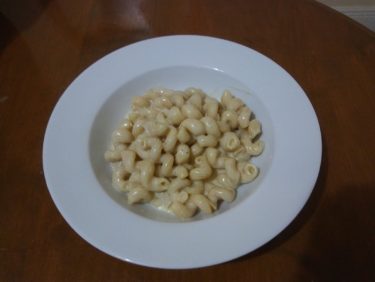
    In the end, you’ve got yourself a creamy and delicious mac and cheese that took very little effort to make.

    When making this mac and cheese, it is best to shred your own cheese.  Pre-shredded cheeses are usually coated with starch or contain other ingredients that may affect the texture of your finished product.

    Pressure Cooker Mac and Cheese

    Ingredients

    • 1 lb dry elbow macaroni (I use corkscrew pasta)
    • 4 tbsp unsalted butter
    • 1 quart water
    • 2 tsp Dijon mustard
    • 1 tbsp hot sauce
    • 1/2 tsp onion powder
    • 1 tsp salt
    • 1/2 tsp ground pepper
    • 1 cup whole milk
    • 8 oz cream cheese, cut into cubes (you can also use Mascarpone cheese)
    • 8 oz white cheddar cheese, shredded
    • 8 oz Monterey Jack cheese, shredded

    Directions

    Add the dry elbow pasta followed by the butter, water, ground mustard, kosher salt, granulated onion or onion powder, black pepper, and cayenne pepper to the bowl of the Instant Pot. Secure the lid and set the vent to “sealing”.

    Cook on “Manual” (High Pressure) for 4 minutes. When the 4 minutes is up, leave the pot on Keep Warm and manually release the pressure.

    Open the lid and add the cubed cream cheese. Stir gently but thoroughly until the cream cheese is melted.

    Add the milk and stir until combined. Add the shredded cheeses, a little bit at a time, until all of the cheese is melted and smooth. Serve immediately.

  • Pressure Cooker Boneless BBQ Pork Ribs

    Pressure Cooker Boneless BBQ Pork Ribs

    Skip to Recipe
    When you’re a working adult, you sometimes don’t have time to prepare an elaborate meal.  Sure, I would love to have the time and energy to make a lasagna from scratch on a weeknight, but the reality is that it’s a miracle that I even pack tomorrow’s lunch before bed some days.  Let’s face it, there are just going to be some days where your need for a hot meal can be overridden if it means putting in more effort than just opening a few jars and dumping things in a pot.  That’s where these boneless BBQ pork ribs come in.

    Originally, I had picked up a pack of boneless pork ribs at the grocery store to make some bacon wrapped ribs.  Well, when the weekend rolled around, I decided that I really didn’t feel like babysitting a smoker (and then cleaning it afterward).  So, I wound up cooking them in the pressure cooker instead.  As it turns out, they were pretty tasty and flavorful when cooked this way, and came together with hardly any effort.

    Arrange your dry-rubbed ribs in the liner of your pressure cooker.  Add some apple cider vinegar and your favorite barbecue sauce, then seal and cook for 15-20 minutes.  When the timer goes off, let the pressure release naturally for about 10 minutes before you release any remaining pressure.

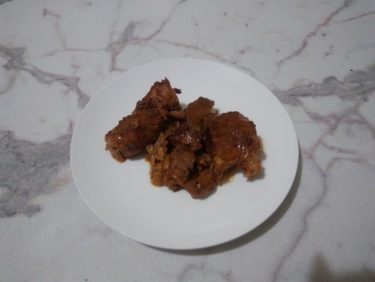
    When they are done, your ribs will have released a lot of liquid.  Just set the pot to Saute (Browning) and let the liquid reduce for a few minutes.  For me, it usually takes about 10 minutes to get the right consistency.

    Check out that thick, bubbling goodness!

    And there you have it.  Easy, right?  Just serve with your favorite side, and you’re good to go!

    Pressure Cooker Boneless BBQ Pork Ribs

    Ingredients

    • 1 1/2 lbs boneless pork ribs (I get the ones labeled “country style”)
    • 2 tbsp of your favorite BBQ rub (more or less to taste)
    • 1/4 cup apple cider vinegar
    • 1/2 cup of your favorite BBQ sauce

    Directions

    Sprinkle seasoning over pork ribs, turning to cover all sides.  Place in a single layer in the liner of your pressure cooker.  Add the vinegar and BBQ sauce on top.

    Cover and seal the pressure cooker.  Cook on Manual (High Pressure) for 15-20 minutes (depending on the thickness of the ribs).  Allow the pressure to release naturally for about 10 minutes before releasing the remaining pressure.  Uncover and set the pressure cooker to the Saute setting.  Let the ribs simmer until the sauce has reduced.

    Makes about 4 servings

    Note: To make this low-carb, use low-carb BBQ rub and low-card BBQ sauce

  • Pressure Cooker Flan

    Pressure Cooker Flan

    Skip to Recipe

    Flan is one of my favorite desserts EVER.  I blame the Latina in me.  I can’t help it.

    I still remember when I first learned how to make it.  It wasn’t easy.  I overcooked it many times before I finally got the hang of the ideal temperature and cook time.  When I moved, I’d have to re-learn in order to get it just right with the new oven.  I was baking flan in a water bath for about an hour and a half.  It was torture!  So, you can imagine my delight when I discovered that flan cooks quicker AND easier in an electric pressure cooker.

    I mean, seriously!  Rich, velvety smooth flan every single time.  No air bubbles.  No graininess.  Just flan perfection.

    A friend of mine asked me to teach her how to make this.  I decided to do even better and post the step-by-step instructions on the blog.  And, after some additional requests for the recipe started rolling in, here it is!

    I use a flanera (flan pan) for my flans.  I have also had success with round ceramic or glass baking dishes.  Just make sure that you use the oven-safe kind.

    Start by making your sugar syrup.  Heat the sugar in a small saucepan over medium heat.  Swirl the pan occasionally to redistribute the sugar, but do not stir it until it starts to turn deep amber and most of the sugar has melted.  At this point, use a heat-proof spatula to stir the sugar until the last solid clumps are melted, then remove it from the heat and add 2 tbsp of water.  Be careful, because it will steam and might splatter.  Once you can get close enough, stir the sugar and water until it’s all combined, then pour it into your flan mold.  If you want, you can also tilt the mold around a little bit to get some of the sugar to coat the sides.

    Next, we make the custard mixture.  All you need is half-and-half, condensed milk, eggs, and vanilla extract.  Combine them in a blender, then pour the mixture into the sugar-coated flan mold.  Cover the mold, place on a trivet, then lower into your electric pressure cooker (filled with 1 cup of water).  Seal and cook on Manual (High Pressure) for 12 minutes, then do another 12 minutes of Natural Release.  Remove the flan and uncover.  The center of the flan should still be slightly jiggly, as it will firm up as it cools. Once it has cooled completely, cover it and refrigerate until it’s ready to serve.  The minimum should be 4 hours, but it’s preferable to leave it overnight.

    When you are ready to serve, run a thin knife along the edge of the flan, then invert onto a serving plate.

    Then, be rewarded with creamy flan goodness.

    If you like a firmer flan, you can add an additional egg or two to the flan mixture.  You can also adjust the amount of vanilla extract, but I feel like this amount gives it a great flavor.

    Pressure Cooker Flan

    Ingredients

    • 1/2 cup granulated white sugar
    • 2 tbsp water
    • 2 cups half-and-half (or milk)
    • 1 14oz can sweetened condensed milk
    • 3 eggs
    • 1 tbsp vanilla extract
    • Required equipment: a flan pan (this one is what I have)

    Directions

    In a small saucepan, heat white sugar over medium heat until all of the sugar has melted and turned amber.  Remove from heat and carefully add the 2 tbsp of water (watch out for the steam).  Stir until all of the water has mixed in, then pour into your flan mold or round baking dish.  Set aside to cool while you make the flan mixture.

    Combine the eggs, half-and-half, condensed milk, and vanilla in a blender.  Blend until combined and no streaks remain.  Gently pour into your prepared flan mold, then cover.

    Pour 1 cup of water in the liner of your electric pressure cooker.  Place the flan mold on a trivet in the liner, then seal and cook on Manual (High Pressure) for 12 minutes.  After time is up, turn off the pressure cooker and allow the pressure to release naturally for another 12 minutes.  Remove flan from pressure cooker and uncover (flan should be slightly jiggly in the center, but not watery).  Allow to cool completely, then refrigerate for at least 4 hours (preferably overnight) before serving.

    Makes about 8 servings.

    Note: To make an Irish Cream Flan, replace 1/2 cup of half-and-half with 1/2 cup of your favorite brand of Irish Cream and reduce the vanilla extract to 1 teaspoon.  Do NOT use milk, or your flan might curdle.

    To make a dulce de leche flan, replace the can of condensed milk with a can of dulce de leche.

  • Pressure Cooker Apple Risotto

    Pressure Cooker Apple Risotto

    Skip to Recipe
    Okay, so I know that I posted a recipe inspired by an anime last month, but I have to do it again.  In fact, this apple risotto is yet another recipe that came from the same anime (Shokegeki no Soma), which the protagonist makes in a breakfast-themed cooking duel against his father.  Although he loses the match to his father’s ramen bowl, the risotto definitely left a bigger impression.  The protagonist does it the “long and painful” way, AKA on the stovetop, but I was determined to make this in my Instant Pot.  “Work smarter, not harder”, right!?

    I made this for my friends recently, and didn’t have very high hopes.  Sweet and savory is typically not my jam, but I figured that apple risotto with bacon was basically just a fancy take on pork chops and applesauce.  Boy, did this blow my expectations out of the water!  Such a rich, creamy treat doesn’t deserve to be reserved just for breakfast.  The sweet and savory tones in the components of the dish seem to strike a perfect balance, so it doesn’t taste like a dessert that is trying to be an entree or vice versa.  Best of all, making it in a pressure cooker makes it so much easier to make!

    Start by gathering all of your ingredients.  Melt the butter in the liner of the pressure cooker on the Saute/Browning setting, then saute your onions in the butter.  When they are softened, add the rice and stir until the rice is coated in the melted butter.  Cook the rice/onion mixture until the rice becomes fragrant and starts to change color, then add some white wine and continue to cook until the rice has absorbed the wine.  Next, add the apple juice and your broth/stock of choice, then season with salt and pepper.  Cover, seal, and cook on Manual (High Pressure) for 6-7 minutes.  While the risotto is pressure-cooking, prep your apples.  Peel, core, and dice them, then toss them with the juice of a lemon.  When the pressure cooker timer goes off, release the pressure manually, then stir in your apples.  Last, stir in your mascarpone cheese and continue to stir until all of the cheese has melted into the risotto.

    Serve your risotto with some slices of crispy bacon, which adds a salty punch to counterpoint the sweet undertones of the apple in the risotto.  You can also sprinkle on some parmesan cheese, if you’d like.

    Risotto is usually best eaten fresh.  However, if you MUST reheat it, you can add a little bit of water before warming it in the microwave to keep it from getting too dry.

    Pressure Cooker Apple Risotto

    Ingredients

    • 2 Apples (I used Golden Delicious)
    • 1 lemon, juiced
    • 1 onion, diced
    • 2 cups Arborio rice
    • 3 cups of unfiltered apple juice
    • 3 cups chicken broth or stock
    • 4 tablespoons butter
    • 1/2 cup white wine
    • 4 oz mascarpone cheese
    • grated parmesan cheese (optional)
    • 1lb thick cut bacon
    • salt and pepper to taste

    Directions

    Cook the bacon according to your preferred cooking method (I use the oven).  Set aside.

    Set pressure cooker to Saute/Browning setting. When hot, add the butter. When the butter has melted, add the onions and saute until translucent, about 5 minutes. Add the rice, and stir to coat.  Continue cooking, stirring, until the rice starts to turn fragrant.

    Add the wine and continue to stir until the wine is absorbed.  Add the apple juice and chicken broth/stock, then season with salt and pepper to taste..  Cover, seal, and cook on High Pressure for 6-7 minutes.  Meanwhile, peel, core, and dice your apples.  Toss them in a bowl with the lemon juice, and set aside.

    When the pressure cooker timer goes off, release the pressure manually.  Stir in the apples, and then mascarpone cheese.  Continue to stir until the mascarpone cheese has fully melted and the apple risotto is creamy.  Serve immediately with a side of cooked bacon and topped with grated Parmesan cheese (if desired).

    Makes about 6 servings