Category: Pressure Cooker (Instant Pot)

Recipes that can be made in a pressure cooker or Instant Pot

  • Pressure Cooker Red Enchilada Sauce

    Pressure Cooker Red Enchilada Sauce

    One of my favorite things to get at Mexican/Tex-Mex eateries is a burrito smothered in sauce.  Depending on the place, it’s either red sauce or green sauce, but definitely red sauce over green.  A friend of mine has been trying to recreate the red sauce from her favorite Mexican eatery.  While this recipe wasn’t an exact copy, it was close enough for me to enjoy the heck out of it.

    One of the steps in making a red enchilada sauce is to take your dried chiles and boil them for about half an hour to soften them up.  Being the lazy cook that I am, I thought to myself “why not just pressurize them with liquid and the rest of the ingredients for a fraction of that time?”  It was worth a shot, so I gave it a try and was pleasantly surprised that it worked very well.  I wound up making a second batch and sending a friend home with it.

    Skip to Recipe

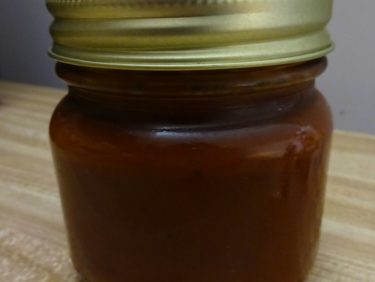
    She put it in a nice little jar to keep it fresh in her fridge.  I asked her to let me know how she likes it.  She let me know by sending me pictures of all of the things that she has been eating her enchilada sauce with.

    Taco Pie, which I found to be a bit boring on its own, is taken to a whole new level when topped with red enchilada sauce.  It really adds a new dimension to the dish without a whole lot of extra work.

    The following morning, it was a bagel topped with a fried egg drenched in the sauce.  Both she and her sister made sure that not a single drop of the red enchilada sauce went to waste.  The sauce didn’t last long, and she was asking me to share the recipe.  So, here it is!

    Pressure Cooker Red Enchilada Sauce

    Ingredients

    • 1 tbsp olive oil
    • 2 cups beef stock or broth
    • 2 oz dried guajillo chiles
    • 1 oz dried pasilla chiles
    • 1/2 yellow onion, chopped
    • 1 medium tomato, chopped
    • 2-3 garlic cloves, crushed
    • 1 tsp kosher salt
    • 1 tsp dried oregano
    • 1 tsp smoked paprika
    • 1/2 tsp cumin powder
    • 1 cinnamon stick (optional)

    Directions

    Remove the stems from the dried chiles.  Discard the seeds if desired.  Set aside.

    Set the pressure cooker to Saute and add the oil.  When hot, add the onions and cook until they start to soften and turn translucent.  Add the garlic and continue cooking until fragrant (about 2-3 minutes), then add the tomato.  Continue cooking until the tomato starts to release some of the liquid.

    Add the chiles, seasonings, beef broth/stock, and cinnamon stick (if using).  Seal the pressure cooker, switch the setting to Manual (high pressure), and set the timer to 10 minutes.  When the timer runs out, allow the pressure to release naturally.

    Remove the cinnamon stick and transfer the mixture to a blender and puree, then pass the puree through a mesh strainer to remove the pulp.  Serve hot, or allow to cool completely and refrigerate or freeze until ready to use.

    Makes about 1 quart.

  • Red Velvet Lava Cake

    Red Velvet Lava Cake

    Another Fourth of July, approaches.  In addition to another year to celebrate our nation’s independence, it’s yet another reason to eat things that are red, white, blue, or a combination of all three.  Normally, this means flag cakes or tri-color jello molds, but I am thinking out of the box this year.  I’m thinking red velvet lava cake. This definitely isn’t the type of dessert that you’d plan to bring to a neighborhood barbecue or cookout, but it will impress nonetheless.  Besides, who ever really wants to eat a boxed cake mix sheet cake topped with Cool Whip, anyway?

    You can make red velvet lava cake in your oven or in your Instant Pot (pressure cooker).  I personally prefer the texture of an oven-baked lava cake, but I know that others prefer the moist, custard-like consistency of an Instant Pot lava cake.  Make sure that you play around with the cook times until you get the center as runny as you like it.

    If you REALLY want to stick to the red velvet theme, this treat is best enjoyed with a scoop of cream cheese ice cream.  Yes, it does exist.  Otherwise, vanilla ice cream also works.

    I was tempted to add a few blueberries to the plate to tie it in with the red, white, and blue, but I just didn’t think that the flavors would come together for this one.

    Red Velvet Lava Cake

    (adapted from Gretchen’s Bakery)

    Ingredients

    • 4 tbsp (1/2 stick) butter
    • 3 tbsp buttermilk
    • 2 eggs
    • 3 egg yolks
    • 1 1/4 cups bittersweet chocolate,chopped
    • 1/2 cup flour
    • 1/2 cup powdered sugar
    • a pinch of salt
    • red gel food coloring as needed

    Directions

    Preheat oven to 375°.  Generously grease 5 4oz ramekins.

    Melt the chocolate and the butter in the microwave or over a double boiler.  Stir in the buttermilk.  Sift the flour, salt, and sugar together and set aside.

    In a separate bowl, whisk the eggs and yolks.  Gradually add in the chocolate mixture to the egg yolks, a little bit at a time to keep from scrambling the eggs.  Add in the food coloring until the mixture is the desired color.  Stir in the flour mixture and whisk until smooth.

    Divide batter evenly between the greased ramekins.  Bake in the preheated oven for 14-18 minutes.  Serve immediately by inverting onto a plate to remove from the ramekin.

    To make in the Instant Pot, fill the pot with 1 cup of water, place the ramekins on a trivet, and cook on Manual (High Pressure) for 5-7 minutes.

    Makes 5 servings

  • Buffalo Shrimp and Blue Cheese Grits

    Buffalo Shrimp and Blue Cheese Grits

    Skip to recipe

    Shrimp and grits are something that I have only recently tried, and was pretty ambivalent towards.  I guess it just didn’t click because it’s not something that I grew up eating.  But, during a conversation at work one day, we were talking about what foods could and could not be made “buffalo-style,” and that’s when a light bulb went on in my head.  What about buffalo shrimp and blue cheese grits?  My coworkers’ eyes just lit up.

    Naturally, I wasn’t the first one that had ever thought up such an idea, so it was not difficult to find a recipe for buffalo shrimp and blue cheese grits.  My version isn’t particularly flashy or fancy, but it’s tasty as heck.  Plus, making grits in a pressure cooker or Instant Pot makes this recipe a cinch.  The only thing that you really need to worry about is not overcooking your shrimp.

    Buffalo Shrimp and Blue Cheese Grits

    (Adapted from recipe at Food52)

    Ingredients

    For the Grits

    • 1 cup grits (can be white or yellow) – not Quick Cook or Instant Grits
    • 4 cups chicken broth or stock
    • 1 tbsp butter
    • 4 oz crumbled blue cheese
    • salt and pepper to taste

    For the Buffalo Shrimp

    • 1lb medium shrimp, peeled and deveined
    • 2 tbsp butter
    • 1/2 tsp paprika
    • 3 cloves garlic, minced
    • 1/2 cup buffalo sauce (can be homemade or store-bought)
    • salt and pepper to taste
    • juice of 1/4 lemon

    Directions

    Make the Grits

    To make in the Instant Pot: Set the pressure cooker to Saute – Normal.  When it reads HOT, melt the butter in the pot, then add the grits and stir to coat them in the butter.  Keep stirring the butter-coated grits until they turn fragrant.  Add the chicken stock and season with salt and pepper.  Turn off the Instant Pot, put the lead on and seal, and set to Manual (high pressure) for 25 minutes.  Allow the pressure to release naturally for 10-15 minutes, then release any remaining pressure.  Stir in the crumbled Blue cheese.

    To make on the stovetop: Melt butter in a medium saucepan over medium heat.  Add the grits, stirring to coat in butter.  Continue stirring until the grits start getting fragrant.  Add the chicken broth/stock and season with salt and pepper.  Bring to a brisk simmer, then reduce heat and allow to simmer for about 20 minutes, or until grits are the desired texture.  Remove from heat and stir in the Blue cheese.  Serve immediately.

    Make the Buffalo Shrimp

    Rinse the shrimp and pat dry.  Season with salt, pepper, and paprika.  Toss to coat.

    Heat a skillet on medium to medium-high.  Melt butter on hot skillet, then add shrimp.  Cook the shrimp, turning once, until almost opaque (you want them to be slightly undercooked at this point).  Using a slotted spoon, remove the shrimp and set aside.

    Add the garlic to the hot skillet and cook until fragrant (about 2-3 minutes).  Add the buffalo sauce and continue cooking until sauce begins to thicken and reduce (you may need to lower the heat if it looks like the sauce is starting to burn).  Return the shrimp to the pan and toss to coat in the sauce.  Cook 1-3 minutes until the shrimp are cooked through.  Remove from heat and add the lemon juice.  Serve on top of grits.

  • Pressure Cooker Coffee Dulce de Leche

    Pressure Cooker Coffee Dulce de Leche

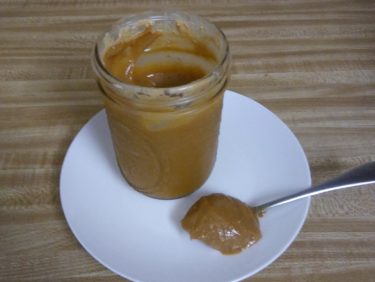
    Dulce de leche is basically the product of sweetened milk that is cooked until it darkens and thickens.  Dulce de leche, or arequipe  as it’s known in Colombia, is getting more and more popular in the US.  And, with more households investing in a pressure cooker or Instant Pot, making it at home has never been easier.  However, during my most recent visit to Colombia, I came across something that I NEVER seen in the US: arequipe con cafe (coffee dulce de leche).  I mean, I guess it’s a no-brainer that Colombians would figure out how to add coffee flavor to this confection, but my head pretty much exploded when I saw it.  I brought some home for my friends, and their reaction was pretty much the same.

    For a good week, I mulled over how I could try to recreate something similar at home.  In the end, I decided to try combining condensed milk with brewed espresso.  My fellow Colombians would have a fit, of course.  Only lazy people make arequipe with condensed milk, and only if they don’t care how it tastes.  But, here in the US, I think that dulce de leche made out of condensed milk tastes just fine, and there’s no need to babysit a pot for hours on end!  I mean, there’s a time to spend hours making something the long and painful way, and there are times to empty a can into a jar, set it in a pressure cooker, and go watch TV.

    Empty one can of condensed milk into a canning jar, then add brewed espresso.  Stir until combined, then seal your jar and place it on a trivet in your pressure cooker.  Fill with water until the jar is about halfway submerged, then seal your pressure cooker.  Cook on High Pressure for 45 minutes, then allow the pressure to release naturally for about 10-15 minutes, then release any remaining pressure.

    Once it’s done, all you have to do is give it a quick whisk to break up any clumps, let it cool, and you’re good to go.  You can make ice cream with it, stir it into yogurt, use as a filling…the possibilities are endless!

    This should keep in the refrigerator for about 2 weeks, if it lasts that long.

    Coffee Dulce de Leche (Arequipe con Cafe)

    Ingredients

    • 1 can sweetened condensed milk
    • 1/4 cup brewed espresso

    Directions

    Pour sweetened condensed milk into a canning jar.  Stir in the espresso until smooth.  Seal the jar.

    Place the sealed jar on a trivet in the pressure cooker, then fill with water until the water reaches about halfway up the jar.

    Seal the pressure cooker, then cook on Manual (High Pressure) for 45 minutes.  Turn off the pressure cooker and allow the pressure to release naturally for 10-15 minutes, then release the remaining pressure.  Remove the jar from the pressure cooker using tongs or mitts, then carefully open the jar and whisk the dulce de leche to smooth out any clumps.  Allow to cool completely before refrigerating.

    Makes about 1 pint.

  • Pressure Cooker Irish Cream Flan

    Pressure Cooker Irish Cream Flan

    This is a haphazard post.  I hadn’t really been planning on posting this recipe to the blog, but I have had a lot of requests for Irish Cream Flan recipe that I just couldn’t refuse.  The public asks, and I deliver.  🙂

    For some reason, I have been on a Bailey’s kick lately, so I’ve been trying to come up with ways to incorporate Irish Cream into desserts.  I made Irish Cream ice cream with mixed success, as the alcohol in the Bailey’s made the ice cream too soft and melted quickly.  So, what else is creamy and whose texture will not suffer from the addition of alcohol?  Flan!  And, an Irish Cream Flan sounded like too good of an idea to pass up.  Best of all, it worked on the first try!

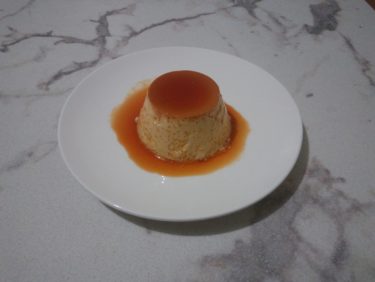
    The outside of the flan had me a little worried that I had overcooked it, but the inside was as smooth and creamy as I like my flans to be.  I was afraid that using too much Irish Cream would make the flan taste too heavily of booze, so I replaced some of the liqueur with Irish Cream flavored coffee creamer.  Feel free to play around with the ratios of booze and creamer to get your preferred concentration of Bailey’s flavor, but this was just right for me.

    Hope you enjoy!

    Pressure Cooker Irish Cream Flan

    Ingredients

    • 1/4 cup plus 2 tbsp white sugar, divided
    • 1 tbsp water
    • 1 cup Half and Half
    • 1/4 cup Irish Cream flavored coffee creamer
    • 1/4 cup Irish Cream
    • 2 eggs

    Directions

    In a small saucepan, heat 1/4 cup of sugar over medium heat, swirling the pan occasionally to distribute the heat.  Once the sugar has melted and turned deep amber, remove from heat and add the 1 tbsp of water (careful, it may splatter) and stir until combined.  Distribute the syrup evenly between 3 6 oz ramekins or custard cups.

    Crack the eggs into a small, heat-proof bowl and whisk, then set aside.  In a small saucepan (can be the same one if you want), heat the Half and Half, creamer, Irish Cream, and sugar until lightly simmering.  Remove from heat and gradually add this mixture, 2 tbsp at a time, to the eggs, whisking constantly.  Once about 1/3 of the hot cream mixture has been added to the eggs, slowly pour the remaining hot cream into the egg mixture, whisking the entire time.

    Add 1 cup of water to the inner liner of your electric pressure cooker and place a trivet inside.  Cover your custard cups tightly with foil, then set on the trivet inside the pressure cooker.  Seal and cook on Steam setting for 5 minutes, then allow the pressure to release naturally for an additional 5 minutes before releasing the rest of the pressure manually.  Remove custards from the pressure cooker and allow to cool, uncovered, on a wire rack.  Flans will be very jiggly when you take them out.  This is normal.  Re-cover and refrigerate at least 4 hours, but preferably overnight.

    To serve, run a small knife around the edge of the custard cup, then invert onto a plate.

    Makes 3 servings.

  • Pressure Cooker Jerk Chicken Chili

    Pressure Cooker Jerk Chicken Chili

    Skip to recipe

    For the second year in a row, my job has organized a chili cook-off.  Now, chili isn’t really my forte, and it’s not something that I make often or ever.  But, ever since I got this Instant Pot I have gotten a lot more adventurous with my cooking.  So, I figured “why not?”

    I wanted to do something that was not only unique, but that had cultural significance.  Living in South Florida, chili is not something that is really huge like it would be in a place like Texas.  Plus, I have been cutting down on the red meat for health reasons and wanted a chicken chili.  I had been working on some different variations of “Latin” inspired chilis when a lightbulb went off.  We’re practically in the Caribbean…so why not make jerk chicken chili?

    Sure enough, I wasn’t the first person to have thought of this, and I came across a great recipe to use as a starting point.  Of course, the challenge became converting it into a pressure cooker recipe, but it worked out fairly well.  I added a few adjustments of my own based on my own experiences eating Caribbean food in South Florida.  And, I wound up winning First Place!  Woohoo!

    One thing to note is that I made this chili in a 6qt pressure cooker and had a lot of issues with it coming to pressure that I suspect may have been from the pressure cooker being too full.  So, the bottom would start to scorch before the pot could actually come to pressure.  If you have an 8qt pressure cooker, I think that you will be fine, but if you’re using a 6qt or smaller than I recommend scaling the recipe down to avoid this issue.

    UPDATE 3/19/2017:  As a test, I halved the recipe and cooked it in my 6qt pressure cooker, and still had the same issue where the pot would not come to pressure before the bottom would scorch.  Once I scraped the burnt bits from the bottom of the pot, it started to simmer pretty furiously and the pot pressurized after I sealed it again.  So, the trick seems to be bring the chili to a simmer prior to sealing so that it will come to pressure.  Also, scotch bonnet peppers vary in heat by color.  I used an orange one in my first batch and a red one in my second batch, and it was SO MUCH hotter.  So, choose your peppers wisely.

    Jerk chicken chili ingredients

    I got my ingredients together, including the tiny atomic bomb known as a scotch bonnet pepper.  Scotch bonnet pepper is a key component of Jamaican jerk, so of course it needs to be included in jerk chicken chili!  I mixed all of the spices and seasonings together to form a paste to make it easier to add in later.

    DSCN4590

    First, you want to cook your beans.  While they are cooking, prep all of your veggies so that they are ready to go.

    DSCN4593

    Once the beans are done, drain and set aside.

    prepthepot

    Saute your veggies until soft, then add your seasoning paste.  Add the tomatoes, beans, and chicken.  I added the tomatoes last in this case, but I would recommend adding those before the beans and chicken.  Then, seal the pot and cook on Beans/Chili setting or on High for 30 minutes.

    DSCN4612

    Let the pressure release naturally, then open and remove the chicken.  Set the pot to Saute to reduce the chili to the desired thickness, then shred your chicken and return to the pot.  Stir in the scallions.

    Finished jerk chicken chili

    Yup…good stuff!

    Plated Jerk Chicken Chili

    I served this jerk chicken chili with mango salsa and plantain chips for dipping, but it also tastes good over rice or scooped up with naan or roti.  It’s great on its own as well.  This can be made on the stovetop or slow cooker with some adjustments if you don’t have a pressure cooker.  It will just take a bit longer.  You can also save some time by using canned beans instead of dried.

    Pressure Cooker Jerk Chicken Chili

    Ingredients

    • 3 lbs bone-in chicken legs and thighs
    • 14oz dried red chili beans
    • 1/2 cup jerk seasoning (I used Mild.  Use Hot at your own risk!)
    • 2 Tbsp vegetable oil
    • 1 medium onion, diced
    • 1 red bell pepper, diced
    • 1 green bell pepper, diced
    • 1 yellow bell pepper, diced
    • 1 Tbsp fresh ginger, grated
    • 5 garlic cloves, minced
    • 1 scotch bonnet or habanero pepper, de-seeded minced (keep the seeds if you like extra spicy)
    • 1½ tsp all-spice
    • 2 tsp smoked paprika
    • 2 tsp thyme
    • 1 Tbsp cumin
    • 1 Tbsp ground cinnamon
    • 1 Tbsp chili powder
    • ¼ cup molasses
    • 1 1/2 tsp liquid smoke
    • 2 tbsp soy sauce
    • 1 tbsp cider vinegar
    • 1 cup chopped scallion
    • 2 15oz cans fire-roasted diced tomatoes (or 1 28oz can also works)
    • 1 cup chicken or vegetable stock
    • salt and pepper to taste

    Directions

    Add the beans to the inner bowl of the pot with 4 cups of water.  Cover and set the pressure valve to Sealing.  Cook on Manual (High Pressure) for 17 minutes, then allow the pressure to release naturally.  Drain and set aside.  In a bowl or measuring cup, combine the jerk seasoning, ginger, allspice, paprika, thyme, cumin, cinnamon, chili powder, molasses, liquid smoke, soy sauce, and salt and pepper so that it forms a loose paste.

    Clean the inner bowl (or, use a new bowl) and set the cooker to Saute/Brown setting.  When hot, add the vegetable oil and saute the onions and peppers until they start to turn translucent.  Add the garlic and continue to saute until fragrant, then add the spice paste and stir until it coats the vegetables.  Add the tomtatoes, beans, chicken/vegetable stock, and chicken.  Stir to combine.

    Turn off the pressure cooker, cover and set the release valve back to Sealing, and set to Beans/Chili function (or Manual High for 30 minutes).  When the timer runs out, allow the pressure to release naturally.

    Once the pressure has been release, open the pot and remove the chicken using tongs and shred it with a form.  Set the cooker back to the Saute setting and cook until the chili until it is reduced to your liking, then return the shredded chicken to the pot.  Stir in the chopped scallions.  Serve the jerk chicken chili immediately or store in an airtight container in the refrigerator until ready to consume.

    Enjoy!

  • Pressure Cooker Red Velvet Cheesecake

    Pressure Cooker Red Velvet Cheesecake

    This is a quickie post due to popular demand.  I made this red velvet cheesecake last week with mixed results, but Valentine’s Day is right upon us and I REALLY wanted to have this cheesecake as my go-to.  So I tried again today with a few adjustments and got it just right!  I posted a picture to an Instant Pot group on Social Media and got several requests for the recipe, so here it is!

    If you don’t know what an Instant Pot is, you’re missing out!  I won’t bore you with the details, mostly because everything there is to know is already available online and said more eloquently.  Google is your friend.  Suffice to say that making cheesecake in the Instant Pot (or any electric pressure cooker) is something that I only discovered a month or two ago, but it’s been GREAT!  If you’re new to making cheesecakes in an Instant Pot, I recommend checking out this link for reference.  It will point you in the right direction.
    [Skip to recipe]

    DSCN4432

    Start by preparing your pan.  Mix your cookie crumbs with melted butter and press onto the bottom of a well-greased cheesecake pan.  This is a 7in cheesecake pan with a removable bottom.  It fits perfectly into the Instant Pot!

    preparecheesecakebatter

    Then, make your cheesecake batter.  Use your preferred method.  I like using a blender or food processor because I am lazy, but some people do it with a stand mixer of by hand.  That is also fine.  Once you have your smooth batter, pour it into your prepared baking pan.  While you’re making your batter, prepare your Instant Pot by pouring about a cup of water into the pot and placing the trivet in there, then press the Saute button to allow the water to come to a simmer.  Fashion a sling out of foil and place it underneath your pan, then use it to lower your cheesecake into the Instant Pot.

    DSCN4446

    Once your pan is in the pot, turn the Instant Pot off, cover and seal it, and then set it to Manual for 20-25 minutes, depending on your preferred texture.  I set it to 23 minutes and then did a 15 minute Natural Release.

    DSCN4451

    Once time is up, you can open your Instant Pot and use the foil sling as handles to pull the red velvet cheesecake out.  Make sure you check for doneness.  If it’s still wobbly, you can put it back in and cook for a few more minutes.  Blot any condensation on the surface of the cheesecake with paper towels.  Afterwards, allow it to cool completely and then refrigerate until firm.

    Red velvet cheesecake

    There you have it!  Beautiful and delicious Instant Pot red velvet cheesecake!  Top with dollops of whipped cream for a dessert to impress, and it will look like you slaved all day over it!  Don’t worry, I won’t tell.

    Red velvet cheesecake

    Ingredients

    • 1 cup Oreo cookie crumbs
    • 1 tbsp butter, melted
    • 2 8oz packages cream cheese, room temperature
    • 2 eggs, room temperature
    • 1/2 cup sugar
    • 1/2 cup buttermilk, room temperature
    • 1 1/2 tbsp Dutch processed cocoa powder
    • 1/2 tsp vanilla extract
    • 1 tbsp red food coloring
    • 1/2 tsp white vinegar

    Directions

    Prepare the Instant Pot by adding 1 cup of water and a trivet or steaming rack to the inner pot.

    Combine the cookie crumbs and melted butter and press onto the bottom of a 7in springform or cheesecake pan.  If you’d like, you can pre-bake for 5 minutes at 350°, but this is not required.

    Set the Instant Pot to the Saute function.  In a food processor, combine the cream cheese, eggs, sugar, and cocoa powder.  Blend until almost combined.  Add the buttermilk, food coloring, and vanilla extract and mix until smooth.  Mix in the vinegar.

    Pour the cheesecake batter into the prepared baking pan.  When the water in the Instant Pot has started to simmer, place the cheesecake pan in the inner pot.  Press cancel.  Cover and seal the Instant Pot and set it to Manual for 20-25 minutes, then Natural Release for 15 minutes.  Open the lid carefully to avoid water dripping onto the cheesecake.  Remove cheesecake from pot and blot the cheesecake with paper towels to remove condensation.

    Allow to cool completely on a wire rack, then refrigerate the red velvet cheesecake at least 4 hours before serving.


  • Bacon, Beer, and Three-Cheese Risotto

    Bacon, Beer, and Three-Cheese Risotto

    Skip to recipe
    I love my friends, but they are a bunch of enablers.  Instead of going outside or having a life, I prefer to spend my free time trying new things out in the kitchen.  They are happy to oblige, always providing me with recipes that caught their eye or that they think I would be interested in.  Of course, it serves their own interests as well, since they normally get to consume the finished product.  I’m not complaining.  I have discovered some pretty delicious things by having a friend plant the seed.

    One such friend, who is practically “vegetarian except for bacon,” sent me this recipe, which immediately caught my attention.  Bacon, beer, and three-cheese risotto!  I love carbs, bacon, and cheese.  What could possibly be bad about combining them all into one, steaming bowl of creamy risotto?  Nothing, that’s what.  I challenge anyone to refute that.  So, I agreed to give this recipe a shot.  And, of course, she was more than happy to come and “assist” and critique the finished product.  Quality control is an important job, you know!  But, thanks to the extra set of hands, I managed to catch some shots of the process to making this decadent dish.

    20160918_133740

    Now, I am normally a pretty ad-hoc cook, but risotto is a fairly time-sensitive dish that requires constant attention.  You really can’t step away to chop a shallot or grate cheese while it simmers, so mise en place (prepping everything and having it ready to go before you start cooking) is critical.  So, before you get started, make sure all of your ingredients are prepped and ready to go.  You can heat up your broth or stock while this is happening.

    20160918_134008

    While your cooking liquid is warming up, you can start cooking the bacon.  Make sure you lower the heat on the liquid as soon as it starts to simmer.  You don’t want to add boiling broth/stock to your risotto.

    cookthebacon

    Fry the bacon until it’s nice and crispy, and then strain the bacon out and set it aside.  Do not clean out your pan.  Just pour out all except for about a tablespoon of the bacon fat.

    addingliquids

    So, we’re leaving the fond-crusted pan as-is and dumping our chopped shallots in there, then the garlic once the shallots are soft.  Once the garlic is starting to get fragrant, throw in the rice and let it brown a little.  Add the beer, and cook until the rice absorbs most of it.  Then, reduce the heat and start adding the hot stock/broth, one ladle at a time.  Let the rice absorb most of the liquid before adding another ladle, continuing to stir gently.  It will take about 20-30 minutes for the rice to cook, so be patient and don’t rush it.  If you run out of liquid and the rice is still not cooked through, you can add some hot water and continue stirring until it’s the desired consistency.

    finishingtouches

    Once the rice is the desired consistency, add the cheeses and stir until they are melted.  The original recipe uses Parmesan and cheddar, but we added a bit of Gruyere to give it some additional bite.  Add the bacon after that, then season with salt and pepper to taste.

    20160918_142630

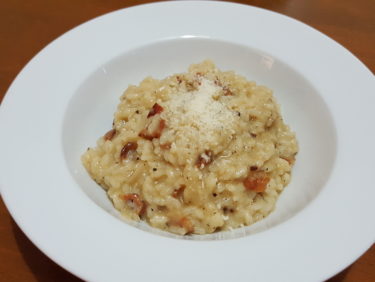
    Dinner is served!  See those dark flecks of solidified bacon drippings floating around in there? That’s concentrated flavor!

    If you’re feeling fancy, garnish with an extra sprinkle of cheese or some chopped parsley or chives.  But, I’m not fancy.  I’m hungry.

    EDIT 10/28/2017: I recently discovered that this can also be made in a pressure cooker, which saves a lot of effort.

    Bacon, Beer, and Three-Cheese Risotto

    Ingredients

    • 1 cup uncooked Arborio rice (add in extra 1/2 cup if using a pressure cooker)
    • 6 slices of bacon, cut into small pieces
    • 1/2 bottle of beer (I use lager)
    • 1 shallot, diced
    • 2 garlic cloves, minced
    • 1 quart broth or stock of your choice (I use Vegetable or Chicken Stock)
    • 1/2 cup cheddar cheese
    • 1/4 cup Parmesan cheese
    • 1/4 cup Gruyere cheese
    • salt and pepper to taste

    Directions

    Pour chicken broth in a small pot, and let it sit on a gentle heat.

    In a large sauté pan, cook bacon to render the fat. Once crispy, remove from pan and set aside.  Leaving about 1 tbsp of the bacon fat in the pan.  In the bacon fat, add the shallot. Cook until translucent, then add the garlic and cook until fragrant. Add the rice and stir to coat the grains in the fat. Cook for about 2 minutes.

    Once the grains begin to brown slightly, pour in the beer. Stir and let simmer. Once the liquid is mostly absorbed, add a large ladle of the hot broth/stock. Continue to stir until the liquid is mostly absorbed. Repeat the process until the grains are creamy and cooked through.

    Lower the heat and stir in the cheeses and cooked bacon. Remove from heat and serve.

    To make in a pressure cooker: Follow the same steps as the stovetop recipe, except use the liner of your electric pressure cooker on the Saute/Browning setting, until you get to the part where you add the beer.

    Once the rice has absorbed most of the beer, add in the entire 4 cups of broth or stock.  Cover and seal your pressure cooker, then cook on Manual (High Pressure) for 6-7 minutes.   Immediately release the pressure, uncover, and remove the liner from the pot.  Stir the rice with the liquid until it starts to thicken.  Add the cheese, a little bit at a time, until all of the cheese is melted and risotto is creamy.  Stir in the cooked bacon and serve immediately.